Go Back
- 2 cups heavy cream - 1 cup whole milk - 1 cup granulated sugar - 4 large egg yolks - 1 cup semi-sweet chocolate chips - 1 teaspoon pure vanilla extract - 1/2 teaspoon sea salt - Optional: Chocolate shavings or cacao nibs for garnish - Heavy cream: This adds richness and creaminess. It helps create a smooth texture in the ice cream. - Whole milk: It balances the cream and keeps the ice cream from being too heavy. - Granulated sugar: This sweetens the custard and adds to its creamy texture. - Egg yolks: They create a rich custard base. They help the ice cream stay smooth and creamy. - Semi-sweet chocolate chips: They provide that deep chocolate flavor we all love. - Pure vanilla extract: This adds warmth and enhances the chocolate flavor. - Sea salt: Just a pinch can boost the sweetness and overall flavor. - Chocolate shavings or cacao nibs (optional): These are great for garnish. They add texture and visual appeal. - Use fresh heavy cream and milk for the best flavor. Check the expiration date. - Granulated sugar should be fine and free of lumps. This ensures even sweetness. - Choose high-quality chocolate chips. Look for brands with cocoa content above 50%. - Use farm-fresh eggs for a richer taste. Freshness matters in custard recipes. - Always opt for pure vanilla extract instead of imitation. The flavor is much better. - If you use optional garnishes, choose those that you enjoy. They make the dish special. {{ingredient_image_2}} 1. Start by heating the heavy cream, whole milk, and 1/2 cup sugar in a medium saucepan. Stir until the sugar dissolves. Keep the heat medium and do not boil. 2. In a bowl, whisk the egg yolks and the remaining 1/2 cup sugar. Whisk until creamy and lighter. 3. Slowly add a bit of the warm cream mix to the egg yolks while whisking. This helps avoid scrambled eggs. 4. Pour the egg yolk mix back into the saucepan with the cream. Cook over medium-low heat. Stir with a wooden spoon until it thickens, about 8-10 minutes. 5. Remove from heat and stir in the chocolate chips. Keep stirring until they melt fully into the custard. 6. Add the vanilla extract and sea salt. Let the custard cool for 30 minutes. Then chill in the fridge for at least 2 hours, or overnight for best results. 7. Pour the chilled custard into an ice cream maker. Churn according to the maker's instructions for about 20-25 minutes. 8. Move the ice cream to an airtight container and freeze for at least 4 hours until firm. 9. Before serving, let the ice cream sit at room temperature for 5-10 minutes. This makes scooping easier. - For step 1, watch the mixture closely. If it starts to boil, lower the heat. - In step 2, whisk firmly to get air into the yolks. This creates a lighter custard. - In step 3, add the warm cream slowly. This keeps the eggs from cooking too fast. - During step 4, stir constantly. This helps the custard cook evenly. - In step 5, make sure the chocolate melts completely. This gives a smooth texture. - For step 6, chilling overnight allows better flavor development. - In step 7, do not over-churn. Stop when it reaches soft-serve consistency. - For step 9, this step helps the ice cream become scoopable without breaking. - Do not let the cream mixture boil. Boiling can change the texture. - Avoid whisking the egg yolks too slowly. This can lead to a heavy custard. - Don't skip the tempering step. This is key to a smooth custard. - Be careful not to overheat the custard in step 4. It can curdle if too hot. - Ensure the chocolate is fully melted in step 5. A lumpy texture is unappealing. - Remember to chill the custard long enough. Rushing this step affects the final taste. - Do not freeze the ice cream too quickly. Let it firm up slowly for the best texture. - Finally, avoid scooping the ice cream straight from the freezer. Let it soften first. To get the best custard texture, keep these tips in mind: - Heat Slowly: Always heat the cream and milk slowly. This helps melt the sugar without boiling. - Whisk Well: Whisk the egg yolks until they look lighter. This adds air for creaminess. - Temper Carefully: When mixing the warm cream with the eggs, do it slowly. This helps prevent the eggs from cooking too fast. - Stir Constantly: While cooking, stir the custard non-stop. It thickens nicely this way. - Check the Coating: The custard is ready when it coats the back of a spoon. This shows it has thickened correctly. Storing your chocolate custard ice cream correctly keeps it fresh: - Freeze Firmly: After churning, freeze the ice cream for at least 4 hours. This makes it easy to scoop. - Room Temperature: Before serving, let the ice cream sit out for 5-10 minutes. This softens it for easier scooping. - Use Airtight Containers: Store ice cream in airtight containers to prevent ice crystals from forming. - Garnish for Style: Top with chocolate shavings or cacao nibs for a fancy touch. This adds texture and looks great on the table. Using the right tools makes ice cream making easier: - Medium Saucepan: For heating the cream and milk. - Mixing Bowls: Use these for whisking egg yolks and mixing. - Wooden Spoon: This is perfect for stirring the custard. - Ice Cream Maker: Essential to churn the custard into ice cream. - Airtight Container: Helps store your ice cream safely in the freezer. With these tips and tools, you can create a smooth and creamy chocolate custard ice cream that everyone will love! Pro Tips Use Quality Chocolate: The flavor of your ice cream largely depends on the chocolate used. Opt for high-quality semi-sweet chocolate chips for the best taste and texture. Chill Thoroughly: Allowing the custard to cool completely in the refrigerator before churning ensures a creamier texture. It's best to leave it overnight if possible. Don’t Rush the Churning: Follow the manufacturer’s instructions carefully when churning the ice cream. Over-churning can lead to a grainy texture. Let It Sit: Before serving, let the ice cream sit at room temperature for about 5-10 minutes. This makes it easier to scoop and enhances the overall eating experience. {{image_4}} You can change the flavor of your chocolate custard ice cream easily. Try using dark chocolate chips for a richer taste. For a twist, add white chocolate chips for a sweet contrast. You can also mix in flavored chocolate, like mint or orange. This change will give your ice cream a fun and unique taste. If you want a dairy-free option, use coconut cream instead of heavy cream. Almond milk works well too. Just make sure to pick a dairy-free chocolate. This way, you can enjoy the same creamy texture without the dairy. You can also try using egg substitutes to make the recipe vegan-friendly. Toppings can bring your chocolate custard ice cream to a new level. Chocolate shavings are a classic choice and add a nice look. Cacao nibs give a crunchy texture and a deeper chocolate flavor. You can also use fresh fruits like raspberries or strawberries for a fruity touch. A drizzle of caramel or chocolate sauce can make it even more delicious. To keep your chocolate custard ice cream fresh, store it in an airtight container. This helps prevent ice crystals from forming. Place a piece of plastic wrap directly on the surface of the ice cream before sealing the container. This extra layer keeps air out. Always freeze the ice cream at 0°F (-18°C) or lower. Avoid opening the freezer too often, as this can raise the temperature. When stored properly, chocolate custard ice cream lasts about 2-3 weeks in the freezer. After this time, it may lose its rich taste and texture. Signs of spoilage include ice crystals on the surface or a grainy texture. If the ice cream smells off or has an unusual color, it's best to throw it away. Always trust your senses. If it doesn't seem right, don't eat it. If your ice cream becomes too hard, you can revive it by re-churning. Let it sit at room temperature for about 10-15 minutes to soften. Then, transfer it back to your ice cream maker and churn again until creamy. This process helps restore the smooth texture. If you don't have an ice cream maker, you can stir it by hand every 30 minutes as it freezes. This method breaks up ice crystals and keeps your ice cream creamy. Custard has egg yolks, while regular ice cream does not. The egg yolks give custard a rich and creamy texture. This makes custard ice cream smoother and denser. Regular ice cream often feels lighter. Both are delicious, but custard offers a unique taste and feel. Yes, you can make it without an ice cream maker. After chilling the custard, pour it into a shallow dish. Place it in the freezer. Stir it every 30 minutes for about 2-3 hours. This process breaks up ice crystals and keeps the texture smooth. It takes a bit more time but works well! To make your ice cream creamier, use more heavy cream and less milk. The fat in cream adds richness. You can also add a bit of corn syrup; it helps with texture. Churning the ice cream well while it freezes incorporates air, making it fluffier. Lastly, ensure you chill the custard fully before churning. In this post, we explored key ingredients for ice cream, how to prepare them, and tips for success. I shared ways to get the perfect custard texture and creative variations to try. Remember to store your ice cream right and check for spoilage signs. Making ice cream at home can be fun and rewarding. Use these tips to create a tasty treat that everyone will love. Enjoy your homemade ice cream journey!

Decadent Chocolate Custard Ice Cream

A rich and creamy chocolate custard ice cream that is perfect for chocolate lovers.
Prep Time 20 minutes
Cook Time 30 minutes
Total Time 6 hours
Course Dessert
Cuisine American
Servings 6
Calories 250 kcal

Ingredients
  

  • 2 cups heavy cream
  • 1 cup whole milk
  • 1 cup granulated sugar
  • 4 large egg yolks
  • 1 cup semi-sweet chocolate chips
  • 1 teaspoon pure vanilla extract
  • 0.5 teaspoon sea salt
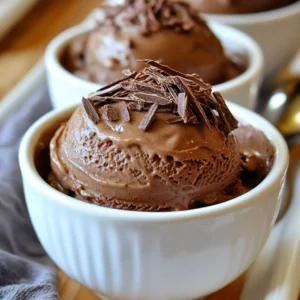
  • 1 optional Chocolate shavings or cacao nibs for garnish

Instructions
 

  • In a medium saucepan, combine the heavy cream, whole milk, and 1/2 cup of granulated sugar. Heat over medium heat, stirring occasionally until the mixture is warm and the sugar has dissolved. Be careful not to let it reach a boil, as this will alter the texture.
  • In a separate mixing bowl, vigorously whisk the egg yolks together with the remaining 1/2 cup of sugar until the mixture is creamy and slightly lighter in color. This process will help create a rich custard.
  • Carefully temper the egg yolks by slowly adding a small amount of the warm cream mixture to the egg mixture while whisking continuously. This step is crucial to avoid scrambling the eggs.
  • Once the warm cream and egg yolk mixtures are well combined, pour the egg yolk mixture back into the saucepan with the rest of the cream mixture. Cook over medium-low heat, stirring constantly with a wooden spoon until the custard thickens and coats the back of the spoon; this should take about 8-10 minutes.
  • Remove the saucepan from heat and immediately stir in the semi-sweet chocolate chips. Keep stirring until the chocolate melts completely and is fully incorporated into the custard, resulting in a smooth texture.
  • Mix in the pure vanilla extract and sea salt. Allow the custard to cool at room temperature for about 30 minutes, then transfer it to the refrigerator to chill completely, which will take at least 2 hours but is best if left overnight.
  • Once the custard is thoroughly chilled, pour it into an ice cream maker and churn according to the manufacturer’s instructions until it reaches a soft-serve consistency, typically around 20-25 minutes.
  • After churning, move the ice cream to an airtight container and freeze it for at least 4 hours, or until it becomes firm enough to scoop easily.
  • For optimal scooping, let the ice cream sit at room temperature for about 5-10 minutes before serving.

Notes

For a luxurious serving suggestion, dish the ice cream into chilled bowls, and sprinkle chocolate shavings or cacao nibs on top for an extra layer of texture and visual appeal.
Keyword chocolate, custard, ice cream