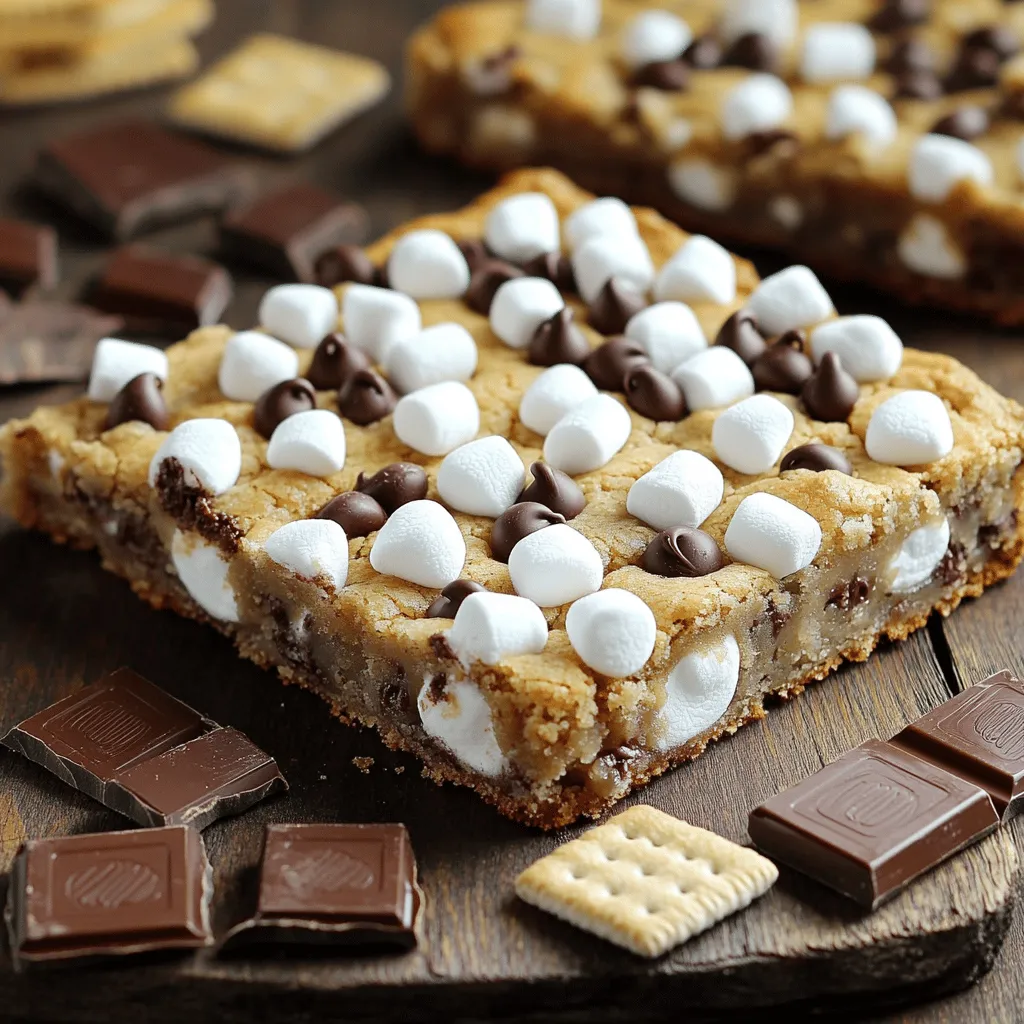
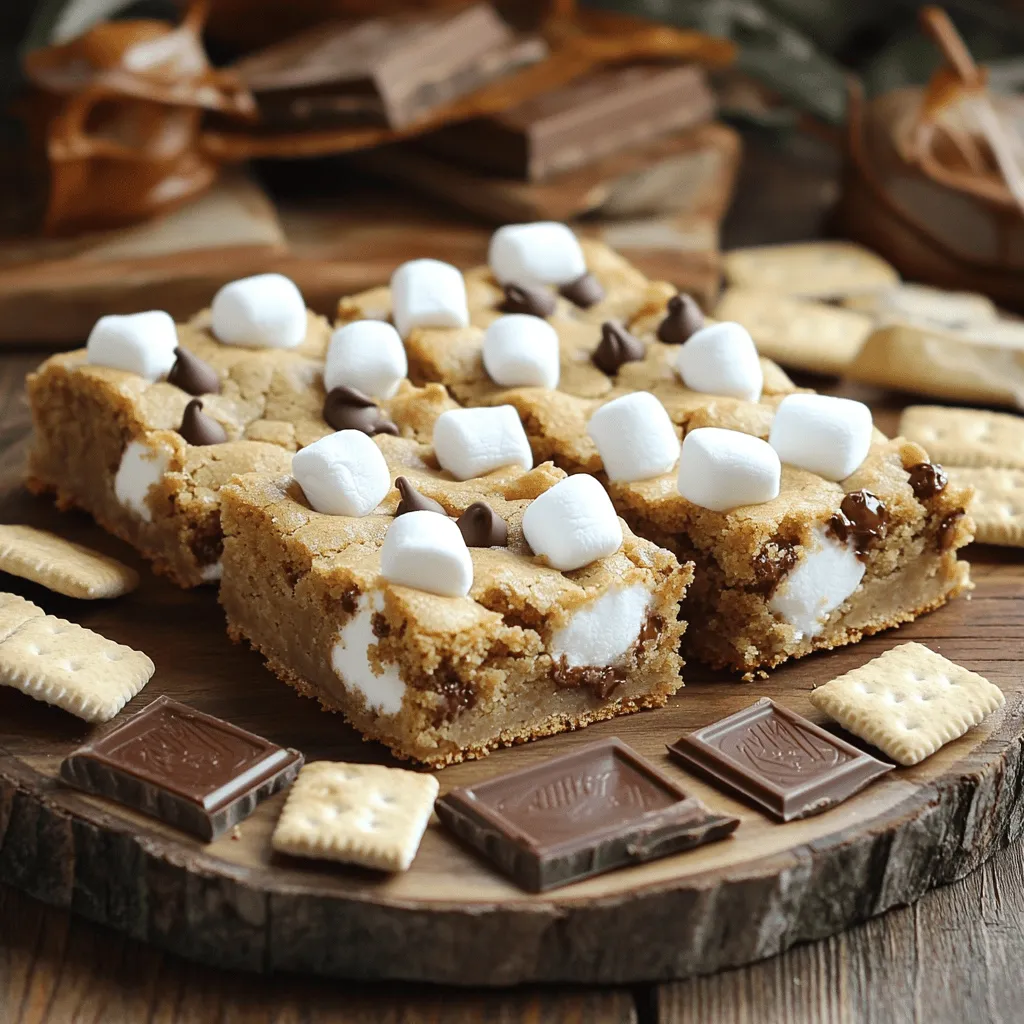
Craving a sweet treat that brings back childhood memories? Look no further! My S’mores Cookie Bars are the ideal blend of chewy cookie, rich chocolate, and gooey marshmallows. These bars are simple to make and packed with flavor. Whether you’re new to baking or a seasoned pro, I’ll guide you step by step. Get ready for a delightful experience that captures the essence of s’mores in every bite. Let’s dive in!
Ingredients
To make S’mores Cookie Bars, you’ll need some simple yet delicious ingredients. Each one adds to the flavor and fun of this treat. Here’s what you need:
– 1 cup unsalted butter
– 1 cup packed brown sugar
– ½ cup granulated sugar
– 2 large eggs
– 1 teaspoon pure vanilla extract
– 2 ½ cups all-purpose flour
– 1 teaspoon baking soda
– ½ teaspoon fine sea salt
– 1 cup semi-sweet chocolate chips
– 1 cup mini marshmallows
– 1 cup graham cracker crumbs
– Optional toppings: Extra marshmallows, chocolate chips
These ingredients combine to create a chewy, gooey delight. The butter makes it rich, while the sugars add sweetness. Eggs give the bars nice structure. The flour and baking soda help them rise. Chocolate chips and marshmallows make every bite a tasty surprise.
Graham cracker crumbs bring that classic s’mores flavor. You can even add more marshmallows or chocolate chips on top for extra fun!
Step-by-Step Instructions
Preparation Overview
Start by preheating your oven to 350°F (175°C). Grease a 9×13 inch baking pan or line it with parchment paper. This makes it easy to remove the bars later. In a large bowl, mix the softened butter, brown sugar, and granulated sugar. Use a hand mixer or stand mixer. Blend until light and fluffy, about 2-3 minutes. Next, add the eggs one at a time. Mix well after each egg. Finally, stir in the vanilla extract for extra flavor.
In another bowl, whisk together the flour, baking soda, and salt. Gradually add this dry mix to the wet mix. Stir gently until combined. Be careful not to overmix, as this can affect the texture.
Dough Preparation
Now, it’s time to create the delicious dough! Carefully fold in the chocolate chips and graham cracker crumbs. Use a spatula to ensure they are evenly spread in the dough. This adds a great texture and flavor to each bite. Set aside a small amount of mini marshmallows and chocolate chips for later. Next, transfer the dough to your prepared baking pan. Press it down firmly into an even layer.
Now, sprinkle the reserved mini marshmallows and chocolate chips on top. Press them gently into the dough. This helps them stick as they bake.
Baking and Cooling
Place the baking pan in your preheated oven. Bake for 25-30 minutes. You want the edges to turn golden brown. The center should look set, and a toothpick should come out with a few moist crumbs.
Once baked, remove the pan from the oven. Let the cookie bars cool for at least 10 minutes in the pan. After cooling, lift the bars out using the parchment paper. Slice them into squares or rectangles. For a special touch, use a kitchen torch to lightly toast the tops before serving. This gives them a nice, toasted flavor.Enjoy every bit of this sweet treat!
Tips & Tricks
Perfecting Your Cookie Bars
To make the best S’mores cookie bars, avoid overmixing your dough. When you mix too much, the bars can turn out dense. Mix just until you see no flour. This keeps your bars light and chewy.
Layering toppings helps create great texture. Start with a base of chocolate chips, then add graham cracker crumbs and mini marshmallows on top. This gives you a nice crunch as you bite into the soft cookie.
Presentation and Serving Suggestions
For a fun serving idea, cut the cookie bars into fun shapes with cookie cutters. You can also stack them on a plate with extra chocolate squares beside them. This makes a great treat for parties or family gatherings!
Garnish the top with a light dusting of graham cracker crumbs. This makes your bars look more like real S’mores. You can also toast some extra mini marshmallows on top for a campfire vibe.
Common Baking Mistakes to Avoid
Make sure to measure your ingredients accurately. Using too much flour or sugar can change the texture of your cookie bars. Use a kitchen scale for the best results.
Recognizing doneness is key. Your bars should be golden brown at the edges. The center might look a bit soft, but it will firm up as it cools. A toothpick should come out with a few moist crumbs, not wet batter.
Variations
Gluten-Free Options
You can make S’mores Cookie Bars gluten-free. Use gluten-free flour blends. Look for ones that have a good mix of starches. These blends often mimic regular flour well. You might need to add a bit more liquid. This keeps your bars chewy and moist.
Flavor Variations
Want to change the taste? You can add peanut butter or butterscotch chips to the dough. These flavors blend well with chocolate. You can also toss in some assorted nuts. Walnuts or pecans add a nice crunch. Mix and match to find your favorite combo!
Seasonal Twists
Try some fun seasonal swaps! In fall, add pumpkin spice for a warm flavor. You can use it in the dough or sprinkle on top. In summer, fresh fruit can brighten your bars. Think strawberries or blueberries for a fresh twist. These small changes can make your treats feel new and exciting.
Storage Info
Proper Storage Techniques
To keep your s’mores cookie bars fresh, use airtight containers. This helps lock in moisture and flavor. Store the bars at room temperature. A cool, dry place is best for keeping them tasty.
Freezing and Reheating Tips
You can freeze cookie bars for later. First, let them cool completely. Then, wrap them tightly in plastic wrap and place them in a freezer bag. When you want to enjoy them, thaw at room temperature. For the best taste and texture, warm them in the oven for a few minutes. This brings back their soft, chewy goodness.
Shelf Life
S’mores cookie bars are best eaten within a week. After that, they may lose their charm. Look for signs of spoilage, like a dry texture or off smell. If they feel hard or crumbly, it’s time to toss them. Enjoy these delightful treats while they’re fresh!
FAQs
How do I know when S’mores Cookie Bars are done?
You can check if the bars are ready by looking for a few key signs. First, the edges should turn a nice golden brown. The center must look set, not jiggly. You can also use a toothpick; if it comes out with a few moist crumbs, they are done.
Can I make these cookie bars ahead of time?
Yes, you can make these cookie bars ahead of time. Simply prepare the dough and store it in the fridge for up to 24 hours. When you are ready, bake them as usual. You can also bake them early and keep them at room temperature for a day.
What can I substitute for eggs?
If you want a vegan option, you can replace eggs with applesauce or flaxseed meal. Use ¼ cup of applesauce for each egg. For flaxseed, mix one tablespoon of ground flaxseed with three tablespoons of water and let it sit for five minutes.
How do I store leftover cookie bars?
To keep your cookie bars fresh, store them in an airtight container. This method keeps them soft and chewy. You can also layer parchment paper between layers to avoid sticking.
Can I use milk chocolate instead of semi-sweet?
Yes, you can use milk chocolate. It will make your cookie bars sweeter and creamier. The texture might become a bit softer, but the bars will still be delicious.
Is this recipe really easy for beginners?
Absolutely! This recipe is simple and straightforward. You only need a few skills, like mixing and baking. The steps are clear, making it great for anyone new to baking.
In this blog post, we explored how to make delicious S’mores Cookie Bars. We covered the essential ingredients, step-by-step instructions, baking tips, and various delicious variations. Remember, perfecting your bars requires attention to mixing and doneness. Feel free to experiment with flavors or options. These treats can bring joy to any occasion. Follow the tips for great results every time. Enjoy your baking journey and share these tasty bars with friends and family!