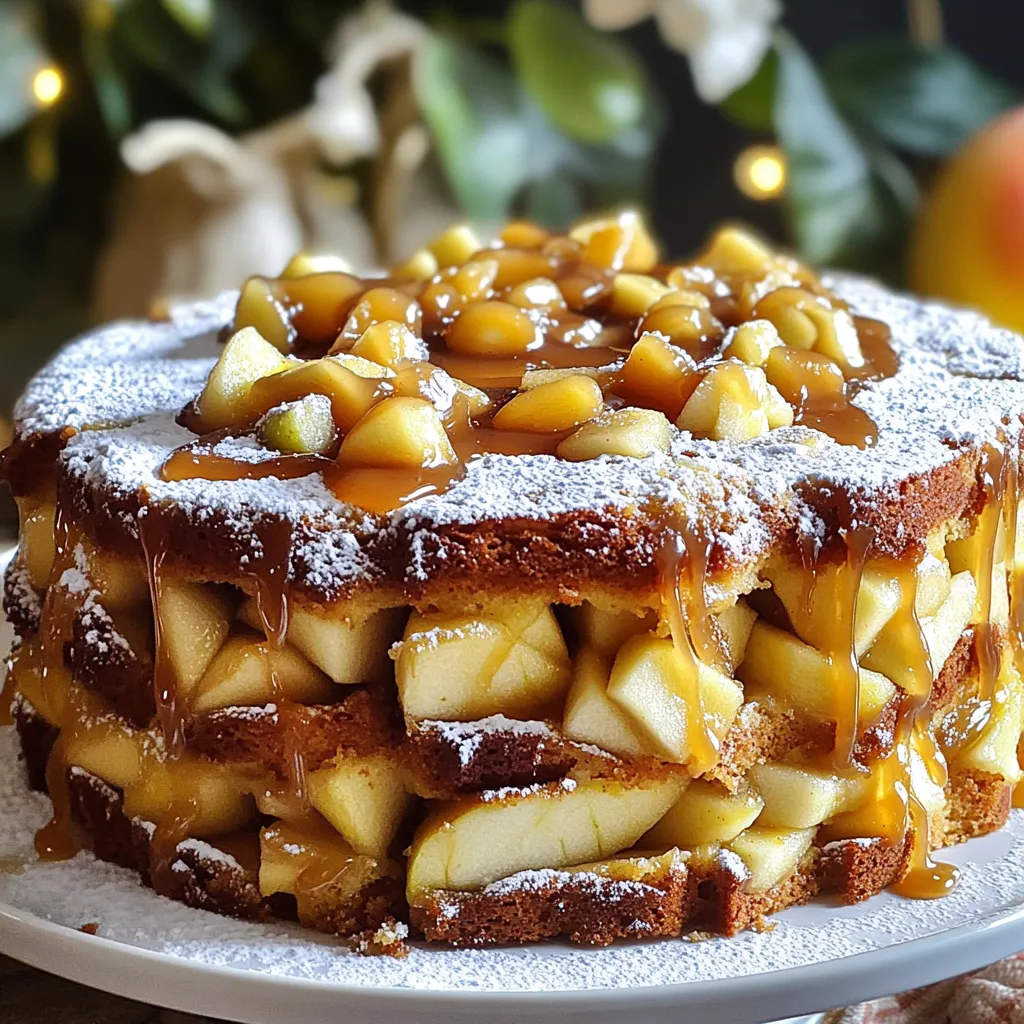
Ready to wow your taste buds? This Salted Caramel Apple Cake recipe combines sweet apples with rich, buttery flavor and a touch of salt. You can impress family and friends with this easy, homemade treat. In this post, I’ll guide you through every step, from picking the right apples to baking the perfect cake. Let’s dive into this irresistible dessert that has all the fall vibes!
Ingredients
Key Ingredients for Salted Caramel Apple Cake
To make a delicious salted caramel apple cake, gather these key ingredients:
– 2 cups all-purpose flour
– 1 ½ teaspoons baking powder
– 1 teaspoon baking soda
– ½ teaspoon salt
– 1 teaspoon ground cinnamon
– ½ cup unsalted butter, softened
– 1 cup granulated sugar
– 2 large eggs
– 1 teaspoon vanilla extract
– 1 cup buttermilk
– 2 cups apples, peeled and diced
– 1 cup salted caramel sauce
Each ingredient plays a vital role in the cake’s flavor and texture. The flour gives structure, while the butter adds richness. The apples bring moisture and a fruity bite. Salted caramel sauce adds that sweet and salty kick we all love.
Recommended Variations for Apples
For the best apple flavor, I recommend using tart apples like Granny Smith or Honeycrisp. These apples add a nice contrast to the sweetness of the cake. You can also try other varieties, like Fuji or Golden Delicious, if you prefer a sweeter taste. Just make sure to peel and dice them small enough to blend well in the batter.
Options for Salted Caramel Sauce (Store-Bought vs. Homemade)
You can choose between store-bought and homemade salted caramel sauce. Store-bought sauce is quick and easy, saving you time. However, making your own can add a special touch. Homemade sauce allows you to control the flavor and sweetness. If you want to make it, just melt sugar, add cream, and a pinch of salt. Either way, the salted caramel sauce elevates the cake to a new level of tasty.
Step-by-Step Instructions
Preparing the Oven and Cake Pan
Start by preheating your oven to 350°F (175°C). Grab a 9×13 inch cake pan. Grease it with butter and dust with flour. You can also line it with parchment paper. This helps the cake come out easily.
Combining Dry Ingredients
In a medium bowl, whisk together the flour, baking powder, baking soda, salt, and cinnamon. Mix until all the dry ingredients blend well. This step is key for a well-risen cake.
Creaming Butter and Sugar
In a large bowl, use an electric mixer to beat the softened butter with granulated sugar. Mix on medium speed for about 3 minutes. You want the mixture to be light and fluffy. This adds air and gives your cake a nice texture.
Mixing in Wet Ingredients
Add the eggs to the creamed butter one at a time. Mix well after each egg. Then, stir in the vanilla extract. This adds a nice flavor to your cake.
Folding in Apples
Now, it’s time to fold in the diced apples. Use a spatula to gently mix the apples into the batter. Be careful not to break them up too much. You want big chunks for texture and flavor.
Layering Batter and Caramel
Pour half of the batter into the prepared cake pan. Drizzle half of the salted caramel sauce over this layer. Use a knife to swirl the caramel into the batter. This creates a lovely marbled effect.
Finishing Layering
Next, add the rest of the batter on top. Drizzle the remaining caramel sauce over this layer. Swirl it gently again with a knife. You want a beautiful design on top before baking.
Baking the Cake
Place the cake in the preheated oven. Bake for 35 to 40 minutes. Check if it’s done by inserting a toothpick in the center. If it comes out clean, the cake is ready. Keep an eye on it to avoid overbaking.
Cooling and Serving Preparation
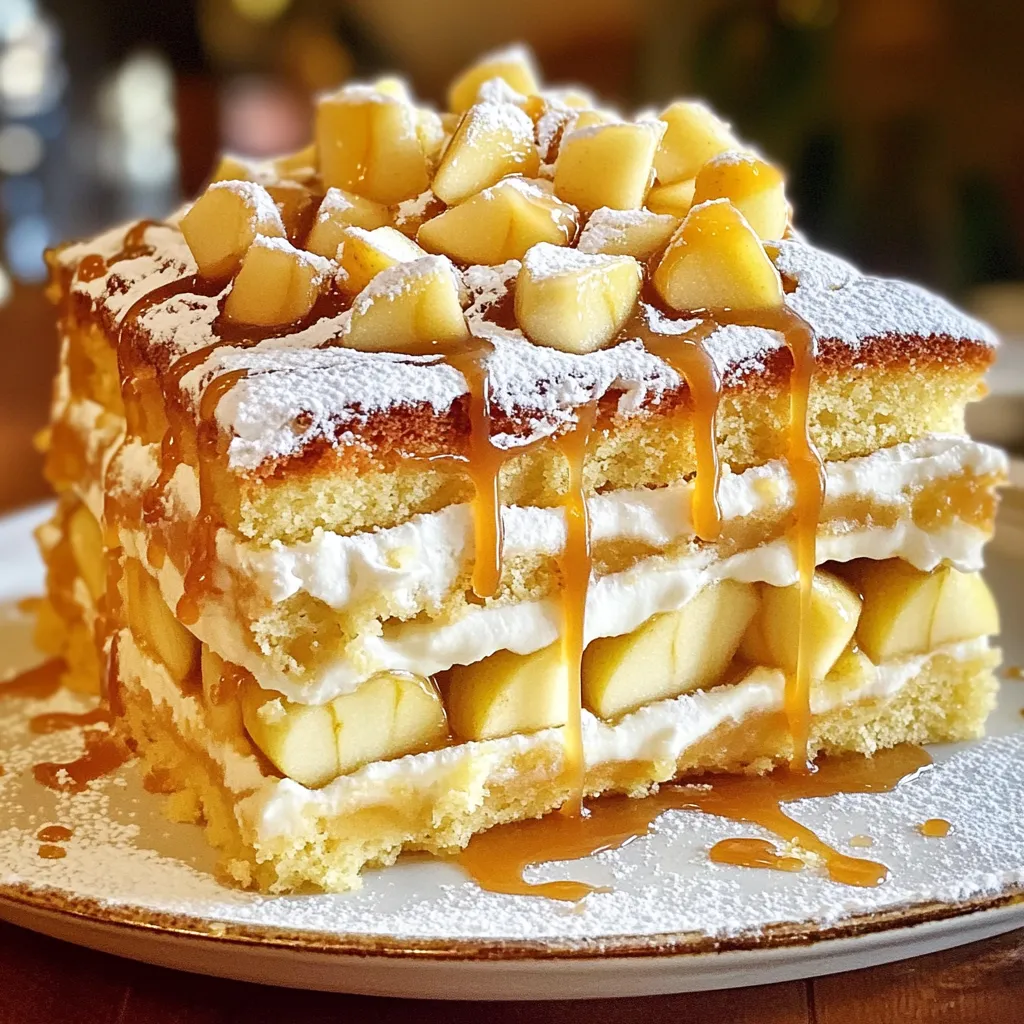
Once baked, let the cake cool in the pan for about 15 minutes. After that, transfer it to a wire rack to cool completely. For a lovely finish, dust the cooled cake with powdered sugar. Drizzle extra caramel sauce on top and serve with whipped cream or vanilla ice cream. Enjoy!
Tips & Tricks
How to Achieve the Perfect Cake Texture
To get the best texture for your salted caramel apple cake, use room temperature ingredients. This helps the batter mix smoothly. Cream the butter and sugar well until light and fluffy. This step adds air and makes your cake rise nicely.
Preventing Overmixing and Toughness
Overmixing can make your cake dense. When mixing dry and wet ingredients, stir until just combined. A few lumps are okay. This keeps your cake light and fluffy. Be gentle when folding in the apples to keep their shape.
Best Practices for Baking Evenly
Make sure your oven is preheated to 350°F (175°C) before baking. Use an oven thermometer to check the temperature. For even baking, place your cake pan in the center of the oven. This helps the heat circulate around the cake evenly. Keep an eye on it, especially in the last few minutes of baking.
Variations
Alternate Flavor Additions (e.g. Nuts or Spices)
You can make this cake even more special. Adding nuts like walnuts or pecans gives it a nice crunch. Chopped nuts mix well with the soft apples. You can also try spices like nutmeg or ginger. These spices add warmth and depth to the flavor. A dash of cardamom can also give an exciting twist.
Gluten-Free Adaptations
If you need a gluten-free version, swap the all-purpose flour. Use a gluten-free blend instead. Make sure it has xanthan gum for the right texture. You can also use almond flour or coconut flour. These add a unique taste and make the cake moist. Just check the measurements, as they differ from regular flour.
Serving Suggestions for Different Occasions
This cake is perfect for any event. For a cozy family dinner, serve it warm with ice cream. At parties, slice it into small pieces for easy sharing. Top it with whipped cream for a fancy touch. For fall gatherings, add a sprinkle of cinnamon on top. It looks great and tastes even better. Enjoy this cake for birthdays, holidays, or just because!
Storage Info
Proper Storage Techniques for Freshness
To keep your salted caramel apple cake fresh, store it in an airtight container. This prevents moisture loss and keeps the cake soft. If you do not have a container, wrap it tightly in plastic wrap. Always store the cake at room temperature for the best texture.
How Long Does Salted Caramel Apple Cake Last?
Your salted caramel apple cake stays fresh for about 3 to 4 days at room temperature. If you keep it in the fridge, it can last up to a week. However, it may dry out a bit if stored too long.
Freezing Instructions for Long-Term Storage
To freeze your cake, first let it cool completely. Then, slice it into portions for easy serving. Wrap each slice tightly in plastic wrap, followed by foil. This double wrapping helps prevent freezer burn. Your cake can last up to 3 months in the freezer. To thaw, simply move it to the fridge overnight. Enjoy your delicious cake even after a few months!
FAQs
Can I use different types of apples?
Yes, you can use various apples. Granny Smith and Honeycrisp are great choices. They add tartness. Other options include Fuji or Gala apples, which are sweet. Mix and match for a fun flavor. Just remember to peel and dice them before adding to the batter.
What is the best way to reheat leftover cake?
To reheat cake, preheat your oven to 350°F (175°C). Place the cake in an oven-safe dish. Cover it with foil to keep it moist. Heat for about 10 to 15 minutes. You can also use a microwave. Heat individual slices for 20 to 30 seconds. Enjoy warm for the best taste!
How do I make homemade salted caramel sauce?
Making homemade salted caramel sauce is easy. Here’s a simple way:
– Ingredients:
– 1 cup granulated sugar
– 6 tablespoons unsalted butter, cut into pieces
– 1/2 cup heavy cream
– 1 teaspoon sea salt
1. In a medium pan, heat sugar over medium heat. Stir until it melts and turns amber.
2. Add butter and stir until melted.
3. Slowly pour in cream while stirring. Be careful, as it will bubble.
4. Once combined, add salt and stir.
5. Remove from heat and let cool before using.
Store the sauce in a jar for up to two weeks. Enjoy it on your cake or other treats!
This blog post shared key steps to make a delicious Salted Caramel Apple Cake. We covered essential ingredients, tips for perfect texture, and various serving ideas. You learned about the best apples to use and how to store the cake for lasting freshness. Remember to experiment with flavors and adjust for dietary needs. Your cake can be both fun and enjoyable for any event. Happy baking, and enjoy every slice of this treat!