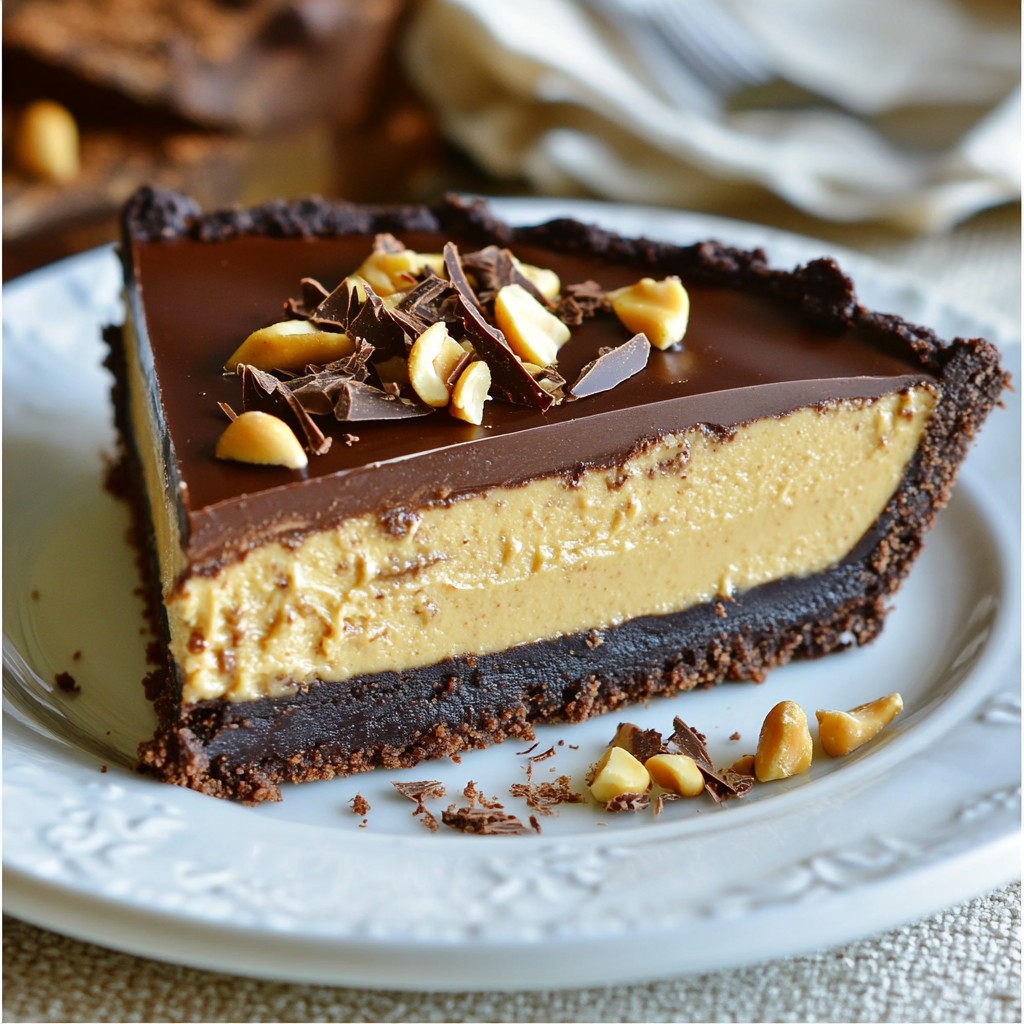
Craving a sweet treat that's quick and easy? Look no further! In this blog post, I’ll show you how to make a No-Bake Chocolate Peanut Butter Pie that’s perfect for any occasion. With just a few simple ingredients, you’ll create a rich, creamy dessert that impresses everyone. Forget the oven—this pie is as fun to make as it is to eat. Let’s dive into the delicious steps!
Why I Love This Recipe
- Irresistible Flavor Combination: The rich chocolate crust paired with creamy peanut butter creates a decadent treat that is hard to resist.
- No Baking Required: This pie is perfect for hot days or when you're short on time, as it requires no baking at all!
- Customizable Toppings: Add your favorite toppings like crushed peanuts or chocolate shavings for extra texture and flavor.
- Perfect for Any Occasion: This no-bake pie is a crowd-pleaser, making it ideal for parties, potlucks, or just a sweet treat at home.
Ingredients
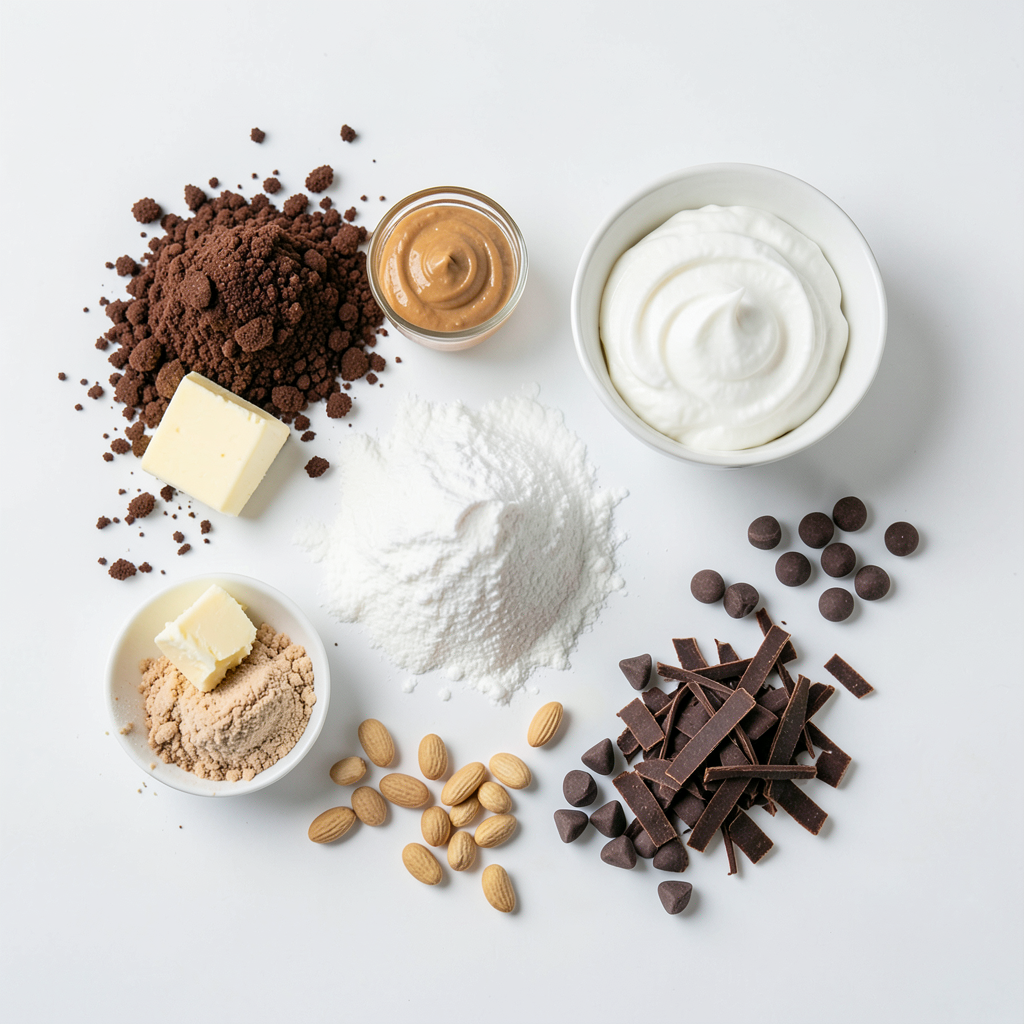
List of Ingredients
- 1 ½ cups chocolate cookie crumbs
- ½ cup unsalted butter, melted
- 1 cup creamy peanut butter
- 1 cup powdered sugar
- 1 cup heavy whipped cream
- 1 cup semi-sweet chocolate chips
- 1 teaspoon vanilla extract
- Pinch of salt
- Crushed peanuts and chocolate shavings for topping (optional)
Measuring Tips
Measuring is key for this recipe. Use dry measuring cups for the cookie crumbs and powdered sugar. Always pack the peanut butter into the cup for accuracy. For the melted butter, liquid measuring cups work best. When measuring heavy cream, use a liquid measuring cup to get it just right. Precision helps the pie turn out perfect.
Best Ingredient Brands
For the best flavor, I recommend using certain brands. For chocolate cookie crumbs, look for brands like Oreo or Famous Amos. Jif or Skippy are great for creamy peanut butter. Use heavy cream from brands like Horizon or Organic Valley for a rich taste. For chocolate chips, Ghirardelli or Nestlé will add a nice touch. Choosing quality ingredients makes a big difference in this pie.
Step-by-Step Instructions
Preparing the Crust
To make the crust, grab a medium bowl. Combine 1 ½ cups of chocolate cookie crumbs with ½ cup of melted unsalted butter. Stir until the crumbs look like wet sand. You want no dry bits left. Next, take a 9-inch pie dish. Firmly press the crumb mix into the bottom and sides of the dish. Use the back of a measuring cup or your fingers to make it even. Once done, pop the pie crust into the freezer for about 15 minutes to set.
Making the Peanut Butter Filling
In a large bowl, beat together 1 cup of creamy peanut butter and 1 cup of powdered sugar. Use an electric mixer on medium speed until it is smooth. This step is key for a creamy filling. Now, in another bowl, whip 1 cup of heavy cream. Use a hand mixer on high speed until stiff peaks form. Be careful not to overwhip it, or it will separate. Fold one cup of the whipped cream into the peanut butter mix using a spatula. This keeps the filling light and fluffy.
Assembling and Chilling the Pie
Spoon the peanut butter filling into your chilled crust. Spread it evenly across the surface. In a small saucepan, melt 1 cup of semi-sweet chocolate chips over low heat. Stir constantly until smooth. Remove it from heat and stir in 1 teaspoon of vanilla extract and a pinch of salt. Pour this chocolate over the peanut butter filling. Use a spatula to spread it evenly. Chill the pie in the refrigerator for at least 4 hours, or overnight for the best texture. When ready to serve, you can top it with crushed peanuts and chocolate shavings for extra fun!
Tips & Tricks
Avoiding Common Mistakes
When making this pie, keep a few things in mind. First, do not overwhip the cream. If you do, it will turn into butter. Second, make sure your crust is firm. Press it down well to avoid a crumbly pie. Lastly, chill the pie long enough. If you cut it too soon, it may not hold its shape.
Enhancing Flavor with Additions
You can boost the taste of your pie easily. Try adding a teaspoon of espresso powder to the peanut butter mix. This adds a rich flavor that pairs well with chocolate. You can also mix in some crushed pretzels. This gives a salty crunch that balances the sweetness.
Serving Suggestions
When it’s time to serve, add some fun toppings. Crushed peanuts add a nice crunch. Chocolate shavings make it look fancy. You can also drizzle melted chocolate over each slice. Serve with whipped cream for extra creaminess. Enjoy this pie chilled for the best taste!
Pro Tips
- Tip for a Perfect Crust: Make sure to press the cookie crumb mixture firmly into the pie dish. This will help the crust hold together when slicing the pie.
- Tip for Creamy Filling: For the smoothest peanut butter filling, use room temperature peanut butter. This will help it blend seamlessly with the powdered sugar.
- Tip on Whipping Cream: Keep your mixing bowl and beaters cold before whipping the heavy cream. This helps achieve stiff peaks more quickly.
- Tip for Topping: Allow the chocolate topping to cool slightly before pouring it over the peanut butter filling. This will prevent it from melting the filling underneath.
Variations
Alternative Nut Butters
You can switch up the nut butter in this pie. Almond butter works great. Cashew butter adds a creamy touch. Each option gives a new twist to the flavor. Just keep the same amount as peanut butter.
Gluten-Free Crust Options
If you need a gluten-free crust, use gluten-free chocolate cookies. You can also use almond flour or crushed nuts. Mix these with melted butter. Press them into your pie dish just like the regular crust.
Adding Flavor Variations
Want to change the taste? Add some espresso powder to the peanut butter mix. This gives a nice coffee kick. A sprinkle of sea salt on top enhances the sweet and salty mix. You can even add a touch of cinnamon for warmth. Each of these ideas makes your pie special.
Storage Info
Proper Storage Techniques
To keep your no-bake chocolate peanut butter pie fresh, store it in the fridge. Use an airtight container or cover the pie with plastic wrap. This prevents odors from other foods from affecting the pie. If you plan to keep the pie for more than a few days, consider freezing it.
Shelf Life and Freezing Tips
The pie lasts up to five days in the fridge. For longer storage, you can freeze the pie. Wrap it tightly in plastic wrap and then in aluminum foil. It can freeze for up to two months. When ready to eat, move it to the fridge overnight to thaw.
Best Serving Practices after Storage
When serving, let the pie sit at room temperature for about 10 minutes. This makes slicing easier and enhances the flavor. If you topped the pie with crushed peanuts or chocolate shavings, add these just before serving for the best crunch. Enjoy every rich, creamy bite!
FAQs
Can I use crunchy peanut butter?
Yes, you can use crunchy peanut butter instead of creamy. It adds texture to the pie. The bits of peanuts give a nice crunch, enhancing the flavor. Just remember, it may change the smoothness of the filling.
How long does it take for the pie to set?
The pie needs at least 4 hours to set in the fridge. For the best results, I recommend chilling it overnight. This allows the layers to firm up and blend together nicely.
Can I make this pie ahead of time?
Absolutely! This pie is perfect for making ahead. You can prepare it up to two days in advance. Just keep it covered in the fridge until you’re ready to serve.
What can I use instead of chocolate cookie crumbs?
If you don't have chocolate cookie crumbs, use graham cracker crumbs. You can also blend vanilla wafers for a different flavor. Just mix them with melted butter like you would with chocolate crumbs.
Is this pie suitable for a gluten-free diet?
Yes, this pie can be made gluten-free. Use gluten-free chocolate cookie crumbs or gluten-free graham crackers. Make sure to check the labels to ensure all ingredients are gluten-free.
You learned how to make a tasty pie from scratch. We covered ingredients, measuring tips, and top brands. I detailed step-by-step instructions for the crust and filling. You found tips to avoid mistakes and enhance flavor. We explored variations and storage tips for keeping the pie fresh. This pie is easy to make and customize. Enjoy your delicious treat and share it with friends and family!