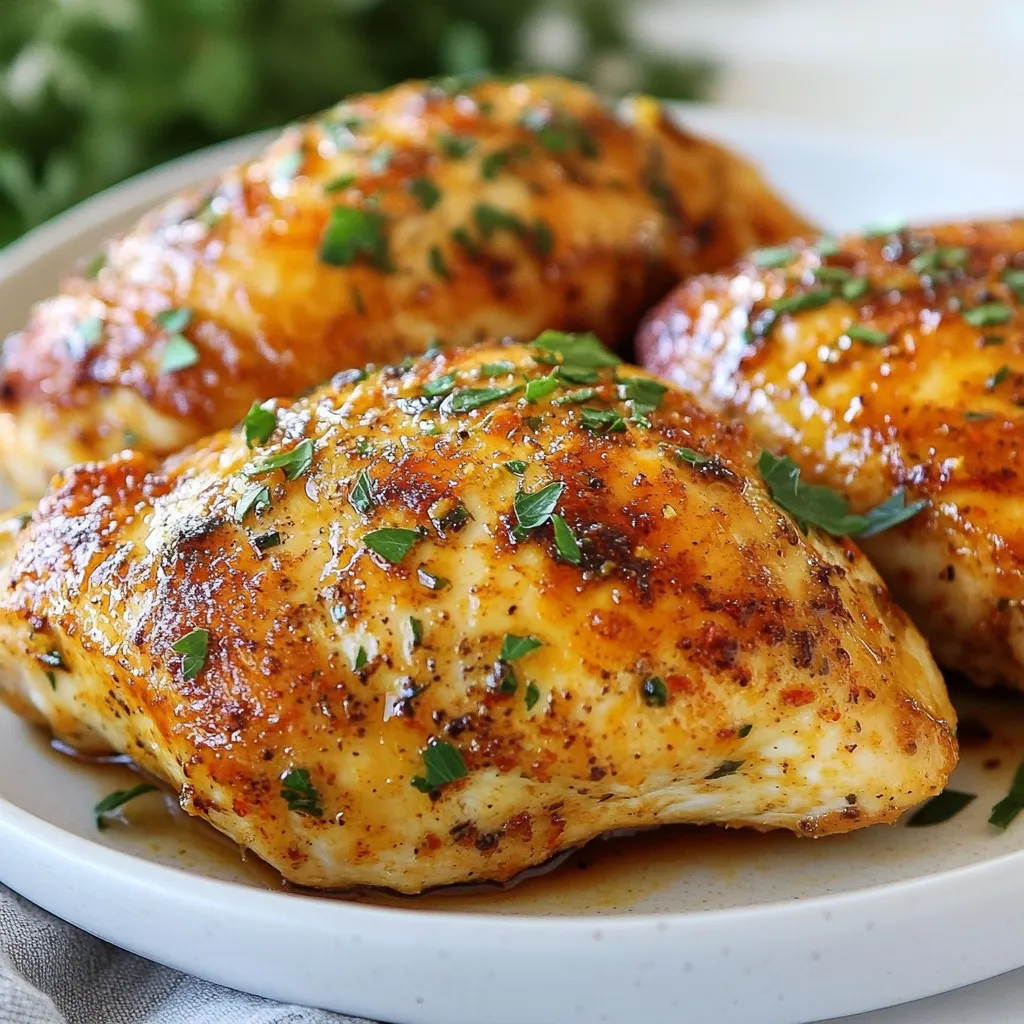
Are you ready to impress your family with melt-in-your-mouth chicken breasts? This easy and flavorful recipe makes chicken juicy and tender with every bite. I’ll guide you through the simple steps, from marinating the chicken to creating a crispy, golden crust. Get your ingredients ready, and let’s dive into the secrets of making this incredible dish that everyone will love!
Why I Love This Recipe
- Flavorful Marinade: The buttermilk marinade infuses the chicken with moisture and flavor, making it incredibly tender and juicy.
- Crispy Coating: The combination of flour, cornmeal, and Parmesan creates a deliciously crispy crust that contrasts perfectly with the tender chicken.
- Easy Preparation: This recipe requires minimal effort and can be prepared ahead of time, allowing the flavors to develop while you go about your day.
- Versatile Dish: Serve it with a side of veggies, over a salad, or in a sandwich—the possibilities are endless!
Ingredients
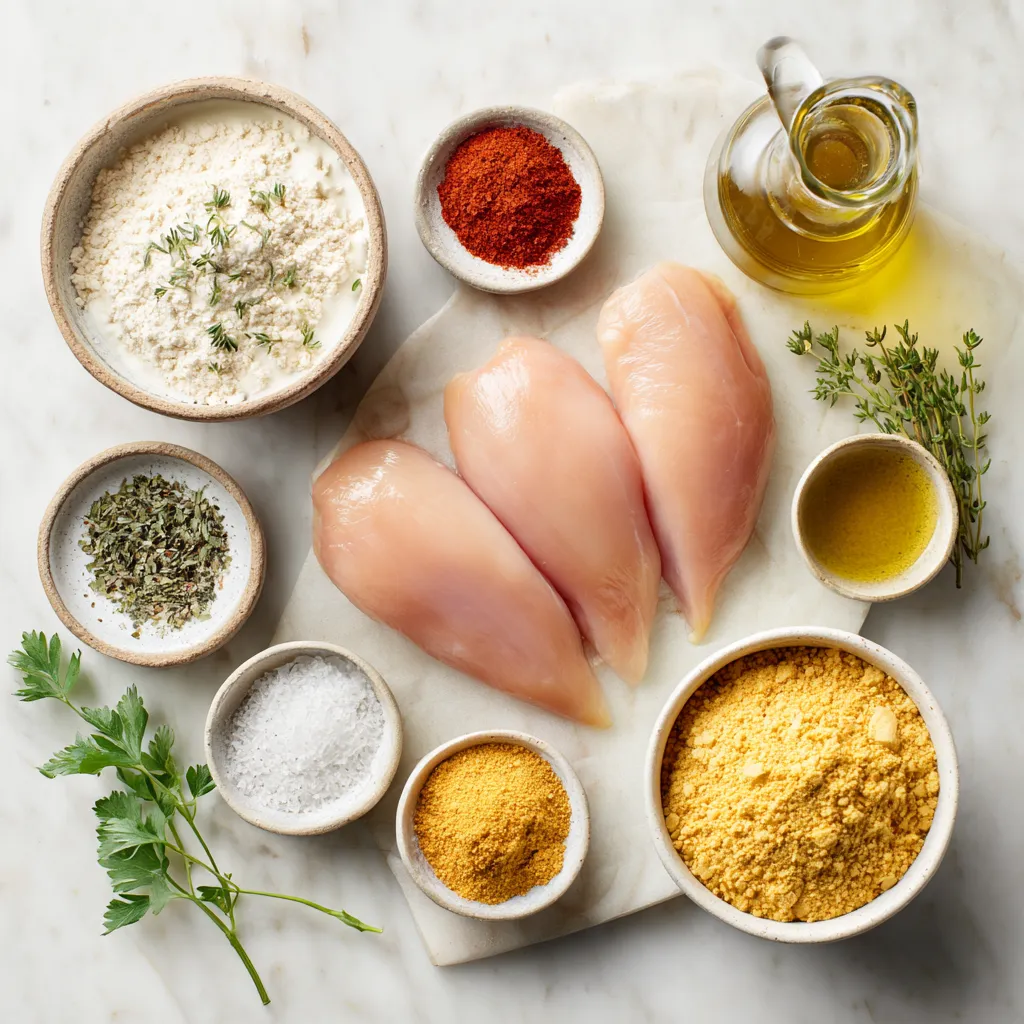
Main Ingredients
– 4 boneless, skinless chicken breasts
– 1 cup buttermilk
Boneless, skinless chicken breasts are lean and cook quickly. They soak up flavors well. I love using buttermilk for marinating. It keeps the chicken moist and tender. The acidity helps break down proteins, which makes the chicken melt in your mouth.
Seasoning
– 2 teaspoons garlic powder
– 2 teaspoons onion powder
– 1 teaspoon smoked paprika
– 1 teaspoon dried thyme
These seasonings bring a lot of flavors. Garlic and onion powder add depth. Smoked paprika gives a nice, smoky touch. Dried thyme adds warmth and earthiness. Combined, they make the chicken taste amazing.
Coating Ingredients
– 1 cup all-purpose flour
– ½ cup cornmeal
– 1 teaspoon baking powder
– ½ cup grated Parmesan cheese
The coating creates a great texture. All-purpose flour makes it crispy. Cornmeal adds crunch and a hint of sweetness. Baking powder helps it puff up and get golden. Parmesan cheese gives a salty, cheesy flavor that enhances every bite.
Step-by-Step Instructions
Marinating the Chicken
Marinating the chicken is key to making it tender and tasty. The buttermilk adds moisture and flavor. It also helps break down the meat’s fibers, making every bite juicy. I recommend marinating for at least 2 hours. For the best taste, let it sit overnight. This extra time lets the spices soak in fully.
Preparing the Coating
Now, let’s make the coating. In a separate bowl, mix the all-purpose flour, cornmeal, baking powder, and grated Parmesan cheese. This mix gives the chicken a crunchy crust. Add salt and pepper to this mix for more flavor. Whisk it all together until well combined. This step is important to ensure every piece is evenly coated.
Cooking Method
For cooking, preheat your oven to 375°F (190°C). While it heats, line a baking sheet with parchment paper. This makes for easy cleanup later. Take the marinated chicken out and let the extra marinade drip off. Coat each piece in the flour mixture. Shake off any extra flour.
Next, heat olive oil in a large skillet over medium heat. Once hot, add the coated chicken breasts. Sear them for 3-4 minutes on each side. This will give them a golden brown color. After searing, move the chicken to your baking sheet. Bake it in the oven for 20-25 minutes. Check for an internal temperature of 165°F (74°C). The chicken should be juicy and tender.
Tips & Tricks
Selecting Quality Chicken
When you pick chicken breasts, look for fresh ones. Choose breasts that are pink and firm. Avoid those that have a grayish color or any signs of bruising. If possible, buy organic or free-range chicken. They often have better flavor and texture.
Optimal Marinade Tips
Marinating chicken in buttermilk makes it tender. The acidity helps break down the meat fibers. I recommend at least two hours for marinating. However, marinating overnight gives the best results. Add garlic powder, onion powder, smoked paprika, and thyme for flavor. Make sure each piece is well-coated.
Searing Techniques
Searing adds a nice crust to your chicken. Heat olive oil in your skillet until it shimmers. Place the chicken in the skillet without crowding it. Sear for about 3-4 minutes on each side. You want a golden brown crust. This crust keeps the juices inside, making your chicken tender and moist.
Pro Tips
- Marinate Longer for Flavor: For the most flavorful chicken, marinate the breasts overnight. This allows the spices to penetrate deeply, resulting in a more tender and flavorful dish.
- Don’t Rush the Searing: Ensure your skillet is hot before adding the chicken. A good sear creates a crust that locks in juices, preventing dryness during baking.
- Use a Meat Thermometer: Check for doneness with a meat thermometer. Chicken should reach 165°F (74°C) for safe consumption while ensuring it remains juicy.
- Rest Before Slicing: Allow the chicken to rest for at least 5 minutes after baking. This helps the juices redistribute, ensuring every bite is succulent and tender.
Variations
Dietary Modifications
For those who need gluten-free or dairy-free options, this recipe is easy to adjust. To make it gluten-free, swap the all-purpose flour with a gluten-free flour blend. Look for a blend that mimics regular flour well. You can also use gluten-free cornmeal if desired.
For a dairy-free version, replace buttermilk with a plant-based milk, like almond or oat milk. Add a splash of vinegar or lemon juice to mimic that tangy taste. This substitution keeps the chicken moist while still delivering great flavor.
Flavor Alternatives
You can change the spices to suit your taste. Want a kick? Add cayenne pepper or chili powder for heat. Prefer a fresh twist? Try fresh herbs like basil or oregano.
For an Italian flair, use Italian seasoning instead of thyme. If you love a smoky flavor, consider adding chipotle powder. Each of these options gives you a new taste while keeping the chicken tender and juicy.
Cooking Methods
You can cook chicken breasts in different ways. Baking is popular, as it gives even heat and helps the chicken cook through without drying out.
If you choose slow cooking, it allows the chicken to absorb flavors over hours. This method makes the chicken very tender, but it might not get as crispy as baking.
Both methods have their pros and cons. Baking takes less time and gives you a nice crust. Slow cooking is great for flavor but may require more time. Choose the method that fits your schedule and taste desires!
Storage Info
Storing Leftovers
To keep your chicken breasts fresh, let them cool first. Place them in an airtight container. This helps to avoid moisture loss and keeps them tender. Store the container in the fridge. Your chicken will stay good for 3 to 4 days. If you want to keep it longer, consider freezing.
Reheating Tips
When it’s time to enjoy leftovers, you want them juicy, not dry. Preheat your oven to 350°F (175°C). Place the chicken on a baking sheet and cover it with foil. This keeps the moisture in. Heat for about 15 to 20 minutes. You can also use a microwave, but be careful. Heat in short intervals and check often.
Freezing Options
For long-term storage, freezing is a great choice. Wrap each chicken breast tightly in plastic wrap. Then, put them in a freezer bag. Squeeze out the air to prevent freezer burn. They will last up to 3 months. When you’re ready to eat, move them to the fridge overnight to defrost. Never refreeze thawed chicken.
FAQs
What makes chicken breasts melt in your mouth?
Marinating chicken in buttermilk makes it very tender. Buttermilk breaks down proteins. It adds flavor and moisture. The garlic powder, onion powder, smoked paprika, and thyme also help. They infuse the chicken with rich taste.
Cooking techniques matter, too. Searing gives the chicken a nice crust. It locks in juices. Baking the chicken at 375°F ensures it cooks evenly. This method keeps the meat moist and tender.
Can I use bone-in chicken for this recipe?
Yes, you can use bone-in chicken. It may take longer to cook. Bone-in chicken has more flavor. You should adjust the cooking time. Bake it for 30-40 minutes instead. Always check the internal temperature. It should reach 165°F for safety.
How do I know when chicken is fully cooked?
To check if chicken is done, look for a few signs. The meat should no longer be pink inside. Juices should run clear when you cut it. Use a meat thermometer for accuracy. The internal temperature must be 165°F (74°C). This ensures it is safe to eat.
This blog post covers key steps to make perfect chicken breasts. You learned about essential ingredients like buttermilk and spices. Marinating adds flavor and helps the chicken stay tender. I shared tips on selecting quality chicken and techniques for a great crust.
Remember, variations exist to meet different diets and preferences. Store your leftovers properly and use reheating techniques to keep them juicy. With these insights, you can create a delicious meal that impresses anyone. Enjoy your cookin