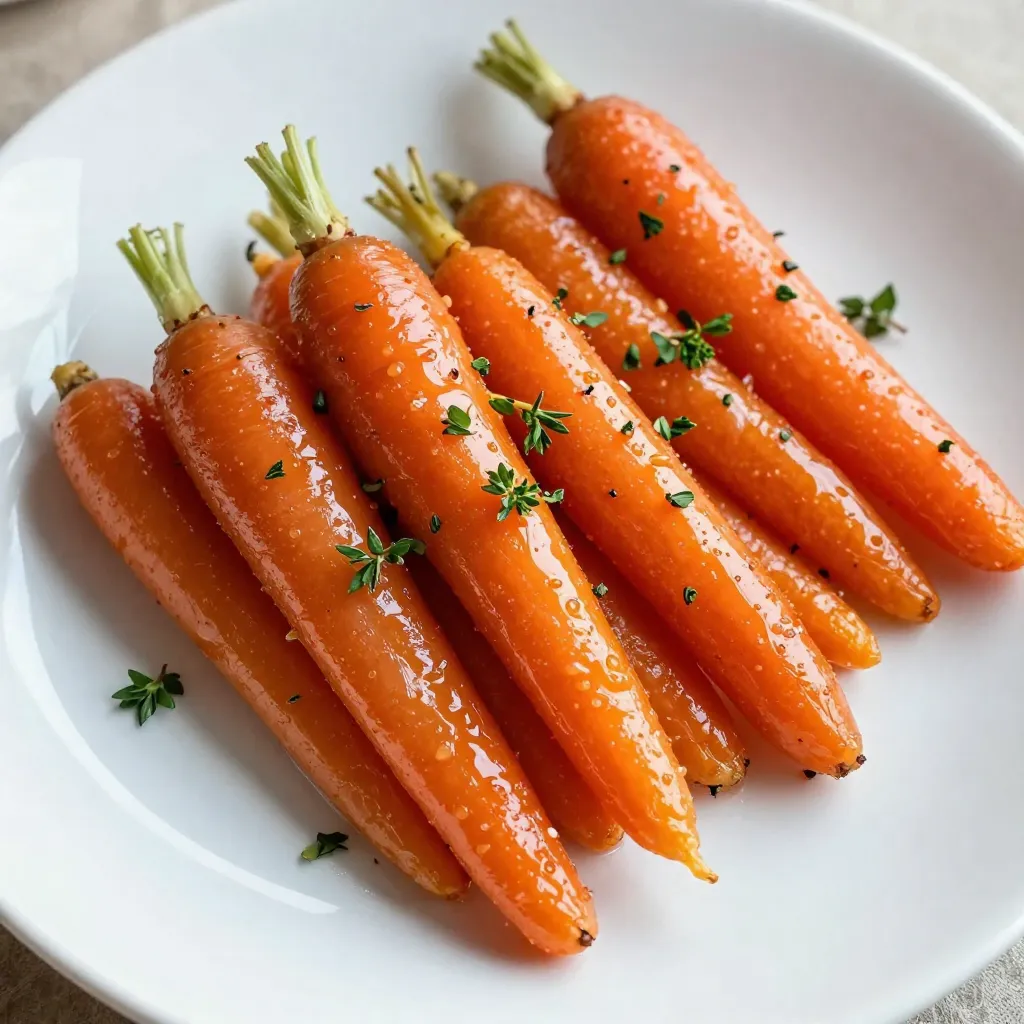
Looking to sweeten up your dinner table? Maple Glazed Carrots are your answer! This simple recipe turns tender carrots into a delightful side dish with a mix of sweet maple syrup and savory herbs. With fresh thyme and a hint of lemon, you’ll create a flavorful dish that complements any meal. Join me as I share step-by-step instructions to make this easy and tasty treat!
Why I Love This Recipe
- Deliciously Sweet: The combination of maple syrup and butter creates a rich and sweet glaze that enhances the natural sweetness of the carrots.
- Easy to Prepare: This recipe requires minimal ingredients and can be made in just 20 minutes, making it perfect for weeknight dinners.
- Versatile Side Dish: These maple glazed carrots complement a variety of main dishes, from roasted meats to vegetarian meals.
- Health Benefits: Carrots are packed with vitamins and antioxidants, making this dish both delicious and nutritious.
Ingredients
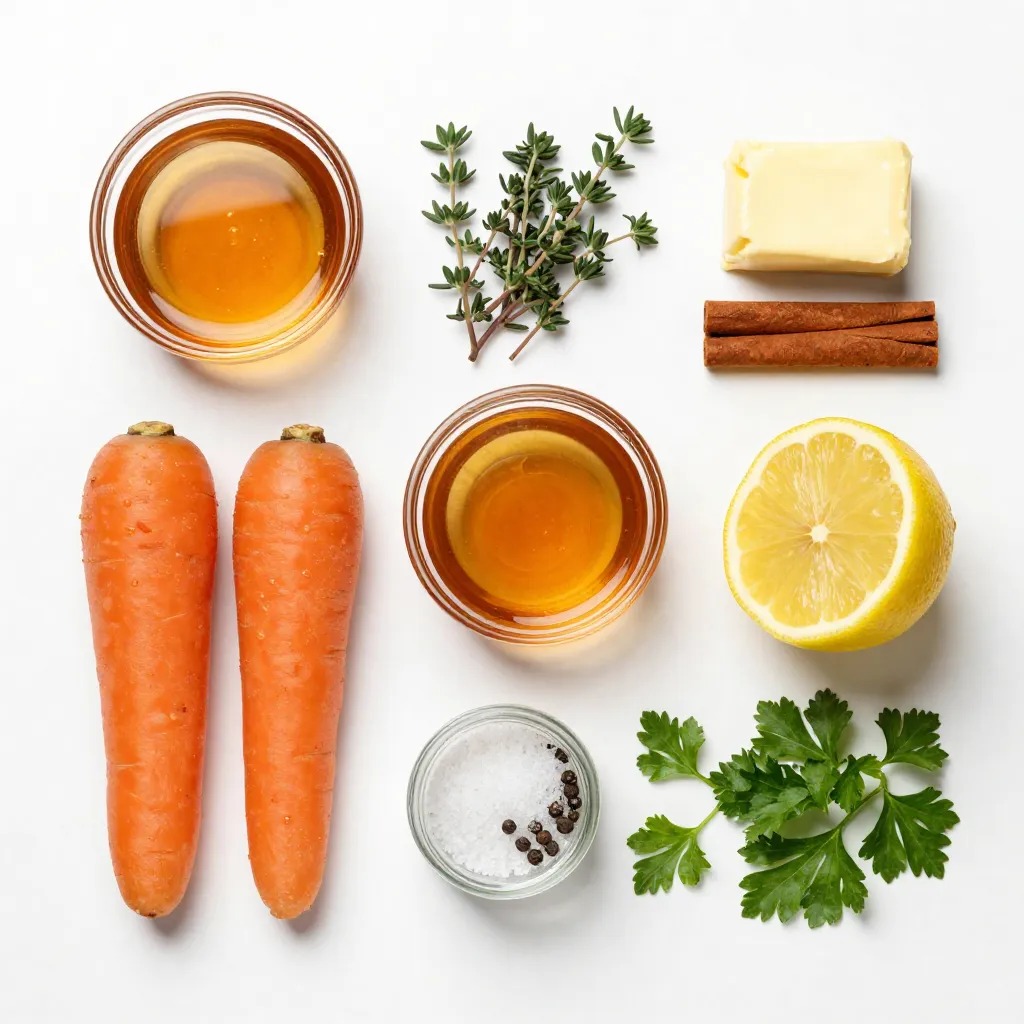
Here is what you need for maple glazed carrots. Fresh and simple ingredients make all the difference.
– 1 pound baby carrots (or regular carrots, sliced)
– 3 tablespoons pure maple syrup
– 2 tablespoons unsalted butter
– 1 teaspoon ground cinnamon
– 1 teaspoon fresh thyme leaves (or 1/2 teaspoon dried thyme)
– Salt and black pepper, to taste
– 1 tablespoon fresh lemon juice
– Chopped fresh parsley, for garnish
These ingredients create a sweet and savory side dish. The maple syrup gives it a rich flavor. The butter adds creaminess. Cinnamon brings warmth, while thyme adds a fresh note.
Using fresh carrots makes the dish bright and vibrant. If you can’t find baby carrots, regular ones work too. Just slice them evenly for even cooking. This helps every piece cook the same way.
The lemon juice at the end brightens the dish. It adds a zesty kick that balances the sweetness. Fresh parsley on top makes it look pretty. Plus, it gives a fresh flavor.
Gather these ingredients, and you are ready to make a tasty side dish!
Step-by-Step Instructions
Preparation of Carrots
Wash and peel the regular carrots first. Then slice them into uniform pieces. This helps them cook evenly. If you use baby carrots, you can skip the peeling.
Cooking the Carrots
Heat a large skillet over medium heat. Add the unsalted butter and let it melt. Once the butter is bubbly, add the carrots. Stir gently to coat each carrot in the melted butter.
Adding Flavor Elements
Drizzle the pure maple syrup over the carrots. Next, sprinkle in the ground cinnamon and fresh thyme. Season with salt and black pepper. Toss everything well to ensure that each carrot gets coated.
Steaming Process
Pour about 1/4 cup of water into the skillet. Cover the skillet with a lid. Let the carrots steam for 10-12 minutes. This will make them tender and keep them crisp. Stir occasionally to avoid sticking.
Caramelizing the Glaze
After steaming, remove the lid and raise the heat to medium-high. Allow any remaining water to evaporate. Cook the carrots for an additional 2-3 minutes while stirring. This will help the glaze caramelize.
Finishing Touches
Once the carrots are tender and coated in a sticky glaze, take the skillet off the heat. Squeeze in some fresh lemon juice to brighten the flavor. Then, sprinkle chopped fresh parsley on top for a pop of color before serving.
Tips & Tricks
Perfecting the Glaze
To make the glaze perfect, you can adjust the maple syrup and butter. If you like it sweeter, add more syrup. For a richer taste, use more butter. You can also mix in a bit of lemon juice. This adds a nice tang that balances the sweetness.
Ensuring Uniform Cooking
Cutting the carrots to the same size is key. This helps them cook evenly. If some pieces are bigger, they will take longer to cook. Uniform pieces ensure that all the carrots are tender at the same time. Use baby carrots or slice regular ones into equal parts.
Using Fresh vs. Dried Herbs
Using fresh herbs can add a bright flavor. Add them at the end of cooking to keep their taste strong. If you use dried herbs, add them earlier. They need time to release their flavor. This timing can change the taste of your dish, so plan accordingly.
Pro Tips
- Choose Fresh Carrots: Always select firm and vibrant carrots for the best flavor and texture. Fresh carrots will enhance the overall taste of the dish.
- Adjust Sweetness: Feel free to adjust the amount of maple syrup based on your preference for sweetness. You can also substitute with honey for a different flavor profile.
- Experiment with Herbs: Try adding other herbs like rosemary or dill for a unique twist. Fresh herbs can elevate the dish and add complexity to the flavor.
- Presentation Matters: For a stunning presentation, arrange the glazed carrots on a serving platter and sprinkle with additional parsley and lemon zest before serving.
Variations
Adding Other Vegetables
You can enhance your maple glazed carrots by adding other veggies. Try mixing in parsnips or sweet potatoes. Both add a nice touch to the dish. Their sweetness pairs well with the maple glaze. Cut them into similar sizes as the carrots. This ensures an even cook. You will enjoy a colorful and tasty side dish.
Spicing it Up
Want to add some flair? Experiment with spices like nutmeg or ginger. A pinch of nutmeg gives warmth to the dish. Ginger adds a nice zing, making it more exciting. Start with a small amount and taste as you go. This way, you can find the right balance for your palate.
Vegan Option
If you’re looking for a dairy-free version, it’s easy! Simply swap the butter for coconut oil. Melt it in the skillet just like you would with butter. This change will still give you a rich flavor. Plus, coconut oil adds a light tropical hint that goes well with the maple syrup. Enjoy this vegan twist on a classic!
Storage Info
Refrigerating Maple Glazed Carrots
To keep your maple glazed carrots fresh, place them in an airtight container. Make sure they cool down before sealing. Store them in the fridge for up to four days. This method helps maintain their sweet and savory flavor.
Reheating Tips
To reheat your carrots, use a skillet over medium heat. Add a splash of water or broth to help steam them. Stir gently to avoid sticking. Heat until warm, which takes about five minutes. This keeps the texture nice and prevents mushiness.
Freezing Options
I do not recommend freezing maple glazed carrots. The glaze may become watery and the texture can suffer. If you must freeze them, use a freezer-safe container. Thaw in the fridge and reheat on the stove to restore some texture.
FAQs
Can I use frozen carrots for this recipe?
Yes, you can use frozen carrots. They are convenient and save time. Just make sure to thaw them first. Cook them until they are tender, but not mushy, for best results. Keep an eye on the cooking time, as frozen carrots may need a bit longer.
How can I make this recipe ahead of time?
You can prepare the carrots a day in advance. Cook them as directed but skip the final caramelizing step. Store them in the fridge after cooling. When ready to serve, reheat in a skillet and finish with the lemon juice and parsley.
What dishes pair well with maple glazed carrots?
Maple glazed carrots go well with many dishes. They complement roasted chicken, grilled steak, and baked ham. You can also serve them with quinoa or rice for a vegetarian meal. Their sweet and savory flavor enhances both light and hearty dishes.
Can I use different sweeteners instead of maple syrup?
Yes, you can use honey or agave syrup as alternatives. Each sweetener gives a unique flavor. If using honey, go for a mild variety to avoid overpowering the carrots. Adjust the quantity to taste, as some sweeteners may be sweeter than maple syrup.
What is the nutritional profile of maple glazed carrots?
Maple glazed carrots are nutritious and packed with vitamins. A serving provides fiber, vitamin A, and antioxidants. The maple syrup adds a bit of sugar, while the butter gives healthy fats. Overall, they make a healthy and tasty side dish.
Maple glazed carrots make a delicious side dish. We covered the key ingredients and steps to make them shine. Careful cooking ensures great taste, while our tips help enhance the glaze. You can also try fun variations or store them for later. With a few tweaks, you’ll create a veggie dish everyone enjoys. Enjoy making this simple yet flavorful recip