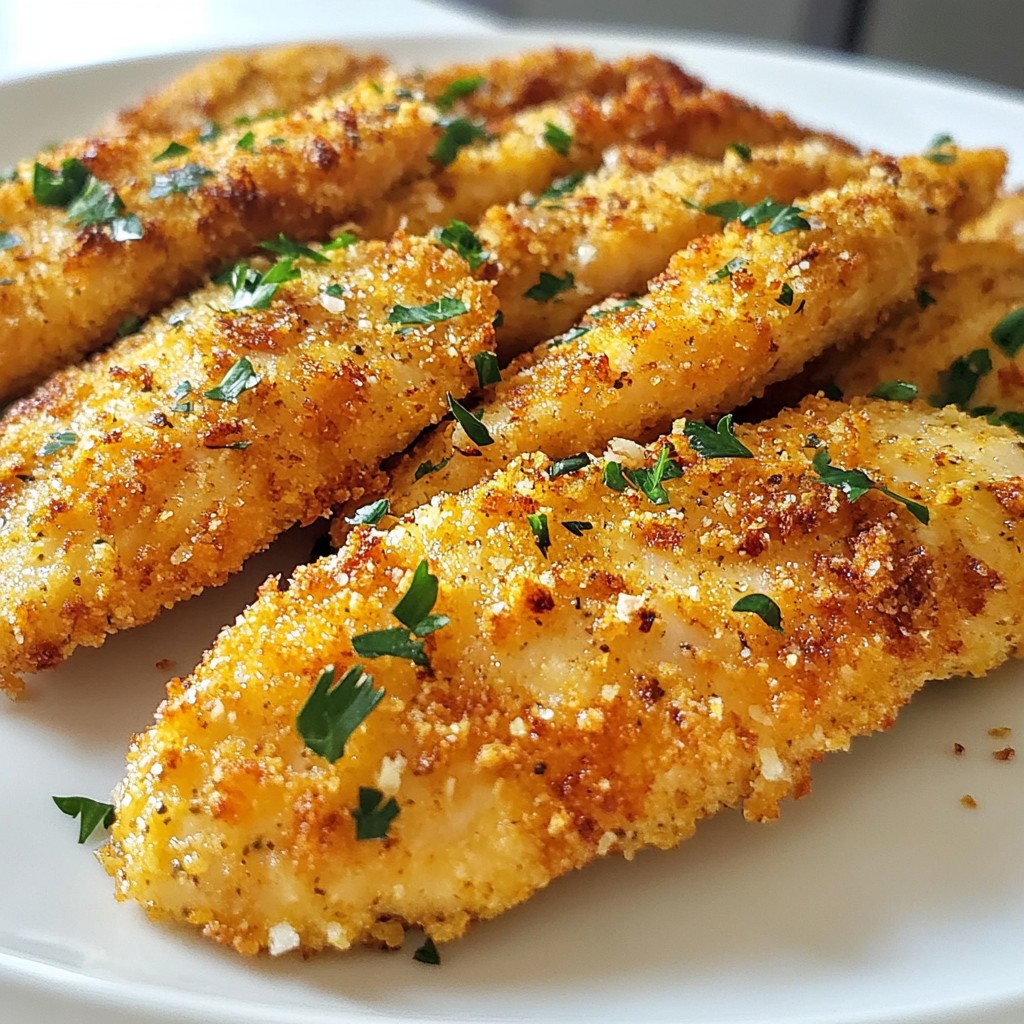
Get ready for a delicious treat! Crispy Garlic Parmesan Chicken Tenders are easy to make and full of flavor. These tenders are perfect for a family dinner or a fun snack. With simple ingredients and clear steps, you can whip them up in no time. I’ll share tips and tricks to ensure they turn out crispy and tasty every time. Let’s dive into making this delightful meal!
Why I Love This Recipe
- Crispy Texture: The use of panko breadcrumbs gives these chicken tenders an incredibly crunchy exterior that contrasts beautifully with the tender chicken inside.
- Flavor Boost: With the addition of garlic, Parmesan, and spices, these tenders are packed with flavor, making them a hit for any meal or snack.
- Easy to Make: This recipe is straightforward and quick, perfect for busy weeknights when you want a delicious homemade meal without too much hassle.
- Versatile Serving Options: These chicken tenders can be served with a variety of dips and sides, making them a flexible choice for parties, family dinners, or casual snacking.
Ingredients
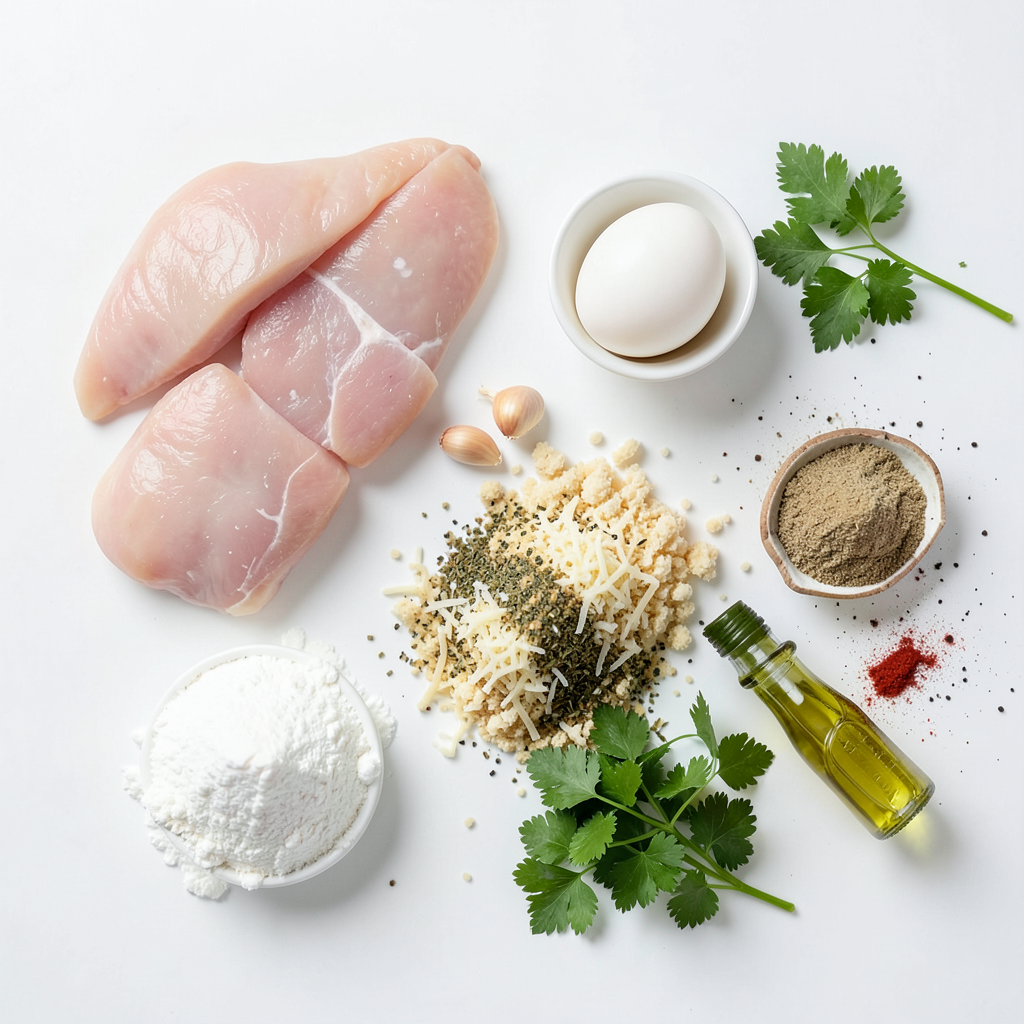
Main Ingredients for Crispy Garlic Parmesan Chicken Tenders
To make crispy garlic Parmesan chicken tenders, gather the following main ingredients:
- 1 pound chicken tenders
- 1 cup all-purpose flour
- 2 large eggs
- 1 cup panko breadcrumbs
- 1 cup finely grated Parmesan cheese
- 4 cloves garlic, minced
These ingredients create a crunchy and flavorful coating that makes the chicken so tasty.
Seasonings and Coating Components
The seasonings add depth to the chicken tenders. You will need:
- 1 teaspoon garlic powder
- 1 teaspoon dried oregano
- 1 teaspoon paprika
- Salt and freshly cracked black pepper to taste
- ½ cup fresh parsley, chopped (for garnishing)
- Olive oil spray (or any cooking spray of your choice)
These seasonings enhance the chicken's flavor while also adding aromatic notes.
Substitutions and Variations for Ingredients
You can easily switch some ingredients if needed. Here are a few options:
- Use chicken breasts cut into strips if you can't find tenders.
- Instead of panko, regular breadcrumbs work, though they may not be as crunchy.
- Nutritional yeast can replace Parmesan for a dairy-free option.
Feel free to get creative with your ingredients. Adjust them to match your taste or dietary needs!
Step-by-Step Instructions
Preparing the Chicken Tenders
To make crispy garlic Parmesan chicken tenders, start by preheating your oven to 400°F (200°C). This step helps create that perfect crunch. Next, line a baking sheet with parchment paper. This will stop the chicken from sticking and make cleanup easier.
Now, take 1 pound of chicken tenders. Pat them dry with a paper towel. This will help the coating stick better. Season the chicken with salt and pepper. This simple step adds flavor to every bite.
Breading Process Explained
The breading process is key for crispy chicken tenders. In a shallow bowl, mix 1 cup of all-purpose flour with salt, pepper, and 1 teaspoon of garlic powder. This will be the first layer of flavor.
In another bowl, whisk 2 large eggs until smooth. This will help the coating stick. In a third bowl, combine 1 cup of panko breadcrumbs, 1 cup of finely grated Parmesan cheese, 4 cloves of minced garlic, 1 teaspoon of dried oregano, 1 teaspoon of paprika, and a pinch of salt and pepper. Mix it well.
Now, take each chicken tender. First, dredge it in the seasoned flour. Shake off any extra flour. Then, dip it into the egg wash, letting the excess drip off. Finally, coat it in the breadcrumb mixture. Press gently to ensure the coating sticks well.
Baking and Cooking Tips for Perfect Crispiness
Once all the tenders are coated, arrange them on the baking sheet. Leave space between each piece. This helps them cook evenly. Lightly spray the tenders with olive oil. This will help them brown nicely.
Bake the chicken tenders for 20-25 minutes. Flip them halfway through to ensure both sides get crispy. They are done when they are golden brown and reach an internal temperature of 165°F. Remove them from the oven and let them cool for a few minutes.
Before serving, garnish your chicken tenders with freshly chopped parsley. This adds a fresh touch. Now you have crispy garlic Parmesan chicken tenders ready to delight everyone at your table!
Tips & Tricks
Achieving the Best Texture and Flavor
To make the crispiest garlic Parmesan chicken tenders, you need the right coating. Use panko breadcrumbs for extra crunch. Combine these with finely grated Parmesan cheese for a rich flavor. Mixing in garlic and spices like paprika and oregano adds depth. Spray the tenders lightly with olive oil before baking. This helps achieve that golden-brown finish.
Common Mistakes to Avoid
One common mistake is not shaking off excess flour from the chicken. This can lead to a gummy texture. Make sure to coat the chicken well, but not too thick. Another mistake is overcrowding the baking sheet. Leave space between each tender for even cooking. Also, remember to flip the tenders halfway through baking for a uniform crunch.
Recommendations for Cooking Equipment
Use a sturdy baking sheet lined with parchment paper. This prevents sticking and makes cleanup easy. A shallow bowl works best for dredging the chicken. If you have one, use a wire rack on top of the baking sheet. This allows hot air to circulate around the tenders, enhancing their crispiness. A good set of tongs helps with handling the chicken without making a mess.
Pro Tips
- Choose the Right Chicken: Opt for organic or free-range chicken tenders for enhanced flavor and better quality.
- Let It Rest: After baking, allow the chicken tenders to rest for a few minutes before serving to retain their juiciness.
- Experiment with Spices: Feel free to customize the seasoning blend by adding your favorite spices like cayenne pepper for a kick.
- Storage Tips: Store leftover tenders in an airtight container in the fridge for up to 3 days, and reheat in the oven for best results.
Variations
Flavor Variations (Spicy, Herb-Infused, etc.)
You can spice up your crispy garlic parmesan chicken tenders. For a spicy kick, add cayenne pepper to the breadcrumb mix. You can also use hot sauce in the egg wash for extra heat. If you like herbs, try adding fresh thyme or rosemary. These herbs make the tenders aromatic and fresh.
Cooking Methods (Air Frying, Frying)
While baking gives a nice crunch, you can also use other methods. Air frying works great for a healthier option. Set your air fryer to 400°F and cook the tenders for 10-12 minutes. Flip halfway for even crispiness. If you prefer frying, heat oil in a pan and fry each tender for about 3-4 minutes on each side until golden. This method adds a crisp outer layer.
Suggested Sides and Compliments
Pair your chicken tenders with tasty sides. A small bowl of marinara sauce or ranch dressing makes a great dip. For something fresh, serve with a garden salad. You can add cucumbers, tomatoes, and a light vinaigrette. These sides make your meal balanced and fun to eat.
Storage Info
How to Store Leftover Chicken Tenders
To store leftover chicken tenders, first let them cool. Place them in an airtight container. This helps keep them fresh. You can store them in the fridge for up to three days. If you want them to last longer, consider freezing.
Reheating Instructions for Best Results
To reheat chicken tenders, use the oven for the best texture. Preheat your oven to 375°F (190°C). Place the tenders on a baking sheet. Bake for about 10-15 minutes until heated through. This keeps them crispy. You can also use a microwave, but they might become soggy. If you use the microwave, heat them in short bursts.
Freezing Tips for Long-Term Storage
For long-term storage, freeze the chicken tenders before reheating. First, let them cool completely. Place them in a single layer on a baking sheet. Freeze until solid, then transfer them to a freezer bag. Remove excess air to prevent freezer burn. These can last up to three months in the freezer. When ready to eat, bake from frozen, adding a few extra minutes to the cooking time.
FAQs
Can I make Crispy Garlic Parmesan Chicken Tenders ahead of time?
Yes, you can prepare these chicken tenders ahead. First, bread the chicken tenders as directed. After breading, place them on a baking sheet. Cover them tightly with plastic wrap. You can store them in the fridge for up to 24 hours. When ready to cook, just bake them straight from the fridge. This saves you time and keeps the flavor fresh.
How can I ensure the chicken tenders stay crispy?
To keep the chicken tenders crispy, follow these tips:
- Use panko breadcrumbs for extra crunch.
- Allow enough space between each tender on the baking sheet.
- Spray the tenders lightly with olive oil before baking.
- Flip them halfway through cooking for even crispiness.
These steps help achieve that perfect, crunchy texture.
What dipping sauces pair well with these chicken tenders?
These chicken tenders taste great with many dipping sauces. Some popular options include:
- Marinara sauce for a classic Italian touch.
- Ranch dressing for a creamy flavor.
- Honey mustard for a sweet and tangy twist.
- BBQ sauce adds a smoky flavor.
Feel free to experiment and find your favorite!
What is the best way to reheat leftover chicken tenders?
To reheat leftover chicken tenders, use the oven for the best results. Preheat your oven to 350°F (175°C). Place the tenders on a baking sheet. Bake for about 10-15 minutes or until heated through. This method keeps them crispy. Avoid using the microwave, as it can make the tenders soggy.
This article covered how to make crispy garlic parmesan chicken tenders. We explored key ingredients, substitutions, and cooking steps to ensure you get perfect results every time. I shared tips to avoid common mistakes and enhance flavor. You can even try fun variations, different cooking methods, and suggest tasty sides. With proper storage and reheating, your leftovers will stay delicious. Enjoy making this dish again and again, and impress your family and friends with your skills!