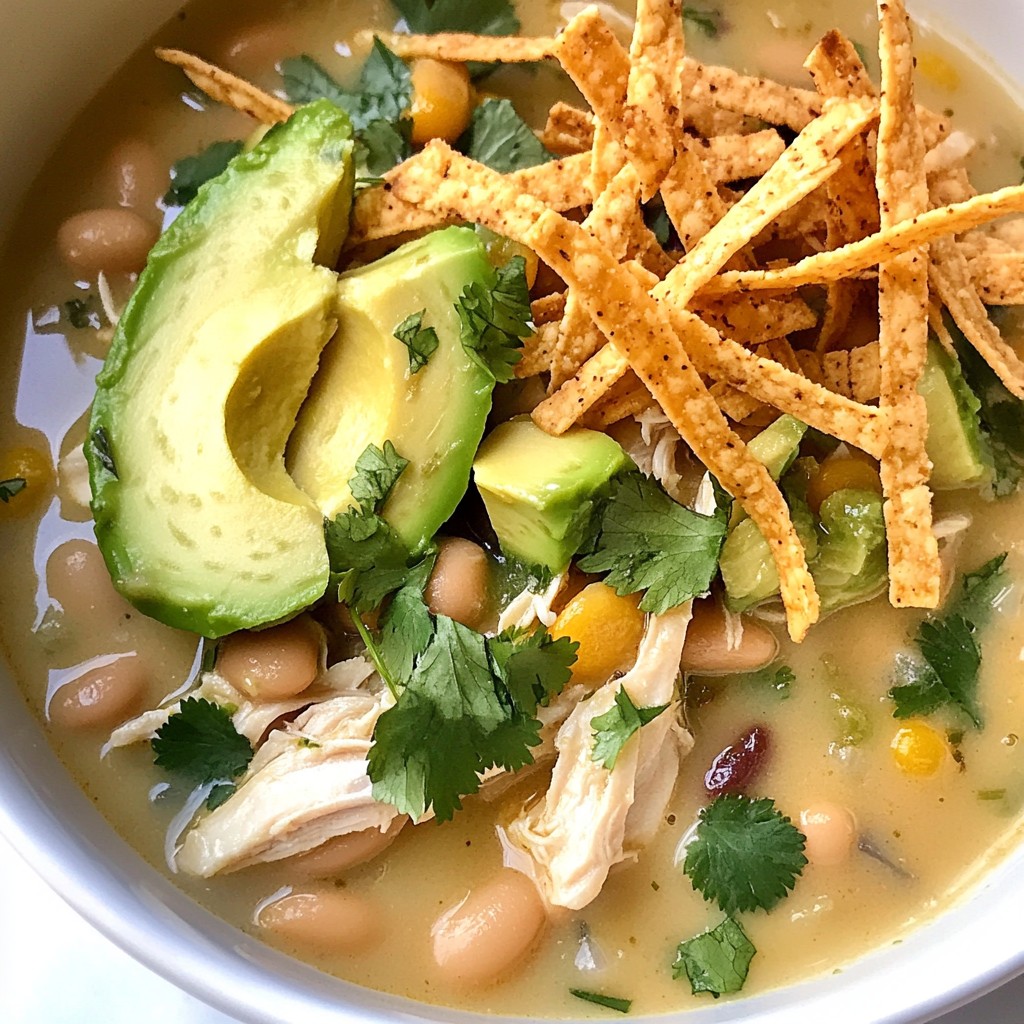
Ready to discover the ultimate comfort food? Creamy White Chicken Chili is a warm, hearty, and flavorful dish that hits all the right notes. With tender chicken, white beans, and a velvety base, this chili is easy to make and perfect for any occasion. Whether you're looking for a cozy dinner or a dish to impress guests, I’ll guide you every step of the way. Let’s dive into the deliciousness!
Error: Error code: 429 - {'error': {'message': 'You exceeded your current quota, please check your plan and billing details. For more information on this error, read the docs: https://platform.openai.com/docs/guides/error-codes/api-errors.', 'type': 'insufficient_quota', 'param': None, 'code': 'insufficient_quota'}}
Ingredients
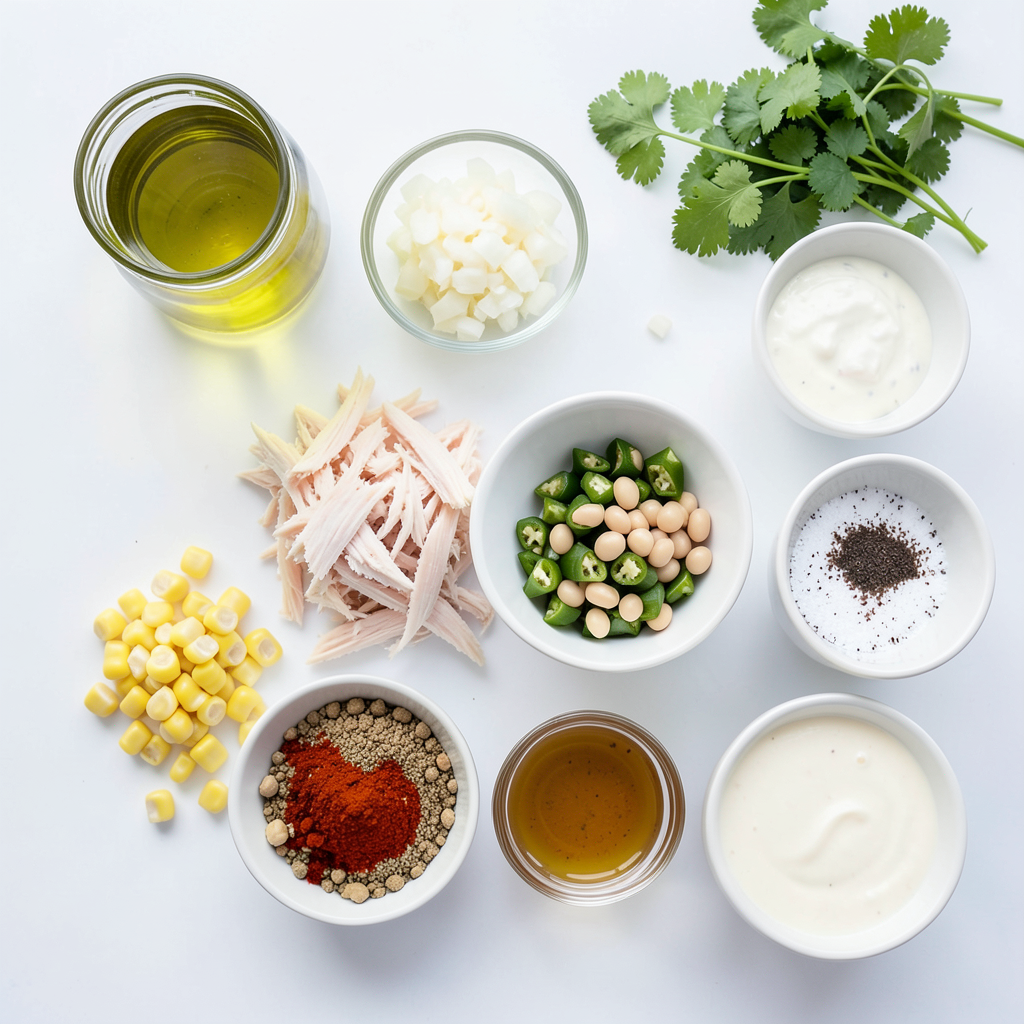
Essential Ingredients
- 2 tablespoons of olive oil
- 1 medium onion, finely diced
- 3 cloves of garlic, minced
- 1 pound of cooked chicken breast, shredded
- 2 cans (15 oz each) of white beans, drained and rinsed
- 1 can (4 oz) of diced green chilies
These ingredients form the base of the chili. Olive oil adds richness, while onion and garlic provide a strong flavor. The shredded chicken gives the dish heartiness. White beans lend a creamy texture, and green chilies add a mild kick.
Broth and Spices
- 3 cups of low-sodium chicken broth
- 1 teaspoon of ground cumin
- 1 teaspoon of smoked paprika
- 1/2 teaspoon of cayenne pepper
The chicken broth creates a warm, savory foundation. Ground cumin gives a warm earthiness. Smoked paprika adds depth and a hint of smokiness. Cayenne pepper lets you control the spice level in your chili.
Creamy Elements and Toppings
- 1 cup of heavy cream
- 1 cup of corn
- Optional: slices of avocado, shredded cheese, crispy tortilla strips
Heavy cream adds a rich, velvety texture. Corn gives a sweet crunch. Toppings like avocado and cheese boost flavor and presentation. Crispy tortilla strips offer a delightful crunch on top.
Step-by-Step Instructions
Preparing the Base
First, heat the olive oil in a large pot over medium heat. Once it’s hot, add the finely diced onion. Sauté the onion for about 3-4 minutes until it turns clear. This step helps build a solid flavor base. Next, add the minced garlic and stir it in. Cook it for one more minute until it smells great.
Now, it’s time to incorporate the main ingredients. Add the shredded chicken, drained white beans, and diced green chilies to the pot. Then, pour in the chicken broth, mixing everything well. This mix forms the heart of your chili.
Building the Flavor
To give your chili a rich taste, sprinkle in the ground cumin, smoked paprika, and cayenne pepper. You can adjust the cayenne based on your spice preference. Add salt and pepper to taste. Stir the mix well, then raise the heat until it gently boils.
Once it starts to bubble, reduce the heat to low. Let the chili simmer for about 15 minutes. This simmering time helps all the flavors blend together nicely.
Finishing Touches
After simmering, it's time to make it creamy. Stir in the heavy cream and corn. Keep cooking on low heat for another 5 minutes or until it’s heated through. Taste and adjust the seasoning if needed.
Finally, remove the pot from the heat. Let the chili rest for a few minutes. This resting time allows the flavors to settle, making each bowl even tastier.
Tips & Tricks
Perfecting Texture
Choosing the right beans I love using cannellini or navy beans. They are creamy and soft. Rinse the beans well before adding them. This step helps reduce sodium and improves flavor.
Best chicken for shredding Cooked chicken breast works best. I recommend using leftover chicken for ease. If you have time, poach chicken in broth for added flavor. Shredding it by hand gives a nice texture.
Spice adjustments
Altering heat levels Start with half a teaspoon of cayenne pepper. If you like more heat, add more. Taste as you go! This way, you control the spice level to match your taste.
Adding extra flavor nuances Don’t shy away from spices! Ground cumin and smoked paprika add depth. You can also experiment with chili powder or fresh herbs. Each addition makes the chili unique.
Presentation and Serving Ideas
Garnishing suggestions Fresh cilantro adds a pop of color. I also like to use avocado slices. Shredded cheese on top makes it comforting and delicious. Crispy tortilla strips add a fun crunch.
Serving with complementary sides This chili pairs well with cornbread or a simple salad. The bread soaks up the creamy goodness. Enjoy a refreshing side salad for balance. Each bite will be satisfying and full of flavor!
Error: Error code: 429 - {'error': {'message': 'You exceeded your current quota, please check your plan and billing details. For more information on this error, read the docs: https://platform.openai.com/docs/guides/error-codes/api-errors.', 'type': 'insufficient_quota', 'param': None, 'code': 'insufficient_quota'}}
Variations
Different Protein Options
You can switch the chicken for turkey. Ground turkey works well and keeps it light. It adds a different taste but still feels hearty. If you want a vegetarian choice, try using mushrooms or tofu. Both will soak up the flavors and give a nice texture.
Beans and Grains
Feel free to use different beans. Black beans or pinto beans can add a unique flavor. Mixing beans enhances the chili and gives it more color. You can also add quinoa or rice. Both will make the dish more filling. Quinoa adds protein, while rice gives a soft texture.
Flavor Enhancements
You can introduce different spices to change the taste. Try adding chili powder for a kick or oregano for a fresh note. Fresh herbs like basil or thyme can also add depth. Lastly, adding vegetables boosts nutrition. Consider bell peppers, carrots, or spinach. They mix well and give extra color.
Storage Info
Refrigerating Leftovers
Store any leftover chili in an airtight container. This keeps it fresh and tasty. You can refrigerate it for up to 4 days. If you want the best flavor, eat it within two days. Always let it cool down before putting it in the fridge. This helps prevent moisture buildup.
Freezing for Later
To freeze this chili, use freezer-safe containers or sealable bags. Make sure to leave some space for expansion. You can store it for up to 3 months. When you are ready to eat, take it out of the freezer. Place it in the fridge overnight to thaw.
Reheating Instructions
For reheating, use a pot on low heat. Stir often to avoid sticking. You can also use a microwave. Heat in short bursts, stirring in between. If the chili is too thick after freezing, add some chicken broth. This helps bring back its creamy texture. Enjoy it warm, just like you made it!
FAQs
Can I make Creamy White Chicken Chili in a slow cooker?
Yes, you can use a slow cooker! First, heat the olive oil in a pan. Sauté the onion and garlic until soft. Then, add this mix to the slow cooker. Next, combine the cooked chicken, white beans, green chilies, chicken broth, and spices in the slow cooker. Stir well. Cook on low for 6-8 hours or on high for 3-4 hours. Add the cream and corn during the last 30 minutes. This keeps them creamy and fresh.
How spicy is this chili?
The spice level is mild to medium. It mainly depends on the cayenne pepper. If you like heat, add more cayenne. You can also use hot green chilies. On the other hand, if you prefer less spice, skip the cayenne or use sweet peppers. Taste as you go to find your perfect heat.
What can I serve with this chili?
This chili pairs well with many sides. Try serving it with warm cornbread or crispy tortilla chips. You can also add a fresh salad for a light side. For toppings, use avocado slices, shredded cheese, or crispy tortilla strips. These options add flavor and texture, making your meal even better.
This blog post covered key ingredients and easy steps to make Creamy White Chicken Chili. I shared tips to enhance texture and spice, along with serving ideas. You can also explore various protein options and how to store or freeze leftovers. Remember, this dish is flexible. Feel free to customize it to your taste. Enjoy creating a comforting meal that warms both the body and soul. Dive into this recipe and make it your own!