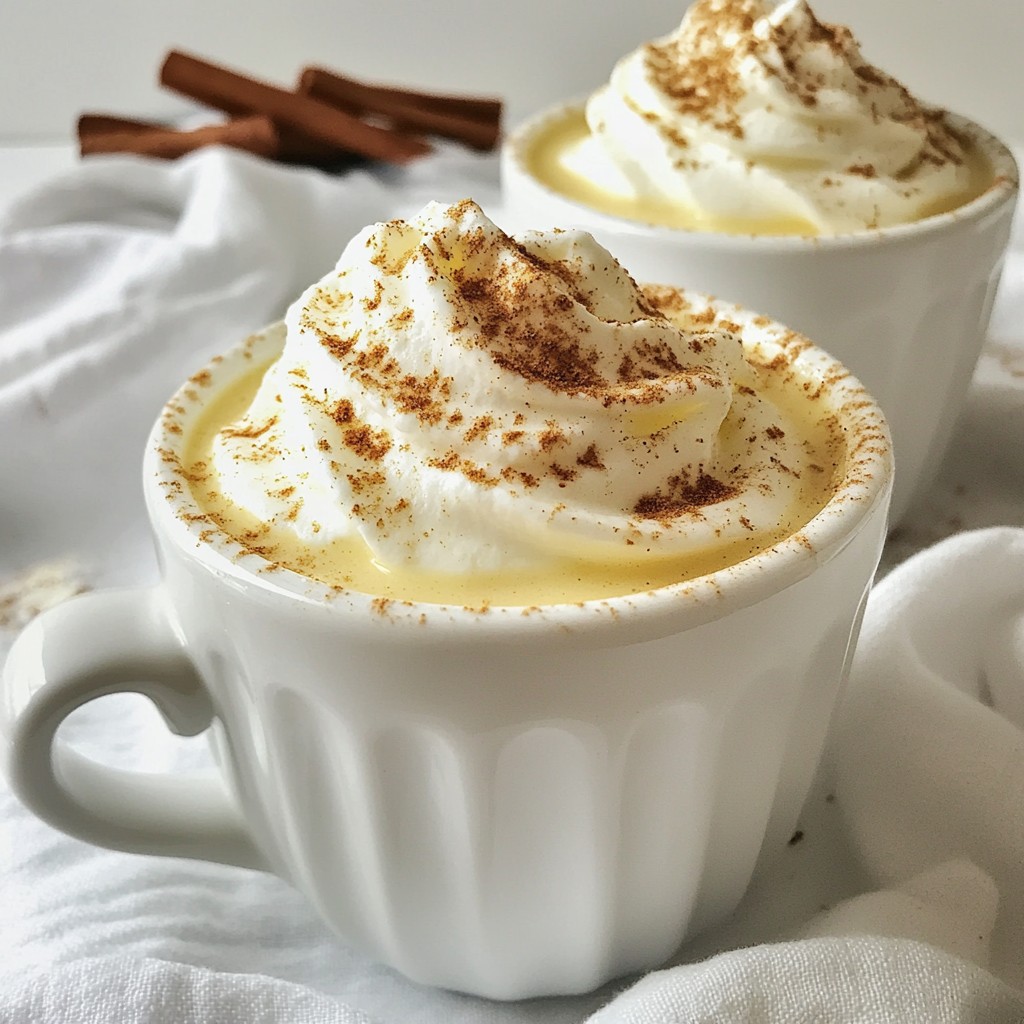
Ready to impress your friends and family this holiday season? In my Classic Holiday Eggnog Creamy and Rich Recipe Guide, I’ll show you how to create the perfect festive drink. Picture a creamy blend of whole milk, heavy cream, and spices, all whisked together with fresh eggs. I'll walk you through each step, offering tips and tricks for the best results. Let’s make this holiday special with homemade eggnog!
Why I Love This Recipe
- Rich and Creamy Flavor: The combination of whole milk and heavy cream creates a luxurious texture that makes each sip delightful.
- Perfect for Celebrations: This festive eggnog is a classic holiday drink that brings warmth and cheer to any gathering.
- Customizable Spices: You can easily adjust the spices to suit your taste, whether you prefer more nutmeg, cinnamon, or even a hint of clove.
- Easy to Prepare: With simple ingredients and straightforward instructions, this recipe is accessible for both novice and experienced cooks.
Ingredients
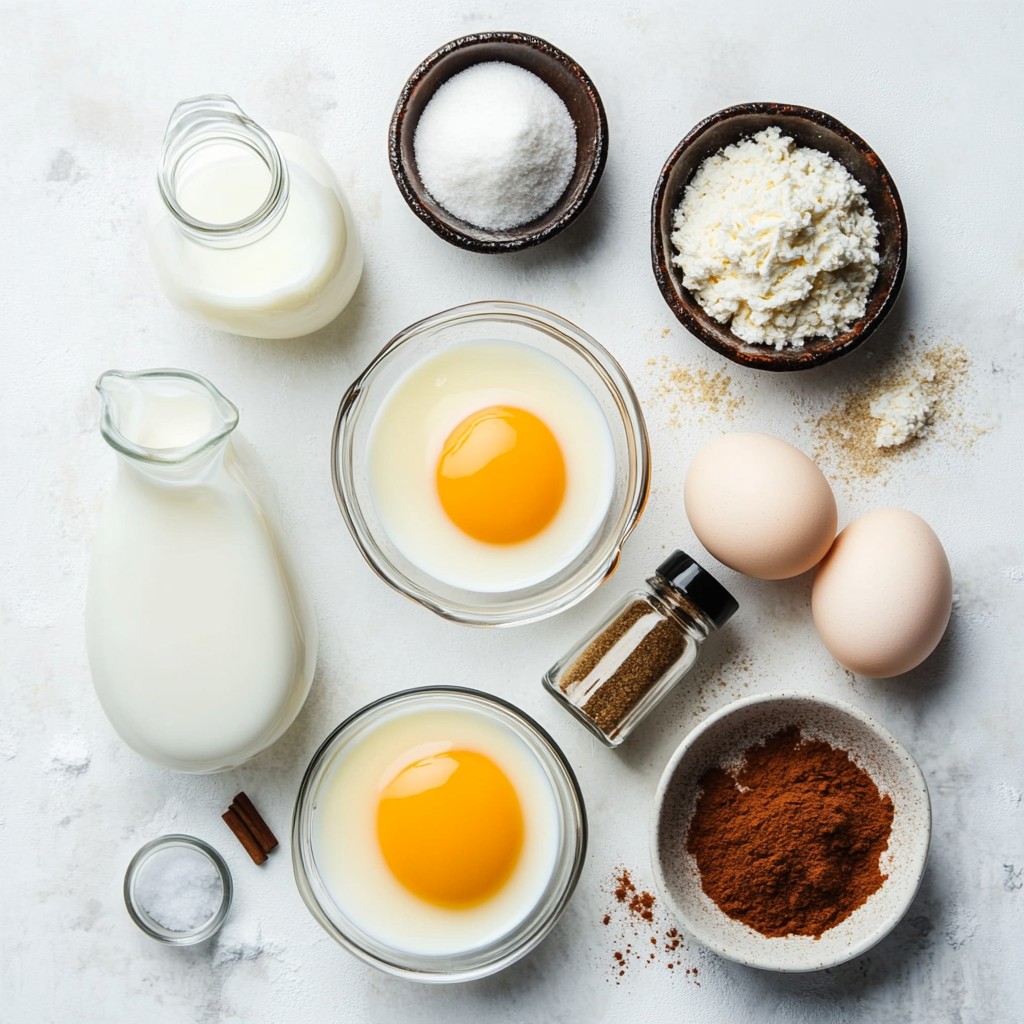
List of Ingredients
- 4 cups whole milk
- 1 cup heavy cream
- 4 large eggs
- 3/4 cup granulated sugar
- 1 teaspoon vanilla extract
- 1/2 teaspoon ground nutmeg
- 1/2 teaspoon ground cinnamon
- Pinch of salt
- Whipped cream for garnish
- Additional nutmeg for garnish
To make classic holiday eggnog, gather these ingredients. Whole milk and heavy cream form the creamy base. Eggs add richness and body. Granulated sugar sweetens the mix, while vanilla extract brings a lovely flavor.
Spices like nutmeg and cinnamon add warmth and festivity. A pinch of salt enhances all the flavors. For the perfect finish, top your eggnog with whipped cream and a sprinkle of nutmeg.
Using fresh, high-quality ingredients is key. This ensures your eggnog tastes great. Enjoy the process of gathering your ingredients. It sets the tone for a delightful cooking experience.
Step-by-Step Instructions
Preparing the Milk and Cream Mixture
To start, you need to heat the milk and cream. In a medium saucepan, combine 4 cups of whole milk and 1 cup of heavy cream. Place the pan over low heat. Stir the mixture gently. You want it hot but not boiling. This usually takes around 5 minutes. Keep an eye on it to avoid burning.
Mixing the Egg and Sugar
While the milk heats, it's time to mix the eggs and sugar. In a large bowl, add 4 large eggs and 3/4 cup of granulated sugar. Whisk them together. You should whisk until the mixture turns pale and fluffy. This step takes about 2 to 3 minutes. Good whisking is key to making a light eggnog.
Combining and Cooking the Mixtures
Now comes the fun part. Slowly pour the warm milk and cream mixture into the egg and sugar bowl. Whisk constantly while you pour. This step is called tempering the eggs. It prevents them from scrambling. Once mixed, pour everything back into the saucepan. Cook over low heat again. Stir constantly with a wooden spoon. You want the mixture to thicken and coat the back of the spoon. This should take about 10 minutes. Once thickened, remove the pan from the heat. Stir in 1 teaspoon of vanilla extract, 1/2 teaspoon of ground nutmeg, 1/2 teaspoon of ground cinnamon, and a pinch of salt. Mix well to blend all the spices.
Tips & Tricks
Achieving a Rich and Creamy Texture
To make eggnog truly rich and creamy, start with high-quality ingredients. Use whole milk and heavy cream for the best results. The cream adds a velvety texture that makes each sip delightful.
Cooking temperature control is key. Heat the milk and cream over low heat. Stir gently until it is hot but not boiling. This helps to keep the mixture smooth. If it boils, you risk curdling the eggs later.
Flavor Enhancements
Spices are a great way to boost flavor. Nutmeg and cinnamon are classic choices. Adjust these spices to match your taste. Want more warmth? Add a bit more nutmeg or a hint of cinnamon.
When it comes to alcohol, you have options. Rum, bourbon, or brandy can all add depth. Choose what you like best. Each spirit brings a unique twist, making your eggnog special.
Pro Tips
- Use Fresh Ingredients: For the best flavor, use fresh eggs and high-quality whole milk and cream. This will enhance the creaminess and richness of your eggnog.
- Chill Thoroughly: Allowing the eggnog to chill for at least 2 hours helps meld the flavors together, resulting in a more delicious drink.
- Experiment with Spices: Feel free to adjust the amount of nutmeg and cinnamon to your taste. You can also try adding a splash of vanilla or a hint of clove for extra warmth.
- Garnish Creatively: Beyond whipped cream, consider garnishing with chocolate shavings, a sprinkle of cocoa powder, or a festive cinnamon stick for added flair and flavor.
Variations
Dairy-Free Eggnog Options
If you want to make dairy-free eggnog, you have great choices. You can use almond milk or coconut milk instead of whole milk. Both options add a nice flavor and creamy texture.
For the heavy cream, try using coconut cream. It gives a rich taste and works well in recipes. Just make sure to shake the can well before using. This way, you get the smoothest texture.
Different Flavor Profiles
Want to switch things up? You can easily create different flavor profiles. One fun option is chocolate eggnog. Simply add cocoa powder or melted chocolate to the mix. This adds a rich, sweet touch that kids and adults love.
Another great idea is coffee-infused eggnog. Just brew some strong coffee and mix it in before chilling. This adds a nice kick and makes it perfect for holiday gatherings. Enjoy experimenting with these flavors!
Storage Info
How to Store Homemade Eggnog
After making your eggnog, you want to store it right. The best way is to pour it into a clean, airtight container. Glass jars work well. Seal it tight to keep out air and odors. Place it in the fridge. Homemade eggnog stays fresh for about 3 to 5 days. If you see any separation, just give it a good stir before serving.
Freezing Eggnog
Can you freeze homemade eggnog? Yes, you can freeze it! However, the texture might change a bit. To freeze, pour the eggnog in freezer-safe containers. Leave some space at the top. This space lets it expand. Eggnog can last in the freezer for about 6 months.
When you’re ready to enjoy it again, thaw it in the fridge overnight. This slow thaw keeps the taste nice. After thawing, stir it well. If it looks a little grainy, blend it to smooth it out. Serve chilled, and don’t forget the whipped cream on top!
FAQs
What is the origin of eggnog?
Eggnog has a rich history. It likely started in Europe in the 14th century. People made it with milk, eggs, and spices. It was a drink for the wealthy, served at fancy gatherings. The name "eggnog" comes from "nog," meaning a strong beer. In America, eggnog gained fame in the 18th century. It became popular during the winter holidays. Today, it is a staple drink for festive celebrations.
Can eggnog be made ahead of time?
Yes, you can make eggnog ahead of time. It tastes better when flavors mix and meld. I suggest making it one to two days before serving. Chill it in the fridge after making. This allows spices to blend fully, enhancing the taste. Just remember to stir well before serving to keep it smooth. You can also add whipped cream and nutmeg right before serving.
Is it safe to consume raw eggs in eggnog?
Raw eggs in eggnog can pose risks. They may contain harmful bacteria like Salmonella. To make eggnog safer, use fresh, high-quality eggs. You can also cook the egg mixture gently. This way, you kill any harmful bacteria while keeping the flavor. If you are concerned, pasteurized eggs are a great option. They are safe to eat raw and do not change the taste of your eggnog.
You learned how to make homemade eggnog step by step. We covered the key ingredients, mixing techniques, and tips for a creamy texture. You also discovered fun variations, storage tips, and answers to common questions.
Making eggnog is simple and rewarding. You can customize it to fit your taste. Enjoy sharing your tasty creation with friends and family during the holidays. Now, go ahead and make the best eggnog ever!