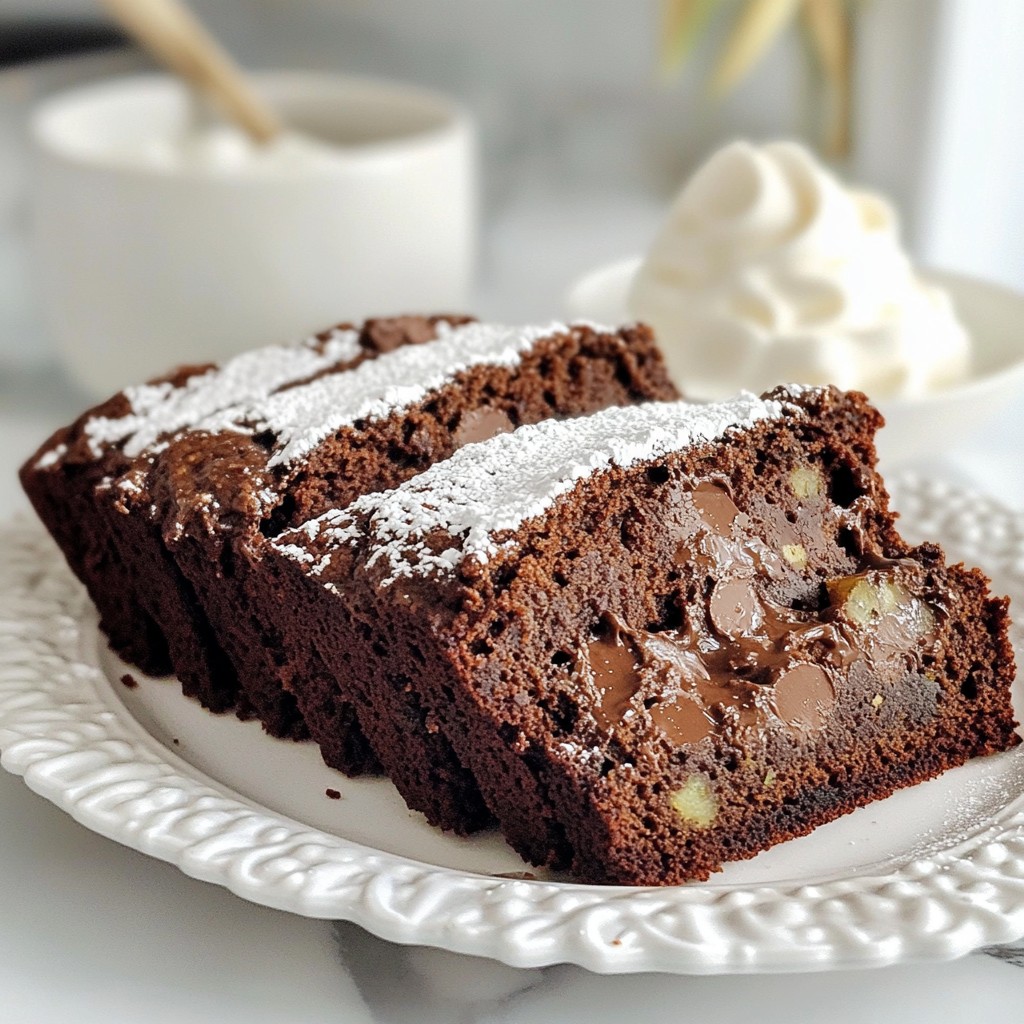
Are you ready to indulge in a dessert that balances rich brownies with light, fluffy mousse? Chocolate Mousse Brownies are the perfect treat for chocoholics and dessert lovers alike. In this post, I’ll walk you through the ingredients, step-by-step instructions, and tips to ensure your dessert is a crowd-pleaser. Whether you’re a beginner or a seasoned baker, you’ll love how easy and delightful these brownies can be. Let’s dive into the sweet details!
Why I Love This Recipe
- Decadent Flavor: This recipe combines rich chocolate brownies with a fluffy mousse, creating a dessert that is both indulgent and satisfying.
- Easy to Make: With simple ingredients and straightforward steps, this recipe is perfect for both novice and experienced bakers.
- Perfect for Any Occasion: Whether it’s a family gathering or a special celebration, these brownies are sure to impress your guests.
- Customizable Toppings: Feel free to get creative with toppings like fresh berries or nuts, allowing you to personalize each serving.
Ingredients
List of Required Ingredients
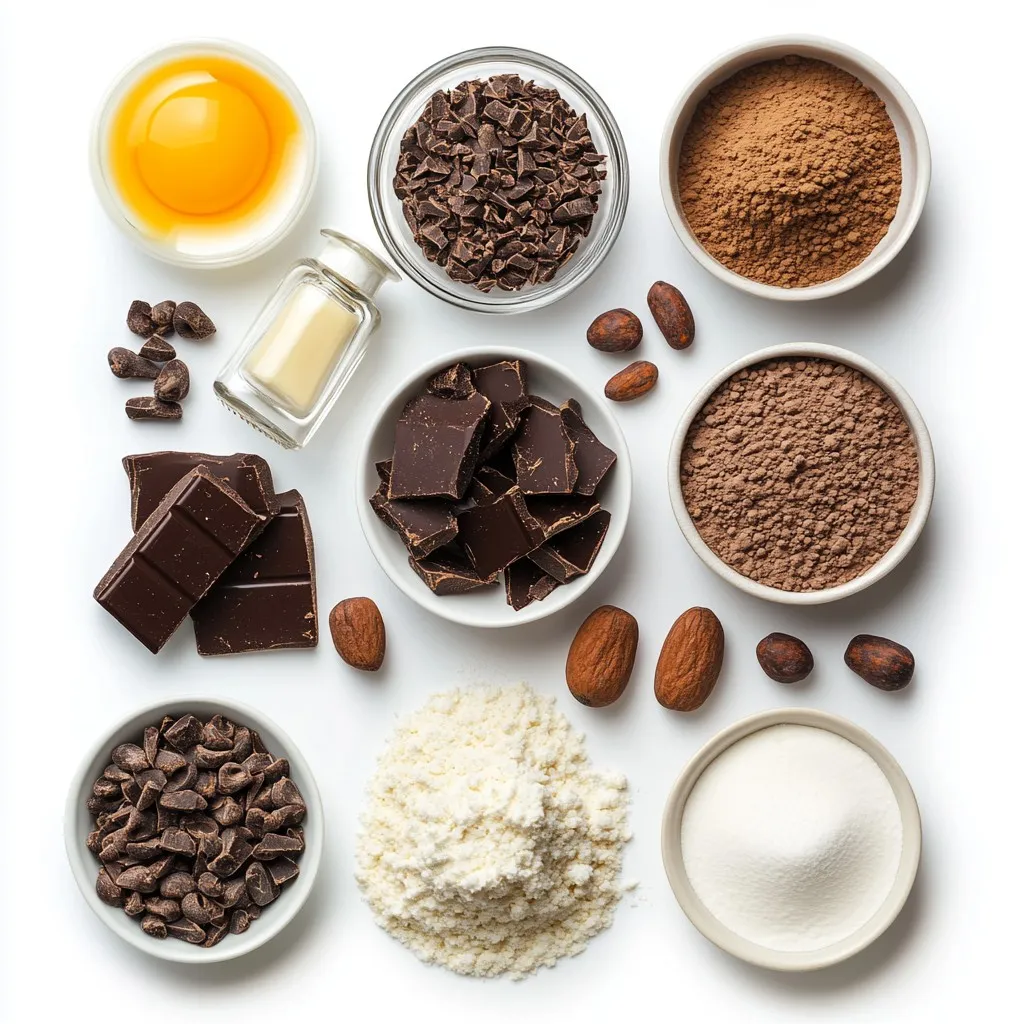
For these rich chocolate mousse brownies, gather the following:
– 1 cup unsalted butter
– 8 oz dark chocolate (60-70% cocoa), chopped
– 1 cup granulated sugar
– 1 cup brown sugar, packed
– 4 large eggs
– 1 teaspoon pure vanilla extract
– 1 cup all-purpose flour
– 1/2 cup unsweetened cocoa powder
– 1/2 teaspoon salt
– 1 cup heavy cream
– 2 tablespoons powdered sugar
– 1 teaspoon espresso powder (optional)
– Chocolate shavings or cacao nibs for garnish
Ingredient Substitutions
If you can’t find certain ingredients, here are some swaps:
– Use coconut oil instead of butter for a dairy-free option.
– Swap dark chocolate for semi-sweet chocolate if you prefer a sweeter taste.
– You can replace granulated sugar with coconut sugar for a healthier choice.
– Use egg substitutes like flaxseed meal or applesauce if you want a vegan version.
Tips on Choosing Quality Ingredients
Quality matters when making these brownies. Here are some tips:
– Chocolate: Select high-quality dark chocolate. Look for brands with minimal ingredients.
– Butter: Use unsalted butter for better control over salt levels.
– Eggs: Fresh, organic eggs will enhance the flavor and texture.
– Vanilla: Pure vanilla extract offers a richer taste than imitation.
– Cocoa Powder: Choose unsweetened cocoa powder with a deep color for bold flavor.
Choosing the right ingredients will elevate your chocolate mousse brownies. Enjoy the process!
Step-by-Step Instructions
Preheating the Oven and Preparing the Baking Pan
Start by preheating your oven to 350°F (175°C). This ensures even baking. Next, grab a 9×13 inch baking pan. Lightly grease it and line the bottom and sides with parchment paper. Leave some paper hanging over the edges. This will help you lift the brownies out later.
Melting the Chocolate and Butter
In a medium saucepan, combine 1 cup of unsalted butter and 8 ounces of chopped dark chocolate. Melt them over low heat. Stir continuously until the mix is smooth. Once melted, remove it from the heat and let it cool slightly before using it.
Mixing Ingredients for the Brownie Base
In a large bowl, mix 1 cup of granulated sugar and 1 cup of brown sugar. Pour in the slightly cooled chocolate mix. Stir well to blend the sugars fully. Then, add 4 large eggs one at a time. Mix after each addition. Finally, stir in 1 teaspoon of pure vanilla extract.
Baking the Brownies
In a separate bowl, sift together 1 cup of all-purpose flour, 1/2 cup of unsweetened cocoa powder, and 1/2 teaspoon of salt. Slowly fold the dry ingredients into the wet mix. Be gentle; we don’t want to overmix. Now, pour the batter into your prepared pan. Spread it evenly. Bake for 25-30 minutes. Check with a toothpick. It should come out with a few moist crumbs.
Preparing the Chocolate Mousse
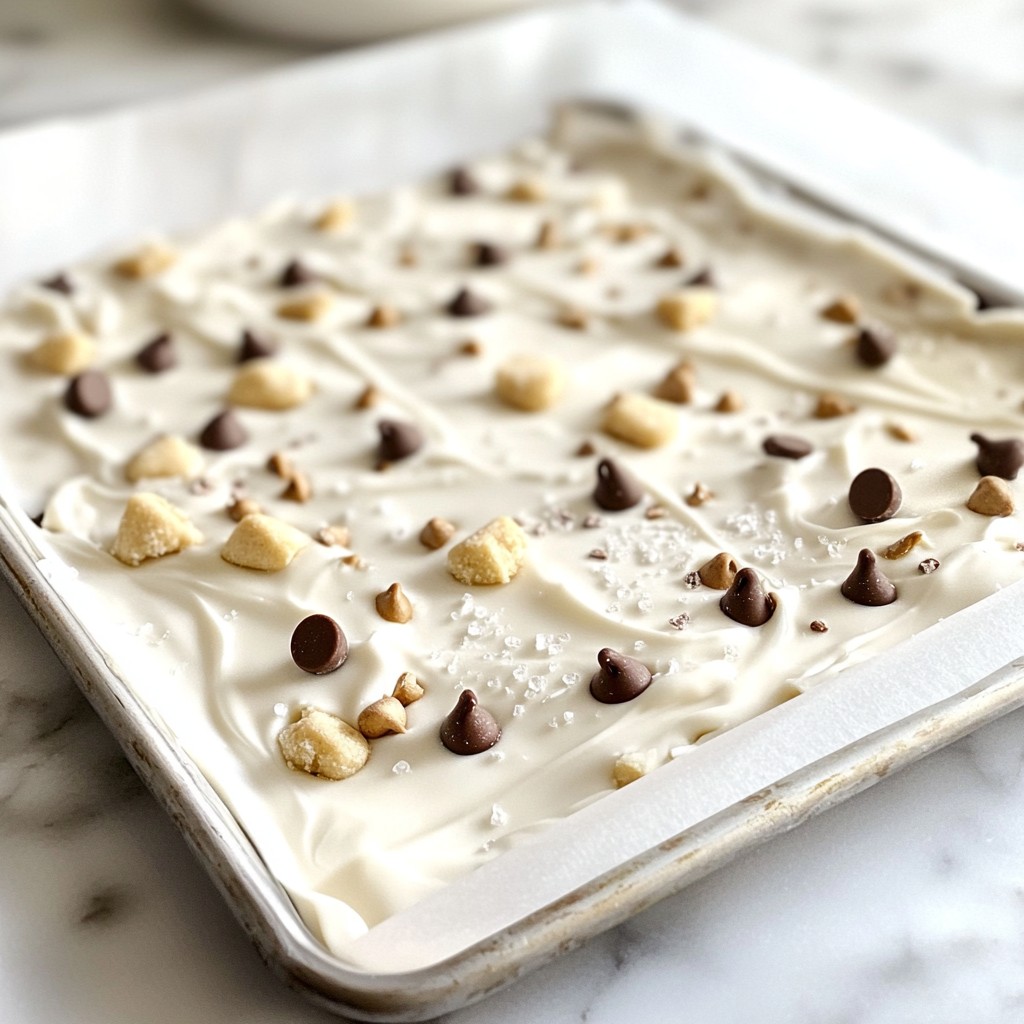
While the brownies bake, whip up the chocolate mousse. In a mixing bowl, beat 1 cup of heavy cream, 2 tablespoons of powdered sugar, and 1 teaspoon of espresso powder (if using). Whip until soft peaks form. Be careful not to overwhip; the mousse should be fluffy and smooth.
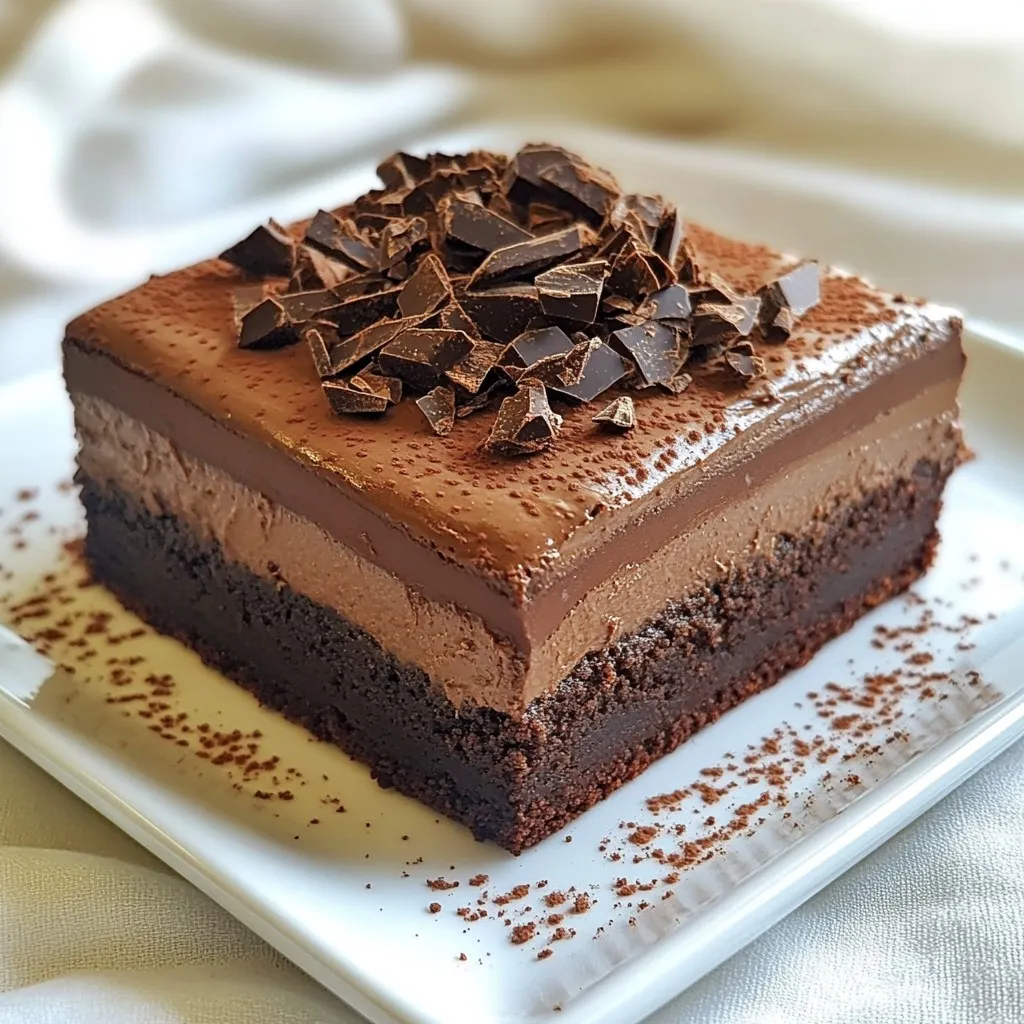
Assembling the Dessert and Chilling
Once the brownies cool completely, lift them out using the parchment overhang. Spread the whipped mousse evenly on top of the brownies. Chill in the fridge for at least 1 hour. This helps the mousse set. Just before serving, sprinkle with chocolate shavings or cacao nibs for a fancy touch. Cut into squares, serve, and enjoy!
Tips & Tricks
Achieving the Perfect Brownie Texture
For the best brownie texture, start with quality chocolate. I use dark chocolate with 60-70% cocoa for rich flavor. Melt the chocolate and butter slowly. Stir often to keep it smooth. Mix the sugar and chocolate well before adding eggs. This step helps create a shiny crust. When you mix in the flour, do it gently. Overmixing can lead to dry brownies. Bake them until a toothpick shows moist crumbs. This means they are perfectly fudgy.
How to Make Light and Fluffy Mousse
To make light and fluffy mousse, use heavy cream. It whips up better than lighter creams. Add powdered sugar for sweetness and espresso powder for depth. Whip the cream until soft peaks form. Stop mixing once it becomes fluffy. Overwhipping can lead to grainy mousse. Spread it evenly on cooled brownies. Chilling helps the mousse set and gives it a nice texture.
Common Mistakes to Avoid
Many people overbake brownies, making them dry. Always check with a toothpick. If it comes out with a few moist crumbs, they are done. Another mistake is not letting brownies cool. They need to cool completely before adding mousse. This prevents melting and helps keep layers distinct. Finally, don’t rush the chilling step. Letting the mousse set is key to a great dessert.
Pro Tips
- Use Quality Chocolate: The flavor of your brownies will largely depend on the quality of the chocolate you use. Opt for a high-quality dark chocolate with at least 60% cocoa for a rich and decadent taste.
- Don’t Overmix: When combining the dry ingredients with the wet ingredients, mix just until combined. Overmixing can lead to tough brownies instead of the desired fudgy texture.
- Let Them Cool: It’s crucial to let the brownies cool completely before adding the mousse. This prevents the mousse from melting and ensures a clean, beautiful layer on top.
- Chill Before Serving: Allow the assembled brownies to chill in the fridge for at least an hour. This helps the mousse set properly, making for easier slicing and a more enjoyable texture.
Variations
Additional Flavor Options (Mint, Orange, etc.)
You can jazz up your chocolate mousse brownies with extra flavors. One easy way is to add mint. Use mint extract in the mousse for a refreshing twist. A little goes a long way, so start with just a half teaspoon.
Another fun option is orange. Add orange zest to the brownie mix for a bright flavor. You can also use orange extract in the mousse. This adds a citrus kick that pairs well with chocolate.
Gluten-Free Version of Chocolate Mousse Brownies
You can easily make these brownies gluten-free. Swap the all-purpose flour for a gluten-free blend. Look for a blend that has xanthan gum to help with texture. This keeps your brownies moist and chewy.
Make sure your chocolate is also gluten-free. Most dark chocolates are safe, but check the label. You want to avoid any hidden gluten.
Serving Suggestions and Pairings
Serve these brownies with some fresh berries. Raspberries or strawberries add a nice tartness. A scoop of vanilla ice cream goes great with the rich chocolate too.
For a fun twist, pair the brownies with a strong coffee. The coffee brings out the chocolate flavor. You can even sprinkle some sea salt on top for a salty-sweet treat.
Storage Info
Best Practices for Storing Brownies
To keep your chocolate mousse brownies fresh, store them in an airtight container. This method prevents air from drying them out. Always let the brownies cool completely before storing. If they are warm, they can create steam, which makes them soggy. You can keep them at room temperature for up to three days. If you want them to last longer, refrigerate them for up to a week.
How to Preserve Mousse Texture in Storage
Mousse can lose its lightness if not stored right. To preserve that fluffy texture, cover the mousse brownies with plastic wrap. Ensure the wrap doesn’t touch the mousse. This keeps moisture out and helps maintain its creaminess. When ready to serve, simply remove the wrap and cut the brownies. The mousse will still be smooth and delicious.
Freezing Tips for Chocolate Mousse Brownies
Freezing is a great way to save extras. First, cut the brownies into squares. This makes it easier to thaw only what you need. Wrap each square in plastic wrap, then place them in a freezer-safe bag. They can stay frozen for up to three months. When you’re ready to enjoy them, let them thaw in the fridge overnight. This keeps the mousse from melting too fast. Enjoy the rich taste of these brownies anytime!
FAQs
What is the best way to cut brownies without crumbling?
To cut brownies cleanly, use a sharp knife. First, let the brownies cool fully. Run the knife under hot water, then dry it. Make your cuts in straight, even strokes. Wipe the knife between cuts to keep it clean. This keeps the edges neat and reduces crumbling.
Can I make the mousse in advance?
Yes, you can make the mousse ahead of time. Prepare it one day before you plan to serve the brownies. Store it in the fridge in an airtight container. Just remember to spread it on the brownies right before serving.
How can I prevent the brownies from sticking to the pan?
To prevent sticking, grease your pan well. Use unsalted butter or cooking spray. Line the bottom and sides with parchment paper, leaving overhang. This helps you lift the brownies out easily after baking.
What types of chocolate are best for this recipe?
For this recipe, use dark chocolate with 60-70% cocoa. This gives a rich flavor. You can also use semi-sweet chocolate if you prefer a sweeter taste. Avoid using milk chocolate, as it may make the brownies too sweet.
How long do chocolate mousse brownies last?
Chocolate mousse brownies last about 3-4 days in the fridge. Store them in an airtight container to keep them fresh. If you want to keep them longer, you can freeze them for up to 2 months. Just wrap them well in plastic wrap.
You learned how to make chocolate mousse brownies, from ingredients to storage. Quality ingredients lead to great desserts. Follow the steps for perfect brownies and fluffy mousse. Don’t skip the tips to avoid common mistakes. You can try different flavors and even make a gluten-free version. Store wisely to keep your treats fresh longer. Enjoy the process, and impress your friends with this delicious desser