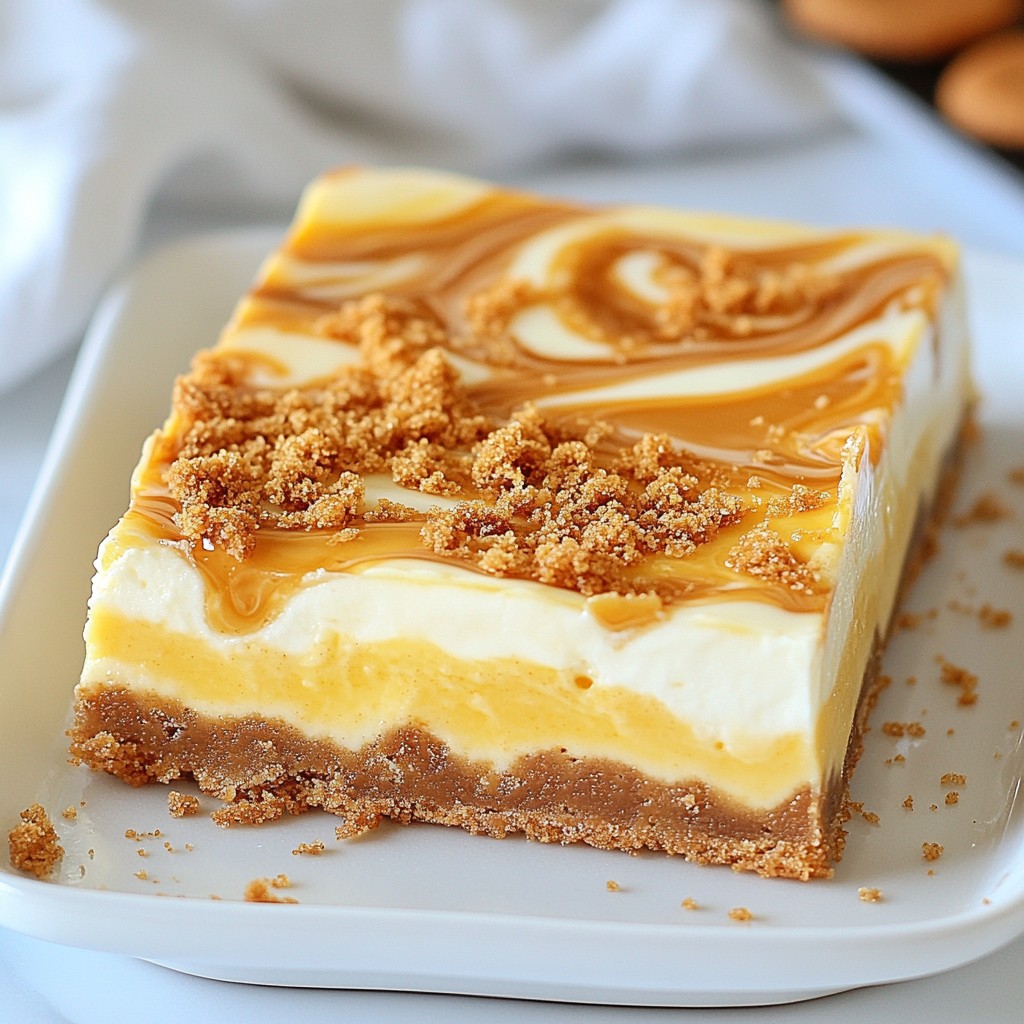
Welcome to your new favorite dessert—Biscoff Cheesecake Bars! If you love rich, creamy treats, you’ll adore these bars that blend the flavors of smooth cheesecake and crunchy Biscoff cookies. They’re simple to make and perfect for sharing. In this post, I’ll guide you through all the steps, from ingredients to tricks for the best results. Get ready to enjoy an irresistible sweet treat that will wow your friends and family!
Why I Love This Recipe
- Decadent Flavor: The combination of Biscoff cookies and creamy cheesecake creates an indulgent treat that's hard to resist.
- Easy Preparation: With straightforward steps and minimal baking time, these bars are simple enough for even beginner bakers.
- Perfect for Sharing: Cut into squares, these bars make an excellent dessert for gatherings, parties, or just a sweet treat at home.
- Customizable Toppings: Feel free to get creative with toppings, whether it's whipped cream, extra Biscoff spread, or even chocolate drizzle!
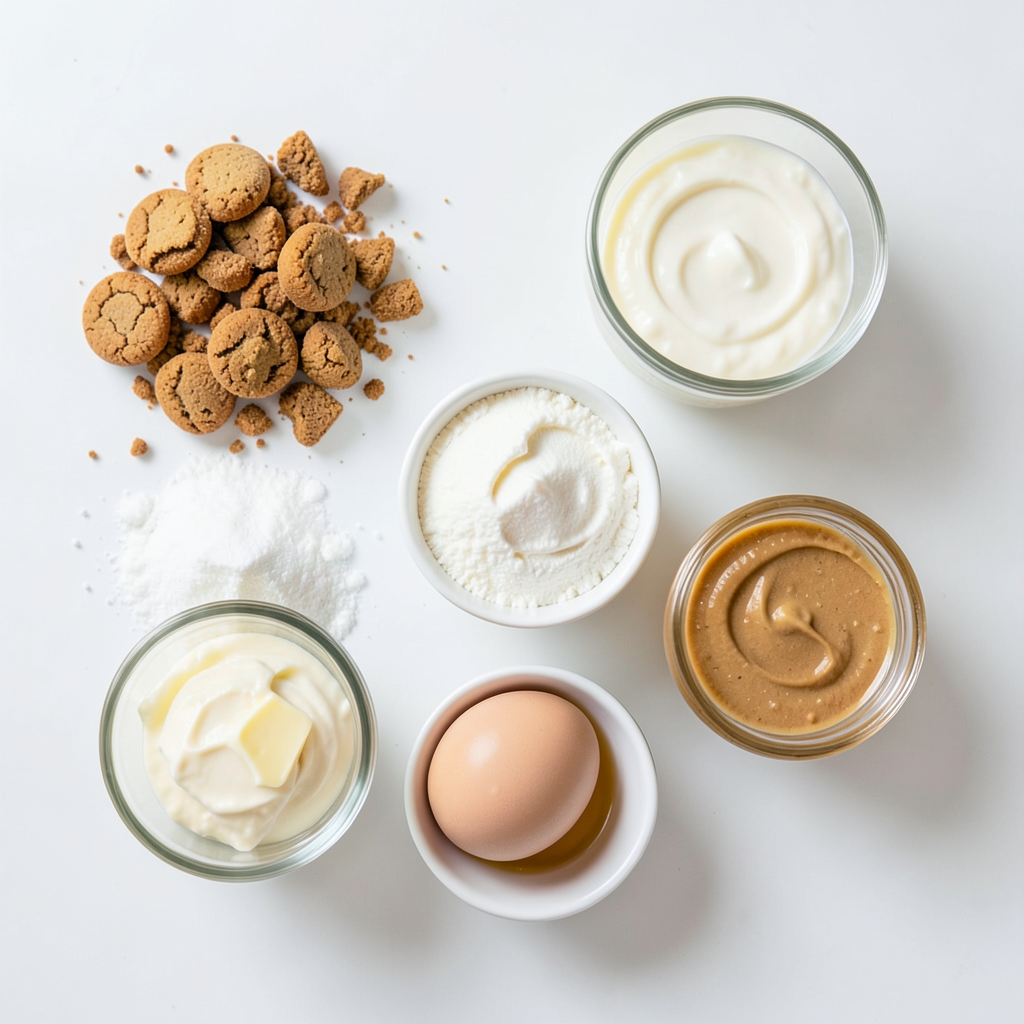
Ingredients
To make these Biscoff cheesecake bars, you will need the following ingredients:
- 200g Biscoff cookies, finely crushed
- 100g unsalted butter, melted
- 400g cream cheese, softened to room temperature
- 150g granulated sugar
- 200ml heavy cream
- 1 teaspoon vanilla extract
- 2 large eggs, at room temperature
- 100g Biscoff spread (for marbling and topping)
- A pinch of salt
These ingredients create a rich and creamy treat. The Biscoff cookies provide a nice crunch and flavor. The cream cheese adds creaminess and depth. Together, they make a dessert that's hard to resist. You can find these items in most grocery stores. Keep them on hand for a sweet treat anytime!
Step-by-Step Instructions
Preparing the Crust
1. Preheat your oven to 350°F (175°C). Line an 8x8-inch baking dish with parchment paper. Leave some paper hanging over the edges. This helps you lift the bars out later.
2. In a medium bowl, mix 200g of finely crushed Biscoff cookies with 100g of melted butter. Stir until the crumbs feel like wet sand.
3. Firmly press this mixture into the bottom of your lined baking dish. Make sure it is even. Bake for 10 minutes. Then, take it out and let it cool completely.
Making the Cheesecake Filling
1. In a large mixing bowl, beat 400g of softened cream cheese and 150g of granulated sugar together. Keep mixing until it is smooth.
2. Next, pour in 200ml of heavy cream and add 1 teaspoon of vanilla extract along with a pinch of salt. Beat this mixture until it is creamy and thick.
3. Add 2 large eggs one at a time. Mix gently after each egg until just combined. Be careful not to overmix this batter.
Assembling the Bars
1. Scoop 100g of Biscoff spread into the cheesecake mixture. Use a spatula to swirl it in. This creates a pretty marbled effect.
2. Pour the cheesecake batter over your cooled crust. Spread it evenly across the top.
3. Bake in your preheated oven for 30-35 minutes. The edges should be set, and the center should still jiggle slightly.
4. After baking, turn off the oven. Crack open the oven door a little. Let the bars cool inside for 1 hour. This helps prevent cracks.
5. Remove the baking dish from the oven. Transfer it to the fridge. Chill for at least 4 hours, or overnight if you can. This makes the bars firm.
6. Once chilled, use the parchment overhang to lift the bars out. Cut them into squares and enjoy!
Tips & Tricks
Common Mistakes to Avoid
- Overmixing the batter: Mix just until smooth. Overmixing adds air and can make your cheesecake dense. You want it creamy and light, not heavy.
- Not cooling cheesecake properly: Let your bars cool slowly in the oven with the door ajar. This step helps prevent cracks. After an hour, move them to the fridge to chill.
Serving Suggestions
- Presentation tips: For a beautiful touch, sprinkle crushed Biscoff cookies on top. Drizzle extra Biscoff spread over the bars. Adding whipped cream elevates the treat and makes it look fancy.
- Best times to serve: These bars shine at parties, holidays, or any casual get-together. They also make a sweet ending to a cozy family dinner.
Tools Needed
- Electric mixer: This tool makes it easy to whip cream cheese and sugar until smooth.
- Baking dish and parchment paper: The dish holds your cheesecake bars, while parchment helps with easy removal.
- Mixing bowls: Use different sizes to keep your ingredients organized as you prepare the crust and filling.
Pro Tips
- Use Room Temperature Ingredients: Make sure your cream cheese and eggs are at room temperature before mixing. This helps create a smoother and creamier cheesecake filling.
- Don't Overmix: When adding the eggs, mix just until combined. Overmixing can introduce air, leading to cracks in your cheesecake as it bakes.
- Cooling Technique: After baking, let the cheesecake cool in the oven with the door ajar. This gradual cooling helps prevent cracks on the surface.
- Chill Overnight: For the best texture and flavor, refrigerate the cheesecake bars overnight. This allows the flavors to meld and the bars to set perfectly.
Variations
Flavor Additions
You can make Biscoff cheesecake bars even more fun by adding flavors. Here are two easy ways to spice them up:
- Chocolate chips: Fold in some chocolate chips to the cheesecake batter. They add a nice bite and richness. Choose dark or milk chocolate based on your taste.
- Peanut butter swirl: Take creamy peanut butter and swirl it into the filling. This adds a salty-sweet flavor that pairs well with Biscoff.
Alternative Crust Ideas
If you want to try a different crust, here are two great options:
- Oreo crust: Use crushed Oreo cookies instead of Biscoff for a classic twist. Just mix with butter as you did with the Biscoff cookies.
- Gluten-free cookie options: For a gluten-free crust, use gluten-free cookies. Look for options like almond or rice cookies. They work well and taste great.
Topping Ideas
Toppings can elevate your Biscoff cheesecake bars. Here are some ideas:
- Fresh fruit toppings: Add fresh strawberries, raspberries, or sliced bananas on top. This brings a fresh taste and nice color.
- Caramel or chocolate drizzles: Drizzle warm caramel or melted chocolate over the bars before serving. It adds a sweet touch and makes the bars look fancy.
Storage Info
Best Storage Practices
To keep your Biscoff cheesecake bars fresh, store them in an airtight container. This helps prevent them from drying out. Make sure to place parchment paper between layers if you stack them. Keep the bars in the fridge for the best taste. A temperature of about 40°F (4°C) is perfect.
Freezing Instructions
You can freeze Biscoff cheesecake bars for later enjoyment. To do this, wrap each bar in plastic wrap. Then place them in a freezer-safe bag or container. Squeeze out any air to avoid freezer burn. When you're ready to eat, thaw them in the fridge overnight. This keeps the texture smooth and creamy.
Shelf Life
In the fridge, Biscoff cheesecake bars will last for about 5 days. If you freeze them, they can last up to 3 months. Always check for any signs of spoilage before eating. If the bars look or smell off, it’s best to toss them.
FAQs
How do I know when the cheesecake bars are done?
Check for these signs of doneness:
- The edges should look set and firm.
- The center should have a slight jiggle.
- A toothpick inserted should come out mostly clean.
When you see these signs, your bars are ready to cool!
Can I make these bars ahead of time?
Yes, you can! Here are some tips for preparing in advance:
- Make the crust and filling one day early.
- Chill the bars overnight for the best taste.
- They hold well in the fridge for up to five days.
This way, you enjoy fresh bars without the rush!
Is there a vegan version of Biscoff cheesecake bars?
Yes, there are tasty vegan options!
- Use vegan cream cheese instead of regular cream cheese.
- Replace eggs with flax eggs (1 tablespoon of flaxseed meal mixed with 2.5 tablespoons of water).
- Swap heavy cream for coconut cream.
These swaps keep the bars creamy and delicious!
In this article, we explored how to make delicious Biscoff cheesecake bars. We covered the key ingredients, easy steps, and tips for perfect execution. You learned how to prepare the crust, make a creamy filling, and assemble your bars. Remember to avoid common mistakes and consider fun variations. Store leftovers properly for the best taste. Enjoy these treats at any gathering for a delightful wow factor. With practice, you’ll master the art of cheesecake bars that everyone will love!