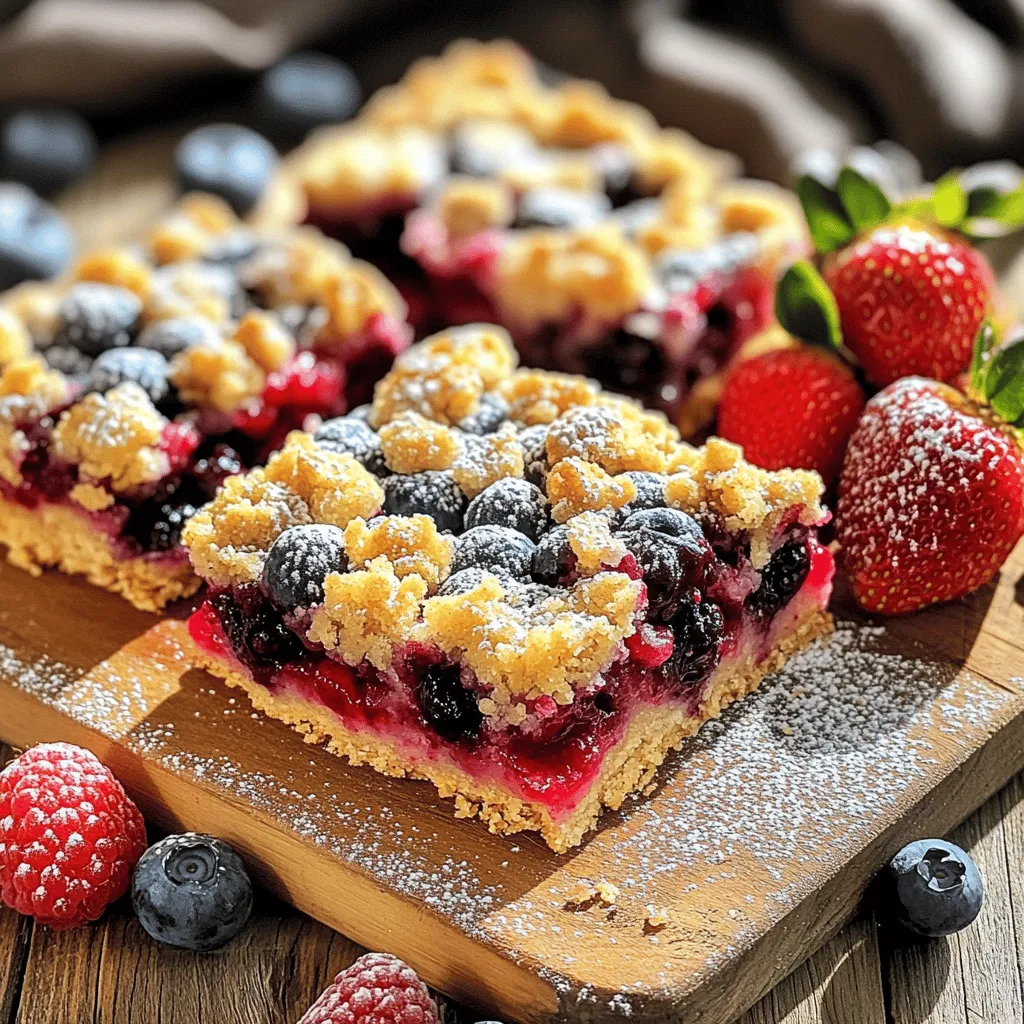
Are you ready to enjoy a delicious treat that reminds you of your favorite bakery? My Bakery-Style Triple Berry Crumble Bars are the perfect blend of sweet and tart, making them an instant hit for any occasion. With juicy mixed berries and a buttery crumble topping, these bars are simple to make and even easier to love. Let’s dive into the ingredients and steps to create this delightful dessert!
Ingredients
Essential Ingredients List
To make these tasty crumble bars, gather these key ingredients:
– 1 cup all-purpose flour
– 1 cup rolled oats
– 1/2 cup packed brown sugar
– 1/2 cup granulated sugar
– 1/2 cup unsalted butter, melted and slightly cooled
– 1/2 teaspoon baking powder
– 1/4 teaspoon sea salt
Berry Selection and Preparation
For the berry filling, I love using a mix of berries. You can pick:
– Blueberries
– Strawberries
– Raspberries
Fresh berries taste great, but frozen berries work too. When using frozen berries, they may release more juice. This can make the bars a bit softer but still delicious.
Optional Flavor Enhancers
To boost flavor, consider adding:
– 1 tablespoon fresh lemon juice
– 1 teaspoon pure vanilla extract
These add a bright taste. The lemon juice balances the sweetness of the berries. The vanilla enhances the overall flavor.
Step-by-Step Instructions
Prepping the Oven and Pan
First, preheat your oven to 350°F (175°C). This helps the bars bake evenly. While the oven heats, grease a 9×9-inch baking pan. You can also line it with parchment paper. Make sure some paper hangs over the edges. This will help you lift the bars out later.
Making the Crumble Base
In a large bowl, mix the dry ingredients. Combine 1 cup of all-purpose flour, 1 cup of rolled oats, ½ cup of packed brown sugar, ½ cup of granulated sugar, ½ teaspoon of baking powder, and ¼ teaspoon of sea salt. Pour in ½ cup of melted butter. Stir this mixture with a spatula until it looks like coarse crumbs. Some pieces can be larger for texture.
Preparing the Berry Filling
In a separate bowl, take 1 cup of mixed berries. You can use blueberries, strawberries, and raspberries. Add 1 tablespoon of cornstarch, 1 tablespoon of fresh lemon juice, and 1 teaspoon of pure vanilla extract. Gently toss the berries with these ingredients. Make sure each berry gets coated well. This step helps thicken the berry juices while baking.
Assembling the Bars
Now it’s time to put everything together! Press about 2 cups of the crumb mixture into the bottom of your prepared pan. Spread it evenly across the base. Next, pour the berry mixture over the crust. Use a spatula to spread it out evenly. Finally, sprinkle the reserved crumb mixture on top of the berries. This will create a lovely crumble topping.
Baking Process
Place the pan in your preheated oven. Bake for 30-35 minutes. Look for a golden brown topping and bubbling edges. These are signs that your bars are done.
Cooling and Serving
Once baked, take the pan out of the oven. Let it cool for at least 15 minutes. This cooling time is key before slicing the bars. After cooling, lift the bars out using the parchment paper. Place them on a wire rack to cool completely. For a beautiful presentation, serve the bars on a rustic wooden board. Dust with powdered sugar and arrange fresh berries around them for a pop of color.
Tips & Tricks
Achieving the Perfect Crumble Texture
To make the best crumble, butter temperature is key. Use unsalted butter that is melted and slightly cooled. This ensures your crumble is tender and not too greasy.
When mixing your crumble ingredients, work quickly. Combine the flour, oats, sugars, baking powder, and salt in a bowl. Pour in the melted butter and stir gently. Stop when the mixture looks like coarse crumbs. You want some larger clumps for texture.
Berry Mixture Tips
To prevent soggy bars, use cornstarch. It thickens the berry juices. Mix the berries with lemon juice and cornstarch before adding them to the base. This will keep your crust nice and firm.
Adjust sweetness based on the berries you choose. If your berries are tart, add a little more sugar. Taste the mix before you pour it over the crust. This way, you control the flavor.
Serving Suggestions
Pair these crumble bars with drinks like tea, coffee, or lemonade. They make a great afternoon snack.
These bars are perfect for gatherings or picnics. They fit well at birthday parties or holiday events. You can easily serve them on a rustic wooden board. Dust with powdered sugar and add fresh berries for a lovely display.
Variations
Alternative Fruit Combinations
You can change the fruit in your crumble bars based on the season. Fresh peaches, apples, or even cherries work great. You can use only one type of fruit, like just blueberries or just strawberries. This makes it simple and fun to try new flavors every time.
Healthier Substitutions
If you want a healthier version, try gluten-free flour. Almond flour or oat flour are great options. You can also reduce the sugar. Use a sugar substitute like honey or maple syrup. This way, you keep the yummy taste while making it a bit better for you.
Flavor Additions
Spices can really elevate your bars. Add a sprinkle of cinnamon or nutmeg to the crumble. It gives a warm, cozy taste. You can also throw in some nuts for crunch, or mix in chocolate chips for a sweet twist. This lets you customize your bars to fit your mood!
Storage Info
Storage Recommendations
To keep your crumble bars fresh, store them in an airtight container. This method prevents them from drying out. Place parchment paper between layers if stacking. Keep the container in a cool, dry place. The ideal storage temperature is room temperature, around 70°F (21°C).
Freezing Instructions
To freeze your crumble bars, first let them cool completely. Cut them into squares. Wrap each square tightly in plastic wrap. Then, place the wrapped bars in a freezer-safe bag. Make sure to remove excess air. For thawing, leave them in the fridge overnight or at room temperature for a few hours. To reheat, warm them in the oven at 350°F (175°C) for about 10 minutes.
Shelf Life
In the refrigerator, these bars last about five days. You’ll know they have gone bad if you see mold or they smell off. If the texture becomes very dry, it’s time to toss them. Always trust your senses when checking for freshness.
FAQs
Can I use frozen berries instead of fresh for the crumble bars?
Yes, you can use frozen berries. They can still taste great!
Pros of using frozen berries:
– Frozen berries are often picked at peak ripeness, so they can be very sweet.
– They are available year-round and save you a trip to the store.
Cons of using frozen berries:
– Frozen berries can release more juice. This may make the bars a bit soggy.
– They may not hold their shape as well during baking.
To minimize sogginess, try to thaw and drain the berries before using them. This helps keep the texture nice.
How do I make the bars more or less sweet?
You can easily adjust the sweetness in this recipe.
To make the bars sweeter:
– Add more granulated or brown sugar to the mixture.
– Consider using sweeteners like honey or maple syrup.
To reduce sweetness:
– Cut back on the sugars. Start by lowering each type by a couple of tablespoons.
– You can also use unsweetened applesauce as a natural sweetener.
Always taste the berry mixture before adding it to the crust. This helps ensure the right level of sweetness.
What is the best way to cut the crumble bars for serving?
Cutting the bars neatly can be tricky. Here are some tips:
– Let the bars cool completely before cutting. This helps firm them up.
– Use a sharp knife for clean cuts. A dull knife will just squish the bars.
– Wipe the knife with a damp cloth after each cut. This keeps the edges clean.
If they crumble a bit, don’t worry! They will still taste amazing. Enjoy every bite!
In this post, we explored how to make delicious crumble bars with berries. We covered essential ingredients, step-by-step instructions, and helpful tips for perfecting your bars. You learned about berry selection and optional flavor enhancers. With variations and storage tips, you’re set for success.
Now it’s your turn to create these tasty treats. Enjoy the process and share them with friends! Happy baking!