FREE DINNER EBOOK! Get your copy!
  • Cookie Policy
  • GDPR Policy
  • Disclaimer
  • Terms Of Use
  • Visit my other site: Fun Cookie Recipes
yummybiterecipes
  • Home
  • Dinner
  • Desserts
  • Drinks
  • Appetizers
  • Contact
  • About
  • Privacy Policy
  • Home
  • Dinner
  • Desserts
  • Drinks
  • Appetizers
  • Contact
  • About
  • Privacy Policy
  • Cookie Policy
  • GDPR Policy
  • Disclaimer
  • Terms Of Use
Visit my other site: Fun Cookie Recipes

HOME / CATEGORIES /

Latest

- 3 medium apples (like Granny Smith or Honeycrisp) - 1 tablespoon fresh lemon juice - 1 teaspoon ground cinnamon - 1/4 cup packed brown sugar - 1 cup heavy whipping cream - 1/2 cup powdered sugar - 1 teaspoon pure vanilla extract - 1 cup granola (your favorite kind) - 1/2 cup caramel sauce (store-bought or homemade) - Extra caramel sauce and diced apples for garnish - Use 3 apples for a fresh crunch. - Add 1 tablespoon of lemon juice to keep apples bright. - Sprinkle in 1 teaspoon of cinnamon for warmth. - Mix in 1/4 cup of brown sugar for sweetness. - Whip up 1 cup of heavy cream for a rich layer. - Sweeten with 1/2 cup of powdered sugar. - Flavor with 1 teaspoon of vanilla extract. - Layer with 1 cup of granola for crunch. - Drizzle with 1/2 cup of caramel sauce for that sweet finish. - Use extra apples and caramel for a pretty top. - Try Fuji or Gala apples if you want a sweeter taste. - Use lime juice instead of lemon juice for a twist. - Swap brown sugar for maple syrup for a different flavor. - Use non-dairy cream for a vegan option. - Try coconut whipped cream for a tropical touch. - Experiment with different granola types, like nut or chocolate. - Use chocolate sauce instead of caramel for a rich change. - You can also add nuts or dried fruits for extra texture. First, grab your apples. I like using Granny Smith or Honeycrisp for their crunch. Peel, core, and dice them into small pieces. In a medium bowl, mix the diced apples with lemon juice, ground cinnamon, and brown sugar. This step adds flavor and keeps the apples fresh. Toss the apples gently to coat them well. Let them rest for about 10 minutes. This time helps the apples soften and release their juices. While the apples marinate, it’s time to whip the cream. Take a clean mixing bowl. Pour in 1 cup of heavy whipping cream. Using an electric mixer, whip the cream on medium speed. Watch closely as it thickens. Once it starts to get thick, slowly add in ½ cup of powdered sugar and 1 teaspoon of vanilla extract. Keep whipping until soft peaks form. Be careful not to overwhip, or it may turn to butter! Once ready, set the whipped cream aside. Now for the fun part—layering! Get your serving cups or jars ready. Start with about 1 tablespoon of the marinated apples at the bottom of each cup. Next, add 2 tablespoons of whipped cream on top of the apples. Then, sprinkle about 1 tablespoon of granola over the cream. Drizzle a spoonful of caramel sauce on top of the granola. Repeat this layering process until your cups are full. You can fit two to three layers, depending on cup size. For the final layer, add a big dollop of whipped cream. Finish it off with another drizzle of caramel sauce. To make it pretty, top with extra granola and a few diced apple pieces. A light dusting of cinnamon adds a nice touch. Cover the trifle cups with plastic wrap. Put them in the fridge for at least 30 minutes. This time allows the flavors to mix and the layers to set before you enjoy your treat! Serve these trifle cups cold for the best taste. They make a great treat for parties. You can also set them out for a fun family dessert night. For a special touch, add a sprinkle of nuts or chocolate shavings on top. These little details make your dessert shine! Layering is key to a great trifle. Start with a thin layer of apples. Then, add whipped cream to keep things light. Follow with granola for a nice crunch. Repeat these layers until your cup is full. Make sure the top layer is whipped cream, so it looks pretty. This way, guests see the delicious layers right away. Whipping cream is easy, but it can be tricky. Start with cold cream for the best results. Use a clean bowl and beaters to get the cream fluffy. Whip until you see soft peaks. Don't overwhip, or it will turn into butter. If you want sweet cream, add powdered sugar slowly while whipping. This makes it sweet and smooth. {{image_4}} You can use many apple types for your trifle cups. Each type brings its taste. Granny Smith apples add tartness, while Honeycrisp offers sweetness. Fuji apples are juicy and sweet. For a spicier flavor, try using Jonagold apples. Mixing different kinds can also boost flavor and texture. Toppings can change your trifle in fun ways. Instead of granola, use crushed cookies or nuts for crunch. You can also swap caramel sauce for chocolate sauce. Fresh berries add a bright touch and a burst of flavor. Consider whipped cream alternatives, like yogurt or coconut cream. Each option gives your trifle a new twist. Want a lighter version? Use low-fat whipped cream or Greek yogurt. Swap brown sugar with honey or maple syrup for natural sweetness. You can also add more fruits, like bananas or pears, to boost nutrition. Use less caramel sauce to cut sugar. These changes keep the dessert tasty but healthier for you. To store your trifle cups, cover them tightly with plastic wrap. You can also use a lid if your cups have them. This keeps the layers fresh and prevents drying. Make sure they are placed in the fridge. They stay cool and tasty this way. These trifle cups are best enjoyed within two days. After that, the apples may lose their crunch. The whipped cream can also lose its fluffiness. If you want the best taste, eat them fresh. However, they can last up to three days in the fridge if stored well. Caramel apple trifle cups are meant to be served cold. Reheating is not recommended. The whipped cream will melt, and the trifle will lose its charm. Enjoy them straight from the fridge for a refreshing treat. Yes, you can make these trifle cups ahead of time. Prepare them and store them in the fridge. They taste even better after resting. The flavors blend well, and the apples soften nicely. Just be sure to cover them well with plastic wrap. Absolutely! You can use any whipped topping you like. Store-bought whipped cream works great. You can also use dairy-free options if you prefer. Just make sure it holds its shape well. Some people even use cool whip for ease. If you don’t have caramel sauce, try using chocolate sauce instead. You can also use honey or maple syrup for a twist. These options add sweetness and flavor. If you want a healthier choice, use date syrup. Just pick what you love! This blog post covered how to make Caramel Apple Trifle Cups. We talked about the needed ingredients, their amounts, and alternatives you can use. I shared step-by-step instructions for preparing the apples, whipping the cream, and layering the trifle. You learned serving tips and best practices for layering. We also explored variations, storage, and frequently asked questions. Get creative with your trifle and enjoy it your way!

Caramel Apple Trifle Cups Delightful Dessert Treat

- 1 lb large shrimp, peeled and deveined - 4 cups fresh broccoli florets - 1/4 cup unsalted butter - 6 cloves garlic, finely minced - 1 tablespoon freshly squeezed lemon juice - 1/2 teaspoon red pepper flakes - Salt and freshly cracked black pepper, to taste - 1 tablespoon fresh parsley, finely chopped Gather these simple ingredients for an easy yet tasty meal. Start with large shrimp that are cleaned. This makes cooking quick and simple. Fresh broccoli adds color and crunch to your dish. Unsalted butter is best for controlling salt levels. You can adjust the flavor with garlic, lemon juice, and red pepper flakes. Garlic brings a rich taste, while lemon juice adds brightness. Adjust the red pepper flakes based on your spice level. You can leave them out for a milder dish. After seasoning, sprinkle salt and black pepper to enhance the flavors. Don't forget the fresh parsley! It adds a lovely touch when you serve the dish. The combination of these ingredients will create a meal that is both delightful and satisfying. - Set the temperature to 400°F (200°C). - Prepare the sheet pan with parchment paper. This helps with cleanup and keeps food from sticking. - Melt the butter gently in a small saucepan over low heat. - Sauté minced garlic until fragrant, about 2-3 minutes. Be careful not to let it burn. - Coat broccoli with half of the garlic butter. Toss it well so the florets are covered. - Toss the shrimp in the remaining garlic butter. Make sure each shrimp is coated nicely. - Bake for 10-12 minutes until the shrimp are pink and the broccoli is tender. - Add fresh parsley for garnish before serving. This adds a nice pop of color. To make great garlic butter, start with low heat. This prevents garlic from burning. If garlic burns, it turns bitter. I use six cloves for a strong flavor, but you can adjust this. If you prefer a milder taste, try using less garlic. Timing is key for perfect shrimp. Bake them for about 10-12 minutes. They should turn pink and opaque when done. For size, large shrimp work best. They cook evenly and stay juicy. If you use smaller shrimp, check them sooner to avoid overcooking. To keep broccoli vibrant, do not overcook it. It should be tender yet bright green. If you like, you can try other vegetables. Carrots, asparagus, or bell peppers make great alternatives. Just cut them into similar sizes for even cooking. {{image_4}} You can swap shrimp for other proteins. Chicken works well in this dish. Use bite-sized pieces of chicken breast. Cook it the same way as shrimp. Fish is another option. Choose a firm fish like salmon or cod. Cut it into chunks and follow the same method. If you prefer vegetarian options, try tofu or chickpeas. For tofu, use firm or extra-firm tofu. Cut it into cubes and press to remove excess water. For chickpeas, use canned ones for quick prep. Rinse and drain them before adding to the pan. You can change the flavor by adding fresh herbs. Thyme and basil add a nice touch. Chop them finely and mix them in with the garlic butter. This gives your dish a fresh taste. You may also want to experiment with spices. Try paprika for a smoky flavor. Cumin adds warmth and earthiness. Just a pinch can change the whole dish. Have fun and explore what you like! To control the heat, adjust the red pepper flakes. If you like it mild, use less. For more spice, add more flakes. This lets you make the dish just right for your taste. You can also try different peppers. Jalapeños or serranos add a nice kick. Chop them finely and mix them in. They give a fresh heat that enhances the dish. To store leftovers of your sheet-pan garlic butter shrimp and broccoli, wait until it cools. Place it in an airtight container. This keeps your meal fresh for up to three days. Avoid letting it sit out too long. Bacteria can grow quickly at room temperature. To reheat, you can use either the oven or the microwave. For the oven, preheat it to 350°F (175°C). Place the shrimp and broccoli on a baking sheet. Cover with foil to keep moisture in. Heat for about 10 minutes. In the microwave, use a microwave-safe dish. Heat in 30-second intervals to avoid overcooking. Stir in between to help it heat evenly. You can freeze leftovers for up to three months. Make sure the shrimp and broccoli are in a freezer-safe container. When you are ready to eat, thaw overnight in the fridge. Reheat it gently to maintain the flavors. Avoid refreezing once you thaw it. This helps keep your meal tasty and safe. Yes, you can use frozen shrimp. It may change the cooking time. Frozen shrimp usually needs 2-3 extra minutes to cook through. To thaw frozen shrimp, place it in a bowl of cold water for about 15-20 minutes. You can also leave it in the fridge overnight. Make sure to drain it well before cooking to avoid excess water. You can store leftovers in the fridge for up to 3 days. Use an airtight container to keep them fresh. Check for signs of spoilage, like an off smell or slimy texture. If it looks or smells bad, throw it away. This dish is great on its own, but you can add sides. Consider serving with rice or quinoa for a hearty meal. Garlic bread or a fresh salad also pairs well. For a complete meal plan, add a light dessert, like fruit salad or sorbet, to finish your dinner. This blog post shared a simple, tasty recipe for garlic butter shrimp and broccoli. You learned the main ingredients, step-by-step instructions, and tips for cooking. I highlighted variations for different proteins and flavors. Proper storage and reheating tips were also included. In conclusion, you can easily make this dish at home. Customize it to match your taste and make it your own. Enjoy experimenting with flavors and making this meal a family favorite!

Sheet-Pan Garlic Butter Shrimp and Broccoli Delight

For my Slow Cooker White Chicken Chili, you'll need: - 2 boneless, skinless chicken breasts - 1 can (15 oz) white beans (cannellini or great northern work best) - 1 can (4 oz) diced green chilies - 1 medium onion, finely diced - 3 cloves garlic, minced - 2 cups low-sodium chicken broth - 1 teaspoon ground cumin - 1 teaspoon smoked paprika - ½ teaspoon chili powder - 1 teaspoon salt (adjust to personal preference) - ½ teaspoon freshly cracked black pepper - 1 cup frozen sweet corn - 1 cup heavy cream or coconut cream (for a dairy-free alternative) - Fresh cilantro, for garnish - Lime wedges, for serving These ingredients come together to create a rich and smooth chili. Each one plays a vital role in the flavor profile. When shopping for ingredients, I recommend a few trusted brands: - Chicken Broth: Swanson’s or College Inn are great choices. - Canned Beans: Eden Organic or Goya offer high-quality options. - Canned Green Chilies: Hatch is my go-to for a good kick. - Spices: McCormick or Simply Organic have fresh options. Using good brands makes a difference in taste and quality. Always check the labels for added ingredients or preservatives. If you want to customize the chili, here are some easy swaps: - Chicken: Use turkey or shredded rotisserie chicken instead. - Beans: Black beans or pinto beans can work too. - Cream: For a lighter option, try Greek yogurt or sour cream. - Corn: Fresh corn can replace frozen if you have it on hand. - Spices: Adjust the chili powder for more heat or use taco seasoning for a twist. These substitutions keep the essence of the dish while allowing for flexibility based on your pantry. Enjoy experimenting! {{ingredient_image_2}} To start, place your two boneless, skinless chicken breasts at the bottom of the slow cooker. Make sure they lie flat for even cooking. Next, take a can of white beans and drain it. Rinse the beans under cold water, then add them to the slow cooker. Open the can of diced green chilies and pour them in too. This adds a lovely kick to the chili. Now, it’s time to add the onion and garlic. Finely dice one medium onion and mince three cloves of garlic. Layer these on top of your chicken and beans. They will give great flavor as they cook. Carefully pour in two cups of low-sodium chicken broth. This keeps your chili moist and tasty. Next, you will sprinkle in the spices: one teaspoon of ground cumin, one teaspoon of smoked paprika, and half a teaspoon of chili powder. Don’t forget to add one teaspoon of salt and half a teaspoon of black pepper. Use a spoon to gently stir everything together. Cover the slow cooker with its lid. Set it to low for six to eight hours or high for three to four hours. The chicken should cook until it’s tender and easy to shred. When the cooking time is up, carefully take the chicken out. Use two forks to shred the chicken. Then, return the shredded chicken back into the pot. Next, add one cup of frozen sweet corn. Pour in one cup of heavy cream or coconut cream for a dairy-free option. Stir everything together. Cover the slow cooker again and cook on low for an extra 30 minutes. This step lets all the flavors blend beautifully. Before you serve, taste the chili. Adjust the seasoning if needed. To serve, ladle the chili into warm bowls. Garnish with fresh cilantro on top. Add a lime wedge on the side for a zesty touch. If you like heat, offer sliced jalapeños for an extra kick! Enjoy your comforting meal. To make your slow cooker white chicken chili truly shine, focus on the spices. Ground cumin and smoked paprika are key. They add warmth and depth. You can also try adding a little lime juice just before serving. It brightens the flavors. Fresh cilantro on top will give a nice touch too. If you like heat, add jalapeños or a dash of hot sauce. One common mistake is not seasoning enough. Taste your chili before serving. Adjust with salt and pepper if needed. Another mistake is overcooking the chicken. You want it tender, not dry. Make sure to remove it when it shreds easily. Lastly, don’t skip the cream. It adds richness and smoothness to the chili. If your chili is too thin, don’t worry! You can thicken it easily. One way is to mash some of the white beans. This adds creaminess. You can also let it cook uncovered for the last 30 minutes. This helps reduce the liquid. If you want, add a cornstarch slurry. Mix 1 tablespoon of cornstarch with 2 tablespoons of cold water, then stir it in. Let it cook for a bit longer to thicken. Pro Tips Adjust the Spice Level: If you prefer a milder chili, reduce the amount of chili powder or omit it altogether. For extra heat, consider adding diced jalapeños or a dash of cayenne pepper. Use Leftover Chicken: This recipe is a great way to utilize leftover rotisserie chicken. Simply shred it and add it to the slow cooker in the last 30 minutes of cooking for a quick and easy meal. Make it Ahead: This chili can be made a day in advance and stored in the refrigerator. The flavors will deepen overnight, making it even more delicious when reheated. Garnish Creatively: Enhance the presentation by adding toppings such as diced avocado, shredded cheese, or a dollop of sour cream. Fresh cilantro and lime juice also brighten up the dish. {{image_4}} You can easily make this chili vegetarian or vegan. Start by skipping the chicken. Use two cans of white beans instead. They add protein and keep the texture nice. For a vegan option, swap heavy cream with coconut cream. This adds a sweet touch and keeps it creamy. You can also add more veggies, like bell peppers or zucchini. They bring color and flavor to the dish. If you want to switch up the protein, you have options. Ground turkey or beef can work well. Just brown the meat in a pan before adding it to the slow cooker. You can also try shredded pork for a different taste. Each choice gives you a unique flavor while keeping the dish hearty and satisfying. Adjust the spice to fit your taste. If you like it milder, just cut back on the chili powder. For a spicy kick, add sliced jalapeños or a dash of cayenne pepper. You can also mix in some hot sauce before serving. Always taste your chili before serving. This way, you can make sure it’s just right for you and your guests. After you make slow cooker white chicken chili, let it cool. Place it in an airtight container. It will stay fresh in the fridge for up to four days. If you want to enjoy it later, make sure to store it right away. You can freeze white chicken chili too! First, let it cool completely. Then, pour it into a freezer-safe container or bag. Remove as much air as you can before sealing. This chili can last for about three months in the freezer. When you are ready, simply thaw it in the fridge overnight. To reheat, you have a few options. You can use the microwave or the stove. If using the stove, pour the chili into a pot and heat it over medium heat. Stir it often until it warms up. If using a microwave, place it in a bowl and heat for a few minutes, stirring halfway through. Always check that it is hot throughout before serving. Enjoy your comforting chili again! Yes, you can use frozen chicken in your slow cooker. It cooks safely and well. Just make sure to cook it on high for 4-5 hours instead of low. This ensures the chicken heats up properly. Thawing the chicken first can help it cook evenly. If you choose to use frozen chicken, remember to check that it reaches a safe temp of 165°F. To add heat to your chili, you have a few options. You can add diced jalapeños or a dash of hot sauce. Another great choice is to increase the chili powder amount. You might also try adding cayenne pepper for an extra kick. Adding fresh diced peppers will also bring more spice to the dish. Always taste your chili as you go, so it’s just right for you. White chicken chili pairs well with several tasty sides. Cornbread is a classic choice that adds a sweet touch. Fresh tortilla chips also make a great crunchy side. A simple green salad with lime dressing can balance the meal nicely. For a hearty option, consider serving rice or quinoa on the side. You could also offer avocado slices for creaminess. Each side enhances the chili's flavor and makes your meal more enjoyable. In this blog post, we explored how to make a tasty white chicken chili. We covered the main ingredients, step-by-step instructions, and helpful tips. You learned about ingredient substitutions, variations, and storage methods. This dish is versatile and easy to adapt. You can use different proteins or make it vegetarian. Now you’re ready to make a delicious meal. Enjoy your cooking adventure and impress your family or friends!

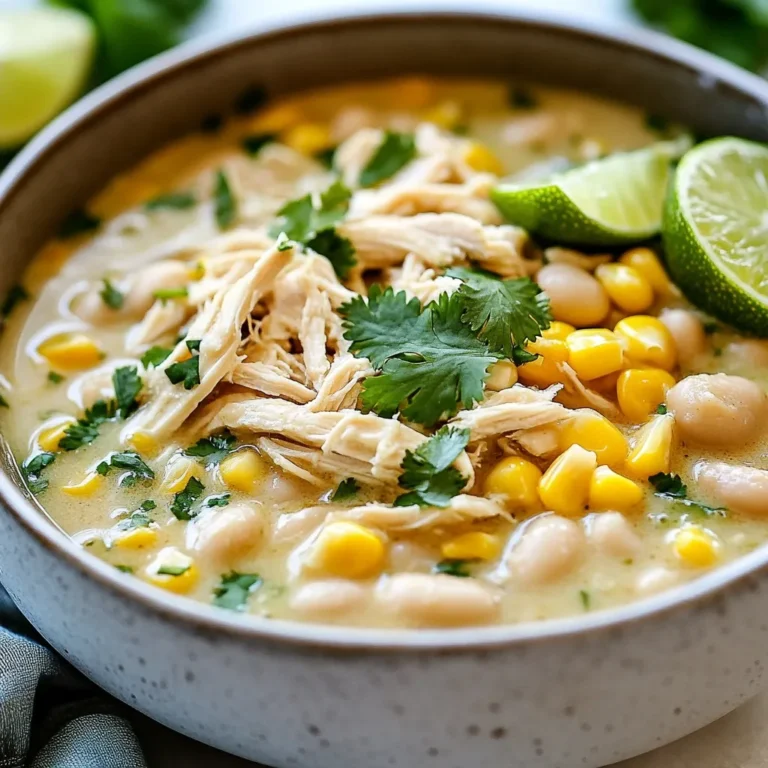
Slow Cooker White Chicken Chili Comforting and Easy

- 2 cups cooked chicken, shredded - 1 cup mozzarella cheese, shredded - ¼ cup cream cheese, softened - 4 large flour tortillas - 3 cloves garlic, finely minced - ½ cup fresh spinach, chopped - ½ teaspoon garlic powder - ½ teaspoon smoked paprika - Salt and freshly ground black pepper, to taste - 2 tablespoons extra virgin olive oil - Fresh parsley for garnish - Extra virgin olive oil You need simple and tasty ingredients for Cheesy Garlic Chicken Wraps. First, you use cooked chicken that is shredded. I love using leftover chicken for this dish. Next, mozzarella cheese adds creaminess. Cream cheese makes the filling rich and smooth. For the wrap, large flour tortillas work best. They hold all the yummy filling. Garlic adds flavor, and fresh spinach gives a pop of color. Garlic powder and smoked paprika boost the taste. Don't forget salt and pepper to season well. If you want to make it special, fresh parsley brightens the dish. A drizzle of extra virgin olive oil adds depth, too. This mix of ingredients makes every bite a delight. {{ingredient_image_2}} First, we need to mix the chicken and cheeses. Take a large bowl. Add 2 cups of shredded chicken. Next, mix in 1 cup of mozzarella cheese and ¼ cup of softened cream cheese. This mix gives the filling a creamy texture. Then, we add minced garlic and spinach. Add 3 cloves of finely minced garlic. It gives a bold flavor. Now, toss in ½ cup of chopped fresh spinach. This adds color and a healthy touch. Finally, sprinkle in ½ teaspoon of garlic powder, ½ teaspoon of smoked paprika, and salt and pepper to taste. Stir until all ingredients are well blended. Now, we turn to the tortilla. Heat a non-stick skillet over medium heat. Once it’s hot, add 2 tablespoons of extra virgin olive oil. Place one tortilla in the skillet. Heat it for about 30 seconds. The goal is to make it flexible, not browned. Next, we use the spoon and fold method. On one half of the warmed tortilla, spoon a generous amount of the cheesy chicken filling. Aim for about ¼ of the total filling. Then, fold the tortilla over to cover the filling. Press down gently to seal the edges. It’s time to cook the wraps. Allow the wrap to crisp. Cook for about 2-3 minutes. Check if the underside is golden and crispy. Now, we flip for even cooking. Use a spatula to turn the wrap over. Cook for another 2-3 minutes until the other side is also golden brown. Repeat this for the remaining tortillas and filling. Adjust the heat as needed to avoid burning. Once cooked, transfer the wraps to a cutting board. Let them cool for a minute. Then, slice each wrap in half at a diagonal angle. To make great wraps, start with the tortillas. You want them soft and flexible. Heat a tortilla for about 30 seconds in a non-stick skillet. This step helps them bend without breaking. If they start to brown, lower the heat a bit. When you cook the wraps, keep an eye on the heat. If it’s too high, they can burn quickly. Cook them just until golden brown. This gives the outside a nice crunch while keeping the inside warm and cheesy. To take your wraps to the next level, think about extra spices. Adding a pinch of cayenne can give a nice kick. You can also try Italian seasoning for a different taste. Cheese is another area where you can play around. While mozzarella is great, you can swap it for cheddar or pepper jack. Each cheese brings its own flavor and pairs well with the garlic. When serving your wraps, a little garnish goes a long way. Fresh parsley adds color and taste. You can sprinkle some on top right before serving. For dipping, try ranch or a spicy aioli. These sauces add extra flavor and make the meal fun. You can even serve the wraps with a side of fresh veggies for a complete meal. Pro Tips Use Leftover Chicken: For a quicker prep, use leftover rotisserie chicken or any cooked chicken you have on hand to save time. Customize Your Cheese: Feel free to mix in different types of cheese such as cheddar or pepper jack for more flavor! Get Creative with Fillings: Add other vegetables like bell peppers, onions, or mushrooms for added texture and nutrition. Perfectly Crispy Wraps: Ensure the skillet is hot enough before adding the wraps; this helps achieve that golden, crispy exterior. {{image_4}} You can change the filling to fit your taste. Instead of chicken, try beef or a mix of veggies. Beef adds a rich flavor, while veggies make it light and fresh. You can use bell peppers, mushrooms, or zucchini. They all work well! Changing the cheese is another fun option. Try sharp cheddar or pepper jack for a kick. Each cheese will bring a new taste to your wraps. Don’t be afraid to mix and match your favorites. If you're looking for healthier options, consider whole grain or low-carb tortillas. Whole grain gives extra fiber, while low-carb tortillas cut down on carbs. Both options keep the wraps tasty and filling. You can also use pita bread instead of tortillas. Pita adds a unique texture and taste. Just fill it up and enjoy a different wrap experience! Herbs and spices can make a big difference. Add fresh basil or oregano for a garden taste. You can also sprinkle in some red pepper flakes for heat. A little goes a long way, so adjust to your liking! Incorporating sauces can also boost flavor. Try ranch, barbecue, or even sriracha for some zing. Drizzle your chosen sauce inside the wrap before folding. This extra step makes every bite even more delicious! To store your Cheesy Garlic Chicken Wraps, let them cool first. Place them in a clean, airtight container. This helps keep them fresh and tasty. You can also wrap them in foil or plastic wrap. Both options work well. Make sure to store them in the fridge. If you want to freeze these wraps, follow these steps: 1. Let the wraps cool completely. 2. Wrap each one tightly in plastic wrap. 3. Place them in a freezer-safe bag or container. This helps keep out air. To reheat, take them out of the freezer. Let them thaw in the fridge overnight. To warm them up, use a skillet over medium heat until they are hot. This keeps the texture nice and crispy. In the fridge, these wraps last about 3 to 4 days. If you freeze them, they can last up to 2 months. Always check for signs of spoilage. If they smell bad or look off, throw them away. Enjoy your wraps fresh for the best taste! You can make these wraps ahead of time with ease. Start by preparing the cheesy chicken filling. Mix the cooked chicken, cheeses, garlic, and spinach in a bowl. Store this mixture in the fridge. You can assemble the wraps when you're ready to eat. - Mix and chill: Prepare and chill the filling for up to two days. - Wrap wisely: Store wrapped tortillas in airtight containers. - Reheat: Warm them in the skillet for best results. Yes, rotisserie chicken works great! It saves time and adds flavor. Pre-cooked chicken already has seasoning, which enhances your wraps. - Quick and easy: Just shred the chicken and mix it in. - Less prep: You skip the cooking step, making this dish faster. - Flavor boost: Rotisserie chicken often has herbs that add depth. If you want a dairy-free option, try using hummus or silken tofu. Both create a creamy texture without dairy. - Hummus: Adds flavor and keeps it light. - Silken tofu: Blend it for a smooth consistency. - Greek yogurt: For a tangy taste, use plain Greek yogurt as a lower-fat choice. This blog post explored making Cheesy Garlic Chicken Wraps. We covered the key ingredients, like cooked chicken, cheese, and tortillas. I shared step-by-step instructions to prepare and cook your wraps. You learned tips for perfecting your wraps and ideas for variations. Wraps can be stored safely in the fridge or freezer. Keeping your meals fresh and tasty is easy. Now, you have everything to make delicious wraps at home. Enjoy your cooking adventure!

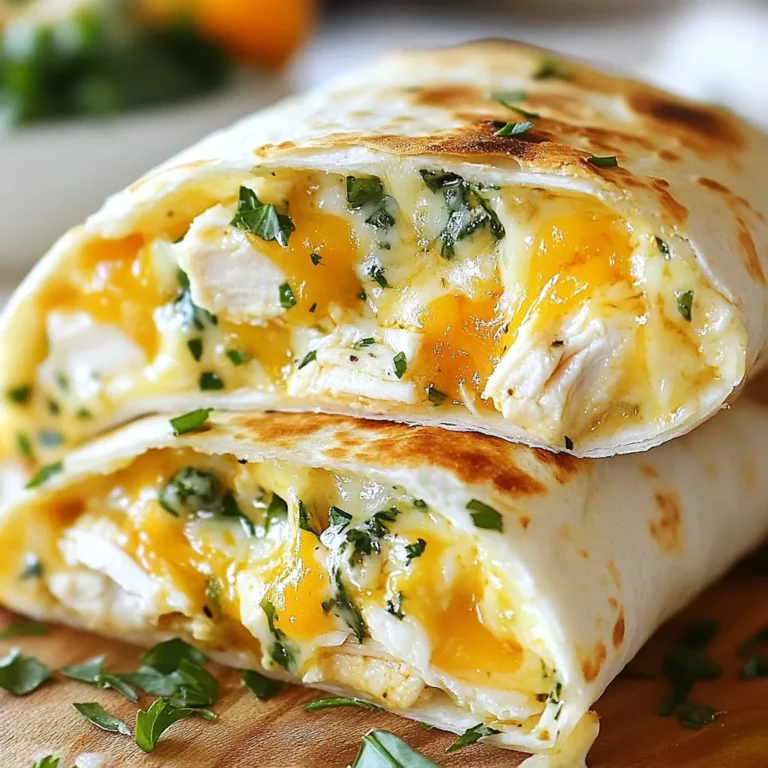
Cheesy Garlic Chicken Wraps Flavorful and Simple Dish

- 1 cup pumpkin puree - 1 cup dark chocolate chips (select dairy-free if preferred) - 1/2 cup coconut sugar - 1/4 cup pure maple syrup - 3 large eggs - 1/2 cup almond flour - 1/4 cup unsweetened cocoa powder - 1 teaspoon vanilla extract - 1 teaspoon baking soda - 1/2 teaspoon sea salt - Optional: 1/4 teaspoon ground cinnamon Pumpkin puree is the star of this torte. It adds moisture and flavor. It also gives the torte a lovely, rich color. Dark chocolate chips bring sweetness and depth. They melt beautifully and mix well with the pumpkin. Coconut sugar adds a caramel-like sweetness. Maple syrup gives extra flavor and moisture. Eggs help bind everything together, creating a light texture. Almond flour adds a nutty taste and keeps the torte gluten-free. Unsweetened cocoa powder gives a deep chocolate flavor. Baking soda helps the torte rise, making it fluffy. Sea salt balances the sweetness and enhances all the flavors. Ground cinnamon, if you choose to use it, adds warmth and spice. If you need a dairy-free option, use dairy-free dark chocolate. This choice keeps the dessert rich and creamy while staying vegan. For a nut-free version, replace almond flour with oat flour. Just make sure your oat flour is certified gluten-free. If you want to cut sugar, try using a sugar substitute like erythritol. This can help keep the torte low in calories. You can also swap coconut sugar with brown sugar for a similar taste. {{ingredient_image_2}} Start by heating your oven to 350°F (175°C). Grease a 9-inch round cake pan with cooking spray or butter. Then, line the bottom with parchment paper. This will help you easily remove the torte later. Next, take a microwave-safe bowl and add the dark chocolate chips. Heat them in the microwave for 20-30 seconds. Stir after each session until the chocolate is smooth and melted. Let it cool a bit. In a large bowl, mix the pumpkin puree, melted chocolate, coconut sugar, maple syrup, and vanilla extract. Use a whisk or spatula to blend everything well until it’s smooth. Now, crack the eggs into the chocolate and pumpkin mix one by one. Whisk each egg in well before adding the next. This helps make the batter light and fluffy. In another bowl, combine almond flour, cocoa powder, baking soda, sea salt, and ground cinnamon if you choose to use it. Stir this mix well so the dry ingredients blend together nicely. Gradually add the dry mix to the wet batter. Fold gently with a spatula until no dry bits remain. Pour the batter into your prepared cake pan. Smooth the top with a spatula. Place the pan in the oven and bake for 25-30 minutes. To check if it’s done, insert a toothpick in the center. If it comes out mostly clean with a few moist crumbs, your torte is ready. After baking, let it cool in the pan for about 10 minutes. Then, turn it out onto a wire rack to cool completely. To get the right texture, mix well. Whisk the eggs until fluffy. This step adds air, making the torte light. When adding dry ingredients, fold gently. This helps keep the batter airy. Don't overmix; stop as soon as you see no dry flour. Store any leftover torte in an airtight container. Let it cool to room temperature first. Place it in the fridge for up to five days. If you want to keep it longer, freeze it. Wrap it tightly in plastic wrap, then place it in a freezer-safe bag. It can last up to three months in the freezer. For the best flavor, serve the torte warm. Top it with whipped coconut cream for a rich taste. A scoop of vanilla ice cream is also great. Add chocolate shavings or a sprinkle of cinnamon on top. These extras make each slice even more special! Pro Tips Use High-Quality Chocolate: The flavor of your torte heavily relies on the quality of the chocolate you choose. Opt for high-quality dark chocolate for a richer taste. Check for Doneness: Since ovens can vary, keep an eye on your torte towards the end of the baking time. A toothpick should come out with a few moist crumbs for perfect texture. Let It Cool Completely: Allowing the torte to cool completely before serving helps it set and makes slicing easier, ensuring beautiful presentation. Experiment with Toppings: Feel free to get creative with toppings! Try adding chopped nuts, fresh berries, or a drizzle of nut butter for additional flavor and texture. {{image_4}} You can add spices to change your torte's taste. Consider using ground cinnamon, nutmeg, or ginger. Just a little can enhance the pumpkin's natural sweetness. For example, add 1/4 teaspoon of cinnamon for warmth. More spices can create a cozy vibe. Think about what flavors you love most. Mixing spices makes the torte unique. Feel free to experiment and find your favorite blend. Frosting can change the whole look of your torte. If you want something simple, use whipped coconut cream. This adds a light, creamy touch. You can also try a chocolate ganache for rich flavor. To make ganache, melt more dark chocolate with coconut milk. Pour it over the cooled torte for a glossy finish. Another option is a sprinkle of powdered sugar or cocoa. These choices let you create a dessert that fits any occasion. Mini tortes or cupcakes are fun and cute! To make them, use a muffin tin instead of a cake pan. Line each cup with paper liners. Pour in the batter, filling each one about two-thirds full. Bake mini tortes for about 15-20 minutes. Check with a toothpick to see if they're done. These bite-sized treats are perfect for parties or gifts. They are easy to share and enjoy! After baking your gluten-free chocolate pumpkin torte, let it cool in the pan for about 10 minutes. This short time helps the torte firm up. Then, gently flip it onto a wire rack. Cooling it completely on the rack helps prevent sogginess. If you skip this step, the steam will make the bottom too wet. You can store the torte in the fridge or freezer. If you plan to eat it within a few days, the fridge is best. Wrap it tightly in plastic wrap or place it in an airtight container. This keeps it fresh for about 3 to 5 days. If you want to save it for longer, freeze it. Wrap slices in plastic wrap and then in foil. This helps avoid freezer burn. You can freeze it for up to 3 months. The torte stays fresh for about 3 to 5 days in the fridge and up to 3 months in the freezer. To reheat, place it in the oven at 350°F for about 10 minutes. You can also use the microwave. Heat it for 15-30 seconds. Just be careful not to overheat, as it can dry out. Enjoy your delicious torte warm or at room temperature! Yes, you can use fresh pumpkin. First, cook the pumpkin until soft. Then, puree it until smooth. Fresh pumpkin can taste better and add a nice texture. Just be sure to measure one cup for your recipe. This recipe is not vegan due to the eggs. However, you can replace each egg with a flax egg. To make one flax egg, mix one tablespoon of ground flaxseed with three tablespoons of water. Let it sit for five minutes until it thickens. This will help bind your torte without eggs. Check the torte after 25 minutes. Insert a toothpick into the center. If it comes out mostly clean, your torte is done. A few moist crumbs are fine. If the toothpick has wet batter, bake for a few more minutes. Yes, you can. Use oat flour or coconut flour as alternatives. If using coconut flour, reduce the amount to 1/4 cup. Coconut flour absorbs a lot of moisture. This change may alter recipe texture, so keep an eye on the batter. This blog post explored a rich chocolate and pumpkin torte. We discussed key ingredients, substitutions, and step-by-step baking methods. I shared tips to achieve the perfect texture and ideas for variations. Remember, you can play with flavors and toppings. Store leftovers to enjoy later, and don’t hesitate to experiment. This torte is fun to make and will impress everyone. Enjoy every bite and share it with friends!

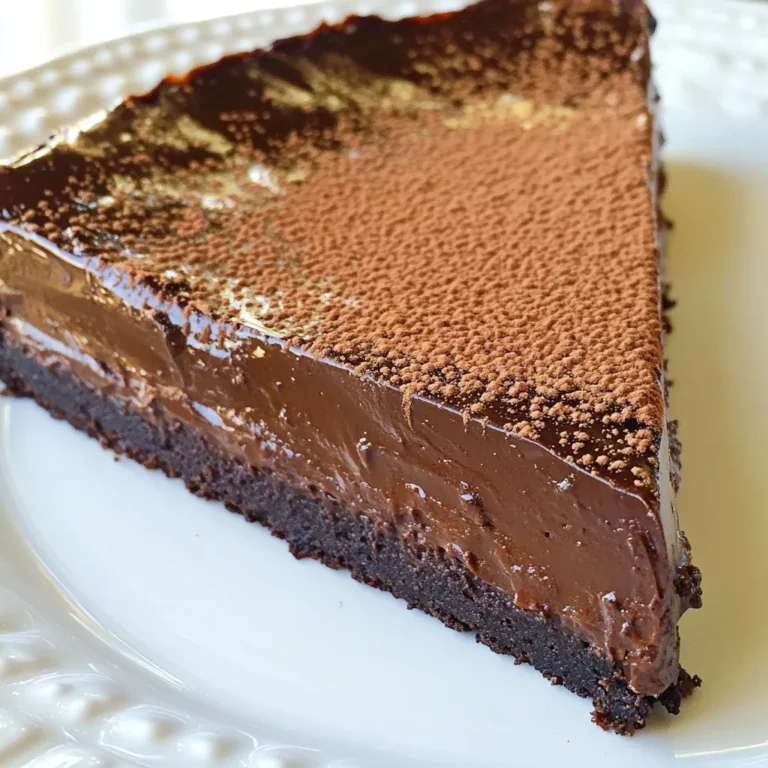
Gluten-Free Chocolate Pumpkin Torte Decadent Delight

- 1 cup blue coconut milk - 1/2 cup pineapple juice - 1/4 cup coconut cream - 1 tablespoon agave syrup (or honey) - 1/2 teaspoon vanilla extract - 1/2 cup ice cubes - Fresh blueberries (for garnish) - Toasted coconut flakes (for rimming glasses) I love using vibrant blue coconut milk for this drink. It adds a fun color. Pineapple juice brings a sweet and tangy kick. Coconut cream gives it a rich, creamy feel. Agave syrup or honey adds a touch of natural sweetness. A hint of vanilla extract rounds out the flavors nicely. Ice cubes keep your drink cool and refreshing. Fresh blueberries make a lovely garnish. They add color and a burst of flavor. Toasted coconut flakes are optional, but they enhance the look. Plus, they give a nice crunch when you sip. Gather these ingredients to create the perfect Jack Frost Blue Coconut Cocktail. Each one plays an important part in making this drink delightful. Enjoy mixing these together for a treat that’s both tasty and beautiful! {{ingredient_image_2}} Start by wetting the rims of your cocktail glasses. You can use a little water or some coconut milk. This step helps the toasted coconut flakes stick better. Dip the wet rims into the flakes. This makes a tasty and pretty border for your drink. Now, let’s blend! In a blender, add the blue coconut milk, pineapple juice, coconut cream, agave syrup, vanilla extract, and ice cubes. Make sure to put the lid on tight. Blend on high speed until the mix is smooth and creamy. This makes the drink thick and yummy. After blending, taste the drink. If you like it sweeter, add more agave syrup and blend it again. Pour the mixture into your prepared glasses. Fill them almost to the rim for a nice look. Finally, garnish each drink with fresh blueberries. This adds color and fun to your cocktail! Enjoy your drink right away for the best taste. To make the best Jack Frost Blue Coconut Cocktail, start with the right blend. Use a strong blender for a smooth mix. I suggest blending on high speed for about 30 seconds. This ensures the drink is creamy and frothy. If you want a sweeter cocktail, taste it after blending. You can add more agave syrup if needed. Blend again to mix it well. This simple step can change the drink's flavor. Garnishes can make your cocktail pop. Fresh blueberries are a fun choice. They add color and a burst of flavor. You can also use toasted coconut flakes. They look great and add texture. To rim your glasses, wet the edges with coconut milk. Then dip them in the coconut flakes. This creates a nice, crunchy border that looks fancy. How you serve your drink matters. Use colorful trays to catch the eye. Add extra fruits like pineapple slices or mint leaves. This adds freshness and beauty to your drink display. Pour the cocktail almost to the rim of the glass. It makes it look inviting. These little touches make your Jack Frost Blue Coconut Cocktails stand out at any gathering. Pro Tips Chill Your Ingredients: For an extra refreshing cocktail, refrigerate your coconut milk and pineapple juice before mixing. Cold ingredients will enhance the drink's chill factor. Experiment with Flavors: Feel free to add a splash of lime juice or a hint of coconut extract for an extra layer of tropical flavor that complements the other ingredients beautifully. Choose Quality Ingredients: Opt for high-quality coconut cream and fresh pineapple juice for the best flavor. Fresh ingredients make a noticeable difference in taste. Presentation Matters: Use clear glasses to showcase the vibrant blue color of the cocktail. Adding fun straws or cocktail picks can elevate the presentation and make it more festive. {{image_4}} You can easily switch up the fruit flavors in your Jack Frost Blue Coconut Cocktail. Try using mango juice instead of pineapple juice. This change gives a sweeter taste and a lovely tropical vibe. You could also use passion fruit juice for a tangy twist. Each fruit adds its unique flavor. Experiment until you find your favorite mix. Adjusting the sweetness of your cocktail is simple. If you want it sweeter, add more agave syrup. Honey is another great option if you prefer a natural sweetener. You can also reduce the syrup for a less sweet drink. Taste the mix before pouring to ensure it suits your palate. Making a non-alcoholic version is easy and just as fun. Simply skip any alcohol and enjoy the bright, fruity flavors. The combination of blue coconut milk and pineapple juice still delivers a refreshing drink. You can also add a splash of soda water for some fizz. This option is perfect for all ages and still tastes amazing! If you have leftover Jack Frost Blue Coconut Cocktail, pour it into a clean container. Seal it tightly with a lid. Store it in the fridge for up to two days. Shake or stir it well before serving again. The ingredients may separate, but that’s normal. To keep your drink fresh, store the blue coconut milk and coconut cream in the fridge. Use them within a week after opening. Pineapple juice should also stay sealed and chilled. If you buy fresh blueberries, keep them dry in the fridge for best results. - Blue Coconut Milk: 5-7 days once opened. - Pineapple Juice: 5-7 days once opened. - Coconut Cream: 7-10 days once opened. - Fresh Blueberries: 3-7 days in the fridge. - Agave Syrup or Honey: Can last for months if sealed properly. Knowing how to store your cocktail and its ingredients helps keep flavors fresh. Enjoy your drink at its best! The Jack Frost Blue Coconut Cocktail is a bright and fun drink. It mixes blue coconut milk, pineapple juice, and coconut cream. This cocktail is creamy, fruity, and refreshing. The blue color looks stunning and is perfect for parties. You can also add fresh blueberries on top for a pop of flavor. Yes, you can make the base of this cocktail ahead of time. Blend the blue coconut milk, pineapple juice, coconut cream, agave syrup, and ice. Store it in the fridge for a few hours. Just remember to blend it again before serving. It will keep its creamy texture, and you can add ice right before serving. If you can't find blue coconut milk, don’t worry! You can use regular coconut milk and add blue food coloring. This way, you can still enjoy the vibrant look. You can also try almond milk or oat milk for a dairy-free option. Just make sure to keep the coconut cream for that rich taste. In this post, we covered how to make a refreshing Jack Frost Blue Coconut Cocktail. You learned about the simple ingredients, how to blend them, and tips for a great presentation. Don’t forget variations to suit your taste! Enjoy storing leftovers for later. This drink is fun for any occasion. Experiment with different fruits, flavors, and garnishes. With these steps, you’ll impress your friends and family. Try making this cocktail and savor the flavors of summer anytime!

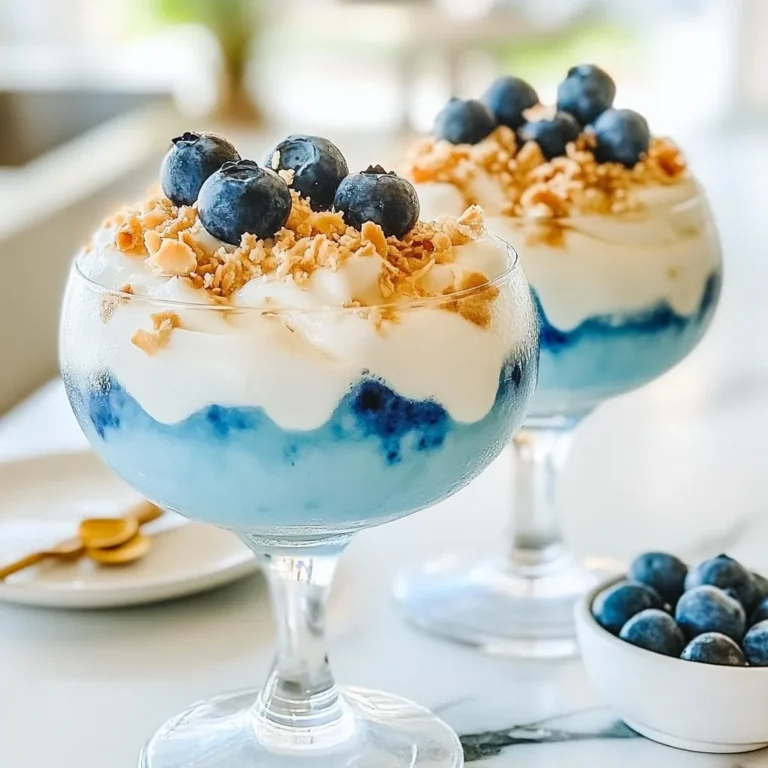
Jack Frost Blue Coconut Cocktail Refreshing Delight

To make One-Pot Creamy Lemon Spinach Orzo, you need a few key items. Each ingredient plays a special role in making this dish creamy and full of flavor. - 1 cup orzo pasta - 2 cups vegetable broth - 1 cup fresh spinach, chopped - 1/2 cup heavy cream - 1/2 cup grated Parmesan cheese - 1 tablespoon olive oil - 2 cloves garlic, minced - Juice and zest of 1 lemon - Salt and pepper to taste - 1/4 teaspoon red pepper flakes (optional) - Fresh basil or parsley for garnish Orzo pasta and vegetable broth form the base of this dish. The orzo cooks up tender and absorbs all the flavors. The broth adds a savory depth to every bite. Creamy components like heavy cream and Parmesan cheese create a rich sauce that coats the orzo. This makes each spoonful feel luxurious and satisfying. Flavor enhancers include garlic, olive oil, lemon juice, and zest. Garlic gives a warm aroma. Olive oil adds richness. Lemon juice and zest brighten the dish, making it fresh and zesty. Fresh additions are the chopped spinach and garnish options. Spinach wilts down, adding color and nutrients. Fresh basil or parsley on top adds a pop of green and enhances the taste. Gather these ingredients, and you’re ready to create a delicious meal! Start by heating olive oil in a large pot over medium heat. When the oil is hot, add minced garlic. Sauté the garlic for about one minute. You want it fragrant but not brown. This step adds a rich flavor to our dish. Next, add one cup of orzo pasta to the pot. Stir continuously to coat the orzo in the garlicky oil. Toast the orzo for about two minutes. You want it to turn slightly golden. This step enhances the flavor of the orzo. Now, gently pour in two cups of vegetable broth. Stir the mixture to combine everything well. Raise the heat and bring it to a gentle boil. Once it boils, cover the pot and reduce the heat to low. Let it simmer for about ten minutes. This allows the orzo to cook al dente while soaking up most of the liquid. After the orzo has cooked, fold in one cup of chopped spinach. Then, add half a cup of heavy cream and half a cup of grated Parmesan cheese. Squeeze in the juice of one lemon and add its zest too. Stir everything to combine. Let it cook for another two to three minutes. This helps the spinach wilt and makes the dish creamy. Finally, season the mixture with salt and pepper. You can also add red pepper flakes for a little heat, if you like. Remove the pot from the heat and let it sit for a couple of minutes. This resting time helps thicken the sauce, making it even creamier. Serve the creamy orzo in bowls, garnished with fresh basil or parsley for extra flavor and a lovely pop of color. - Perfecting al dente orzo: To achieve the perfect al dente texture, aim for a cooking time of about 10 minutes. Stir the orzo often while it cooks. This helps it cook evenly and prevents sticking. Remember, the orzo will continue to cook slightly after you remove it from heat. - Tips for a creamy texture: Use heavy cream for a rich and velvety sauce. After adding the cream, let the mix simmer for a few minutes. This allows the flavors to meld and thicken. If the sauce seems too thick, add a splash of vegetable broth to loosen it. - Suggestions for adding protein: You can easily make this dish heartier by adding protein. Grilled chicken, shrimp, or chickpeas work well. Stir them in just before serving to warm them up without overcooking. - Adjusting spices to personal preference: Feel free to customize the spices. Add more red pepper flakes for heat or a pinch of nutmeg for warmth. Fresh herbs like basil or parsley can also bring extra flavor. Don't be shy; taste as you go to find your ideal balance! {{image_4}} You can easily switch up the orzo in this dish. Other pasta types like quinoa or couscous work well too. Each choice brings a unique taste and texture. Experiment to find your favorite. When it comes to greens, spinach is just the start. You can use kale, Swiss chard, or even arugula. Each green adds its own flavor and nutrients. Try different cheeses like feta or goat cheese for a twist. These swaps can change the whole dish! If you follow a vegan diet, you can make simple swaps. Use coconut cream instead of heavy cream. Nutritional yeast can replace Parmesan cheese for a cheesy taste. This way, you keep all the creaminess without dairy. For those needing gluten-free options, use gluten-free orzo or rice. Make sure to check the broth for gluten-free labels. These changes let everyone enjoy this creamy dish! To keep your creamy lemon spinach orzo fresh, store it in the fridge. Use airtight containers to avoid moisture loss. I recommend glass containers because they do not stain and keep food fresh. Make sure to cool the dish to room temperature before sealing it. This helps prevent excess condensation, which can lead to soggy orzo. When reheating orzo, the best method is on the stove. Add a splash of water or broth to the pot to revive the creaminess. Heat it gently over low to medium heat while stirring. This keeps the orzo from sticking and helps maintain its texture. You can also use the microwave. Just cover the bowl with a damp paper towel. Heat it in short bursts, stirring in between. This way, you keep the flavors bright and delicious. Can I make this dish ahead of time? Yes, you can make One-Pot Creamy Lemon Spinach Orzo ahead of time. Just cook it as usual and let it cool. Then, store it in an airtight container in the fridge. It stays fresh for up to three days. When you're ready to eat, just reheat it on the stove or in the microwave. What can I serve with orzo? Orzo pairs well with many dishes. You can serve it with grilled chicken, shrimp, or roasted vegetables. A crisp salad or garlic bread also works great. The creamy orzo acts as a perfect base for these flavors. How to prevent the orzo from becoming mushy? To keep the orzo firm, follow a few simple steps. First, use the right amount of liquid. This recipe calls for two cups of broth for one cup of orzo. Stir the orzo while cooking to prevent clumping. Also, check for doneness a minute or two before the time is up. Can I freeze One-Pot Creamy Lemon Spinach Orzo? Freezing this dish is possible but not ideal. The cream may change in texture when frozen. If you do freeze it, store it in a freezer-safe container. Use it within a month for the best taste. When ready to eat, thaw it overnight in the fridge and reheat gently on the stove. In this blog post, we explored how to make One-Pot Creamy Lemon Spinach Orzo. We discussed key ingredients like orzo pasta, vegetable broth, and creamy elements. I shared step-by-step cooking methods for perfect flavor and texture. Remember to try the tips for adding protein and adjusting spices. You can also customize this dish with different greens or make it vegan. Storing and reheating leftovers is easy with the right tips. Enjoy creating this simple, flavorful dish that can impress anyone!

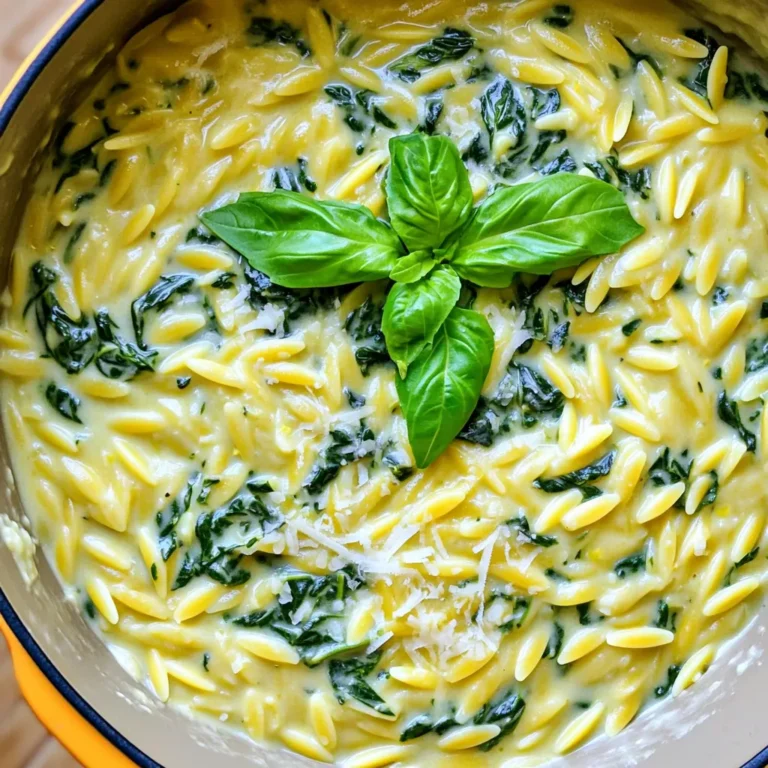
One-Pot Creamy Lemon Spinach Orzo Irresistible Delight

To make a delicious salted caramel apple cake, gather these key ingredients: - 2 cups all-purpose flour - 1 ½ teaspoons baking powder - 1 teaspoon baking soda - ½ teaspoon salt - 1 teaspoon ground cinnamon - ½ cup unsalted butter, softened - 1 cup granulated sugar - 2 large eggs - 1 teaspoon vanilla extract - 1 cup buttermilk - 2 cups apples, peeled and diced - 1 cup salted caramel sauce Each ingredient plays a vital role in the cake's flavor and texture. The flour gives structure, while the butter adds richness. The apples bring moisture and a fruity bite. Salted caramel sauce adds that sweet and salty kick we all love. For the best apple flavor, I recommend using tart apples like Granny Smith or Honeycrisp. These apples add a nice contrast to the sweetness of the cake. You can also try other varieties, like Fuji or Golden Delicious, if you prefer a sweeter taste. Just make sure to peel and dice them small enough to blend well in the batter. You can choose between store-bought and homemade salted caramel sauce. Store-bought sauce is quick and easy, saving you time. However, making your own can add a special touch. Homemade sauce allows you to control the flavor and sweetness. If you want to make it, just melt sugar, add cream, and a pinch of salt. Either way, the salted caramel sauce elevates the cake to a new level of tasty. Start by preheating your oven to 350°F (175°C). Grab a 9x13 inch cake pan. Grease it with butter and dust with flour. You can also line it with parchment paper. This helps the cake come out easily. In a medium bowl, whisk together the flour, baking powder, baking soda, salt, and cinnamon. Mix until all the dry ingredients blend well. This step is key for a well-risen cake. In a large bowl, use an electric mixer to beat the softened butter with granulated sugar. Mix on medium speed for about 3 minutes. You want the mixture to be light and fluffy. This adds air and gives your cake a nice texture. Add the eggs to the creamed butter one at a time. Mix well after each egg. Then, stir in the vanilla extract. This adds a nice flavor to your cake. Now, it’s time to fold in the diced apples. Use a spatula to gently mix the apples into the batter. Be careful not to break them up too much. You want big chunks for texture and flavor. Pour half of the batter into the prepared cake pan. Drizzle half of the salted caramel sauce over this layer. Use a knife to swirl the caramel into the batter. This creates a lovely marbled effect. Next, add the rest of the batter on top. Drizzle the remaining caramel sauce over this layer. Swirl it gently again with a knife. You want a beautiful design on top before baking. Place the cake in the preheated oven. Bake for 35 to 40 minutes. Check if it’s done by inserting a toothpick in the center. If it comes out clean, the cake is ready. Keep an eye on it to avoid overbaking. Once baked, let the cake cool in the pan for about 15 minutes. After that, transfer it to a wire rack to cool completely. For a lovely finish, dust the cooled cake with powdered sugar. Drizzle extra caramel sauce on top and serve with whipped cream or vanilla ice cream. Enjoy! To get the best texture for your salted caramel apple cake, use room temperature ingredients. This helps the batter mix smoothly. Cream the butter and sugar well until light and fluffy. This step adds air and makes your cake rise nicely. Overmixing can make your cake dense. When mixing dry and wet ingredients, stir until just combined. A few lumps are okay. This keeps your cake light and fluffy. Be gentle when folding in the apples to keep their shape. Make sure your oven is preheated to 350°F (175°C) before baking. Use an oven thermometer to check the temperature. For even baking, place your cake pan in the center of the oven. This helps the heat circulate around the cake evenly. Keep an eye on it, especially in the last few minutes of baking. {{image_4}} You can make this cake even more special. Adding nuts like walnuts or pecans gives it a nice crunch. Chopped nuts mix well with the soft apples. You can also try spices like nutmeg or ginger. These spices add warmth and depth to the flavor. A dash of cardamom can also give an exciting twist. If you need a gluten-free version, swap the all-purpose flour. Use a gluten-free blend instead. Make sure it has xanthan gum for the right texture. You can also use almond flour or coconut flour. These add a unique taste and make the cake moist. Just check the measurements, as they differ from regular flour. This cake is perfect for any event. For a cozy family dinner, serve it warm with ice cream. At parties, slice it into small pieces for easy sharing. Top it with whipped cream for a fancy touch. For fall gatherings, add a sprinkle of cinnamon on top. It looks great and tastes even better. Enjoy this cake for birthdays, holidays, or just because! To keep your salted caramel apple cake fresh, store it in an airtight container. This prevents moisture loss and keeps the cake soft. If you do not have a container, wrap it tightly in plastic wrap. Always store the cake at room temperature for the best texture. Your salted caramel apple cake stays fresh for about 3 to 4 days at room temperature. If you keep it in the fridge, it can last up to a week. However, it may dry out a bit if stored too long. To freeze your cake, first let it cool completely. Then, slice it into portions for easy serving. Wrap each slice tightly in plastic wrap, followed by foil. This double wrapping helps prevent freezer burn. Your cake can last up to 3 months in the freezer. To thaw, simply move it to the fridge overnight. Enjoy your delicious cake even after a few months! Yes, you can use various apples. Granny Smith and Honeycrisp are great choices. They add tartness. Other options include Fuji or Gala apples, which are sweet. Mix and match for a fun flavor. Just remember to peel and dice them before adding to the batter. To reheat cake, preheat your oven to 350°F (175°C). Place the cake in an oven-safe dish. Cover it with foil to keep it moist. Heat for about 10 to 15 minutes. You can also use a microwave. Heat individual slices for 20 to 30 seconds. Enjoy warm for the best taste! Making homemade salted caramel sauce is easy. Here’s a simple way: - Ingredients: - 1 cup granulated sugar - 6 tablespoons unsalted butter, cut into pieces - 1/2 cup heavy cream - 1 teaspoon sea salt 1. In a medium pan, heat sugar over medium heat. Stir until it melts and turns amber. 2. Add butter and stir until melted. 3. Slowly pour in cream while stirring. Be careful, as it will bubble. 4. Once combined, add salt and stir. 5. Remove from heat and let cool before using. Store the sauce in a jar for up to two weeks. Enjoy it on your cake or other treats! This blog post shared key steps to make a delicious Salted Caramel Apple Cake. We covered essential ingredients, tips for perfect texture, and various serving ideas. You learned about the best apples to use and how to store the cake for lasting freshness. Remember to experiment with flavors and adjust for dietary needs. Your cake can be both fun and enjoyable for any event. Happy baking, and enjoy every slice of this treat!

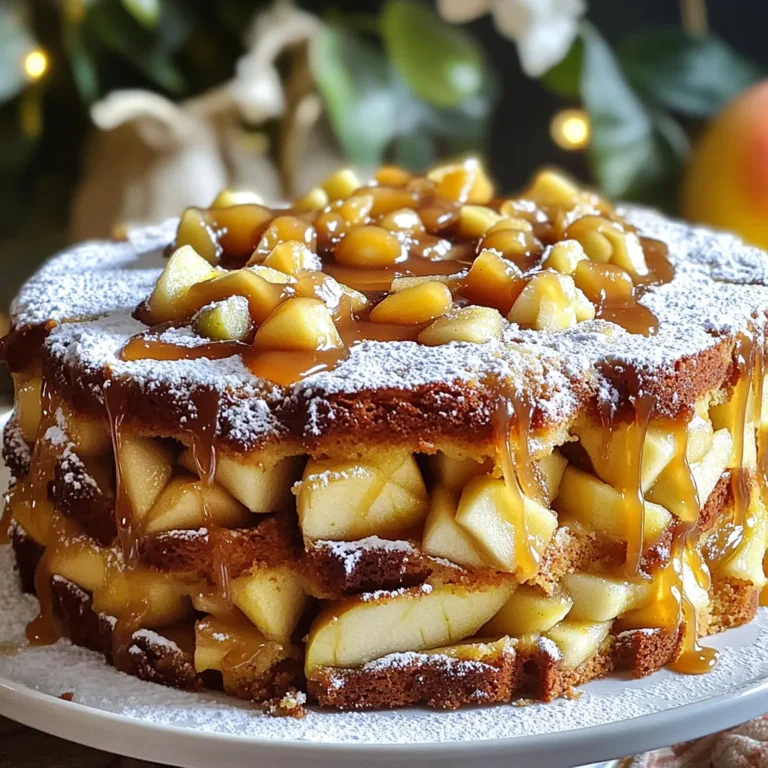
Salted Caramel Apple Cake Irresistible Homemade Recipe

To make a delicious chocolate peppermint cheesecake, gather these key ingredients: - 1 ½ cups chocolate graham cracker crumbs - ½ cup unsalted butter, melted - 2 cups cream cheese, softened to room temperature - 1 cup granulated sugar - 1 teaspoon vanilla extract - 1 teaspoon peppermint extract - 3 large eggs, at room temperature - 1 cup sour cream - 1 cup semi-sweet chocolate chips, melted and slightly cooled - Whipped cream, for garnishing - Crushed peppermint candies, for garnish You will need the following tools to create this cheesecake: - 9-inch springform pan - Mixing bowls - Electric mixer - Spatula - Measuring cups and spoons - Oven - Refrigerator If you need to make some swaps, here are good options: - Use gluten-free graham cracker crumbs for a gluten-free crust. - Swap cream cheese for mascarpone for a different texture. - Replace granulated sugar with coconut sugar for a lower glycemic index. - Use Greek yogurt in place of sour cream for a tangy flavor. - Try dark chocolate chips if you prefer a richer taste. These substitutions keep the spirit of the recipe while allowing for personal tastes and dietary needs. Enjoy your baking! {{ingredient_image_2}} Start by preheating your oven to 325°F (160°C). Take a 9-inch springform pan and spray it with non-stick cooking spray. This step helps the cheesecake come out easily later. Make sure to cover all sides well. In a medium bowl, mix 1 ½ cups of chocolate graham cracker crumbs with ½ cup of melted unsalted butter. Stir until all the crumbs are coated. This mixture should feel wet and crumbly. Next, press this mixture firmly into the bottom of the springform pan. You want an even layer. Bake the crust in the oven for 10 minutes. Once baked, let it cool completely. In a large bowl, beat 2 cups of softened cream cheese and 1 cup of granulated sugar with an electric mixer. Mix until the mixture is smooth with no lumps. Add 1 teaspoon of vanilla extract and 1 teaspoon of peppermint extract. Mix until both flavors are well blended. Next, add 3 large eggs one at a time. Mix gently after each addition. Avoid over-mixing to keep the cheesecake light. Then, fold in 1 cup of sour cream and 1 cup of melted semi-sweet chocolate. Use a spatula to mix until smooth. Pour the cheesecake filling over the cooled crust. Smooth the top with a spatula. Place the springform pan back in the oven and bake for 55-60 minutes. The center should be set but still jiggle a bit. After baking, turn off the oven but leave the cheesecake inside for one more hour. This helps prevent cracks. When the hour is up, move the cheesecake to the fridge. Chill it for at least 4 hours, or overnight for the best flavor and texture. To get the best texture in your cheesecake, start with room-temperature cream cheese. Cold cream cheese can create lumps. Mix on low speed to keep air out, which helps prevent cracks. After mixing, add eggs one at a time, mixing just enough. Over-mixing can make the cheesecake too dense. Let the cheesecake cool slowly in the oven. This helps it set well. Chill it in the fridge for at least four hours. For the best results, let it chill overnight. This allows flavors to blend and improves texture. One common mistake is not greasing the pan. If the pan is not prepared, the cheesecake will stick. Be sure to press the crust firmly. A loose crust can fall apart when slicing. Watch the baking time carefully. Overbaking can lead to cracks. The center should jiggle slightly when you shake it. Lastly, avoid opening the oven door too often. This can cool the oven and affect baking. When serving, top each slice with whipped cream. Add crushed peppermint candies for a festive touch. A drizzle of chocolate sauce makes it even more special. For a fresh look, add a sprig of mint next to the slice. Consider serving it on a holiday-themed plate. This adds to the festive vibe. For a twist, pair it with hot cocoa or coffee. These drinks enhance the peppermint flavor. Pro Tips Chill the Ingredients: Ensure the cream cheese and eggs are at room temperature before mixing. This helps achieve a smoother batter without lumps. Don’t Overmix: Gently fold the ingredients together to avoid incorporating too much air, which can cause cracks during baking. Cool Gradually: Allow the cheesecake to cool in the oven after baking. This gradual cooling process helps prevent cracking on the surface. Garnish Just Before Serving: Add whipped cream and crushed peppermint candies right before serving to maintain their freshness and texture. {{image_4}} You can mix up this cheesecake with different flavors. Try adding orange zest for a citrus twist. It pairs well with chocolate and peppermint. You can also use almond extract instead of peppermint. This gives a whole new taste. For a richer flavor, add espresso powder to the filling. This makes the chocolate taste deeper and more complex. If you need a gluten-free dessert, you can still enjoy this cheesecake. Use gluten-free chocolate graham cracker crumbs for the crust. Just check the label to be sure. If you can't find these, you can crush gluten-free cookies. This keeps the crust tasty and safe for everyone. The rest of the ingredients are naturally gluten-free. So, you can enjoy this treat without worry! For those hot days, a no-bake version is perfect. Start with the same crust using chocolate graham crackers and melted butter. Press it into your pan like before. For the filling, mix cream cheese, sugar, and extracts until smooth. Fold in whipped cream instead of eggs for a fluffy texture. Pour this mixture onto your crust and chill until firm. This version is easy and quick, with all the same festive flavors. After you enjoy your chocolate peppermint cheesecake, store any leftovers in the fridge. Use an airtight container or cover the cheesecake with plastic wrap. This keeps it fresh and tasty for up to five days. If you want to keep it longer, freezing is a great option. To freeze your cheesecake, first, let it cool completely. Then, wrap the cheesecake tightly in plastic wrap and aluminum foil. This prevents freezer burn. You can freeze it for up to three months. When you're ready to enjoy it, move the cheesecake to the fridge to thaw overnight. Cheesecake tastes best cold, but you can serve it at room temperature. To warm it slightly, place a slice in the microwave for about 10 seconds. This will soften it a bit without melting the structure. Enjoy your delicious cheesecake with whipped cream and crushed peppermint candies for the perfect holiday treat! Yes, you can make this cheesecake ahead of time. It tastes best after chilling for at least four hours. You can even prepare it a day in advance. Just cover it well with plastic wrap or foil. This helps keep it fresh and delicious until serving time. The cheesecake lasts for about five days in the fridge. Keep it covered to avoid drying out. If you want to keep it longer, consider freezing it. Just make sure you wrap it tightly to avoid freezer burn. Absolutely! You can use dark chocolate or milk chocolate chips instead of semi-sweet. Each type gives a unique taste. If you want a richer flavor, opt for dark chocolate. For a sweeter dessert, choose milk chocolate. If you don’t have sour cream, you can use Greek yogurt. It offers a similar tangy taste. You can also use cream cheese, but it may change the texture a bit. Just add a little milk to thin it out if needed. You've learned how to make a delicious chocolate peppermint cheesecake. We covered the ingredients, essential equipment, and tips for perfect texture. I shared common mistakes and creative variations to try. Now, you can impress your friends and family with this treat. Remember to store leftovers properly, so nothing goes to waste. Enjoy your cheesecake adventure and have fun experimenting with flavors!

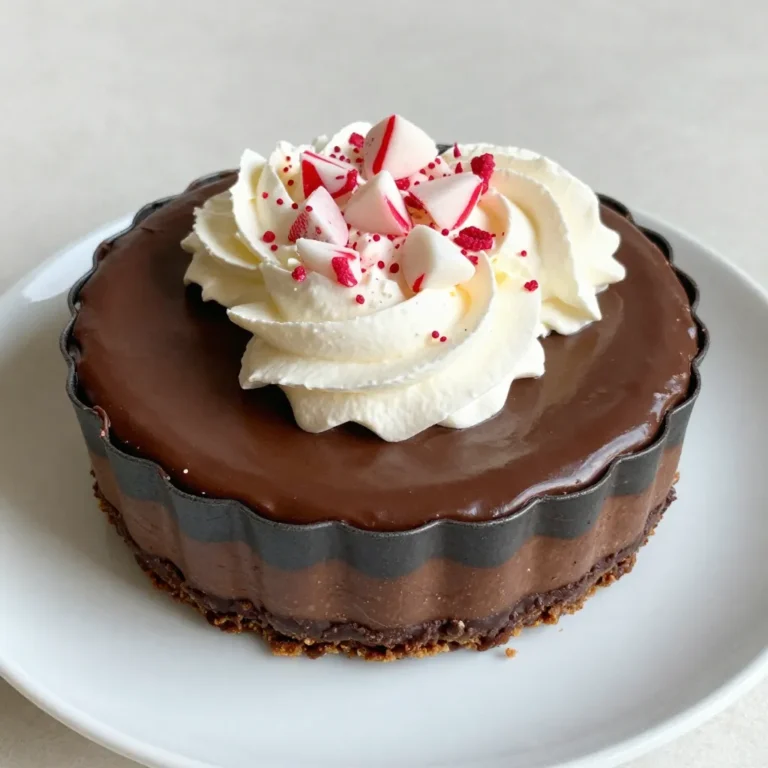
Chocolate Peppermint Cheesecake Tasty Holiday Dessert

- 2 large onions, peeled and sliced into 1/4-inch thick rings - 1 cup all-purpose flour - 1 teaspoon smoked paprika - 1 teaspoon garlic powder - 1 teaspoon onion powder - 1/2 teaspoon sea salt - 1/2 teaspoon freshly ground black pepper - 2 large eggs, beaten - 1 cup panko breadcrumbs - Cooking spray To make crispy air fryer onion rings, gather these simple ingredients. Start with two large onions. Peel and slice them into rings, about one-quarter inch thick. This size gives you the perfect crunch. Next, you need one cup of all-purpose flour. This helps the seasonings stick to the onion rings. Speaking of seasonings, add smoked paprika, garlic powder, onion powder, sea salt, and black pepper. Each spice adds a unique flavor. You’ll also need two large eggs. Beat them well until they are mixed. The eggs act as glue for the breadcrumbs. Finally, grab one cup of panko breadcrumbs. They make your onion rings extra crispy. Don’t forget the cooking spray! This helps the onion rings brown nicely in the air fryer. With these ingredients ready, you are set to make a tasty snack that everyone will love. - Peel and slice onions into rings. - Separate and arrange onion rings on a plate. First, I peel two large onions. I slice them into 1/4-inch thick rings. It’s best to use a sharp knife for clean cuts. After slicing, I separate each ring. I arrange them neatly on a plate. This makes the next steps easier. - Mixing flour and seasonings. - Beating eggs. - Preparing panko breadcrumbs. Next, I set up my breading station. I grab three shallow bowls. In the first bowl, I mix 1 cup of flour with seasonings. I add 1 teaspoon of smoked paprika, garlic powder, and onion powder. I also add 1/2 teaspoon of salt and pepper. I whisk this mixture well. In the second bowl, I beat two large eggs until they are frothy. I leave the third bowl for 1 cup of panko breadcrumbs. I spread them out evenly. - Dipping in flour. - Coating with egg. - Pressing into panko breadcrumbs. Now comes the fun part—bread the onion rings! I take each ring and dip it into the flour mixture. I make sure it gets fully coated, then shake off any excess flour. Next, I dip the ring into the beaten egg, letting any extra egg drip back. Finally, I press the egg-coated onion ring into the panko breadcrumbs. I ensure the breadcrumbs stick well all around. I repeat this process for each onion ring. - Preheating the air fryer to 375°F (190°C). - Arranging the onion rings in the air fryer. Now it’s time to preheat the air fryer. I set it to 375°F (190°C) for about 3-5 minutes. While it heats up, I lightly spray the air fryer basket with cooking spray. This helps the onion rings not stick. I arrange the breaded onion rings in a single layer. They shouldn’t touch or overlap. - Cooking the onion rings for 10-12 minutes. - Flipping halfway through for even cooking. I air fry the onion rings for 10-12 minutes. Halfway through, I flip them for even cooking. I look for a golden brown color and crispiness. If my air fryer is small, I may need to cook in batches. - Removing and serving hot. - Ideas for dipping sauces. Once cooked, I carefully remove the onion rings from the air fryer. I serve them hot and crispy. They taste best right away! I love to pair them with ranch, BBQ, or spicy aioli sauces. This makes the snack even more delicious! To get that sought-after crunch, I always use panko breadcrumbs. They create a light and crispy coating that makes the onion rings pop. Preheating the air fryer is also key. It helps the rings cook evenly and stay crisp. Set your air fryer to 375°F (190°C) for about 3-5 minutes before cooking. One common mistake is overlapping the onion rings in the air fryer. This leads to soggy spots and uneven cooking. Arrange them in a single layer, giving each ring space to breathe. Also, keep an eye on the doneness indicators. Look for a golden brown color, which shows they are ready. You can easily boost the flavor of your onion rings. Try adding extra seasonings like cayenne for heat or Italian herbs for a twist. For dipping, consider making homemade sauces. Ranch, BBQ, or spicy aioli pair perfectly with these onion rings. {{image_4}} You can spice up your onion rings easily. Try adding cayenne pepper or hot sauce for a kick. This gives them a nice heat that balances well with the sweetness of the onions. You can also make a parmesan-crusted version. Just sprinkle grated parmesan over the breadcrumbs before coating the rings. This adds a rich, cheesy flavor that many will love. If you need a gluten-free option, use almond flour or chickpea flour instead of all-purpose flour. Both give a great texture and taste. For a vegan version, skip the eggs. Use a mixture of ground flaxseed and water as a binder. This helps the breadcrumbs stick, ensuring you get that crispy finish. Onion rings are versatile! Pair them with different cuisines. They go well with burgers, tacos, or even barbecue dishes. You can also turn them into loaded onion rings. Top them with cheese, jalapeños, or bacon bits for a fun twist. Add a drizzle of ranch or spicy sauce for extra flavor. Enjoy experimenting! To keep your onion rings fresh, place them in an airtight container. Make sure they cool down before sealing the container. You can refrigerate them for up to three days. Eating them sooner gives the best taste and texture. If you wait too long, they may lose their crunch. Reheating onion rings can be tricky. You want to keep them crispy. I recommend using the air fryer again. Preheat it to 350°F (175°C). Place the leftover onion rings in the basket and cook for about 5 minutes. This helps restore their crispiness. You can freeze both raw and cooked onion rings. For raw rings, arrange them on a baking sheet and freeze until firm. Then, transfer them to a freezer bag. For cooked rings, let them cool, then store in a bag. Raw onion rings can last up to three months. Cooked ones are best eaten within one month. When you’re ready to eat, thaw them overnight in the fridge before reheating. To make onion rings crispier, use panko breadcrumbs. They give a great crunch. Make sure to preheat your air fryer to 375°F (190°C) before cooking. This helps the rings cook evenly. Also, avoid stacking the rings in the basket. Arrange them in a single layer to allow hot air to circulate. Yes, you can use sweet onions for this recipe. Sweet onions add a nice flavor. They will caramelize a bit, giving extra taste. Just slice them as you would regular onions. The cooking time will remain the same. Some great dipping sauces include ranch, BBQ, or spicy aioli. You can also try honey mustard or ketchup. These sauces add flavor and make your snack even better. Feel free to mix and match different sauces for fun! For store-bought frozen onion rings, cook them for about 8-10 minutes at 375°F (190°C). Flip them halfway through for even cooking. Check for a crispy, golden appearance to ensure they are done. Yes, you can make onion rings without eggs. Use a mixture of flour and water instead. The mixture should be thick enough to coat the onion rings. This will help the breadcrumbs stick on well. This blog post provides a simple guide to making delicious air fryer onion rings. You learned about the ingredients, preparation steps, and cooking process. You also discovered tips for texture, flavor variations, and storage information. By following these steps, you can enjoy crispy onion rings at home. Feel free to experiment with different seasonings and sauces. Enjoy your cooking journey with onion rings that will impress your friends and family!

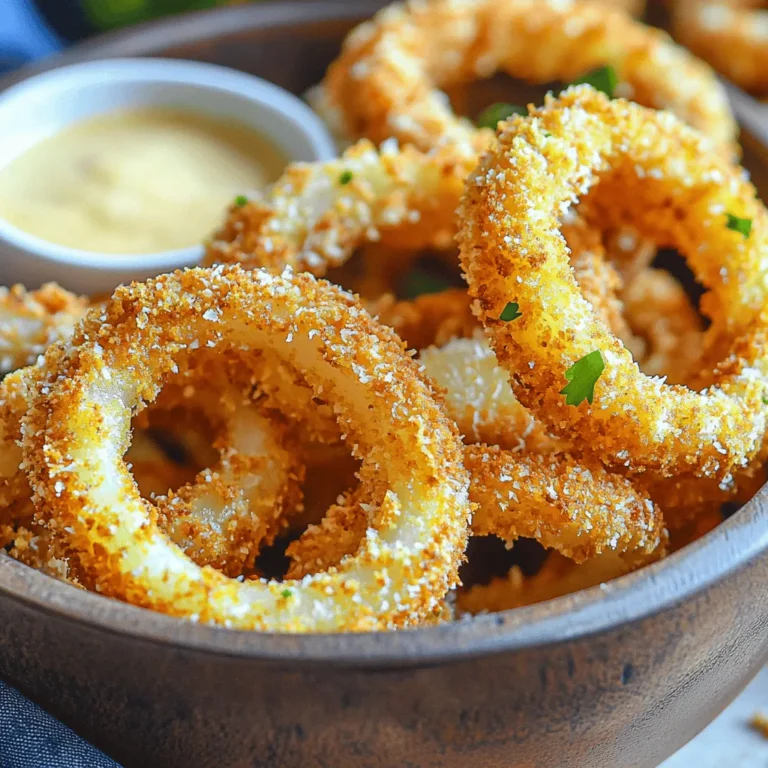
Crispy Air Fryer Onion Rings Easy and Delicious Snack

PREV 1 … 8 9 10 … 44 NEXT
yummybiterecipes

explore

DessertsDinnerAppetizersDrinks

Our Policies

  • Cookie Policy
  • Copyright Policy
  • Disclaimer
  • GDPR Policy
  • Terms Of Use
Back to Top
  • About
  • Contact Us
  • Privacy Policy
© 2025 yummybiterecipes