FREE DINNER EBOOK! Get your copy!
  • Cookie Policy
  • GDPR Policy
  • Disclaimer
  • Terms Of Use
  • Visit my other site: Fun Cookie Recipes
yummybiterecipes
  • Home
  • Dinner
  • Desserts
  • Drinks
  • Appetizers
  • Contact
  • About
  • Privacy Policy
  • Home
  • Dinner
  • Desserts
  • Drinks
  • Appetizers
  • Contact
  • About
  • Privacy Policy
  • Cookie Policy
  • GDPR Policy
  • Disclaimer
  • Terms Of Use
Visit my other site: Fun Cookie Recipes

HOME / CATEGORIES /

Latest

- 4 large apples (preferably Granny Smith or Honeycrisp), peeled, cored, and sliced thinly - 1 tablespoon fresh lemon juice - 1 cup granulated sugar - 2 teaspoons ground cinnamon - 1 teaspoon pure vanilla extract - 1 cup all-purpose flour - 1 teaspoon baking powder - 1/2 teaspoon salt - 1/2 cup unsalted butter, melted and slightly cooled - 1/2 cup whole milk - 1/2 cup brown sugar (for topping) - 1/2 teaspoon ground nutmeg (for topping) For the best flavor in your cobbler, I suggest using Granny Smith or Honeycrisp apples. Granny Smith apples bring a nice tartness, while Honeycrisp offers a sweet crunch. You can mix these two for a balanced taste. Other great options include Fuji or Braeburn, which add sweetness and depth. Remember, the key is to use fresh apples for the best texture and flavor in your homemade apple cobbler. {{ingredient_image_2}} Start by preheating your oven to 350°F (175°C). This step ensures your cobbler bakes evenly. While the oven heats, grab a 9x13 inch baking dish and grease it lightly. Use butter or cooking spray for easy cleanup. In a large bowl, mix the sliced apples with granulated sugar, ground cinnamon, lemon juice, and vanilla extract. Toss gently until each apple slice is coated. This mixture brings out the apples' natural sweetness. Once mixed, transfer the apple filling to your greased baking dish. Spread it evenly across the bottom. In another bowl, whisk together all-purpose flour, baking powder, and salt. Next, pour in the melted butter and milk. Stir until just combined. It’s okay if the batter has lumps; they add texture to the cobbler. Carefully pour the batter over the apple filling. Make sure it covers most of the apples but avoid stirring. The batter will rise during baking, creating a nice topping. In a small bowl, mix brown sugar and ground nutmeg. Sprinkle this blend over the batter for a sweet, caramelized topping. Place the baking dish in your preheated oven. Bake for 40-45 minutes. Look for a golden brown top and use a toothpick to test doneness. When it comes out clean, your cobbler is ready. Let it cool for a few minutes before serving. Enjoy warm with ice cream for an extra treat! When picking apples, I suggest using Granny Smith or Honeycrisp. These apples give a nice balance of tartness and sweetness. Look for apples that are firm and free from bruises. Ripe apples make the best cobbler. For a sweeter taste, you can mix in some Fuji or Gala apples. This mix adds depth to your dish. If your cobbler turns out too dry, it might need more liquid. You can add a bit more milk to your batter next time. If the top is too dark, try covering it with foil during baking. This will protect it from burning while the inside cooks. If your apples are too mushy, you may have baked them too long. Aim for a golden top and test the batter with a toothpick. Serve your apple cobbler warm for the best flavor. I love adding a scoop of vanilla ice cream on top. It melts slightly, creating a creamy texture. A sprinkle of cinnamon makes it look inviting. For a pop of color, add a sprig of fresh mint. This simple touch makes your dessert stand out on the table. Pro Tips Choose the Right Apples: Using a mix of Granny Smith and Honeycrisp apples provides the perfect balance of tartness and sweetness, enhancing the flavor of the cobbler. Let the Batter Rest: Allowing the batter to rest for about 10 minutes after mixing helps improve the texture, resulting in a fluffier topping. Experiment with Spices: Try adding a pinch of allspice or ginger to the apple mixture for an extra layer of warmth and complexity in flavor. Serve with a Twist: For an elevated presentation, drizzle caramel sauce over the cobbler before serving, and add a sprinkle of sea salt for a delightful contrast. {{image_4}} To make a gluten-free apple cobbler, swap all-purpose flour for gluten-free flour. Many brands work well, but check that the blend is good for baking. Use the same amount as the recipe calls for. The taste and texture remain delicious. The cobbler will still be warm and cozy. If you love oats, try an oat topping. Mix 1 cup of rolled oats with 1/2 cup of brown sugar, 1/2 cup of flour, and 1/2 cup of melted butter. Stir until crumbly. Spread this mixture over the apple filling instead of the batter. Bake as usual. You’ll enjoy a crunchy, sweet topping that complements the soft apples. Add more flavor by mixing in spices. Consider using 1/4 teaspoon of ground ginger or allspice to the apple mixture. These spices add warmth and depth. You can also toss in a handful of raisins or chopped nuts for extra texture. Enjoy the mix of spices and flavors in every bite! After making your cozy apple cobbler, let it cool for about 15 minutes. This helps the flavors settle. You can cover the dish with plastic wrap or aluminum foil. Store it in the fridge. It will stay fresh for up to three days. If you plan to eat it soon, keep it at room temperature for a few hours. Just remember to cover it to keep it from drying out. To freeze your apple cobbler, first let it cool completely. Then, cut it into slices for easy serving. Place the slices in an airtight container or a freezer-safe bag. Make sure to remove as much air as possible. This helps prevent freezer burn. Your cobbler will last in the freezer for about three months. When you're ready to enjoy it, just thaw it overnight in the fridge. Reheating your apple cobbler is simple. Preheat your oven to 350°F (175°C). Place the cobbler in an oven-safe dish. Cover it with foil to keep it moist. Heat for about 20-25 minutes or until warmed through. If you're in a rush, you can microwave a slice for about one minute. Just be careful, as it may get hot in some spots. Enjoy your delicious cobbler warm! Yes, you can use frozen apples in this recipe. Thaw them first. Drain any extra liquid. This helps keep your cobbler from being too soggy. Frozen apples may cook faster, so check for doneness early. Apple crisp has a crunchy topping made from oats and flour. It usually lacks a batter. On the other hand, apple cobbler has a softer, cake-like batter that covers the apples. Cobblers are thicker and fluffier than crisps. Homemade apple cobbler lasts about three days at room temperature. If stored in the fridge, it can last up to a week. Make sure to cover it tightly. You can also freeze it for up to three months. Just thaw it overnight before reheating. In this blog post, I covered how to make a delicious apple cobbler. We looked at fresh ingredients, pantry items, and the best apple varieties. I shared step-by-step instructions from prep to baking. You also got tips for choosing apples and fixing common problems. Variations like gluten-free options and oat toppings were included, along with storage and reheating advice. Now you’re ready to enjoy this warm dessert anytime. Happy baking!

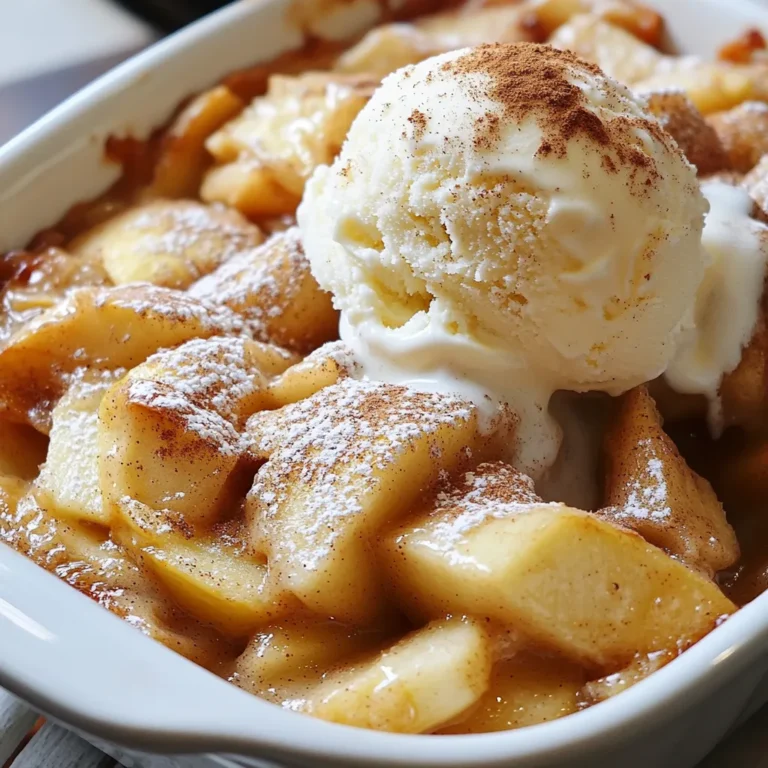
Homemade Apple Cobbler Tasty and Easy Dessert Recipe

- 1 cup rolled oats - 1 cup milk (dairy or plant-based) - 1/2 cup mashed ripe bananas (about 1 large banana) - 1/3 cup honey or maple syrup - 1/4 cup vegetable oil (or melted coconut oil) - 1 large egg - 1 teaspoon vanilla extract - 1 cup all-purpose flour - 1 teaspoon baking powder - 1/2 teaspoon baking soda - 1/2 teaspoon ground cinnamon - 1/4 teaspoon salt - 1/2 cup chocolate chips (semi-sweet or dark) - 1/4 cup chopped nuts (optional, walnuts or pecans) You can boost the flavor with a few extras. Think about adding: - 1/2 cup dried fruit, like raisins or cranberries - 1/4 cup shredded coconut for a tropical twist - 1 teaspoon almond extract for a nutty note Each muffin offers a tasty and balanced start to your day. Here’s a quick breakdown: - Calories: ~150 - Protein: 3g - Carbohydrates: 25g - Dietary Fiber: 2g - Sugars: 6g - Fat: 5g - Saturated Fat: 1g These muffins are a great mix of wholesome oats and sweet chocolate. Enjoy the goodness with every bite! {{ingredient_image_2}} First, preheat your oven to 350°F (175°C). This step is key for even baking. While the oven warms up, grab your muffin tin. Lightly grease it or line it with paper muffin liners. This makes it easy to remove the muffins later. Next, take a medium bowl and combine 1 cup of rolled oats with 1 cup of milk. Let the oats soak for about 10 minutes. Soaking helps the oats soften and mix well with the other ingredients. In a large bowl, whisk together 1/2 cup of mashed ripe bananas, 1/3 cup of honey or maple syrup, 1/4 cup of vegetable oil, 1 large egg, and 1 teaspoon of vanilla extract. Mix until the mixture is smooth. This blend gives the muffins a sweet and rich flavor. Now, grab another bowl and sift together 1 cup of all-purpose flour, 1 teaspoon of baking powder, 1/2 teaspoon of baking soda, 1/2 teaspoon of ground cinnamon, and 1/4 teaspoon of salt. Mix these dry ingredients well. This ensures the leavening agents and spices are evenly distributed. Add the soaked oats mixture to the banana mixture. Gently stir to combine. Then, gradually fold in the dry ingredients. Mix until just combined. Avoid overmixing to keep your muffins light and fluffy. Now it’s time for the fun part! Carefully fold in 1/2 cup of chocolate chips and 1/4 cup of chopped nuts if you're using them. Be gentle to keep the batter fluffy. Using a spoon or ice cream scoop, fill each muffin cup about two-thirds full with batter. This gives them room to rise. Place the muffin tin in the oven and bake for 18-20 minutes. Check if they are done by inserting a toothpick in the center; it should come out clean. Once baked, let the muffins cool in the pan for about 5 minutes. Then, transfer them to a wire rack to cool completely. This step helps keep their texture nice and fluffy. Enjoy your muffins warm or at room temperature! To make your muffins fluffy, start by soaking the oats in milk. This softens the oats and helps them blend well. Avoid overmixing the batter when you combine wet and dry ingredients. Mixing too much can make the muffins dense. Instead, gently fold until just combined, allowing air to stay in the batter. When mixing wet ingredients, ensure everything is well-combined. Use a whisk to break up any banana lumps. For dry ingredients, sift them together. This step helps spread the baking powder and spices evenly. Remember, mixing should be gentle when you combine the two mixtures. A few lumps are okay, but no dry flour should remain. For a lovely presentation, sprinkle extra chocolate chips on top before baking. This makes them look more inviting. Serve the muffins warm for the best taste. A drizzle of honey on top adds a sweet touch. You can also pair them with fresh fruit or yogurt for a balanced breakfast. One common mistake is using cold milk. Room temperature milk helps the batter mix better. Another mistake is not checking the oven temperature. An oven thermometer ensures your muffins bake correctly. Lastly, don’t skip the cooling step. Letting muffins cool helps improve their texture and taste. Pro Tips Use Fresh Bananas: Make sure your bananas are ripe, as they provide natural sweetness and moisture to the muffins. The browner, the better! Experiment with Flours: Try substituting some all-purpose flour with whole wheat or almond flour for added nutrition and a different flavor profile. Customize Your Mix-Ins: Feel free to get creative! Add dried fruits like cranberries or apricots, or swap the chocolate chips for butterscotch or peanut butter chips. Storage Tips: Store the muffins in an airtight container at room temperature for up to 3 days, or freeze them for longer freshness—just reheat as needed! {{image_4}} You can make these muffins gluten-free. Use gluten-free all-purpose flour instead of regular flour. Many brands offer a good mix that works well in baking. Ensure your oats are certified gluten-free, as some may be processed with gluten. This keeps your muffins safe and tasty for everyone. To make these muffins vegan, swap the egg for a flax egg. Simply mix one tablespoon of ground flaxseed with three tablespoons of water and let it sit for five minutes. You can also replace the honey with maple syrup or agave nectar. Use plant-based milk like almond or soy instead of dairy. This way, you keep the flavor and stay true to a vegan diet. You can add many flavors to these muffins. Try mixing in a teaspoon of vanilla or almond extract for extra taste. You can also throw in spices like nutmeg or cardamom to bring warmth. Want some fruit? Add about half a cup of blueberries or diced apples. These fruits add moisture and a burst of flavor. Don't be afraid to get creative! To keep your oatmeal chocolate chip muffins fresh, store them in an airtight container. This helps prevent them from drying out. Place the muffins in the container once they cool completely. If you have leftover muffins, store them at room temperature for up to three days. For longer freshness, consider refrigerating them. You can freeze these muffins for later enjoyment. Wrap each muffin tightly in plastic wrap. Place the wrapped muffins in a freezer-safe bag or container. They can stay fresh for up to three months in the freezer. When you're ready to eat, thaw them in the fridge overnight. For a warm treat, reheat in the microwave for about 20-30 seconds. The best containers for muffin storage are glass or plastic airtight containers. These options keep moisture in and air out. You can also use a muffin tin with a lid for short-term storage. Avoid using paper bags, as they allow air in and can dry out your muffins. Yes, you can use quick oats. They will make your muffins softer. Quick oats absorb liquid faster than rolled oats. This can change the texture a bit. If you prefer a chewier muffin, stick with rolled oats. You can replace honey with maple syrup. Maple syrup adds a nice flavor. You can also use agave nectar or brown sugar. If you use brown sugar, mix it with a bit of water to keep the batter moist. For a vegan option, use flaxseed meal. Mix 1 tablespoon of flaxseed meal with 2.5 tablespoons of water. Let it sit for a few minutes to thicken. This mixture works well as a binding agent in the muffins. These muffins stay fresh for about 3 days at room temperature. Store them in an airtight container. For longer storage, keep them in the fridge for up to a week. You can also freeze them for up to 3 months. Absolutely! Dried fruit adds nice sweetness. Try raisins, cranberries, or chopped dates. Seeds like chia or sunflower can add crunch and nutrition. Just be careful not to add too many mix-ins. This can affect the batter's texture. You learned how to make delicious muffins from scratch. We discussed key ingredients and optional choices for flavor. I shared steps from soaking oats to baking. You now have tips for fluffy muffins and how to avoid mistakes. Explore variations like gluten-free and vegan recipes. Remember storage tips for freshness. Enjoy your baking journey, and share these muffins with friends and family! They'll love your tasty treats.

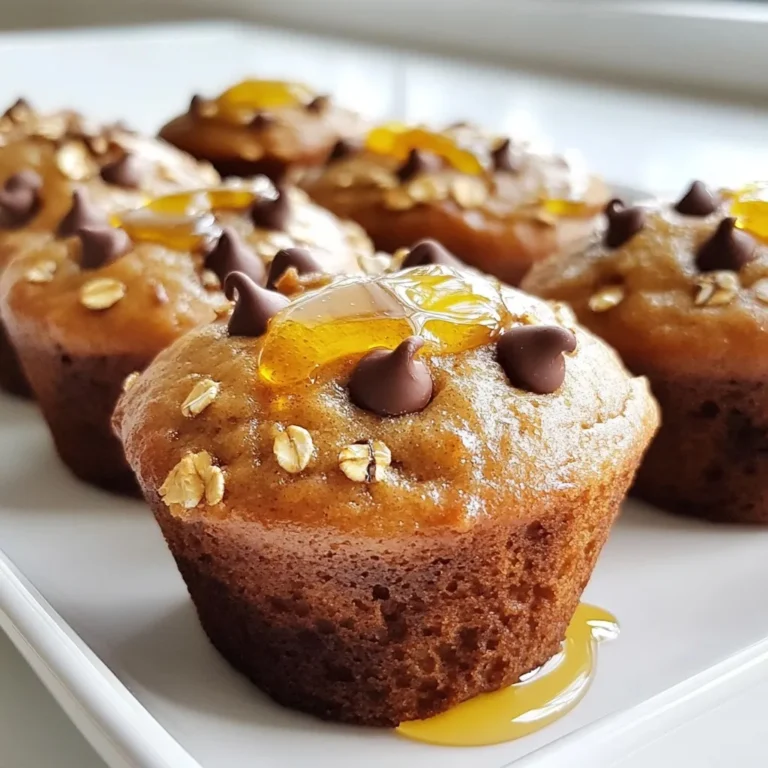
Oatmeal Chocolate Chip Morning Muffins Simple Recipe

To make S’mores cookie bars, gather these items: - 1 cup unsalted butter, softened - 1 cup packed brown sugar - ½ cup granulated sugar - 2 large eggs, at room temperature - 1 teaspoon pure vanilla extract - 2 ¼ cups all-purpose flour - 1 teaspoon baking soda - ½ teaspoon salt - 1 cup semisweet chocolate chips - 1 cup mini marshmallows - 1 cup graham cracker crumbs These ingredients create a rich, gooey treat that will impress everyone. You can swap some ingredients based on your needs: - Use coconut oil instead of butter for a dairy-free option. - Swap brown sugar for coconut sugar for a lighter flavor. - Use egg substitutes like applesauce or flaxseed meal for a vegan version. - If you want a different taste, try white chocolate chips instead of semisweet. These substitutions keep the essence of S’mores alive while catering to different diets. To prepare these cookie bars, you will need: - A 9x13 inch baking pan - Parchment paper (optional, for easy removal) - Large mixing bowl - Electric mixer or whisk - Measuring cups and spoons - Rubber spatula - Wire rack for cooling Having the right tools makes the process smooth and enjoyable, ensuring delicious results. {{ingredient_image_2}} First, you need to preheat your oven to 350°F (175°C). This step warms the oven for even baking. Next, grab a 9x13 inch baking pan. You can grease it or line it with parchment paper. Lining helps with easy removal later. In a large bowl, add 1 cup of softened unsalted butter. Next, add 1 cup of packed brown sugar and ½ cup of granulated sugar. Use an electric mixer to blend them together. Aim for a light and fluffy mix. This should take about 2-3 minutes. Now, it’s time to add the eggs. Include 2 large eggs, one at a time. Mix well after each addition. Then, pour in 1 teaspoon of pure vanilla extract. Make sure it is combined well with the butter and sugar mixture. In another bowl, whisk together the dry ingredients. You will need 2 ¼ cups of all-purpose flour, 1 teaspoon of baking soda, and ½ teaspoon of salt. Mix these until they are well combined. Gradually add this dry mix to the wet ingredients. Stir until there are no visible flour streaks left. Gently fold in 1 cup of semisweet chocolate chips and 1 cup of graham cracker crumbs. Make sure they are evenly distributed in the dough. Now, pour half of the cookie dough into your baking pan. Press it down evenly to create a base layer. Next, sprinkle 1 cup of mini marshmallows over the first layer. After that, add the remaining cookie dough on top. Spread it gently to cover the marshmallows. Place the pan in the preheated oven. Bake for 25-30 minutes. You want the edges to be golden brown. A toothpick inserted in the center should come out with a few moist crumbs. Once baked, let the bars cool in the pan for at least 15 minutes. Then, transfer them to a wire rack to cool completely. Finally, cut into squares and serve! To get the best texture in your S’mores cookie bars, use softened butter. This helps create a light and fluffy dough. Make sure your eggs are at room temperature. This also helps the dough mix well. When you add the dry ingredients, mix just until no flour streaks remain. Overmixing can lead to tough bars. For a richer taste, consider adding a touch of sea salt on top before baking. This will enhance the chocolate flavor. You can also use different types of chocolate chips, like dark or milk chocolate. This will create new flavor profiles. For a fun twist, try adding a bit of peanut butter to the dough. It pairs nicely with the chocolate and marshmallows. If your bars are too dry, check your measurements. Too much flour can lead to dry bars. If they come out too gooey, they might need more baking time. Keep an eye on them in the oven. If the edges brown too fast, cover the pan with foil. This will help the center bake without overcooking the outside. Pro Tips Chill the Dough: For a thicker cookie bar, chill the dough in the refrigerator for 30 minutes before baking. This helps prevent spreading and enhances the texture. Use Fresh Ingredients: Ensure your baking soda and chocolate chips are fresh for the best flavor and texture. Stale ingredients can affect the outcome of your cookie bars. Don’t Overbake: Keep an eye on the baking time and remove the bars when the edges are golden brown. Overbaking can lead to dry cookie bars. Customize Toppings: Feel free to add other mix-ins like peanut butter chips, nuts, or even a sprinkle of sea salt on top for an extra flavor boost! {{image_4}} To make gluten-free S’mores cookie bars, swap out the all-purpose flour. Use a gluten-free flour blend instead. Many blends work great in baking. Look for one that includes xanthan gum. This will help with texture. Your bars will still be soft and delicious. Ensure all other ingredients are gluten-free too. You can switch the chocolate chips for different types. Try dark chocolate chips for a richer taste. Milk chocolate gives a sweeter flavor. White chocolate can add a fun twist. You can even mix them together. Each type brings its own unique flavor to the bars. Feel free to get creative with add-ins! You can add nuts like walnuts or pecans for crunch. Try using peanut butter chips for a nutty flavor. You might even mix in some toffee bits for extra sweetness. Just remember to keep the balance of flavors in mind. Adding these options can make your bars even more special. To keep your S’mores Cookie Bars fresh, store them in an airtight container. Place a piece of parchment paper between layers to avoid sticking. They stay best at room temperature for up to five days. If you want them to last longer, consider refrigeration. These cookie bars freeze well! First, let them cool completely. Then, wrap them tightly in plastic wrap. Place them in a freezer-safe bag or container. They can stay frozen for up to three months. When ready to enjoy, just thaw them in the fridge overnight. To reheat S’mores Cookie Bars, use an oven set to 350°F (175°C). Place the bars on a baking sheet and warm them for about 10 minutes. You can also microwave individual squares for 15-20 seconds. This brings back the gooey goodness of the marshmallows! S’mores cookie bars last about 5 to 7 days when stored correctly. Keep them in an airtight container at room temperature. This keeps them soft and chewy. If you want to keep them longer, you can freeze them for up to three months. Just wrap them well in plastic wrap and place them in a freezer-safe bag. Yes, you can make these bars ahead of time. They are perfect for meal prep or gatherings. Bake and cool the bars, then store them in an airtight container. You can also freeze the dough before baking. Just thaw it in the fridge overnight before baking. If you don’t have marshmallows, try using marshmallow fluff. You can also use chocolate-covered marshmallows for a twist. For a different texture, mini meringues can work as a fun alternative. They won’t melt like marshmallows but will still add a nice crunch. Absolutely! Adding nuts can give these bars a nice crunch. Chopped walnuts or pecans pair well with the chocolate and graham crackers. Just fold them in with the chocolate chips and graham cracker crumbs. Aim for about ½ cup of nuts for a great balance. This article covered all you need for S’mores cookie bars. We looked at ingredients, step-by-step instructions, and tips for the best results. You can substitute items based on what you have at home. Remember to store, freeze, or reheat your bars correctly. With the right tools and a few tricks, you can make these treats perfectly every time. Enjoy experimenting with the variations and don’t hesitate to try something new! Happy baking!

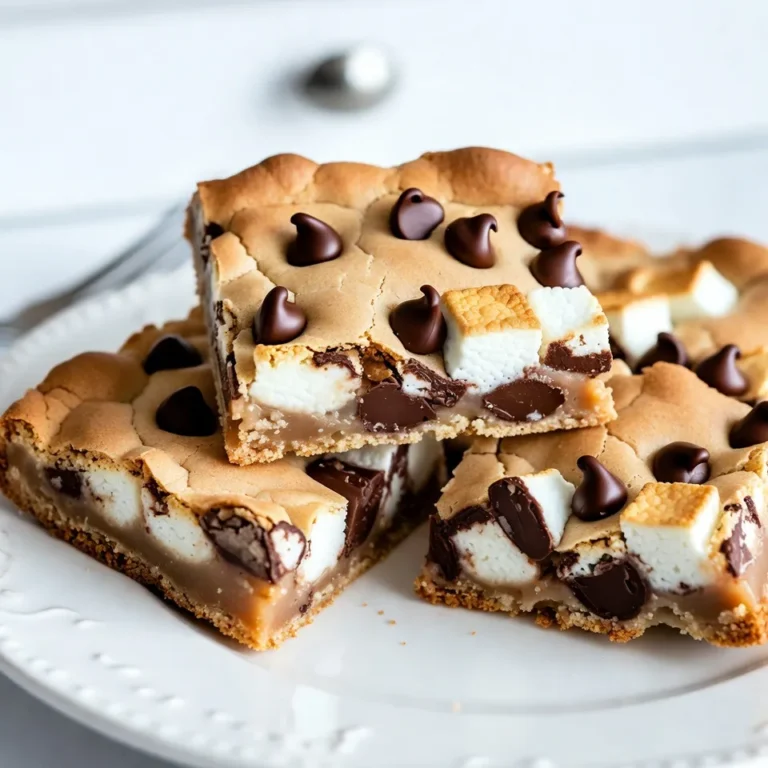
S’mores Cookie Bars Irresistible and Easy Recipe

- 2 cups all-purpose flour - 1/2 cup granulated sugar - 2 teaspoons baking powder - 1/2 teaspoon baking soda - 1/2 teaspoon salt - 6 tablespoons cold unsalted butter - 1 cup fresh blueberries - Zest of 1 large lemon - 1/4 cup heavy cream - 1 large egg - 1 tablespoon freshly squeezed lemon juice To make my Lemon Blueberry Scones, I use simple, fresh ingredients. Each one plays an important role in creating the perfect flavor and texture. First, I choose all-purpose flour. It gives scones their soft structure. The granulated sugar adds a hint of sweetness. I use baking powder and baking soda to help the scones rise. Salt balances the flavors and brings everything together. Next, I add cold unsalted butter. Chilled butter creates flaky layers in the scones. This is key for that light texture. Then, I fold in fresh blueberries. They burst with flavor and make each bite delicious. Zest from a lemon adds a bright note that lifts the scones. For the wet ingredients, I mix heavy cream, a large egg, and freshly squeezed lemon juice. These keep the scones moist and add richness. With the right ingredients, you can create scones that are fresh and tasty. Each element works together to make a delightful treat. {{ingredient_image_2}} - Preheat the oven to 400°F (200°C). - Line a baking sheet with parchment paper. - Whisk together flour, sugar, baking powder, baking soda, and salt. - Add cubed butter. - Rub it into the flour mixture until it looks like coarse crumbs. - Fold in lemon zest and blueberries. Be gentle to keep the berries whole. - Whisk together heavy cream, egg, and lemon juice until smooth. - Pour the wet mix into the dry. - Stir gently until just mixed. The dough should be sticky. - Transfer the dough to a floured surface. - Pat it into a circle about 1 inch thick. - Cut into wedges or use a cutter for rounds. - Place on the baking sheet, about 1 inch apart. - Bake for 15-20 minutes until golden brown. - Check with a toothpick; it should come out clean. To get the best scones, avoid overmixing the dough. Overmixing makes scones tough. You want a light, tender texture. Instead, mix just until the dough comes together. Using cold ingredients is key for flakiness. Cold butter helps create layers in the scone. It keeps the dough light and airy. Make sure your butter is firm and cold when you mix it in. Serve your scones warm for the best taste. A drizzle of lemon glaze adds a sweet touch. You can make the glaze by mixing powdered sugar with lemon juice. Fresh blueberries on the side enhance the flavor. They also look great on the plate. Many people overwork the dough. This can lead to dry scones. Remember to mix gently! Another mistake is baking too long. Keep an eye on them, so they stay golden brown. A toothpick test helps; it should come out clean when done. Pro Tips Use Cold Ingredients: Ensure your butter and cream are cold to achieve flaky scones. This helps create steam during baking, resulting in a light texture. Don’t Overmix: When combining wet and dry ingredients, mix just until combined. Overmixing can lead to tough scones. Chill the Dough: For even better results, chill the shaped scones in the refrigerator for about 15 minutes before baking. This helps them maintain their shape and enhances the texture. Experiment with Flavors: Feel free to add other mix-ins like chopped nuts or different fruits to customize your scones. Just remember to adjust the moisture content accordingly. {{image_4}} You can make your scones even more delightful. Try adding poppy seeds for a nice crunch. They bring a unique texture that pairs well with the soft scone. You can also swap blueberries for other berries. Raspberries or blackberries will work great too. Each berry adds its own twist to the flavor. If you want gluten-free scones, use almond or coconut flour. These flours will keep the scones light and fluffy. For a vegan option, use plant-based butter instead of regular butter. You can also replace the heavy cream with your favorite alternative milk. Both of these changes keep the scones tasty while meeting dietary needs. Store your scones in an airtight container at room temperature. This keeps them fresh and soft. They are best enjoyed within a few days. If you want to keep them longer, freezing is a great option. You can freeze unbaked dough for later use. Shape the dough into wedges or rounds, then wrap them tightly in plastic wrap. Place them in a freezer bag. When you’re ready to bake, just pop them in the oven without thawing. This way, you can enjoy fresh scones anytime! To warm your scones, use either the oven or microwave. For the oven, set it to 350°F (175°C) and heat for about 10 minutes. For the microwave, heat each scone for about 15-20 seconds. This helps restore their fluffy texture and makes them taste fresh. Enjoy them warm with a bit of butter or lemon glaze! Yes, frozen blueberries can be used without thawing. They bake well and keep the scones moist. Just remember not to crush them too much when mixing. You can reduce the amount of sugar in the recipe. Start by cutting the sugar by a quarter. This keeps the lemon and blueberry flavors bright. Scones are best served warm with lemon glaze or on their own. A drizzle of glaze adds a sweet touch. You can also enjoy them with butter or jam. Your scones are done when the tops are golden brown and a toothpick comes out clean. Keep an eye on them, as baking times can vary slightly. Yes, you can increase lemon zest or juice slightly. This will give your scones a brighter, fresher lemon taste. Just be sure not to add too much liquid. In this blog post, we explored how to make delicious blueberry scones. We outlined the key ingredients, step-by-step instructions, tips, and variations. Remember to use cold ingredients and avoid overmixing for the best texture. You can also freeze the dough for later use. Enjoy experimenting with flavors and serving suggestions. Making scones can be simple and fun. With practice, you'll master this tasty treat and impress your friends and family.

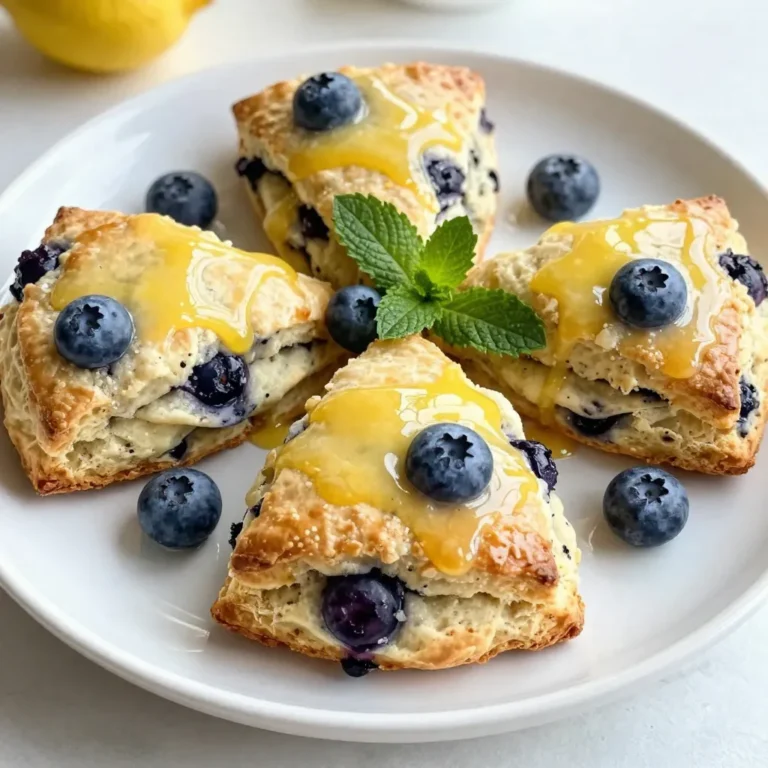
Lemon Blueberry Scones Fresh and Tasty Delight

To make a tasty Cinnamon Roll French Toast Bake, you need the right ingredients. Here’s what you will need: - 2 cans (8 oz each) refrigerated cinnamon rolls - 6 large eggs - 1 cup whole milk - 1/2 cup heavy cream - 1 teaspoon pure vanilla extract - 1 teaspoon ground cinnamon - 1/4 teaspoon freshly grated nutmeg - 1/3 cup pure maple syrup - 1/2 cup chopped pecans (optional) - Powdered sugar for a finishing touch Each ingredient plays a key role. The cinnamon rolls bring sweetness and flavor. Eggs, milk, and cream create a rich custard base. Vanilla and spices add warmth and depth. You can boost flavor with a few fun add-ins. Here are some ideas: - Fresh berries: Blueberries or strawberries add a fruity kick. - Chocolate chips: For a sweet surprise in every bite. - Bananas: Add slices for a tropical twist. - Almond extract: A splash can enhance the flavor profile. Feel free to mix and match these options. They can make your bake even more special. If you need to swap some ingredients, here are a few good options: - Milk: Use almond milk or oat milk for a dairy-free version. - Heavy cream: Replace with coconut cream for a lighter option. - Maple syrup: Honey or agave syrup works well too. - Pecans: Substitute walnuts or skip them entirely if you prefer. These swaps can help fit your dietary needs or preferences. Enjoy creating your own version of this tasty dish! {{ingredient_image_2}} First, preheat your oven to 350°F (175°C). This step is key for even baking. Next, grease a 9x13-inch baking dish using butter or non-stick spray. This prevents sticking and helps with cleanup. Now, open the two cans of cinnamon rolls. Carefully separate each roll and cut them into quarters. Arrange the pieces evenly in the dish, spreading them out well. In a large bowl, crack six eggs. Add one cup of whole milk and half a cup of heavy cream. Pour in one teaspoon of pure vanilla extract, one teaspoon of ground cinnamon, and a dash of nutmeg (1/4 teaspoon). Whisk everything together until it’s frothy and smooth. This mixture will soak into the cinnamon roll pieces. Now, pour the egg mixture over the cinnamon roll pieces. Make sure each piece gets a nice coating. Drizzle one-third cup of pure maple syrup on top. If you like, sprinkle half a cup of chopped pecans for extra texture. With a fork, gently press down on the rolls to help them soak up the custard. Let this sit for about 10 minutes. Place your baking dish into the preheated oven. Bake for 25-30 minutes. You will know it’s done when the top is golden brown and a knife comes out clean. The baking time may vary, so keep an eye on it. Once baked, take the dish out and let it cool for about 5 minutes. This helps the bake set up nicely. For a tasty finish, drizzle the icing from the cinnamon rolls over the top. A light dusting of powdered sugar adds a nice touch, too. Serve warm, either straight from the dish or cut into squares. Garnish with fresh berries or a dollop of whipped cream for extra flair! To make your cinnamon roll French toast bake perfect, follow these tips: - Use fresh cinnamon rolls for the best flavor. - Cut each roll into equal pieces to ensure even baking. - Soak the rolls in the egg mixture for at least 10 minutes. This helps them absorb the custard well. - Keep an eye on the bake time. You want a golden brown top. To take your bake to the next level, consider these ideas: - Add extra spices like cardamom for a warm flavor. - Mix in some vanilla bean paste for richer taste. - Try adding fruit like apples or berries for freshness. - Top with whipped cream or yogurt for a creamy finish. Avoid these common errors to ensure a great bake: - Don’t skip greasing the baking dish; it helps prevent sticking. - Avoid overcrowding the dish; give the rolls space to rise. - Don’t rush the soaking time; it’s key for flavor and texture. - Be careful not to overbake. A knife inserted should come out clean but not dry. Pro Tips Use Day-Old Cinnamon Rolls: For the best texture, use day-old cinnamon rolls. They will absorb the custard mixture better than fresh ones, resulting in a deliciously custardy bake. Experiment with Flavors: Feel free to customize the recipe by adding chocolate chips, dried fruit, or your favorite spices to the egg mixture for a unique twist. Let It Soak: Allow the assembled cinnamon roll mixture to sit for at least 10 minutes before baking. This helps the flavors meld and ensures a moist final dish. Serve with Fresh Toppings: Enhance your presentation by serving with fresh berries, whipped cream, or a drizzle of caramel sauce for an extra touch of indulgence. {{image_4}} You can change up this recipe with seasonal ingredients. In fall, add pumpkin puree and spice to the egg mix. It gives a cozy vibe. In spring, fresh berries blend well. You can fold in strawberries or blueberries for a fruity twist. For summer, ripe peaches or cherries add sweetness. Each season brings fresh flavors to the table. The best part of this bake is the toppings. You can drizzle it with chocolate sauce for a rich touch. A berry compote adds a fruity flair. You might enjoy a simple maple syrup or honey drizzle too. For something lighter, use yogurt or whipped cream. Add nuts or coconut flakes for extra crunch. The options are endless! If you need gluten-free, you can use gluten-free cinnamon rolls. Check the package to ensure they taste great. For dairy-free, swap the milk and cream for almond or oat milk. You can use coconut cream for richness too. These swaps keep the dish delicious while fitting your diet. Enjoy this treat no matter your needs! After you enjoy your Cinnamon Roll French Toast Bake, store any leftovers. Place them in an airtight container. This keeps the dish fresh for about three days in the fridge. If you want to keep it longer, consider freezing it instead. To reheat, use your oven or microwave. If using the oven, preheat it to 350°F (175°C). Place the leftovers in an oven-safe dish. Cover it with foil to keep it moist. Heat for about 15-20 minutes or until warm. If using a microwave, heat individual pieces for about 30 seconds to 1 minute. Check if it’s hot before serving. Freezing is a great option for this dish. Cut the baked French toast into squares before freezing. Wrap each piece in plastic wrap, then place them in a freezer bag. Label the bag with the date. It can last up to three months in the freezer. When you’re ready to enjoy, simply thaw overnight in the fridge and reheat as mentioned above. Yes, you can make this recipe ahead of time. Prepare the dish the night before. Follow all the steps until you pour the egg mixture over the cinnamon rolls. Cover it tightly and place it in the fridge. In the morning, bake it straight from the fridge. You may need to add a few extra minutes to the bake time. This makes breakfast easy and fun! To adjust the sweetness, you can change the maple syrup amount. If you like it less sweet, use less syrup. You can also skip the icing for a less sugary treat. For a sweeter taste, add more syrup or sprinkle in brown sugar. You can always taste the egg mixture before pouring it over the rolls. This gives you a chance to tweak it to your liking. This dish pairs well with fresh fruits. Think berries, bananas, or even apple slices. You might also serve it with whipped cream or yogurt for creaminess. A side of crispy bacon or sausage adds a nice salty contrast. If you want a drink, try coffee or a fruity smoothie. These options make your meal more fun and tasty! You now have a full guide on making Cinnamon Roll French Toast Bake. We covered key ingredients, step-by-step instructions, and helpful tips. You learned about variations to keep things fresh and how to store leftovers. In summary, this dish is easy to make and perfect for any meal. Enjoy playing with flavors and swap ingredients as you like. With practice, you’ll impress everyone at the table. Happy baking!

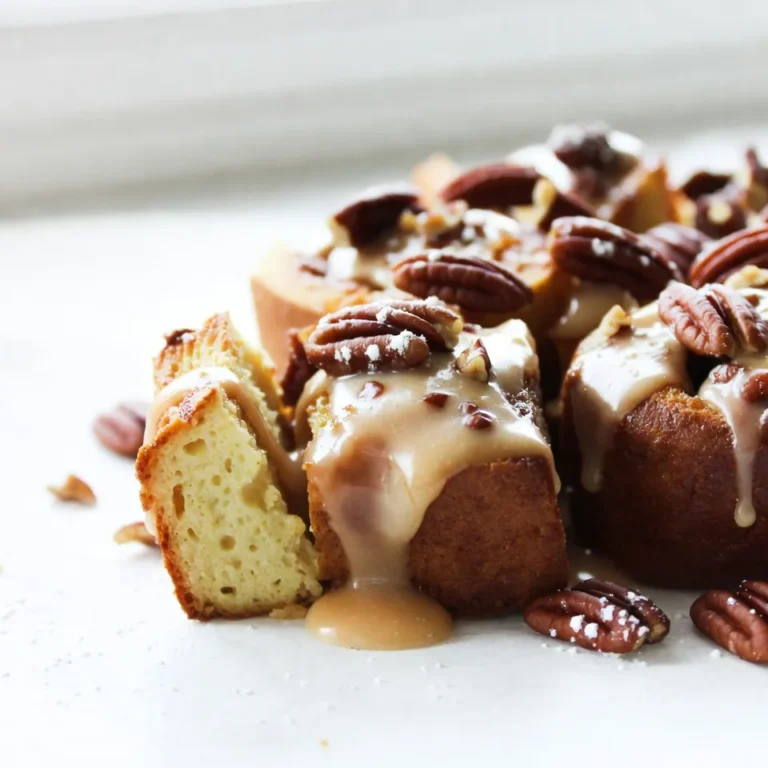
Cinnamon Roll French Toast Bake Fluffy and Delicious

To make creamy mushroom orzo, you will need these simple items: - 1 cup orzo pasta - 2 tablespoons olive oil - 1 medium onion, finely chopped - 3 cloves garlic, minced - 8 ounces mushrooms (cremini or button), sliced - 4 cups vegetable broth - 1 cup heavy cream (or choice of non-dairy alternative) - 1/2 cup grated Parmesan cheese (or nutritional yeast for a vegan option) - 1 teaspoon dried thyme - Salt and freshly cracked pepper, to taste - Fresh parsley, chopped, for garnish You can switch out ingredients for your taste or needs. Here are some easy swaps: - Orzo pasta: Use quinoa or rice for gluten-free options. - Olive oil: Canola or avocado oil works well too. - Heavy cream: Try coconut cream or cashew cream for dairy-free. - Parmesan cheese: Nutritional yeast adds a nice cheesy flavor for vegan dishes. - Thyme: Fresh herbs like rosemary or parsley can change the flavor a bit. Garnishes can make your dish pop. Here are a few ideas to consider: - Freshly chopped parsley adds color and brightness. - A drizzle of extra olive oil gives richness. - Extra Parmesan cheese or nutritional yeast enhances flavor. - Crushed red pepper flakes can add a little heat. {{ingredient_image_2}} Start by gathering all your ingredients. This makes cooking smooth and fun. Measure out 1 cup of orzo pasta. Chop 1 medium onion finely and mince 3 cloves of garlic. Slice 8 ounces of mushrooms. You can use cremini or button mushrooms. Have 4 cups of vegetable broth ready. Measure 1 cup of heavy cream or a non-dairy choice. Grate 1/2 cup of Parmesan cheese or use nutritional yeast for a vegan dish. Lastly, chop fresh parsley for garnish. 1. Heat 2 tablespoons of olive oil in a large skillet over medium heat. 2. Add the chopped onion and cook for about 5 minutes. You want it soft and clear. 3. Next, add the minced garlic and sliced mushrooms. Sauté for 7-8 minutes. The mushrooms should be tender and their moisture gone. 4. Stir in the orzo pasta, making sure it mixes well with the onion and mushroom. 5. Gradually pour in the vegetable broth, stirring all the time. Bring it to a gentle simmer. 6. Let it cook for 10-12 minutes. The orzo should be al dente and most of the broth absorbed. 7. Reduce heat and stir in the heavy cream, grated Parmesan, and dried thyme. Add salt and pepper to taste. 8. Cook for another 2-3 minutes until creamy. 9. Remove from heat and let it sit for a few minutes. This helps thicken the dish. To get that creamy feel, use heavy cream. If you want a lighter option, choose a non-dairy milk. Stirring well while adding the cream helps blend it smoothly. Adjust the heat low when adding cream. This prevents it from boiling and keeps it rich. If it seems too thick, add more vegetable broth. Finally, let it sit after cooking. This makes it even creamier. Enjoy your delicious meal! One common mistake is overcooking the orzo. Keep an eye on the pasta. It should be firm, not mushy. Another mistake is not letting the mushrooms brown. Browning adds nice flavor, so let them cook until they are golden. Lastly, don’t skip seasoning. A little salt and pepper makes a big difference in taste. To boost flavor, try adding fresh herbs like basil or chives. You can also mix in a splash of white wine before adding broth. This step adds depth and a touch of acidity. For a richer taste, use homemade vegetable broth instead of store-bought. Lastly, finish with a drizzle of truffle oil for an upscale flavor. For this recipe, use a large skillet. A non-stick skillet can help prevent sticking. A wooden spoon is great for stirring. If you have it, a microplane is perfect for grating cheese. A measuring cup will help you with precise broth and cream amounts. Lastly, keep a sharp knife handy for chopping onions and mushrooms. Pro Tips Use Fresh Ingredients: For the best flavor, opt for fresh mushrooms and herbs. Fresh ingredients can elevate the taste of your dish significantly. Customize Your Creaminess: Adjust the amount of heavy cream or dairy alternative to achieve your desired level of creaminess. You can also add a splash of pasta cooking water for extra richness. Experiment with Add-ins: Feel free to incorporate other vegetables like spinach or peas, or proteins like grilled chicken or shrimp for a heartier meal. Let It Rest: Allow the dish to sit for a few minutes after cooking. This helps thicken the sauce and enhances the overall flavor as it settles. {{image_4}} You can easily make this dish vegan. Swap the heavy cream for a non-dairy option like coconut milk or cashew cream. Instead of Parmesan cheese, use nutritional yeast for a cheesy flavor. This keeps your dish creamy and rich while being dairy-free. Want to change the flavor? Add fresh herbs like basil, dill, or parsley. They bring brightness to your meal. You can also toss in vegetables such as spinach, peas, or bell peppers. These add color and nutrition. Just add them when you stir in the orzo. For a heartier meal, consider adding protein. Cooked chicken or shrimp works great in this dish. You can add them after the mushrooms have cooked. Mix them in just before you add the cream. This adds extra flavor and makes your meal filling. To store leftover creamy mushroom orzo, first cool it down. Place the orzo in an airtight container. Make sure to seal it tightly. Store it in the fridge for up to three days. This keeps the flavors fresh and tasty. When you’re ready to eat, reheat the orzo on the stove. Add a splash of vegetable broth or cream to keep it creamy. Stir gently over medium heat. You can also use a microwave. Heat it in short bursts to avoid drying it out. Check for warmth before serving. If you want to freeze the orzo, use a freezer-safe container. Leave some space at the top for expansion. It can last for up to two months in the freezer. To thaw, move it to the fridge overnight. Reheat it gently when you’re ready to enjoy again. Orzo is a small, rice-shaped pasta. It cooks quickly and has a nice chewy texture. You can use it in salads, soups, or as a side dish. In this recipe, orzo absorbs the flavors of the creamy sauce and mushrooms. It makes the dish filling and delicious. Yes! You can use various mushrooms in this dish. Cremini and button mushrooms work well. You might try shiitake or portobello for a deeper flavor. Each type adds its own taste. Mixing mushrooms can also enhance the dish. Feel free to experiment with what you have on hand. To make creamy mushroom orzo gluten-free, swap the orzo for gluten-free pasta. Many brands offer rice-shaped gluten-free options. Just be sure to check the label to ensure it’s gluten-free. The rest of the recipe stays the same. You can still enjoy the creamy goodness without gluten. This article covered all you need to know about making a tasty dish with orzo pasta. We went over the key ingredients and how to make it creamy. I shared important tips to avoid common mistakes and thoughts on flavoring it just right. You learned about delicious variations, storage, and reheating instructions. Cooking can be simple and fun. With these tips, you are ready to impress! Get creative and enjoy your cooking journey.

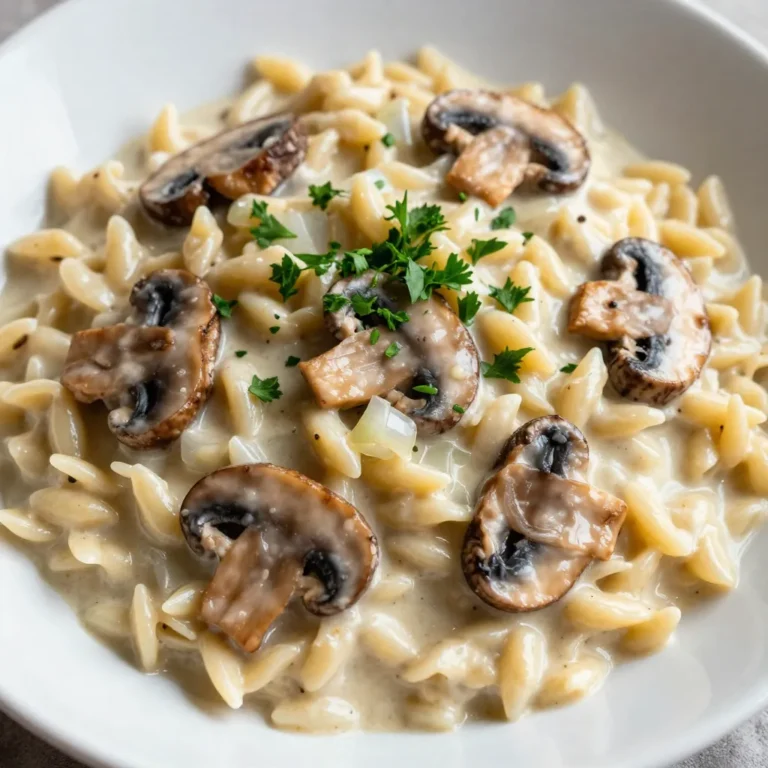
Creamy Mushroom Orzo Simple and Flavorful Dish

- 1 lb ground chicken - 1/2 cup breadcrumbs (preferably panko for added crunch) - 1/4 cup finely chopped fresh cilantro - 2 tablespoons green onions, finely chopped - 1 tablespoon fish sauce - 1 tablespoon soy sauce - 1 tablespoon minced fresh ginger - 2 cloves garlic, minced - 1 teaspoon red curry paste - 1 tablespoon freshly squeezed lime juice - 1/2 teaspoon salt - 1/2 teaspoon black pepper - Sriracha or sweet chili sauce (for serving and dipping) Gathering the right ingredients is key. You want fresh ground chicken for flavor. I prefer panko breadcrumbs for their extra crunch. Fresh cilantro gives a bright taste. Green onions add a mild kick. Fish sauce and soy sauce bring umami depth. Ginger and garlic give a warm, spicy touch. Red curry paste adds that classic Thai flavor. A splash of lime juice brightens everything up. Lastly, salt and black pepper balance all the flavors. Sriracha or sweet chili sauce adds a nice kick when you dip. With these ingredients, you’re all set for a tasty meal! {{ingredient_image_2}} Start by setting your oven to 400°F (200°C). This step is key for cooking the meatballs evenly. While the oven heats, grab a baking sheet and line it with parchment paper. This helps prevent sticking and makes cleanup a breeze. In a large mixing bowl, add these ingredients: - 1 lb ground chicken - 1/2 cup breadcrumbs - 1/4 cup finely chopped fresh cilantro - 2 tablespoons green onions, finely chopped - 1 tablespoon fish sauce - 1 tablespoon soy sauce - 1 tablespoon minced fresh ginger - 2 cloves garlic, minced - 1 teaspoon red curry paste - 1 tablespoon freshly squeezed lime juice - 1/2 teaspoon salt - 1/2 teaspoon black pepper Now, mix everything gently. You can use a fork or your hands. Make sure all ingredients blend well, but do not overmix. This keeps the meatballs tender. Take small portions of the mixture. Roll them between your palms to create 1-inch meatballs. Place each meatball on the lined baking sheet. Make sure they are spaced about an inch apart. This allows them to cook evenly. Place the baking sheet in your preheated oven. Bake the meatballs for 20 to 25 minutes. They should turn a light golden color and be fully cooked. Use a meat thermometer to check the inside. It should reach 165°F (75°C). Once baked, take the meatballs out of the oven. Let them cool for a few minutes. This helps them firm up. Serve them warm with Sriracha or sweet chili sauce on the side. This adds a nice spicy or sweet touch. Arrange the meatballs on a platter, drizzle with lime juice, and garnish with cilantro and lime wedges for an extra pop of color. Enjoy your dish! - Avoid Overmixing: Mix the ground chicken and spices gently. If you mix too hard, the meatballs can get tough. You want them light and tender. Use your hands or a fork and stop once everything is combined. - Spacing on Baking Sheet: Place the meatballs on the sheet about an inch apart. This helps them cook evenly. If they're too close, they may stick together and not brown well. Arrange the meatballs on a large platter. Drizzle extra lime juice over them for a fresh taste. Add a sprinkle of chopped cilantro on top for color. You can place lime wedges around the platter too. This makes the dish look bright and inviting. For a tasty dip, use Sriracha or sweet chili sauce. Both add a nice kick to the meatballs. If you want more options, try a peanut sauce or a yogurt dip. Each sauce brings out different flavors from the meatballs. Enjoy exploring different pairings! Pro Tips Use Fresh Ingredients: Fresh herbs and spices will elevate the flavors of your meatballs. Opt for fresh ginger and cilantro instead of dried for the best taste. Don’t Overmix: When combining the ingredients, mix just until incorporated. Overmixing can lead to tough meatballs. Check for Doneness: Use a meat thermometer to ensure your meatballs reach an internal temperature of 165°F (75°C) for safe consumption. Experiment with Dipping Sauces: While Sriracha and sweet chili sauce are great options, consider trying peanut sauce or a tangy vinegar-based sauce for a unique twist. {{image_4}} You can swap ground chicken for ground turkey or pork. These options taste great too. Turkey gives a lighter flavor, while pork adds richness. If you need gluten-free meatballs, use gluten-free breadcrumbs. They work just as well as regular breadcrumbs. This keeps the dish safe for those with gluten allergies. Want to make your meatballs even tastier? You can add spices like cumin or coriander. A pinch of chili powder gives a nice kick. You can also adjust the red curry paste to match your spice level. If you love garlic, add more minced garlic for extra flavor. These meatballs are perfect as an appetizer or a main course. For an appetizer, serve them on a platter with dipping sauces. Sriracha or sweet chili sauce works well. As a main dish, pair them with rice or noodles. You can add a side of steamed veggies for a balanced meal. The options are endless, so feel free to get creative! To keep your Thai Baked Chicken Meatballs fresh, store them in an airtight container. Place a piece of parchment paper between layers to prevent sticking. Make sure the container is sealed well to avoid air exposure. These meatballs stay tasty in the fridge for up to three days. When you are ready to enjoy leftovers, reheating is simple. Preheat your oven to 350°F (175°C). Arrange the meatballs on a baking sheet and cover them with foil. Bake for about 10-15 minutes until they are heated through. You can also use a microwave. Heat them on medium power for 1-2 minutes, checking often to avoid overcooking. If you want to save some for later, freezing is a great option. Allow the meatballs to cool completely. Spread them on a baking sheet and freeze for about an hour. Once firm, transfer them to a freezer-safe bag or container. They can last up to three months in the freezer. When ready to eat, bake from frozen for 25-30 minutes at 400°F (200°C), or thaw overnight in the fridge before reheating. Thai Baked Chicken Meatballs last about 3 to 4 days in the fridge. Store them in an airtight container to keep them fresh. If you want to enjoy them longer, consider freezing them. Yes, you can bake these meatballs straight from the freezer. Just add about 5 to 10 extra minutes to the cooking time. Make sure they reach 165°F (75°C) inside. The best way to check is to use a meat thermometer. Insert it into the center of a meatball; it should read 165°F (75°C). If you don’t have a thermometer, cut one open; it should be no longer pink inside. Absolutely! You can use ground turkey, pork, or beef. Just keep in mind that cooking times may vary slightly depending on the meat you choose. You now have a solid recipe for Thai Baked Chicken Meatballs. We covered key ingredients, helpful tips, and variations to make this dish your own. Each step is simple, from mixing to baking. Remember these meatballs work as both a snack or a meal. Store extras for later or share with friends. Enjoy exploring flavors and make this recipe a regular in your kitchen!

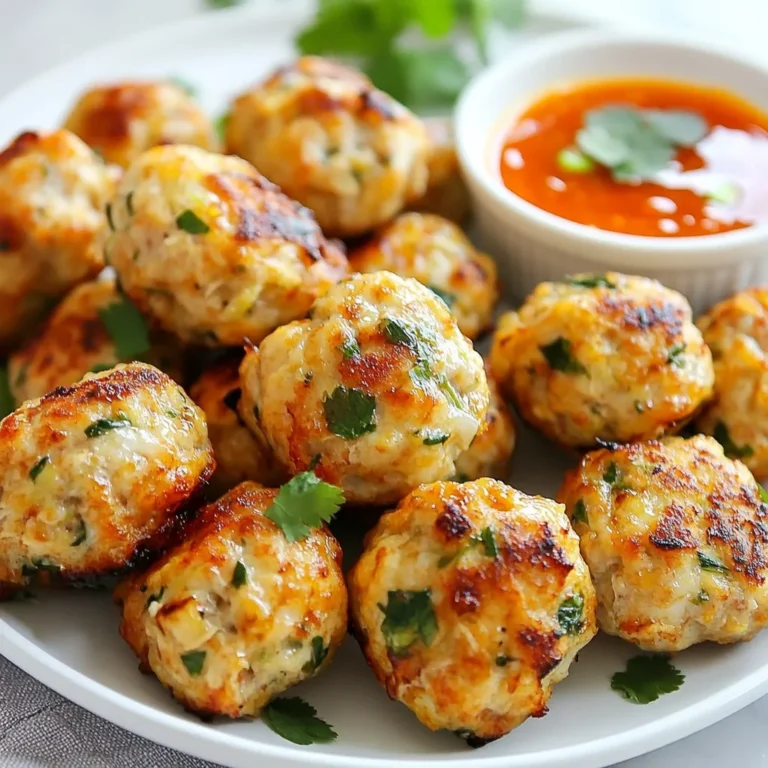
Thai Baked Chicken Meatballs Flavorful and Easy Recipe

To make Ritz Cracker Fiesta Bites, you'll need a few simple ingredients. Each one adds flavor and fun to your snacks. Here’s what you will need: - Ritz crackers - Cream cheese - Salsa - Shredded cheddar cheese - Black olives - Green onions - Garlic powder - Chili powder - Fresh cilantro These ingredients work together to create a tasty treat. The Ritz crackers provide a crunchy base. Cream cheese adds a creamy layer. Salsa gives a zesty kick. Each topping brings its own unique flavor. You can mix and match to make it your own! Gather these items before you start. It makes cooking easier and more fun. Plus, it ensures you have everything you need for these yummy snacks. {{ingredient_image_2}} 1. Start by softening the cream cheese. Let it sit at room temperature for about 10 minutes. 2. In a bowl, combine the softened cream cheese, salsa, garlic powder, and chili powder. 3. Use a hand mixer or a spatula to blend everything together. Mix until the texture is smooth and creamy. Make sure there are no lumps. 1. Take a Ritz cracker and spread about one tablespoon of the cream cheese mixture on top. 2. Cover the entire cracker for the best flavor. 3. Sprinkle some shredded cheddar cheese over the cream cheese layer. This adds a rich taste. 4. Next, add a few slices of black olives. Then, sprinkle some chopped green onions for a fresh crunch. 5. Place another Ritz cracker on top to create a sandwich. Repeat with the remaining crackers and filling. 1. Add a small sprig of cilantro on each bite for color and flavor. 2. For a nice display, arrange the bites on a colorful platter. 3. You can also serve extra salsa in a bowl on the side. This makes it more festive and fun! - Substitutions for cream cheese: If you want a lighter option, use Greek yogurt. It adds creaminess and tang. Cottage cheese is another choice, but it will have a different texture. For a vegan option, try a nut-based cream cheese. - Adjusting spice levels in salsa: You can control the heat. If you want less spice, choose a mild salsa. For a kick, add diced jalapeños or hot sauce. A tablespoon of honey can balance the heat too. - Other seasoning options: Try adding smoked paprika for a smoky twist. A pinch of cumin can bring warmth to the bites. Experiment with Italian herbs for a fresh taste. - Additional toppings ideas: Consider adding diced tomatoes or fresh avocado for extra flavor. You can also sprinkle on some crumbled feta or sliced radishes for crunch. - Recommended dippings or side dishes: Serve these bites with extra salsa or guacamole. A side of sour cream can also add a nice touch. Chips and fresh veggies make great side dishes too. - Accompaniments to elevate the snack experience: Pair with a refreshing drink like lemonade or iced tea. A light beer or a crisp white wine can also complement these snacks nicely. Pro Tips Mix It Up: Feel free to customize the filling by adding diced bell peppers or jalapeños for an extra kick! Cheese Choices: Experiment with different cheeses like pepper jack or cream cheese with herbs for varied flavors. Make Ahead: Prepare the cream cheese mixture a day in advance and assemble the bites just before serving for best freshness. Serving Style: Serve with additional salsa or guacamole on the side for dipping, enhancing the flavor experience! {{image_4}} You can change up your Ritz Cracker Fiesta Bites with fun flavors. For a Southwest-style snack, add some jalapeños. This gives a nice kick. Just chop them finely and mix them into the cream cheese. Another great option is a Mediterranean twist. Use hummus instead of cream cheese. Top it with crumbled feta cheese for a tasty treat. This will bring a delightful, fresh taste to your bites. If you need vegan-friendly options, switch the cream cheese for a plant-based spread. Many brands make great alternatives. You can still enjoy the same flavors with salsa and veggies. For gluten-free options, use gluten-free crackers. They work just as well as Ritz crackers. Make sure to check the salsa to confirm it is gluten-free as well. Kids might prefer milder flavors. Choose a mild salsa or even a simple cream cheese spread. You can let them pick fun shapes for the crackers too. Use cookie cutters to make stars or hearts. This makes snacks exciting and fun for them! Remember, the key is to involve kids in the process. Let them help assemble the bites. This way, they will enjoy eating them even more! For short-term storage, keep the Ritz Cracker Fiesta Bites in the fridge. Place them in an airtight container. This method keeps them fresh for about three days. Avoid stacking the bites to prevent crushing. If you have leftovers, you can freeze them. Wrap each bite tightly in plastic wrap. Then, put them in a freezer-safe bag or container. They can last up to two months in the freezer. Just remember to let them thaw in the fridge before serving. When reheating, I suggest using an oven. Preheat it to 350°F (175°C). Place the bites on a baking sheet. Heat for about 10 minutes. This method keeps the texture intact. Avoid using a microwave. It can make the crackers soggy. Soggy snacks lose that nice crunch we all love. These bites last about three days in the fridge. After that, they may spoil. Look for signs like a change in color or smell. If the cream cheese looks off, it's best to throw them away. Trust your senses; they help you stay safe! To make the cream cheese mixture smooth, start with softened cream cheese. Use a hand mixer for best results. Mix until you achieve a creamy and even texture. If you don’t have a mixer, a spatula works too, but it may take more time. Adding salsa slowly can help maintain a smooth blend. Yes, you can prepare Ritz Cracker Fiesta Bites ahead of time. Make the cream cheese mixture and store it in the fridge. You can assemble the snacks up to 2 hours before serving. Just keep them covered to avoid drying out. This way, you save time and keep your snacks fresh. Ritz Cracker Fiesta Bites pair well with a variety of snacks. Serve them with extra salsa or guacamole for dipping. You can also add tortilla chips or veggie sticks. For drinks, consider serving iced tea, lemonade, or a light beer. These pairings enhance the fun at your gathering! Absolutely! Kids can help in many ways. Younger children can spread the cream cheese mixture on crackers. Older kids can layer toppings like cheese and olives. This is a fun way to bond and teach cooking skills. Just supervise to keep the kitchen safe and enjoyable! In this post, we explored how to create tasty Ritz Cracker Fiesta Bites. You learned about the key ingredients and step-by-step instructions to prepare them. I shared tips for flavor enhancement and variations to suit different dietary needs. Proper storage methods keep your bites fresh longer. These snacks are simple, fun, and perfect for any gathering. Give them a try, and enjoy the burst of flavors!

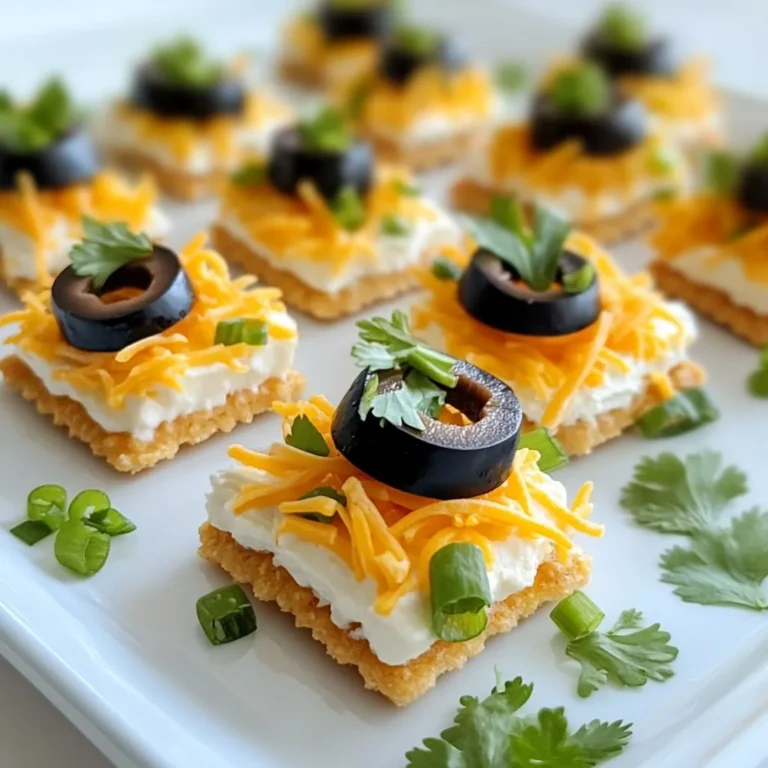
Ritz Cracker Party Snacks That Everyone Will Love

- Leeks (3 large): These add a mild onion flavor and sweetness to the soup. - Potatoes (4 medium): Yukon Gold or Russet works best. They give the soup its creamy texture. - Onion (1 medium): Diced onion adds depth and flavor. - Garlic (3 cloves): Minced garlic offers a warm, aromatic touch. - Vegetable broth (4 cups): This is the base of your soup, adding richness. - Almond milk (1 cup): Unsweetened almond milk adds creaminess without dairy. - Extra virgin olive oil (2 tablespoons): This oil enhances flavor and helps cook the veggies. - Dried thyme (1 teaspoon): Thyme brings an earthy note to the dish. - Sea salt and black pepper: These seasonings enhance all the flavors. - Fresh chives or parsley: Finely chopped for garnish, they brighten up the soup. If you need to make swaps, here are some ideas: - Potatoes: Try cauliflower for a low-carb option. - Almond milk: Use coconut milk for a richer flavor. - Vegetable broth: Make your own or use low-sodium options for less salt. - Olive oil: Avocado oil can stand in if you prefer. - Calories per serving: About 200 calories. - Macros: - Carbohydrates: 32 grams - Fats: 7 grams - Proteins: 4 grams - Potatoes: They are a great source of potassium and Vitamin C. - Leeks: Packed with antioxidants, they support heart health. - Garlic: Known for boosting the immune system and promoting heart health. - Almond milk: Low in calories and high in Vitamin E, it's good for skin health. This soup is not just tasty but also full of good nutrients! {{ingredient_image_2}} 1. Slicing leeks and onions: First, take the large leeks. Cut off the dark green tops and the roots. Slice the white and light green parts thinly. Rinse them well to remove any dirt. Next, dice the medium onion into small pieces. This adds great flavor to the soup. 2. Preparing the potatoes and garlic: Peel the four medium potatoes and cut them into 1-inch cubes. This size helps them cook evenly. Then, mince the three cloves of garlic. Minced garlic adds a nice punch to the soup. 1. Sautéing the leeks and onions: In a large pot, heat two tablespoons of olive oil over medium heat. Once hot, add the sliced leeks and diced onion. Sauté them for about 5 to 7 minutes. Stir often until they become soft and clear. This step builds a great base flavor. 2. Blending the soup for creaminess: After the leeks and onion soften, add the minced garlic. Cook for one more minute, just until you smell the garlic. Then, add the diced potatoes and dried thyme. Stir everything together for 2 minutes. Pour in the vegetable broth and bring it to a boil. Once boiling, lower the heat and let it simmer for 20 minutes. After that, blend the soup using an immersion blender until smooth. If you don't have one, carefully use a stand blender. Mix in one cup of almond milk and season with salt and pepper to taste. - Recommended garnishes: When ready to serve, ladle the soup into bowls. Top with finely chopped chives or parsley for a fresh touch. - Ideal pairing options: This soup pairs well with crusty bread or a light salad. Enjoy this creamy vegan potato leek soup warm for a comforting meal. To make your creamy vegan potato leek soup even better, try adding some herbs and spices. Fresh thyme or rosemary can boost the taste. You can also add a pinch of smoked paprika for a nice twist. Using homemade broth adds a lot of flavor. If you don't have time, store-bought broth works too. Just check that it is low-sodium to control the salt in your soup. An immersion blender is great for blending soups. It saves time and makes less mess. Just blend until smooth and creamy. If you use a regular blender, be careful. Always vent the lid to let steam escape. When cooking garlic, watch closely. Garlic can burn quickly and turn bitter. Stir it constantly for about a minute. This keeps it fragrant and tasty. Don’t overcook your leeks or garlic. Overcooked leeks lose flavor and become mushy. Garlic can turn bitter if cooked too long. Add them at the right time for the best taste. Make sure to season adequately. Taste your soup before serving. Add salt and pepper to enhance the flavors. A little can make a big difference! Pro Tips Use Fresh Herbs: Fresh thyme or chives will enhance the flavor profile of your soup significantly. Add them just before serving to keep their vibrant taste. Customize Your Creaminess: Adjust the amount of almond milk based on your desired creaminess. For a richer texture, consider adding a splash of coconut cream. Flavor Boosters: For additional depth, consider adding a splash of white wine or a squeeze of lemon juice just before serving. Garnish with Texture: Top your soup with crispy croutons or roasted chickpeas for an added crunch that complements the creamy base. {{image_4}} You can change the taste of this soup easily. For a spicy kick, add chili or red pepper flakes. This adds warmth and depth to the dish. You can also try different plant-based milks. Coconut milk brings a rich flavor, while soy milk keeps it light. Each choice makes the soup unique and tasty. To add more texture, you can include other vegetables. Carrots and celery work well. They add crunch and a bit of sweetness. If you love a bit of crunch, top the soup with croutons or seeds. This gives contrast to the smooth soup. You can experiment with different toppings to make it your own. To keep your creamy vegan potato leek soup fresh, follow these steps: - Let the soup cool down to room temperature. - Transfer it to an airtight container. Glass or plastic works well. - Store the container in the fridge for quick access. If you want to freeze the soup: - Leave some space in the container to allow for expansion. - Label it with the date. - Freeze for up to three months. When you're ready to eat, thaw it in the fridge overnight. Reheat gently on the stove over low heat. Stir often to keep it smooth. In the fridge, your soup will last for about 4 to 5 days. Keep an eye out for these signs that it has spoiled: - Unpleasant smell or off-taste. - Changes in color or texture. - Mold on the surface. If you notice any of these, it’s best to toss the soup. Enjoy your cooking! Yes, you can make this soup ahead of time. To prepare in advance, follow these steps: - Cook the soup as directed and let it cool. - Store it in an airtight container in the fridge for up to three days. - To reheat, pour the soup into a pot. Heat it over low heat until warm. - If the soup thickens, add a splash of vegetable broth or almond milk to thin it out. This soup tastes great the next day, as the flavors blend even more! Yes, this soup is gluten-free. Most vegetable broths do not contain gluten, but always check the label. If you use homemade broth, you can be certain it is gluten-free. All other ingredients, like potatoes, leeks, and almond milk, are also gluten-free. Enjoy this dish without worry! To make this recipe low-carb, you can swap out the potatoes. Here are a few ideas: - Use cauliflower instead of potatoes. It creates a creamy texture, just like potatoes. - Zucchini or celery root can also work as lower-carb alternatives. - If you prefer, you can mix in some leafy greens for added nutrition. These swaps will help you enjoy a tasty, low-carb version of this creamy vegan soup! This blog post gave you a clear view of making a delicious soup. We looked at each ingredient, its purpose, and alternatives. You learned about nutrition and the benefits of key ingredients like potatoes and leeks. The step-by-step instructions helped simplify preparation and cooking. With tips to enhance flavor and avoid common mistakes, you are now ready. Enjoy trying variations for texture and spice! Store leftovers correctly to maintain freshness. Dive in, and make this soup your own!

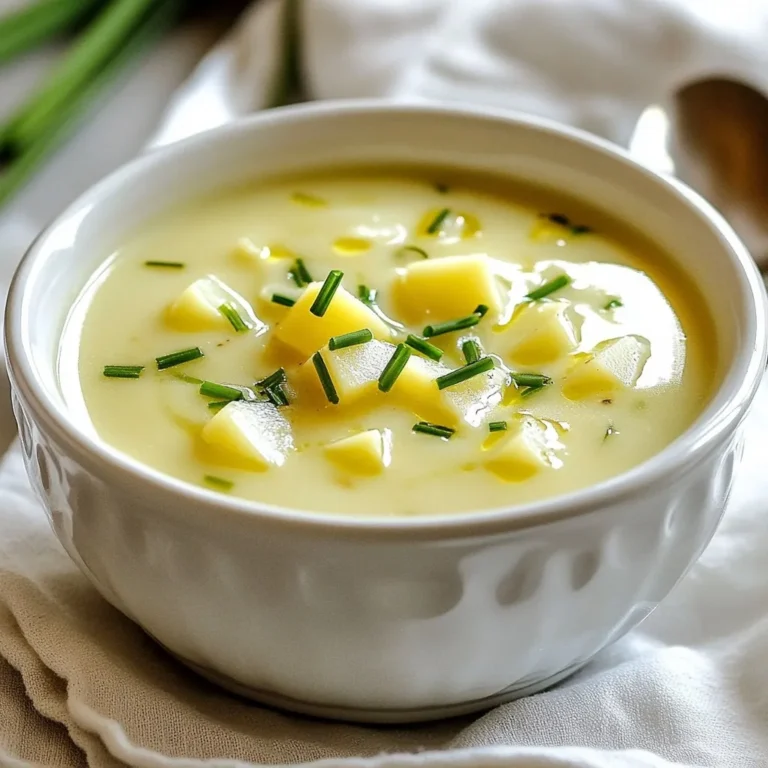
Creamy Vegan Potato Leek Soup Easy and Flavorful Dish

To make a delicious Teriyaki Ground Turkey Bowl, you will need a few key ingredients. Here’s what you need: - 1 lb ground turkey - 1 cup broccoli florets - 1 cup mixed bell peppers, sliced (red, yellow, and green) - 1 cup cooked brown rice - 2 tablespoons low-sodium soy sauce - 2 tablespoons honey or maple syrup - 1 tablespoon rice vinegar - 1 teaspoon fresh ginger, grated - 2 cloves garlic, minced - 1 tablespoon sesame oil - 2 green onions, chopped (for garnish) - 1 teaspoon sesame seeds (for garnish) - Salt and pepper to taste These ingredients combine to create a bowl that is not only healthy but also packed with flavor. The ground turkey provides lean protein, while the colorful vegetables add important vitamins. Brown rice serves as a hearty base, making the dish filling and satisfying. The teriyaki sauce, made with soy sauce, honey, ginger, and garlic, ties everything together beautifully. The green onions and sesame seeds give a nice finish and extra crunch. Enjoy the cooking process and let your creativity shine! {{ingredient_image_2}} To start, mix the teriyaki sauce ingredients. In a medium bowl, combine: - 2 tablespoons low-sodium soy sauce - 2 tablespoons honey or maple syrup - 1 tablespoon rice vinegar - 1 teaspoon fresh ginger, grated - 2 cloves garlic, minced Whisk these items together until smooth. Set this sauce aside for later. It adds great flavor! Now, heat a large skillet over medium heat. Add 1 tablespoon of sesame oil. Once the oil is hot, add 1 pound of ground turkey. Use a wooden spoon to break it apart while cooking. Season with salt and pepper to taste. Cook for about 5-7 minutes. The turkey should be evenly browned and cooked through. Next, add 1 cup of broccoli florets and 1 cup of sliced bell peppers to the skillet. Stir-fry this mixture for 3-4 minutes. The veggies should be tender but still crisp. Pour the teriyaki sauce over the turkey and vegetables in the skillet. Stir well to coat everything evenly. Let it cook for another 2-3 minutes. This helps the sauce thicken and warm up. For serving, divide 1 cup of cooked brown rice among four bowls. Spoon the teriyaki ground turkey and vegetable mix on top of the rice. It looks and smells amazing! Finally, garnish each bowl with chopped green onions and a sprinkle of sesame seeds. This adds a nice touch and some extra flavor. Enjoy your creation! Fresh vegetables make a big difference in flavor and nutrition. Look for bright, crisp broccoli and colorful bell peppers. They should feel firm and have no brown spots. Lean ground turkey is also key. It keeps the dish light yet tasty. Check for a low-fat content, which is usually around 93% lean. This choice helps you stay healthy while enjoying great flavor. You can adjust the sauce's sweetness to match your taste. If you like it sweeter, add more honey or maple syrup. For a tangy kick, increase the rice vinegar. You can also customize flavors. Try adding red pepper flakes for heat or sesame oil for a richer taste. Each adjustment can make the dish your own. Stir-frying is fast and keeps veggies crisp. Use high heat to cook quickly without losing nutrients. Start with the turkey, then add veggies. This method helps them stay bright and crunchy. Watch the time, too. Cook broccoli and bell peppers for just 3-4 minutes. This way, they stay tender yet firm. Pro Tips Use Fresh Ingredients: For the best flavor, try to use fresh vegetables and high-quality ground turkey. Fresh ingredients enhance the overall taste of the dish. Customize Your Veggies: Feel free to substitute or add your favorite vegetables, such as snap peas or carrots, to the stir-fry. This adds variety and nutrition. Adjust Sweetness: Depending on your taste preference, you can adjust the sweetness of the teriyaki sauce by adding more or less honey or maple syrup. Meal Prep Friendly: This dish is great for meal prep! Cook a larger batch and store individual portions in the fridge for easy lunches throughout the week. {{image_4}} You can switch ground turkey for chicken. Chicken has a similar taste and is easy to find. If you want a plant-based option, try tofu. Tofu absorbs flavors well and adds protein. You can also use tempeh, which has a firmer texture. Both options work great in this teriyaki bowl. Get creative with your veggies! You can add carrots, snap peas, or zucchini. These veggies bring color and crunch. In summer, try fresh corn or green beans. In winter, consider using Brussels sprouts or kale. Seasonal veggies make the bowl fresh and exciting. Pair your bowl with grains like quinoa or farro. These grains add texture and nutrients. You can also serve it in lettuce wraps for a fun twist. Consider using a large lettuce leaf as a wrap. This adds crunch and makes it lighter. Enjoy mixing and matching to find your favorite style! To store leftovers, let the Teriyaki Ground Turkey Bowl cool down first. Place it in an airtight container. This helps keep the flavors fresh. You can store it in the fridge for up to three days. I recommend using glass containers. They are safe and don’t hold onto smells. You can freeze the bowl components for later use. Store the turkey and vegetables in a separate container from the rice. This keeps everything fresh. You can freeze it for up to three months. When you want to eat it, take it out of the freezer the night before. Let it thaw in the fridge. To reheat, warm the turkey and veggies in a skillet. Add a splash of water to keep it moist. Heat the rice in the microwave. This helps keep the rice fluffy. Once everything is heated, mix it all together. Enjoy your meal just like it was fresh! Yes, you can make this dish ahead of time. Meal prep is easy with this recipe. Here are the steps: - Cook the turkey and veggies: Prepare them as per the recipe. - Store separately: Place the turkey and veggies in one container and the rice in another. - Refrigerate: Keep them in the fridge for up to three days. - Reheat: When you’re ready to eat, just warm them up in a skillet. This recipe is not spicy by default. It has a mild flavor. If you want more heat, try these tips: - Add chili flakes: Sprinkle some red chili flakes for a kick. - Use spicy sauce: Swap in a spicy soy sauce or sriracha. - Chili paste option: Mix in a small amount of chili paste while cooking. Yes, with a few changes, you can make it gluten-free. Here’s how: - Use gluten-free soy sauce: Replace regular soy sauce with a gluten-free version. - Check rice: Ensure your brown rice is gluten-free, which it usually is. - Avoid cross-contamination: Use clean utensils and cookware to prevent gluten exposure. In this blog post, I covered how to make a tasty bowl with ground turkey and fresh veggies. We started with the ingredients, like broccoli and bell peppers, and moved through the steps, making teriyaki sauce and cooking everything together. I shared tips on choosing fresh produce and cooking techniques for the best flavor. Finally, I explored variations and storage tips to keep your meals fresh. Now, you have all the tools to create delicious and healthy bowls at home. Enjoy your cooking!

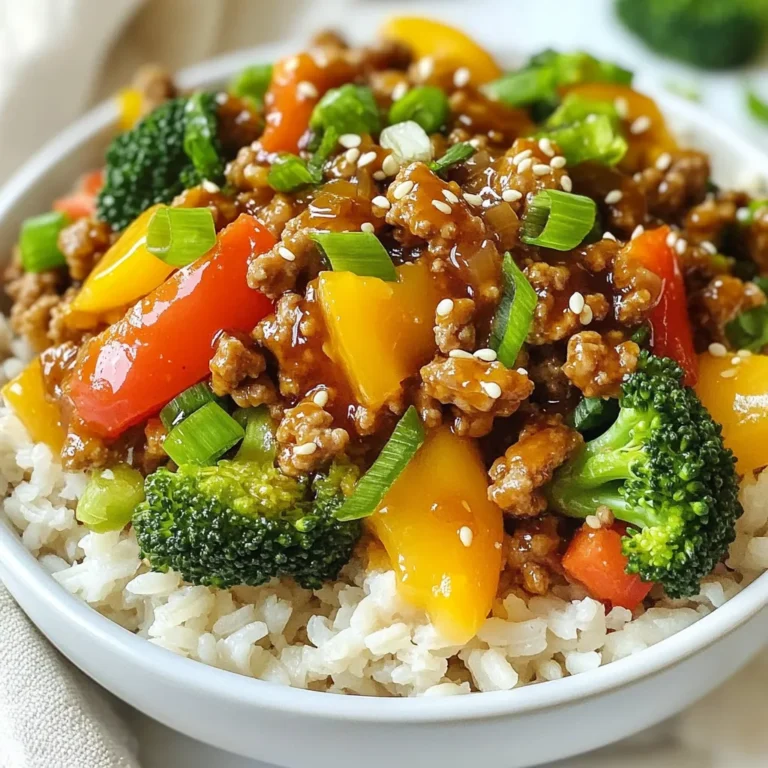
Teriyaki Ground Turkey Bowl Healthy and Flavorful Meal

PREV 1 … 35 36 37 … 44 NEXT
yummybiterecipes

explore

DessertsDinnerAppetizersDrinks

Our Policies

  • Cookie Policy
  • Copyright Policy
  • Disclaimer
  • GDPR Policy
  • Terms Of Use
Back to Top
  • About
  • Contact Us
  • Privacy Policy
© 2025 yummybiterecipes