FREE DINNER EBOOK! Get your copy!
  • Cookie Policy
  • GDPR Policy
  • Disclaimer
  • Terms Of Use
  • Visit my other site: Fun Cookie Recipes
yummybiterecipes
  • Home
  • Dinner
  • Desserts
  • Drinks
  • Appetizers
  • Contact
  • About
  • Privacy Policy
  • Home
  • Dinner
  • Desserts
  • Drinks
  • Appetizers
  • Contact
  • About
  • Privacy Policy
  • Cookie Policy
  • GDPR Policy
  • Disclaimer
  • Terms Of Use
Visit my other site: Fun Cookie Recipes

HOME / CATEGORIES /

Latest

- 4 cups mixed greens (arugula, spinach, and kale) - 1 cup fresh pomegranate seeds - 1 cup roasted butternut squash, cubed - 1/2 cup feta cheese, crumbled - 1/3 cup walnuts, toasted and roughly chopped - 1/4 cup dried cranberries - 1/4 cup red onion, thinly sliced - 1/4 cup balsamic vinegar - 2 tablespoons olive oil - Salt and black pepper to taste Using fresh ingredients makes your salad bright and tasty. Fresh greens add crunch and color. Pomegranate seeds bring sweetness and a nice pop. Roasted butternut squash adds warmth and depth. Each ingredient enhances the dish, making it festive and inviting. This salad is not just delicious; it is also healthy. Mixed greens are low in calories and high in vitamins. Pomegranate seeds are rich in antioxidants. Butternut squash provides fiber and vitamins A and C. Feta cheese adds protein and calcium. Walnuts offer healthy fats. Together, these ingredients create a balanced dish that supports your well-being. {{ingredient_image_2}} To start, preheat your oven to 400°F (200°C). Next, take your cubed butternut squash and place it on a baking sheet. Drizzle some olive oil over the squash. Add a pinch of salt and black pepper. Spread the cubes out in a single layer. Roast them for about 25-30 minutes. You want the squash to be tender and caramelized. Once done, remove it from the oven and let it cool a bit. In a big salad bowl, add your mixed greens. I like to use a blend of arugula, spinach, and kale for color. Next, add the roasted butternut squash, fresh pomegranate seeds, and crumbled feta cheese. Toss in the toasted walnuts, dried cranberries, and sliced red onion. Gently mix all the ingredients to show off their festive colors and textures. In a small bowl, whisk together the balsamic vinegar and olive oil. Make sure they blend well to create a smooth dressing. Once mixed, drizzle the dressing over your salad. Toss the salad gently so every ingredient gets a tasty coating. Finally, taste your salad and add salt and pepper as needed for flavor. To make a great festive salad, start with fresh greens. Look for mixed greens like arugula, spinach, and kale. These greens offer color and flavor. Choose bright, crisp leaves without blemishes. Smell them; they should have a fresh scent. Avoid wilted or brown leaves. When you pick the greens, check the date on the package. Fresh greens make your salad taste better and look more vibrant. A beautiful salad impresses guests. Use a large, colorful bowl to showcase your salad. Arrange the greens as a base and layer your toppings on top. Add the roasted butternut squash, pomegranate seeds, and feta cheese in sections. This creates a stunning visual. For an extra touch, sprinkle more pomegranate seeds and feta on top. A sprig of fresh rosemary or thyme adds a festive feel. This not only looks great but also enhances the aroma. If you have leftover salad, store it in an airtight container. Keep it in the fridge for up to two days. To maintain freshness, store the dressing separately. When you’re ready to eat, add the dressing just before serving. This helps keep the greens crisp. If the salad looks a bit limp after storage, give it a quick toss. Add a splash of olive oil to revive it. Pro Tips Choose Fresh Ingredients: Always opt for the freshest mixed greens and seasonal produce to enhance the salad's flavor and nutritional value. Customize Your Nuts: Feel free to substitute walnuts with other nuts like pecans or almonds for a different texture and flavor profile. Make-Ahead Dressing: Prepare the balsamic dressing in advance and store it in the fridge. This allows the flavors to meld beautifully before use. Layer for Presentation: For an impressive presentation, layer the ingredients starting with the greens, followed by the squash, and top with pomegranate seeds and feta. {{image_4}} You can boost your Festive Christmas Salad with protein. Grilled chicken or turkey adds flavor and heartiness. For a plant-based option, try chickpeas or lentils. These will make the salad more filling and nutritious. Even shrimp or salmon can work well. Each choice offers a unique taste and texture. This salad is naturally gluten-free, thanks to its fresh ingredients. Ensure your feta cheese and balsamic vinegar are gluten-free. If you want to add croutons, use gluten-free bread. This keeps the salad safe for those with gluten sensitivities. Always check labels to be sure. Seasonal swaps can keep the salad fresh and exciting. In the winter, use roasted beets instead of butternut squash. In spring, swap in asparagus or snap peas. You can also change the greens! Try a mix of romaine or butter lettuce. Adjusting ingredients helps you enjoy new flavors all year long. To keep your festive Christmas salad fresh, store it in an airtight container. This helps lock in the flavors and keeps the greens crisp. It’s best to keep the dressing separate until you are ready to eat. This way, your salad stays crunchy and delicious. Mixed greens can last about 3 to 5 days in the fridge. Fresh pomegranate seeds are good for about a week if stored properly. Roasted butternut squash stays fresh for up to 4 days. Feta cheese can last for about a week after opening, while walnuts can stay good for several months if kept cool and dry. Dried cranberries can last for up to a year, making them a great pantry staple. If you have leftover butternut squash, reheat it in the oven or microwave. For the salad, gently toss it with fresh greens to refresh its look and taste. If the dressing has separated, just whisk it again before adding. This simple step brings back the flavor and makes your salad enjoyable again. Yes, you can make this salad ahead of time. I recommend preparing the roasted butternut squash and the dressing in advance. Store each in separate containers in the fridge. Combine everything just before serving. This keeps the greens fresh and crisp. If you can't find pomegranate seeds, you can use other fruits. Diced apples or pears add sweetness. Sliced strawberries or mandarin oranges work great too. These fruits bring color and flavor to the salad. Absolutely! This salad is perfect for meal prep. Prepare the ingredients in advance and store them in individual containers. Keep the dressing separate until you're ready to eat. This way, the salad stays fresh and tasty throughout the week. This blog covers all you need for a great salad. We discussed the best fresh ingredients, how to prepare roasted butternut squash, and fun variations to try. Remember, fresh ingredients boost flavor and nutrition. Follow the tips for a pretty presentation and safe storage. You can even prep this salad ahead! Embrace creativity with swaps and additions. Enjoy making tasty, healthy choices that you can share with family and friends.

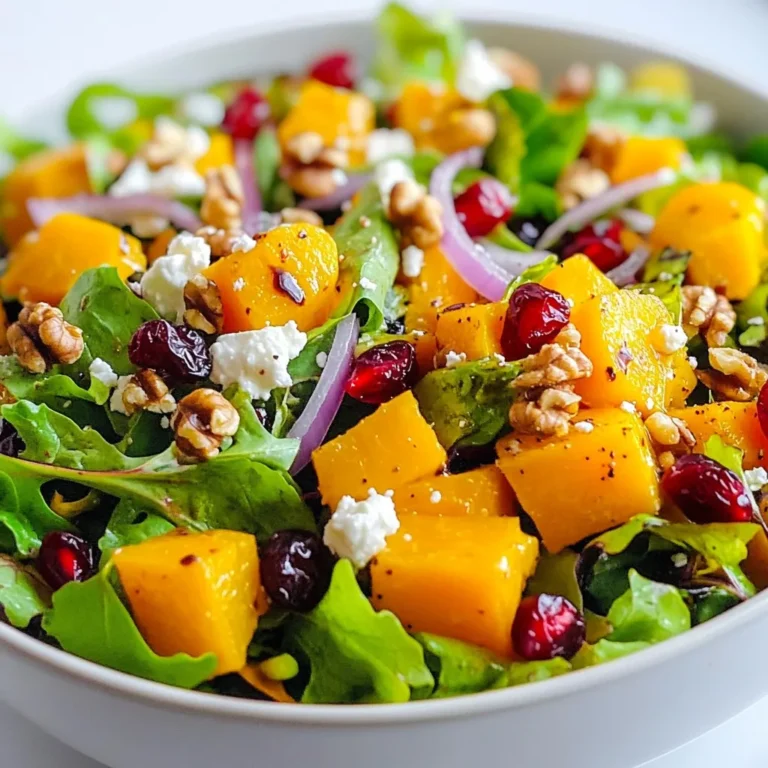
Festive Christmas Salad Healthy and Flavorful Delight

For this icebox cake, use 2 cups of fresh strawberries. Make sure to hull and slice them. The sugar helps release their juices. This creates a sweet syrup that adds flavor. Let them sit with 1 tablespoon of granulated sugar for about 10 minutes. You need 2 cups of heavy whipping cream for a rich texture. Add 1/2 cup of powdered sugar to sweeten it. For extra flavor, mix in 1 teaspoon of pure vanilla extract and 1 teaspoon of almond extract. Whip these together until soft peaks form. Use a package of 14 ounces of ladyfinger cookies. These cookies are light and soak up flavors well. You can also use sponge cake if you prefer. Finally, for a crunch, top with 1/2 cup of slivered almonds. This will give your cake a nice finish. {{ingredient_image_2}} To start, take 2 cups of fresh strawberries. Remove the stems and slice them. Place the sliced strawberries in a medium bowl. Add 1 tablespoon of granulated sugar to the bowl. Gently toss the strawberries to coat them in sugar. Let them sit for about 10 minutes. This resting time helps the strawberries release their juices. The result is a sweet syrup that adds flavor. Next, get a large bowl and pour in 2 cups of heavy whipping cream. Add 1/2 cup of powdered sugar for sweetness. Then, mix in 1 teaspoon of pure vanilla extract and 1 teaspoon of almond extract. Use an electric mixer to whip the cream. Start at medium speed until soft peaks form. This means your cream is light and fluffy. It will hold its shape well for layering. Now, take a 9x13 inch baking dish. Lay ladyfinger cookies along the bottom, side by side. If you prefer sponge cake, slice it and arrange it evenly. Spread a layer of whipped cream over the cookies. Make sure to cover them completely. Next, spoon on a layer of the sugared strawberries. Distribute them evenly across the whipped cream. Repeat this layering process two more times. End with a thick layer of whipped cream on top for a smooth finish. After assembling, cover the dish with plastic wrap. Place it in the refrigerator for at least 4 hours. For best results, let it chill overnight. This time allows the flavors to blend and the cookies to soften. It makes the cake even more delicious and easier to slice. To pick great strawberries, look for bright red color. They should be firm and plump. Avoid berries with green or white spots. The best strawberries smell sweet. If you can, buy them from a local farmer’s market. They often taste better than store-bought. Remember to wash them gently before use to keep them fresh. For the best whipped cream, start with cold equipment. Chill your bowl and beaters before whipping. Use heavy whipping cream for a rich texture. Mix on medium speed until soft peaks form. This takes about 3 to 5 minutes. Don’t overwhip; it can turn into butter. The cream should hold its shape but still be smooth. When layering, start with ladyfinger cookies or sponge cake. Make sure they cover the bottom well. Spread whipped cream evenly over the cookies. Then, add a layer of sugared strawberries. Repeat these layers for a stunning look. The final whipped cream layer should be nice and thick. This helps the cake hold its shape when served. Pro Tips Choose Ripe Strawberries: Select fully ripe strawberries for the best flavor and sweetness. Look for bright red berries with no white spots. Whip Cream to Right Consistency: Be careful not to overwhip the cream; it should be fluffy and hold peaks but not turn grainy. Layering Technique: Ensure even layers of whipped cream and strawberries to achieve a balanced flavor in every bite. Chill Overnight: For the best texture and flavor, allow the cake to chill overnight. This gives the ladyfingers time to absorb the moisture. {{image_4}} You can swap strawberries with other berries for fun! Try blueberries, raspberries, or blackberries. Each berry adds its own flavor. Blueberries give a sweet burst, while raspberries add a tart kick. Mix and match them to create your favorite combo. You can use equal amounts of berries as the recipe calls for strawberries. This way, you keep the same yummy texture and taste. If you need a gluten-free version, use gluten-free ladyfinger cookies or sponge cake. Look for brands that are labeled gluten-free. You can also make your own cookies using gluten-free flour. This makes it easy to enjoy the cake without gluten. Just follow the same layering steps, and you'll have a tasty treat that everyone can enjoy. To add some extra flair, try flavor infusions! You can mix different extracts into the whipped cream. For example, use lemon or coconut extract for a fresh twist. Another idea is to add a splash of orange juice to the strawberries for a citrus burst. These small changes can make your cake unique and exciting. Experiment and find your favorite flavor combination! To keep your Strawberry Shortcake Icebox Cake fresh, store it in the fridge. Use a tight cover or plastic wrap. This helps to keep the cake moist and tasty. Make sure to avoid any air gaps. If you have leftovers, try to finish them within a few days. You can freeze this cake if you want to save it for later. Wrap individual slices in plastic wrap. Then, place them in a freezer-safe bag or container. This helps to prevent freezer burn. Thaw the slices in the fridge before serving. The taste will still be nice, but the texture may change. In the fridge, the cake stays good for about 3 to 5 days. The strawberries and cream will stay fresh, but the cookies may soften. If frozen, the cake can last for about 2 months. Quality can decrease over time, so it’s best to enjoy it sooner rather than later. Yes, you can use frozen strawberries. Just thaw them first and drain any excess juice. This helps keep the cake from getting soggy. Frozen strawberries work well when fresh ones are not in season. The cake stays fresh in the fridge for about 3 days. Make sure to cover it well with plastic wrap. This keeps it moist and tasty. If you notice any liquid, just scoop it out before serving. You can use sponge cake instead of ladyfinger cookies. Slice the cake into layers for even coverage. Other options include graham crackers or even biscuit cookies for a different flavor. Yes, making it ahead of time is a great idea! You can prepare it one day before serving. Just remember to chill it for at least 4 hours or overnight for the best flavor and texture. We covered the key ingredients for a delicious cake, including fresh strawberries and cream. I provided step-by-step instructions for preparing the strawberries, whipping the cream, and assembling the cake. You also learned helpful tips, variations, and smart storage practices. Remember, using the best strawberries and mastering your cream technique is vital. Embrace creative options to make this dessert yours. Enjoy your cake making, and always have fun with flavors!

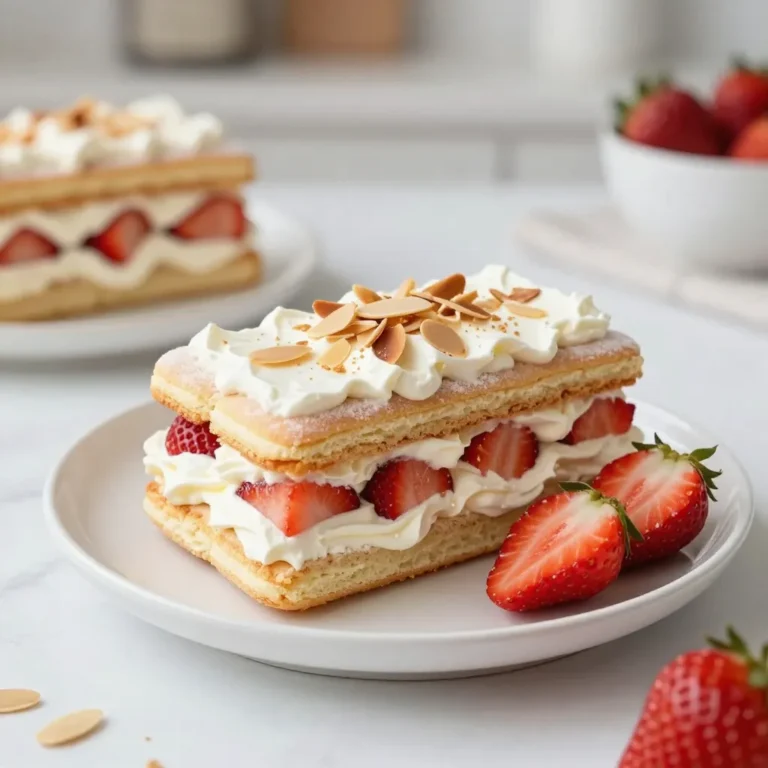
Strawberry Shortcake Icebox Cake Fresh and Tasty Treat

- 4 bone-in, skin-on chicken thighs - 2 tablespoons extra virgin olive oil - 4 cloves of fresh garlic, finely minced - 1 large lemon, juiced and zested - 1 teaspoon dried oregano - 1 teaspoon smoked paprika - ½ teaspoon sea salt - ¼ teaspoon freshly ground black pepper - 1 cup low-sodium chicken broth - 1 cup vibrant cherry tomatoes, halved - Fresh parsley, finely chopped for garnish To make the one-pan lemon garlic chicken thighs, you need just a few ingredients. The chicken thighs are the star. I love using bone-in, skin-on thighs for flavor and moisture. The olive oil helps with cooking and adds richness. Garlic brings a punch of flavor, while lemon adds brightness. Dried oregano and smoked paprika give it depth. Salt and pepper are essential for seasoning. The chicken broth keeps everything moist, and the cherry tomatoes add sweetness. - Large oven-safe skillet - Tongs - Spatula - Knife - Cutting board Having the right tools makes cooking easier. You need a large oven-safe skillet to sear and roast the chicken. Tongs help flip the chicken safely. A spatula is great for mixing and scraping the pan. A knife and cutting board are needed to prepare the garlic and lemon. - Fresh parsley, finely chopped While the dish is great on its own, I love adding fresh parsley. It adds color and a pop of flavor. You can also try other herbs, like thyme or basil, if you want. Feel free to get creative with your garnishes! {{ingredient_image_2}} Start by preheating your oven to 400°F (200°C). This step is key for crisp skin. Next, take the chicken thighs and season them well. Use sea salt, black pepper, smoked paprika, and dried oregano. Rub the spices all over the chicken thighs for great flavor. Set them aside for a moment while you heat the skillet. In a large, oven-safe skillet, add two tablespoons of extra virgin olive oil. Heat the oil over medium-high heat until it shimmers. This will take just a minute. Carefully place the chicken thighs skin-side down in the skillet. Sear them for about 5-7 minutes until the skin turns golden and crispy. Then, flip the chicken and cook for another 3-4 minutes. You want both sides nicely browned. Once done, remove the chicken from the skillet and let it rest on a plate. Now, without cleaning the skillet, add four finely minced garlic cloves. Sauté the garlic for about 30 seconds. You want it fragrant, not burnt. After that, pour in one cup of low-sodium chicken broth. Add the juice and zest of one large lemon. Use a spatula to scrape up any tasty bits stuck to the pan. This adds great flavor to your sauce. Return the chicken thighs to the skillet, placing them on top of the garlic mixture. Add one cup of halved cherry tomatoes around the chicken. Now, carefully transfer the skillet to your preheated oven. Roast for 25-30 minutes. Check that the chicken reaches an internal temperature of 165°F (75°C). Once done, remove the skillet and let the chicken rest for a few minutes. This step helps keep it juicy. Garnish with finely chopped parsley before serving. Enjoy your delicious meal! Preheating the oven is key. Set your oven to 400°F (200°C). This gives your chicken a crisp skin. A hot oven cooks the chicken evenly and quickly. It also helps the lemon garlic flavors stand out. Start by searing the chicken thighs for 5-7 minutes on one side. This makes the skin golden and crispy. Then flip the thighs and cook for another 3-4 minutes. After searing, roast the chicken in the oven for 25-30 minutes. This helps the chicken cook through. To check if the chicken is done, use a meat thermometer. The internal temperature should reach 165°F (75°C). If you don’t have a thermometer, cut into the thickest part of the thigh. The juices should run clear without any pink. Let the chicken rest for a few minutes after cooking. This keeps the juices inside, making it tender and juicy. Pro Tips Choose the Right Chicken Thighs: Opt for bone-in, skin-on chicken thighs for the best flavor and juiciness. The skin helps keep the meat moist during cooking. Perfect Searing: Make sure the skillet is hot enough before adding the chicken. This ensures a crispy skin and locks in moisture. Customize Flavor: Feel free to adjust the seasoning! Experiment with herbs like thyme or rosemary for a different flavor profile. Let it Rest: Allow the chicken to rest for a few minutes after removing it from the oven. This helps the juices redistribute, making the meat more tender. {{image_4}} To get that perfect crispy skin on your chicken thighs, follow these steps. First, dry the chicken well with paper towels. Moisture is the enemy of crispiness. Next, season the skin with salt. Salt draws out moisture and helps the skin crisp up. When you sear the chicken, make sure your skillet is hot. Place the chicken skin-side down and let it cook without moving it. This allows the skin to brown nicely. Cook it for about 5-7 minutes before flipping. Marinades can elevate your chicken to a new level. To make a simple marinade, mix olive oil, lemon juice, garlic, and herbs. Soak the chicken thighs for at least 30 minutes. If you have time, marinate overnight for deeper flavor. This not only adds taste but also keeps the chicken moist while cooking. When you cook marinated chicken, the flavors seal in, making each bite burst with goodness. Fresh herbs offer bright flavors that dried herbs can’t match. If you can, use fresh parsley or oregano for garnishing. Fresh herbs bring a pop of color and a lively taste. However, dried herbs are more concentrated. Use them when fresh is not available. An easy rule is to use one-third the amount of dried herbs compared to fresh. Both options work well. Choose based on what you have on hand. You can easily boost your dish with veggies. Broccoli and bell peppers are great choices. They add color and nutrients. To do this, chop the veggies into bite-sized pieces. Add them to the skillet with the chicken. They will roast nicely in the oven. This keeps them crisp while soaking up the lemon and garlic flavors. If you prefer chicken breasts, feel free to swap them in. Chicken breasts cook faster, so check them sooner. Use the same seasoning and cooking method. Just make sure to keep the skillet hot. This helps seal in the juices and gives good flavor. Cook until the internal temperature hits 165°F (75°C) for safety. Lemon is a star, but you can try other fruits too. Limes, oranges, or even grapefruit work well. Each adds its own twist. For a lime version, use lime juice and zest. It gives a fresh, zesty kick. If you pick orange, it adds sweetness. Just adjust the amount to taste. This keeps the dish fun and new every time you make it. To keep your one-pan lemon garlic chicken thighs fresh, let them cool first. Place the chicken in an airtight container. You can store it in the fridge for up to three days. If you want to keep it longer, consider freezing it. Just make sure to separate the chicken from the sauce to avoid sogginess. When you're ready to enjoy leftovers, reheat them in the oven. Preheat your oven to 350°F (175°C). Place the chicken in a baking dish and cover it with foil. This helps keep it moist. Heat for about 20 minutes or until warmed through. You can also use the microwave, but be careful not to overcook the chicken. To freeze the chicken, wrap each piece tightly in plastic wrap. Then, place them in a freezer-safe bag. You can keep them frozen for up to three months. When you’re ready to eat, thaw them in the fridge overnight. After thawing, reheat as described above for the best results. This way, you can always have a quick meal ready to go! Yes, you can use boneless chicken thighs. They will cook faster than bone-in thighs. This makes them a great choice if you're short on time. Just check the internal temperature to ensure they reach 165°F. Cook them for about 20-25 minutes in the oven. Boneless thighs stay juicy and tender, just like bone-in. They absorb the lemon and garlic flavors well. Many sides complement Lemon Garlic Chicken Thighs. Here are some ideas: - Steamed rice absorbs the delicious sauce. - Quinoa adds a nutty flavor and is healthy. - Roasted vegetables bring color and crunch. - Mashed potatoes give a creamy touch. - A fresh green salad brightens the meal. These sides help balance the rich flavors of the chicken. This dish is easy to make gluten-free! Just ensure your chicken broth is gluten-free. Most brands offer this option. Avoid any sauces or seasonings that contain gluten. The rest of the ingredients like chicken, garlic, lemon, and spices are naturally gluten-free. Enjoy your meal without worry! This blog post covered all you need for making One-Pan Lemon Garlic Chicken Thighs. We explored the main ingredients and tools, step-by-step cooking instructions, and tips for crispy chicken skin. I shared variations to suit your taste and explained how to store leftovers. Enjoy this easy recipe at dinner or for meal prep. With simple swaps, it fits your needs. Now, you can make a tasty dish everyone will love!

One-Pan Lemon Garlic Chicken Thighs Savory and Easy

- 2 cups shredded cooked chicken - 1 cup plain Greek yogurt - 1/2 cup cream cheese - 1/2 cup buffalo sauce - 1 cup shredded mozzarella cheese - 1/4 cup green onions - 1 teaspoon garlic powder - 1/2 teaspoon onion powder - Salt and pepper To make my high-protein buffalo chicken dip, you need a few key items. First, use two cups of shredded cooked chicken. Rotisserie chicken works great and saves time. Next, grab one cup of plain Greek yogurt. This adds protein and a creamy texture. You will also need half a cup of cream cheese. It should be softened to mix well. For flavor, you need half a cup of buffalo sauce. Adjust it based on how spicy you like your dip. For cheesiness, use one cup of shredded mozzarella cheese. Make sure to set aside a bit for topping later. Then, you need a quarter cup of finely chopped green onions for freshness. Don’t forget the garlic powder and onion powder. Use one teaspoon of garlic powder and half a teaspoon of onion powder. Finally, add salt and pepper to taste. These ingredients come together to create a tasty and filling dip. {{ingredient_image_2}} 1. Preheat the oven Start by preheating your oven to 350°F (175°C). This step is key for even baking. 2. Combine main ingredients In a large mixing bowl, add 2 cups of shredded cooked chicken. I love using rotisserie chicken for ease. Next, add 1 cup of plain Greek yogurt and 1/2 cup of softened cream cheese. Pour in 1/2 cup of buffalo sauce. Mix in 1 teaspoon of garlic powder, 1/2 teaspoon of onion powder, and a pinch of salt and pepper. Stir until everything is creamy and well combined. 3. Fold in cheese and onions Carefully fold in 1 cup of shredded mozzarella cheese and 1/4 cup of finely chopped green onions. Make sure to save a little of each for topping later. This adds great flavor and a nice look. 4. Transfer to baking dish Grease a baking dish, then pour in your creamy chicken mixture. Spread it evenly for uniform cooking. 5. Bake the dip Top the dip with the reserved mozzarella and green onions. Place the dish in the oven and bake for 25-30 minutes. Look for bubbly edges and a golden top. Watch it closely to avoid over-browning. 6. Cool before serving Once baked, take the dip out and let it cool for a few minutes. This helps the flavors settle before you dig in. Enjoy! To make this buffalo chicken dip truly yours, adjust the buffalo sauce for spice levels. If you like it hot, add more sauce. For a milder dip, use less. Always taste as you mix. A creamy texture is key. Use full-fat cream cheese and Greek yogurt. Mixing them well helps create a smooth dip. If it seems too thick, add a bit more yogurt. To avoid over-browning, watch the dip while it cooks. Check it after 20 minutes. If it’s browning too fast, cover it with foil. This keeps it from burning while still cooking through. The best items to dip include carrot sticks, celery, and chips. These add crunch and freshness. You can also try soft pita chips for a different texture. For presentation, serve the dip warm in a colorful dish. Top it with extra cheese and green onions for an eye-catching look. Add a sprinkle of fresh parsley for color. This makes your dip not just tasty, but also beautiful! Pro Tips Use Rotisserie Chicken: Rotisserie chicken not only saves you time but also adds great flavor to the dip. Just shred it and mix it in for effortless preparation. Adjust the Heat: Feel free to customize the amount of buffalo sauce based on your heat preference. Start with less if you're unsure and add more until you reach your desired spice level. Perfectly Creamy Texture: Ensure your cream cheese is softened to room temperature before mixing. This will help achieve a smooth and creamy consistency in your dip. Garnish for Visual Appeal: A sprinkle of fresh parsley or additional green onions on top not only enhances the flavor but also makes the dip more visually appealing for serving. {{image_4}} You can make this dip even healthier with a few easy swaps. First, use low-fat Greek yogurt instead of the regular kind. This keeps the protein high while cutting some calories. You can also try using low-fat cream cheese for a lighter option. When it comes to cheese, consider using part-skim mozzarella. This option gives you that melty goodness without as much fat. If you want more flavor, use a sharper cheese like aged cheddar, which adds taste without needing to use a lot. Want to kick up the flavor? Add ranch or blue cheese dressing to the mix. These dressings bring a nice twist and blend well with the buffalo sauce. Start with a couple of tablespoons, then taste and adjust as needed. You can also add vegetables for extra nutrition. Chopped bell peppers, spinach, or even diced celery mix well in the dip. They add crunch and color while boosting the health factor. Just be sure to chop them small so they blend nicely into the creamy base. These variations let you customize your buffalo chicken dip to fit your taste. Have fun experimenting! To keep your buffalo chicken dip fresh, store it in an airtight container. Refrigerate it within two hours of cooking. It will last up to three days in the fridge. For longer storage, freeze the dip in a freezer-safe container. Make sure to leave some space at the top for expansion. The dip can stay good in the freezer for about three months. When you're ready to enjoy leftovers, reheat them gently. The best method is to use the oven. Preheat your oven to 350°F (175°C). Place the dip in an oven-safe dish and cover it with foil. Heat for about 15-20 minutes, until warm. This keeps the dip creamy and prevents it from drying out. You can also microwave it, but do it in short bursts. Stir in between to ensure even heating. Enjoy your dip without losing any flavor! Yes, you can use pre-cooked chicken. Rotisserie chicken works well. Just shred it before mixing. This saves time and adds great flavor. The dip lasts about 3 to 5 days in the fridge. Make sure to store it in an airtight container. This helps keep it fresh and tasty. Absolutely! You can prepare the dip a day ahead. Just store it in the fridge before baking. When you're ready, bake it as directed for a warm treat. You can serve it with many dippables. Carrot sticks, celery, and tortilla chips are great choices. Soft pita chips also work well. Try to mix colors for a fun presentation! This blog post covers everything you need to make the best buffalo chicken dip. We discussed essential ingredients, from shredded chicken to spices. I shared clear steps for preparation and tips for perfecting the recipe. You learned how to make it healthier or add flavors. We also talked about storing leftovers and reheating methods. Try this dip at your next gathering. It's easy and a crowd-pleaser. Remember, the right ingredients and techniques make all the difference. Enjoy creating a delicious dish!

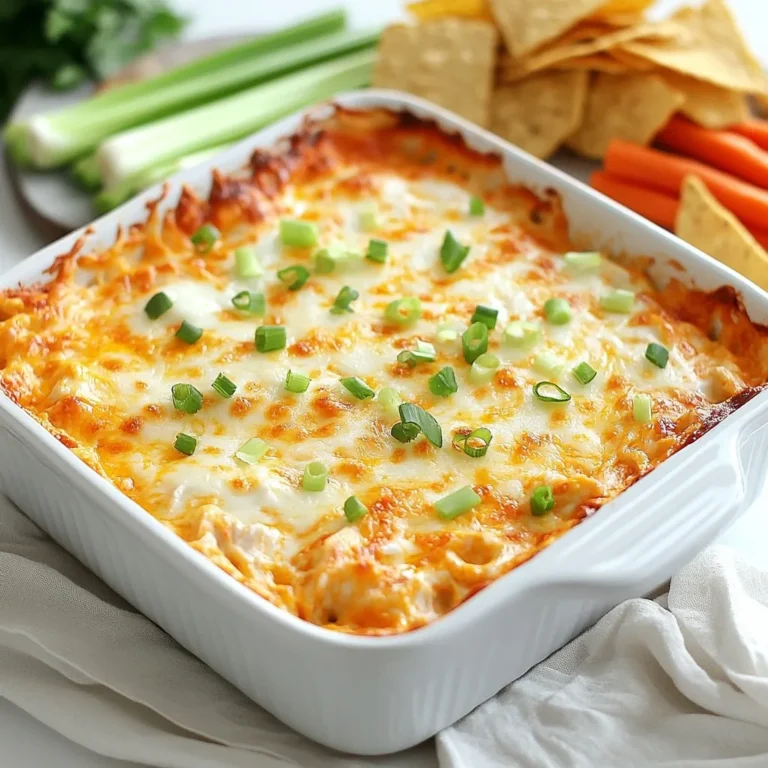
High-Protein Buffalo Chicken Dip for Game Day Fun

- 2 cups cooked white rice - 1 cup fresh spinach, blanched - 1 cup carrots, julienned - 1 cup cucumber, julienned - 1 cup bean sprouts, blanched - 1 cup shiitake mushrooms, sliced - 2 large eggs - 2 tablespoons sesame oil (divided) - 2 tablespoons gochujang (Korean chili paste) - 1 tablespoon soy sauce - 1 tablespoon toasted sesame seeds - Salt and pepper to taste - Chopped green onions, for garnish You can add a variety of ingredients to your bibimbap. Some great options include: - Sliced radishes - Zucchini, julienned - Kimchi for extra flavor - Chicken, beef, or tofu for protein These additions let you make the dish your own. Using high-quality ingredients is key to a great bibimbap. Fresh vegetables give a crisp and vibrant taste. Choose bright, firm veggies for the best flavor. Good rice ensures a nice base. I recommend using short-grain rice for its sticky texture. Authentic gochujang adds depth and flavor. Quality sesame oil enhances the aroma. Always aim for the best, and your bibimbap will shine! {{ingredient_image_2}} First, bring a pot of water to a boil. Blanch the spinach and bean sprouts for 1-2 minutes. After that, drain them and let them cool. In a non-stick pan, heat 1 tablespoon of sesame oil over medium heat. Add the sliced shiitake mushrooms. Sauté them for about 3-4 minutes until they are tender. Season with salt and pepper before removing them from the pan. Next, add the julienned carrots to the same pan. Sauté these for 2-3 minutes until they soften a bit but stay crunchy. Set them aside when done. Finally, add the julienned cucumber to the pan. Sauté briefly for 1-2 minutes just to warm it up, then set aside. In a small skillet, drizzle some sesame oil and heat it over low heat. Carefully crack in two large eggs. Fry them sunny-side up or to your liking. As they cook, sprinkle a pinch of salt on top for flavor. Grab a large serving bowl. Place a generous portion of cooked white rice as the base. Neatly arrange the blanched spinach, sautéed mushrooms, carrots, cucumbers, and bean sprouts around the rice. This creates a colorful and inviting display. Next, gently place the fried egg on top of the rice. Drizzle the remaining tablespoon of sesame oil and soy sauce over the dish. This adds depth of flavor. Serve it with gochujang on the side, so each person can add spice to their taste. Finally, sprinkle toasted sesame seeds and chopped green onions to boost flavor and visual appeal. To make perfect bibimbap, focus on cooking each ingredient well. Blanch the spinach for just 1-2 minutes. This keeps it bright and crunchy. Sauté the shiitake mushrooms until tender, about 3-4 minutes. Add salt to enhance their flavor. Cook the carrots for 2-3 minutes. They should be soft but still have a nice bite. When sautéing cucumbers, just warm them for 1-2 minutes. This keeps their fresh taste. Many skip blanching the bean sprouts and spinach. This step adds flavor and keeps veggies vibrant. Don’t overcook the carrots; they should still be a bit crunchy. Using too much gochujang can overpower the dish. Start with a small amount and add more if needed. Remember to season each layer as you cook. This builds flavor in every bite. Presentation matters in bibimbap. Use deep bowls to show off the colorful layers. Place rice at the bottom, then arrange veggies around it. Keep each ingredient in its own section for a beautiful look. Add a fried egg on top for a nice touch. Drizzle with sesame oil and soy sauce for extra flavor. Finally, sprinkle with sesame seeds and green onions. Serve with gochujang on the side so everyone can adjust the spice. Pro Tips Use Day-Old Rice: For the best texture, use day-old rice that has been stored in the fridge. This helps to prevent the rice from becoming too mushy when mixed with the vegetables. Customize Your Veggies: Feel free to swap in your favorite vegetables or use whatever is in season. Bell peppers, zucchini, or radishes can be great additions! Perfectly Cooked Eggs: For a beautifully runny yolk, lower the heat while frying the eggs and cover the skillet with a lid. This will cook the whites evenly without overcooking the yolk. Mix It Up: Before serving, remind everyone to mix their bibimbap thoroughly. This ensures that the flavors of the gochujang, sesame oil, and vegetables are evenly distributed. {{image_4}} You can add meat to your bibimbap for more protein. Chicken and beef are popular choices. Slice cooked chicken or beef thinly. Sauté them in a pan with a bit of sesame oil. Tofu is a great option too. Use firm tofu, cut it into cubes, and pan-fry until golden. Each meat adds its own flavor, making the dish richer. If you prefer a vegetarian or vegan bibimbap, simply skip the eggs and meat. You can add more veggies like zucchini or bell peppers. Try using marinated tofu for extra flavor. A mix of mushrooms and greens will keep your meal exciting and tasty. This way, everyone can enjoy bibimbap! To boost the flavor, consider sauces and seasonings. Gochujang is essential for spice. Adjust the amount to fit your taste. You can also add a splash of soy sauce for umami. Some people enjoy a drizzle of sriracha or sesame oil. Don’t forget the toasted sesame seeds! They add a nice crunch. Experiment with flavors to find your perfect mix! To store your leftover bibimbap, let it cool first. Place it in an airtight container. Keep it in the fridge for up to three days. This way, you keep the flavors fresh. When you’re ready to eat, reheat bibimbap in the microwave. Use a microwave-safe bowl. Cover it with a damp paper towel to keep moisture. Heat for one to two minutes. Stir halfway through to warm evenly. If you prefer, you can also reheat it on the stovetop. Just add a splash of water and cover it. Heat on low until warmed through. If you want to save bibimbap for later, freezing works well. Pack the rice and veggies in separate containers. This helps keep the texture nice. Make sure they are cool before freezing. Use freezer-safe bags or containers. You can store it for up to three months. When ready, thaw it in the fridge overnight and reheat as mentioned above. Bibimbap is a Korean dish that means “mixed rice.” It features warm rice topped with a variety of vegetables, eggs, and often meat. The dish is colorful and offers a mix of flavors. It’s served with gochujang, a spicy red pepper paste, which adds depth. You can customize it with your favorite ingredients, making it versatile. To make bibimbap spicier, you can simply add more gochujang. Start with a small amount and taste as you go. You can also add sliced fresh chili peppers for extra heat. Another option is to use spicy sesame oil instead of regular sesame oil. This will give your dish a nice kick without overpowering the other flavors. Yes, you can use brown rice instead of white rice in bibimbap. Brown rice has a nuttier flavor and more fiber. Just note that it takes longer to cook. Make sure to adjust the cooking time to ensure it’s tender. The texture will be different, but it still works great in this dish. In this article, we explored the key ingredients and steps to make bibimbap. We focused on quality ingredients, cooking methods, and tips to enhance flavor. Remember to customize your bibimbap with your favorite meats or veggies. Avoid common mistakes for the best results. Whether storing leftovers or reheating, proper methods keep your meal fresh. Bibimbap is versatile and can fit many tastes. Enjoy creating your own unique version!

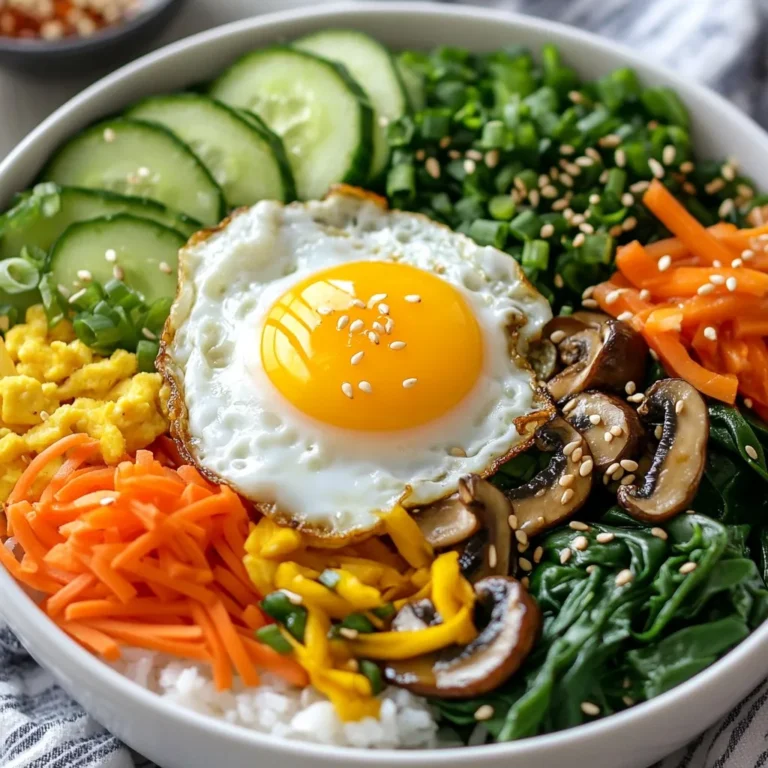
Simple Korean Bibimbap Flavorful and Easy Meal Guide

- 2 cups pretzels, broken into pieces - 1 cup semi-sweet chocolate chips - 1 cup dark chocolate chips - 1 cup caramel sauce (store-bought or homemade) - 1 teaspoon sea salt - Optional: 1/2 cup chopped nuts (such as pecans or almonds) If you want to mix things up, you can swap ingredients. Use milk chocolate chips instead of semi-sweet chocolate. If you prefer a less sweet bark, try using just dark chocolate chips. For a nut-free option, leave out the nuts or replace them with seeds, like pumpkin or sunflower. When it comes to chocolate, quality matters. I recommend using good brands of chocolate chips. Look for bars that have at least 60% cocoa for dark chocolate. Semi-sweet chocolate chips add a nice balance of sweetness. The mix of both chocolates gives the bark a rich flavor. Always check for any added ingredients. The fewer, the better! This ensures your bark has a clean and rich taste. {{ingredient_image_2}} Start by preheating your oven to 350°F (175°C). This heat will toast the pretzels just right. Next, line a baking sheet with parchment paper. Make sure to cover the sides too. This will help you lift out the bark later. Spread the broken pretzel pieces evenly across the baking sheet. Aim for a single layer. This helps each pretzel get coated. Bake them in the oven for 5-7 minutes. Keep an eye on them. You want a light golden color but not burned. Once they look good, take them out and let them cool for a few minutes. While the pretzels cool, grab a microwave-safe bowl. Add both types of chocolate chips to it. Microwave in 30-second bursts, stirring in between. Keep going until the chocolate is smooth and melted. Watch closely, so it doesn’t burn. Now, pour the melted chocolate over the toasted pretzels. Use a spatula to spread the chocolate evenly. Make sure every pretzel piece gets a nice coat. Next, drizzle caramel sauce over the chocolate. Do this generously. For a fancy touch, swirl the caramel lightly with a toothpick. Sprinkle sea salt over the top to boost the flavor. If you’re adding nuts, do it now for extra crunch. Place the baking sheet in the fridge. Let it chill for at least 1 hour. You want the chocolate and caramel to set firm. Once ready, break the bark into chunks and store in an airtight container. Enjoy your sweet treat! To melt chocolate smoothly, use a microwave-safe bowl. Combine semi-sweet and dark chocolate chips. Heat in 30-second bursts, stirring in between. This helps prevent burning. Stir until smooth; the chocolate should be glossy and fluid. If it seems thick, heat a few more seconds. You want a nice pourable consistency. The key to great salted caramel pretzel bark is the balance of flavors. Use 1 teaspoon of sea salt. This salt adds a nice punch against the sweet caramel and chocolate. Taste a piece before adding more salt. You can always sprinkle a little extra on top after serving for added flavor. For a lovely presentation, cut the bark into pieces after it cools. Arrange it on a decorative platter. You can sprinkle some extra sea salt on top for a pop. A drizzle of caramel adds a nice touch too. Serve it at parties or pack it for gifts. It looks great and tastes even better! Pro Tips Use Quality Chocolate: Opt for high-quality chocolate chips for a smoother melt and richer flavor in your bark. Customize Your Nuts: Feel free to experiment with different types of nuts or even add dried fruits for added texture and flavor. Be Patient with Melting: When melting chocolate, stir frequently and use low power settings to avoid scorching the chocolate. Chill Before Cutting: Make sure the bark is fully set before breaking it into pieces for cleaner edges and better presentation. {{image_4}} You can easily make Salted Caramel Pretzel Bark nut-free. Just skip the chopped nuts. This bark is still tasty and crunchy without them. You can also add seeds for crunch. Try pumpkin or sunflower seeds for a nut-free twist. Want to change up the flavor? You can add spices or extracts. A pinch of cinnamon gives a warm taste. You could also use peppermint extract for a fresh touch. Mix in a little chili powder for some heat. These small changes can make your bark unique and fun. Seasonal toppings add flair to your bark. For fall, sprinkle on crushed candy corn or pumpkin spice. In winter, add crushed candy canes for a festive look. Use colored sprinkles for birthdays or bright holidays. These toppings can make your bark a great gift or party treat. To keep your salted caramel pretzel bark fresh, use an airtight container. Layer the bark pieces with parchment paper. This step prevents them from sticking together. Store the container in a cool, dry place. Avoid areas with heat or moisture. When stored properly, the bark lasts about two weeks. After that, it may lose flavor and texture. If you notice any changes, it's best to toss it out. Always check for any signs of spoilage before eating. You can freeze salted caramel pretzel bark for up to three months. Wrap each piece tightly in plastic wrap. Then, place them in a freezer-safe bag or container. When you’re ready to enjoy, let the bark thaw in the fridge. This keeps the texture nice and fresh. You should use regular pretzels, broken into pieces. I like to use the classic pretzel shape, as it adds a nice crunch. You can also use pretzel sticks or rods if you prefer. Just make sure they are not too thick. This way, they will coat well with chocolate and caramel. Yes, you can make homemade caramel sauce! To do this, melt sugar in a pan. Once it turns golden, add butter and cream. Stir until smooth. Homemade caramel adds a rich flavor to your bark. If you’re short on time, store-bought caramel works just fine too. To prevent burning, melt chocolate in short bursts. Use 30-second intervals in the microwave. Stir after each interval to distribute heat. If you see any lumps, keep stirring until smooth. This method stops the chocolate from getting too hot. Yes, you can use white chocolate! It will give a different taste and look. White chocolate is sweeter, so adjust your caramel amount if needed. If you love the sweet and salty mix, white chocolate can work well in this recipe. You can customize your bark in many ways! Add nuts like pecans or almonds for crunch. You can also mix in dried fruit or sprinkles for fun colors. Try adding a pinch of cinnamon or a dash of cayenne for a unique twist. The options are endless! In this article, we explored how to make Salted Caramel Pretzel Bark, starting with the key ingredients like pretzels, chocolate, and caramel. I shared step-by-step instructions and helpful tips to perfect your bark. We also discussed variations and storage methods to keep your treat fresh. Remember, this bark is easy to make and fun to share. Enjoy experimenting with flavors and ideas, and make it your own. Happy snacking!

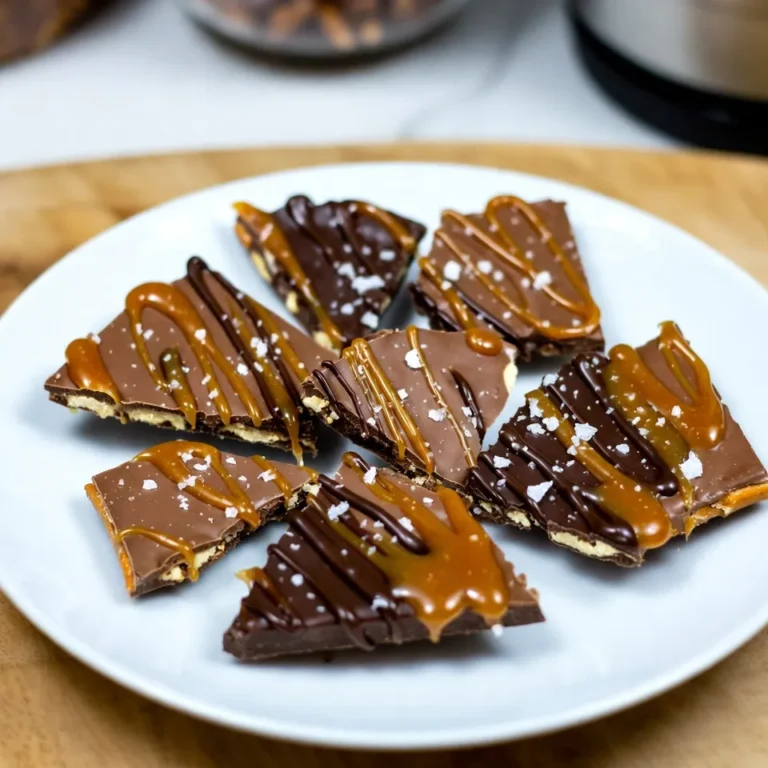
Salted Caramel Pretzel Bark Irresistible Sweet Treat

- 2 cups all-purpose flour - 3/4 cup granulated sugar - 1 teaspoon baking powder - 1/2 teaspoon baking soda - 1/2 teaspoon salt - 1 teaspoon ground cinnamon - 1/2 teaspoon ground nutmeg - 1/4 cup unsalted butter, melted - 1 cup buttermilk (or substitute with milk mixed with 1 tablespoon vinegar) - 2 large eggs - 2 cups diced apples (Granny Smith or Honeycrisp) - 1/2 cup packed brown sugar - 1 teaspoon vanilla extract - 1/4 cup chopped walnuts or pecans (optional) - Powdered sugar for dusting Using high-quality ingredients makes a big difference in flavor. Choose fresh apples. Granny Smith and Honeycrisp are best for their tartness. These apples add a nice bite to the sweet bread. Fresh spices, like cinnamon and nutmeg, enhance the aroma and taste. Always check the expiry dates on baking powder and baking soda. Fresh leavening agents will help your bread rise well. Fresh apples are key to this recipe. They add moisture and flavor. When you bite into the bread, you want that juicy, crisp texture. Old or mealy apples won't give you that taste. I recommend buying apples from local farmers' markets if possible. They often taste better than store-bought ones. Always peel and dice your apples just before adding them. This keeps them firm and tasty in the bread. {{ingredient_image_2}} First, preheat your oven to 350°F (175°C). Grease a 9x5-inch loaf pan with butter or non-stick spray. This helps the bread come out easily after baking. In a large bowl, sift together the dry ingredients. Measure 2 cups of all-purpose flour, 3/4 cup of granulated sugar, 1 teaspoon of baking powder, 1/2 teaspoon of baking soda, and 1/2 teaspoon of salt. Add 1 teaspoon of ground cinnamon and 1/2 teaspoon of ground nutmeg. Stir these together well with a whisk. This step ensures that all your leavening agents and spices mix evenly. In another bowl, combine the wet ingredients. Mix 1/4 cup of melted unsalted butter, 1 cup of buttermilk, 2 large eggs, and 1 teaspoon of vanilla extract. Whisk until the mixture is smooth and creamy. Pour the wet mixture into the dry ingredients. Stir gently until just combined. It's okay if there are small lumps; do not overmix. This will help keep your bread light and fluffy. Fold in 2 cups of peeled and diced apples and, if you like, 1/4 cup of chopped walnuts or pecans. In a small bowl, mix 1/2 cup of packed brown sugar with an extra teaspoon of cinnamon. Pour half of the batter into the loaf pan. Sprinkle half of the brown sugar mixture on top. Add the rest of the batter, then top with the remaining brown sugar mix. Use a knife to swirl the layers for a nice marbled look. Place your loaf pan in the oven and bake it for 50-60 minutes. Check with a toothpick in the center; it should come out clean. Keep an eye on it as baking times may vary slightly. After baking, let the bread cool in the pan for about 15 minutes. Transfer it to a wire rack to cool completely. Dust the top with powdered sugar once it's cool for a lovely finish. To make fluffier bread, use fresh baking powder and baking soda. These help the bread rise well. Mix the dry ingredients well. This ensures even distribution. When you mix the wet and dry ingredients, stir just until combined. Small lumps are fine; they help keep the bread light. Letting the batter rest for a few minutes can also add fluffiness. For a nice swirl, pour half the batter into the pan. Then sprinkle half of the brown sugar mixture on top. Pour the rest of the batter over it. Finish with the remaining sugar mixture. Use a knife to gently swirl through the batter. Make sure not to mix it all together. You want to see the layers for a beautiful marble effect. A 9x5-inch loaf pan is a must for this recipe. It helps the bread bake evenly. Use a whisk for mixing dry ingredients. A rubber spatula works great for folding in the apples. An offset spatula can help spread the batter evenly. Finally, a toothpick is handy for checking doneness. These tools make the process smoother and more fun! Pro Tips Use Fresh Apples: For the best flavor and texture, use fresh, tart apples like Granny Smith or Honeycrisp. They hold their shape well during baking and provide a delicious contrast to the sweetness of the bread. Don’t Overmix: When combining the wet and dry ingredients, mix just until combined. Overmixing can lead to a dense bread, so it's okay if there are a few lumps in the batter. Swirl Effect: For a beautiful marbled effect, gently swirl the brown sugar mixture into the batter with a knife. Be careful not to overdo it, as you want distinct layers for visual appeal. Cooling Time: Allow the bread to cool in the pan for at least 15 minutes before transferring it to a wire rack. This helps it set properly and makes for easier slicing. {{image_4}} You can switch up the apples in this recipe. Try using pears for a sweet twist. Peaches or plums add nice flavor and moisture too. Berries, like blueberries or raspberries, also work well. Just remember to chop large fruits into small pieces for even baking. To make this bread vegan, swap the eggs for flax eggs. Mix one tablespoon of flaxseed meal with three tablespoons of water. Let it sit until it thickens. Use a plant-based milk instead of buttermilk. Almond or soy milk works great. You can also replace the butter with coconut oil or vegan butter. For a gluten-free version, use a gluten-free flour blend. Make sure it includes xanthan gum for texture. You can also mix almond flour and coconut flour for a nutty taste. Check if your baking powder is gluten-free too. This way, everyone can enjoy your tasty bread! To keep your Amish Apple Fritter Bread fresh, wrap it tightly. Use plastic wrap or foil. You can also place it in an airtight container. Store it at room temperature for up to three days. This way, it stays soft and moist. If you want to save some bread for later, freezing is a great option. First, let the bread cool completely. Then, wrap it well in plastic wrap or foil. Place the wrapped bread in a freezer-safe bag. It can stay frozen for up to three months. When you're ready to enjoy it, thaw it in the fridge overnight. To enjoy the best flavor and texture, eat the bread within three days if stored at room temperature. If frozen, aim to eat it within three months. Always check for any signs of spoilage, like mold or off smells. These simple tips help your bread taste great every time! The best apples for Amish Apple Fritter Bread are Granny Smith and Honeycrisp. These apples have a nice tartness that balances the sweet bread. They hold their shape well during baking too. This keeps the apple pieces juicy and flavorful. Yes, you can make this bread ahead of time. It stays fresh for a few days at room temperature. Just store it in an airtight container to keep it moist. You can also freeze the bread. Wrap it in plastic wrap and then foil. It can last for up to three months in the freezer. To check if the bread is fully baked, insert a toothpick into the center. If it comes out clean, the bread is done. If it has wet batter on it, bake for a few more minutes. The bread should also have a nice golden brown color on top. Yes, you can substitute buttermilk with regular milk. Just mix one cup of milk with a tablespoon of vinegar. Let it sit for five minutes before using. This will give you a similar tangy flavor that buttermilk provides. You can serve this bread with a variety of toppings. Whipped cream or vanilla ice cream pair well for dessert. A drizzle of caramel sauce adds a sweet touch. For breakfast, try serving it with maple syrup or a sprinkle of cinnamon sugar. In this post, we explored the key ingredients and steps for making delicious Amish Apple Fritter Bread. Fresh apples and quality ingredients set the stage for fluffy bread. Remember to use Granny Smith or Honeycrisp apples for the best flavor. As you bake, feel free to experiment with variations and storage methods. With these tips, you can enjoy a delightful treat any time. Happy baking!

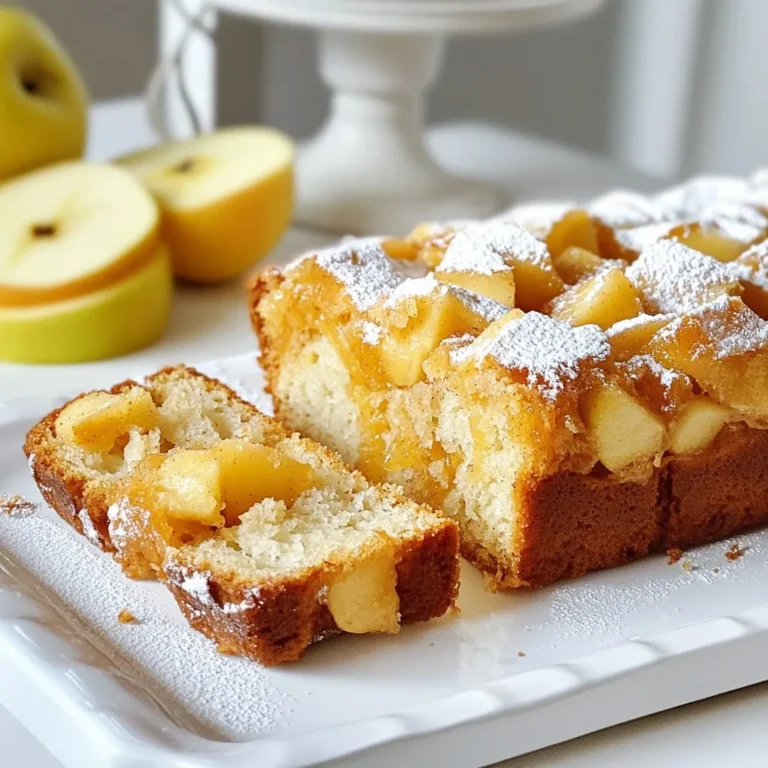
Amish Apple Fritter Bread Tasty and Simple Recipe

- 2 cups shredded cooked chicken - 1 (8 oz) package of cream cheese, softened - 1/2 cup sour cream - 1/2 cup mayonnaise - 1 cup Buffalo sauce - 1 cup shredded sharp cheddar cheese These ingredients form the base of your dip. The shredded chicken gives it texture and protein. Cream cheese, sour cream, and mayonnaise create a rich, creamy base. Buffalo sauce adds spice, and cheddar cheese brings in a sharp flavor. - 1/2 cup crumbled blue cheese - 1/2 teaspoon garlic powder - 1/4 teaspoon onion powder - Salt and pepper to taste You can add crumbled blue cheese for extra richness. Garlic and onion powders deepen the flavor. Salt and pepper balance all the tastes. Feel free to adjust these to match your taste. Each addition can change your dip's flavor, making it even more special. {{ingredient_image_2}} 1. Preheat your oven to 350°F (175°C). This step gets the oven hot for baking. 2. In a large bowl, add the softened cream cheese, sour cream, and mayonnaise. Mix until smooth. You can use a hand mixer or a spatula for this. 1. Once mixed, fold in the shredded chicken. Then, add the Buffalo sauce, garlic powder, and onion powder. Ensure everything is blended well. 2. Next, gently fold in the shredded cheddar cheese. If you like, add crumbled blue cheese as well. Season with salt and pepper to taste. 1. Grease an 8x8-inch baking dish with cooking spray or olive oil. This helps the dip not stick. 2. Pour your creamy chicken mixture into the dish, spreading it evenly. 3. Bake in the preheated oven for 20-25 minutes. Look for a hot, bubbly dip with a golden top. After baking, let it cool for a few minutes before serving. - Choosing the right chicken and cheeses: I love using rotisserie chicken. It saves time and adds flavor. For cheese, sharp cheddar shines in this dip. You can also add crumbled blue cheese for a richer taste. - Adjusting Buffalo sauce for heat preference: Buffalos are spicy! If you like it mild, use less sauce. Add a bit more if you crave heat. Always taste as you go. - Best dippers: tortilla chips, celery, and carrots: Tortilla chips are my top choice. They add a nice crunch. Celery and carrots offer a fresh bite. Mix and match for fun! - Presentation tips for serving guests: Serve warm in the baking dish. Garnish with chopped green onions or parsley for color. Arrange dippers around the dip to make it inviting. Enjoy the savory goodness! Pro Tips Use Leftover Chicken: Utilizing rotisserie chicken not only saves time but also adds a depth of flavor to your dip. Adjust the Heat: Tailor the amount of Buffalo sauce to your liking; start with less and add more if you prefer extra spice. Cheese Variations: Experiment with different cheeses like Monterey Jack or Pepper Jack for a unique twist on flavor and heat. Serving Suggestions: Serve with a variety of dippers such as toasted baguette slices or crunchy crackers to enhance the experience. {{image_4}} If you love heat, try adding jalapeños or hotter sauces. Diced jalapeños add a fresh crunch and spice. You can also use a spicier Buffalo sauce for a real kick. Adjust the amount to suit your taste. Start with a small amount, then add more if you want it hotter. You can make this dip lighter by using light cream cheese and Greek yogurt. These swaps cut calories and add protein. For those on a low-carb diet, consider using shredded chicken without the sauce. You can mix in some spices instead for flavor. This way, you can enjoy a tasty dip without the carbs. Serving Buffalo chicken dip in a bread bowl is a fun twist. Just hollow out a round loaf of bread and fill it with the dip. It makes a great centerpiece! You can also create layered dip variations. Start with a layer of the Buffalo dip, then add layers of cheese, salsa, or guacamole. Each bite will be a surprise! To store leftover Buffalo chicken dip, let it cool first. Place it in an airtight container. Make sure the lid seals tightly. This keeps the dip fresh. You can store it in the fridge for up to four days. If you want to save it longer, freeze it. Use a freezer-safe container and label it. It can last up to three months in the freezer. To reheat the dip, I suggest using the oven or microwave. If using the oven, preheat it to 350°F (175°C). Transfer the dip to a baking dish. Heat for about 15-20 minutes, or until it's hot and bubbly. Stir halfway through to ensure even heating. In the microwave, place the dip in a microwave-safe bowl. Heat in 30-second increments, stirring in between. This keeps the dip creamy and tasty. You can make Buffalo chicken dip ahead of time. Prepare the dip completely but don’t bake it yet. Cover the dish tightly with plastic wrap. Store it in the fridge for up to 24 hours. When you are ready, just pop it in the oven. Bake as directed for a fresh, warm dip when your guests arrive. Can I make this dip in a slow cooker? Yes, you can! Just mix all the ingredients in the slow cooker. Cook on low for 2 to 3 hours. Stir occasionally until it’s hot and bubbly. This method is great for parties. How long does Buffalo chicken dip last in the fridge? Buffalo chicken dip lasts about 3 to 5 days in the fridge. Make sure to store it in an airtight container. If it looks or smells off, it’s best to throw it away. What can I use instead of mayonnaise? You can use Greek yogurt or avocado. Both options add creaminess without the extra calories. They also bring a nice twist to the flavor. Is there a non-dairy option for cream cheese? Yes! Look for vegan cream cheese made from nuts or tofu. These options work well in the dip and keep it creamy. How many people does this recipe serve? This recipe serves about 8 people. It’s perfect for game day or a small get-together. You can easily double it if you have more guests. Can this dip be scaled for larger gatherings? Absolutely! Just increase the ingredients. For a crowd, you might want to make two batches. This way, everyone can enjoy. Buffalo chicken dip is a tasty choice for any gathering. You learned about the key ingredients, like chicken and cheese, and how to mix them. I shared tips for making it perfect and serving it right. Remember, you can always adjust the heat level or swap ingredients. Enjoy making this dip for your next party, and feel free to experiment with flavors. Good food brings people together, so dive into this fun recipe!

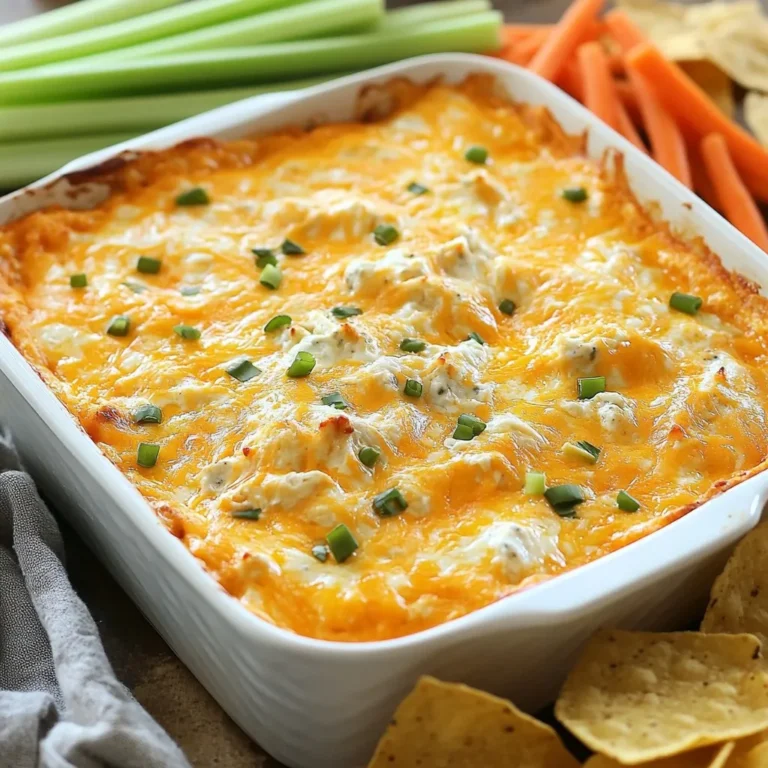
Buffalo Chicken Dip Delight Simple and Tasty Recipe

To make Christmas Lights Pretzel Rods, you need the following ingredients: - 12 pretzel rods - 1 cup white chocolate chips - 1 cup milk chocolate chips - 1 cup colorful candy melts (red, green, yellow, blue) - 1/2 cup mini M&M’s or assorted colorful candies for decoration - 1 teaspoon coconut oil (optional) - Sprinkles (optional) Each ingredient plays a key role in making these treats fun and festive. The pretzel rods give a nice crunch. The white and milk chocolate add sweetness and creaminess. Colorful candy melts bring bright colors, just like Christmas lights! Mini M&M’s and sprinkles offer a fun touch and make them shine. If you want, use coconut oil to keep the chocolate smooth and shiny. Have fun mixing and matching these ingredients! You can even swap in your favorite candies. Enjoy the process and let your creativity shine! {{ingredient_image_2}} To melt chocolate, use a microwave-safe bowl. Place white chocolate chips in one bowl and milk chocolate chips in another. Heat each bowl for 20 seconds at a time. After each burst, stir well. Keep going until the chocolate is fully smooth. If you want a creamier texture, add coconut oil. It helps make the chocolate silky. Grab a pretzel rod and dip it into the melted chocolate. Make sure it gets a good coat. After dipping, gently shake the rod. This lets extra chocolate drip back into the bowl. If needed, use a fork to lift the rod out of the chocolate. This helps avoid a messy look. While the chocolate is still soft, sprinkle mini M&M’s or colorful candies on the rod. You can get creative here! For extra fun, melt the colorful candy melts in a different bowl. Then, drizzle them over the pretzel rod in a zigzag. This looks like twinkling Christmas lights. Line a baking sheet with parchment paper. Place your decorated pretzel rods on it. Then, put the baking sheet in the fridge. Chill for about 15 to 20 minutes. This step is key for a perfect texture. It helps the chocolate set firmly and makes the rods easier to enjoy. You can change the flavor of your Christmas Lights Pretzel Rods by using different chocolates. Instead of white and milk chocolate, try dark chocolate for a richer taste. You can also use flavored chocolate, like mint or caramel, for fun twists. Add flavors to your candy melts for a unique touch. Consider peppermint extract or orange zest in the melts. This step gives your treats a fun holiday touch and makes them even tastier. If you want gluten-free pretzel rods, look for gluten-free pretzel options. Many brands offer them, and they work just as well. You can enjoy the same festive treat without worry. For vegan alternatives, use dairy-free chocolate chips and candy melts. Brands like Enjoy Life offer great vegan options. This way, everyone can enjoy these festive snacks. You can change these pretzel rods for different holidays. For Halloween, use orange and black candy melts. You can add spooky sprinkles or candy eyes for a fun twist. For Easter, dip the rods in pastel colors, like pink and lavender. Use mini eggs or bunny-shaped candies for decoration. These themed variations will add joy to any holiday table! Pro Tips Use Quality Chocolate: Opt for high-quality chocolate chips for a richer flavor and smoother melting experience. The better the chocolate, the more delicious your pretzel rods will taste. Experiment with Flavors: Don't hesitate to add flavor extracts like peppermint or almond to your melted chocolate for a unique twist that complements the holiday season. Mix and Match Colors: Get creative with the colors of your candy melts! Mixing different colors can create beautiful patterns and festive designs that enhance the visual appeal of your treats. Storage Tips: Store your pretzel rods in an airtight container at room temperature to keep them fresh. If you need to stack them, place parchment paper between layers to prevent sticking. {{image_4}} To keep your Christmas Lights Pretzel Rods fresh, store them in a cool, dry place. I recommend using an airtight container. This helps prevent moisture from ruining their crunch. - Use a shallow container to avoid stacking. - Place parchment paper between layers to prevent sticking. - Keep them away from heat sources and direct sunlight. These festive treats can last about two weeks when stored properly. However, they taste best within the first week. Signs that your pretzel rods are past their prime include: - A change in texture, feeling stale or soft. - Discoloration of chocolate or candies. - Off or stale smells when you open the container. Keeping an eye on these signs helps ensure you enjoy your sweet creations while they are at their best! Yes, you can make these pretzel rods ahead of time. I recommend preparing them 1 to 2 days in advance. This way, the chocolate will have time to set fully. Just store them in an airtight container at room temperature. This helps keep them fresh and tasty for your holiday fun. If you don’t have pretzel rods, you can use other snacks. Try pretzel twists or mini pretzels. You can even use graham crackers or cookies for a sweet treat. Each snack will give you a different crunch and flavor. You can add more color and fun! Use different types of sprinkles, such as holiday-themed shapes. Add edible glitter to make them sparkle. You can also drizzle more colorful candy melts on top. Each added detail makes your pretzel rods pop with festivity! Yes, you can use regular chocolate bars for dipping. Just chop them into small pieces for easy melting. Milk chocolate, dark chocolate, or white chocolate will all work well. This gives you more flavor choices for your pretzel rods. You learned how to make fun pretzel rods using simple steps. From melting chocolate to decorating, each part is easy and enjoyable. You can customize them for any occasion, too! Remember to store these treats well for the best taste. So, gather your ingredients and get creative. Whether for yourself or as a gift, these pretzel rods will delight everyone. Enjoy making and sharing your tasty creations!

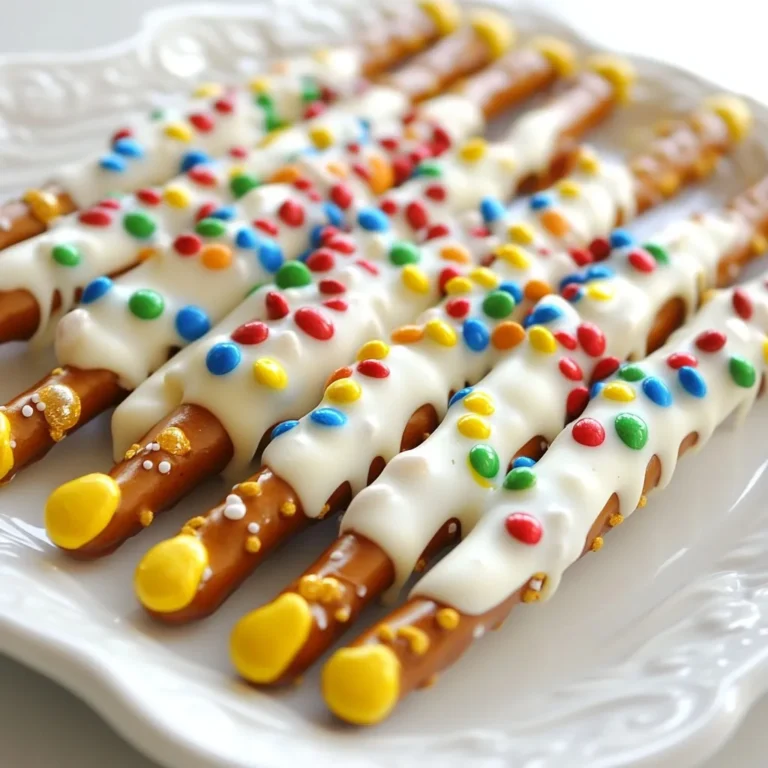
Christmas Lights Pretzel Rods Fun and Festive Treat

- 12 slider-size dinner rolls - 1 lb deli turkey or chicken, thinly sliced - 8 oz Swiss cheese, thinly sliced - 1/2 cup mayonnaise - 1 tablespoon Dijon mustard - 1/4 cup unsalted butter, melted - 1 tablespoon poppy seeds - 1 tablespoon garlic powder - 1 tablespoon onion powder - Kosher salt and freshly ground black pepper, to taste Gathering the right ingredients sets the stage for great flavor. You will start with slider-size dinner rolls, perfect for a party. Choose thinly sliced deli turkey or chicken to keep things easy. Swiss cheese adds a creamy taste that pairs well with the meat. For the spread, mix mayonnaise and Dijon mustard. This blend adds a nice zing to every bite. Melted unsalted butter gives a rich finish. The seasonings include poppy seeds, garlic powder, and onion powder. Sprinkle in a bit of Kosher salt and black pepper for extra flavor. By using fresh, quality ingredients, you will ensure your Party Hot Roll Sandwiches are a hit! {{ingredient_image_2}} 1. Preheat the oven: Start by setting your oven to 350°F (175°C). This warms it up for baking later. 2. Prepare the dinner rolls: Carefully slice the 12 slider-size dinner rolls in half. Keep the halves connected. This makes it easy to assemble the sandwiches. 3. Make the spread: In a small bowl, mix 1/2 cup mayonnaise and 1 tablespoon Dijon mustard. Stir until smooth. Spread this mix on the cut side of the bottom halves of the rolls. 1. Layer the filling: Place a layer of 1 lb deli turkey or chicken on top of the mayo spread. Next, lay 8 oz Swiss cheese over the meat. This adds great flavor. 2. Reassemble the sandwiches: Place the top halves of the rolls back on. This forms your complete sandwiches. 3. Prepare the butter mixture: In another small bowl, whisk together 1/4 cup melted unsalted butter, 1 tablespoon poppy seeds, 1 tablespoon garlic powder, 1 tablespoon onion powder, salt, and pepper. This gives your sandwiches a rich taste. 1. Brush the butter mixture: Pour the butter mixture evenly over the tops of the sandwiches. Make sure every roll is covered well. 2. Cover and bake: Cover the sandwiches with aluminum foil. Place them in the preheated oven and bake for 15 minutes. This helps the flavors blend. 3. Finish baking: After 15 minutes, remove the foil. Bake for an additional 10 minutes. The tops should turn golden brown and the cheese should bubble. This creates a nice crunch. You can prepare the filling in advance. Simply slice the turkey or chicken and cheese the day before. Store them in airtight containers in the fridge. This saves time on the day of your gathering. Assembling sandwiches ahead of time is also smart. Just layer the rolls with mayo, turkey, and cheese. Cover them in plastic wrap and place them in the fridge. Bake them when your guests arrive for warm and tasty sandwiches. To achieve perfect golden brown results, keep an eye on the oven. Remove the foil after 15 minutes to let the tops crisp up. This step is key for that crunchy texture. For recommended baking times, bake the sandwiches for a total of 25 minutes. First, cover and bake for 15 minutes, then uncover and bake for 10 more. You want the cheese to bubble and the tops to be golden. The ideal serving temperature for these sandwiches is warm, right from the oven. Warm sandwiches taste best! For creative presentation ideas, arrange the sliced sandwiches on a bright platter. Garnish with fresh herbs like parsley or chives. A side of pickles adds a nice crunch and color to your table. These small touches make your dish look festive and inviting! Pro Tips Use Fresh Ingredients: Always opt for fresh deli meats and quality cheese to enhance the flavors of your sandwiches. Customize Your Toppings: Feel free to add your favorite toppings like sliced tomatoes or lettuce for added freshness and texture. Make Ahead: These sandwiches can be assembled a few hours in advance and stored in the fridge until baking for a quick party snack. Experiment with Cheese: Try different types of cheese such as cheddar or pepper jack for a twist on the classic flavor. {{image_4}} You can switch up the meat in your Party Hot Roll Sandwiches easily. If you can't find turkey or chicken, try these: - Roast beef - Ham - Salami - Pulled pork For a vegetarian option, use hearty roasted vegetables, like zucchini and bell peppers. You can also use marinated tofu or tempeh for great taste and protein. Swiss cheese is a classic choice, but many other cheeses work well. Here are some great pairings: - Cheddar for a sharp kick - Provolone for a smooth texture - Pepper jack for a spicy twist Using stronger cheeses, like blue cheese or gouda, can add exciting flavors. Just remember, a little goes a long way! To make your sandwiches even better, think about adding spreads and toppings. Try these ideas: - Honey mustard for a sweet touch - Hummus for a creamy base - Sriracha for some heat Adjust the spice level by adding more or less of these toppings. You can also sprinkle in some fresh herbs, like basil or cilantro, for a burst of freshness. To keep your leftovers fresh, store them in an airtight container. This helps maintain moisture and flavor. Place the sandwiches in the fridge right away. They will stay good for about 3 days. For reheating, preheat your oven to 350°F (175°C). Place the sandwiches on a baking sheet. Cover them with foil to keep them from drying out. Heat for about 10 to 15 minutes. Check if the cheese is melted and warm. You can also microwave them for about 30 to 60 seconds, but the oven gives better results. You can freeze pre-assembled sandwiches for later. Wrap each sandwich tightly in plastic wrap. Then, place them in a freezer bag. This helps keep out air and prevents freezer burn. They can last in the freezer for about 2 months. When you’re ready to eat, thaw them in the fridge overnight. For best results, reheat them in the oven. Preheat to 350°F (175°C) and bake for 15 to 20 minutes. This brings back that gooey, warm goodness. Enjoy your Party Hot Roll Sandwiches anytime! Yes, you can use different breads! Here are some great options: - Hawaiian Rolls: They add a sweet taste. - Ciabatta: This gives a nice crunch. - Pita Bread: Perfect for a fun twist. - Whole Wheat Rolls: A healthier choice. Each bread type changes the flavor, so try what you like best! These sandwiches last about 3 to 4 days in the fridge. To keep them fresh: - Wrap them well in plastic wrap. - Place them in an airtight container. This helps keep them tasty and moist. If you notice any signs of spoilage, it’s best to toss them. Trust your nose! Absolutely! You can make tasty vegetarian options. Here are some ideas: - Grilled Vegetables: Use zucchini, bell peppers, and mushrooms. - Spinach and Feta: A classic combination that packs flavor. - Hummus and Roasted Red Peppers: Adds creaminess and sweetness. - Avocado and Tomato: Fresh and filling! These fillings will make your hot roll sandwiches just as delicious! You learned how to make delicious hot roll sandwiches. We covered ingredients, steps, and tips. Making ahead makes it easy to enjoy later. Don't forget the tasty variations and storage methods I shared. Experiment with meats and cheeses to find your favorite combo. These sandwiches are fun to serve and share. Try new ideas to impress your friends and family. Enjoy creating these tasty treats!

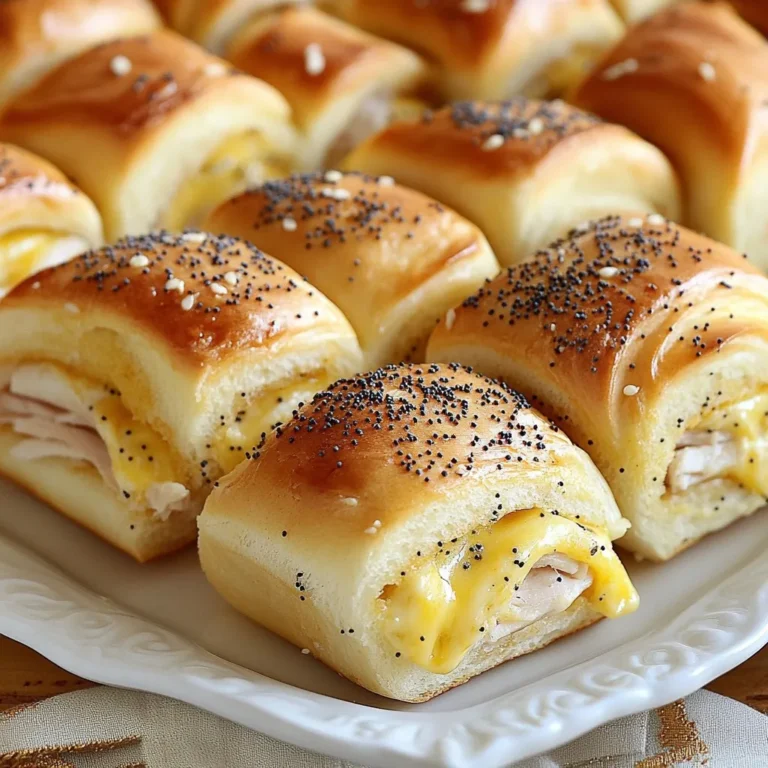
Party Hot Roll Sandwiches Perfect for Any Gathering

PREV 1 … 34 35 36 … 44 NEXT
yummybiterecipes

explore

DessertsDinnerAppetizersDrinks

Our Policies

  • Cookie Policy
  • Copyright Policy
  • Disclaimer
  • GDPR Policy
  • Terms Of Use
Back to Top
  • About
  • Contact Us
  • Privacy Policy
© 2025 yummybiterecipes