FREE DINNER EBOOK! Get your copy!
  • Cookie Policy
  • GDPR Policy
  • Disclaimer
  • Terms Of Use
  • Visit my other site: Fun Cookie Recipes
yummybiterecipes
  • Home
  • Dinner
  • Desserts
  • Drinks
  • Appetizers
  • Contact
  • About
  • Privacy Policy
  • Home
  • Dinner
  • Desserts
  • Drinks
  • Appetizers
  • Contact
  • About
  • Privacy Policy
  • Cookie Policy
  • GDPR Policy
  • Disclaimer
  • Terms Of Use
Visit my other site: Fun Cookie Recipes

HOME / CATEGORIES /

Latest

- 1 cup cream cheese, softened to room temperature - 1/2 cup powdered sugar - 1/2 cup sour cream - 1 teaspoon vanilla extract - 1/2 cup Funfetti cake mix (dry) - 1/2 cup rainbow sprinkles - Fresh strawberries, hulled and sliced - Graham crackers for serving These ingredients create a creamy and sweet dip. The cream cheese gives it a rich base. The powdered sugar adds sweetness. Sour cream makes it smooth, while vanilla adds flavor. Funfetti cake mix brings that iconic birthday cake taste. Finally, rainbow sprinkles add fun and color. You can swap some ingredients if needed. Try using Greek yogurt instead of sour cream. This makes the dip a bit healthier. For a dairy-free option, use vegan cream cheese. You can also replace powdered sugar with coconut sugar for a different sweetness level. If you don't have Funfetti cake mix, vanilla cake mix works too. You can add a few extra sprinkles for that festive touch. Want to make your dip even better? Try these fun add-ins! You can mix in chocolate chips for a sweet twist. Or add crushed cookies for texture. Chopped nuts can give a crunchy bite. You could also add a touch of almond extract for a different flavor. Feel free to get creative! The dip is a blank canvas for your ideas. Just remember, keep it fun and colorful! {{ingredient_image_2}} To start, gather all your ingredients. You will need cream cheese, powdered sugar, sour cream, vanilla extract, dry Funfetti cake mix, and rainbow sprinkles. This dip is easy to make and fun to eat! 1. First, take a large mixing bowl. Add the softened cream cheese. Beat it with an electric mixer until it is smooth. 2. Next, slowly add the powdered sugar while mixing. This step makes the dip light and fluffy. 3. Now, add the sour cream and vanilla extract. Mix until everything is well blended and smooth. 4. Then, gently fold in the dry Funfetti cake mix. Add the rainbow sprinkles last. Be careful not to crush the sprinkles. 5. Scoop the dip into a fun serving bowl. Sprinkle extra rainbow sprinkles on top for a cheerful look. Using an electric mixer helps make the cream cheese super smooth. Make sure your cream cheese is at room temperature. This step makes mixing easier. When adding the powdered sugar, do it slowly. This method keeps your mixture fluffy. For folding the cake mix and sprinkles, use a spatula. This tool helps keep the sprinkles intact. Gently lift and fold the mixture instead of stirring. This technique keeps the colors bright and fun. After mixing, it’s time to chill the dip. Place it in the refrigerator for at least 30 minutes. Chilling helps the flavors blend and makes the dip firmer. When serving, arrange fresh strawberries and graham crackers around the dip. This setup invites everyone to dive in and enjoy. Use a colorful bowl to make it festive. Scatter some extra sprinkles on top for an extra fun touch! When making Funfetti Birthday Cake Dip, avoid these common mistakes for the best flavor: - Overmixing the cream cheese: Mix until smooth, but don’t beat it too much. This can make the dip too airy. - Using cold ingredients: Always use room temperature cream cheese and sour cream. Cold ingredients won’t mix well. - Crushing the sprinkles: Gently fold in the sprinkles. If you stir too hard, they can break and lose their fun colors. This dip works well for many events. Here are some ideas: - Birthday parties: Serve it in a bright bowl with extra sprinkles on top. - Baby showers: Use pastel sprinkles and arrange fresh fruits for a soft look. - Game nights: Pair with graham crackers and chips for a fun snack spread. A great-looking dip makes it more fun to eat! Here are some tips: - Choose a colorful bowl: A vibrant bowl makes the dip stand out on the table. - Add extra sprinkles: Scatter some sprinkles on top for a festive look. - Arrange fruits and crackers: Place sliced strawberries and graham crackers around the bowl. This invites guests to dig in! Pro Tips Use Room Temperature Cream Cheese: This ensures a smoother texture and makes it easier to mix with the other ingredients, resulting in a lump-free dip. Customize Your Sprinkles: Feel free to mix in different types of sprinkles or even edible glitter for a sparkling effect that enhances the festive theme. Chill Before Serving: Allowing the dip to chill for at least 30 minutes lets the flavors meld together beautifully, creating a more delicious experience. Serve with Variety: While strawberries and graham crackers are great, consider adding other dippables like pretzels, cookies, or even apple slices for an exciting twist! {{image_4}} You can swap in different flavors for fun! For a chocolate version, use chocolate cake mix instead of Funfetti. This gives a rich taste. For vanilla, stick with vanilla extract and use vanilla cake mix. You can also mix in flavored extracts like almond or coconut. Each choice adds a unique twist to your dip! Want a lighter dip? You can use low-fat cream cheese or Greek yogurt. This keeps the creaminess while cutting down on fat. For a vegan version, try using a plant-based cream cheese. Replace sour cream with coconut yogurt. These swaps keep the flavor while making it a bit healthier! Adding seasonal touches makes this dip even more fun! During the holidays, use themed sprinkles like red and green or pastel colors for spring. You can also fold in fresh fruits like diced peaches or blueberries. These additions not only taste great but also make your dip pop with color! To keep your Funfetti Birthday Cake Dip fresh, place it in an airtight container. This helps to keep the dip creamy and tasty. Make sure the lid fits tightly. If you made a big batch, you can divide it into smaller containers. This way, you can enjoy it later without losing flavor. When stored properly, the dip will last in the fridge for about 3 to 5 days. After that, the taste and texture may change. Always check for any odd smells or changes before eating. If you notice anything strange, it's safer to toss it out. You don't need to reheat the dip since it’s served cold. If you want to use leftovers in a new way, try these ideas: - Spread it on toast for a sweet breakfast treat. - Use it as a filling for cupcakes or cookies. - Mix it into yogurt for a fun, creamy snack. These ideas will help you enjoy every last bit of your Funfetti Birthday Cake Dip! Yes, you can make this dip ahead of time. Mix all the ingredients and chill it. I recommend making it the night before. This allows the flavors to blend. The dip will taste even better. Just cover it well and place it in the fridge. You have many fun options! I love serving this dip with fresh strawberries. They add a nice tartness. You can also use graham crackers for a crunchy bite. Other great options are pretzels or apple slices. These choices give a mix of flavors and textures. This dip stays fresh for about 3 to 5 days in the fridge. Make sure to store it in an airtight container. If you notice any change in smell or texture, it’s best to toss it. Keep it covered to avoid drying out. Enjoy it while it’s still tasty! This blog post covered key ingredients and how to prepare Funfetti Birthday Cake Dip. I shared tips to avoid common mistakes and suggested ways to present the dip. You learned about flavor variations and healthier options, along with storage tips to keep it fresh. Funfetti dip can brighten any occasion, making it fun and festive. Try these ideas and enjoy your dip with family and friends!

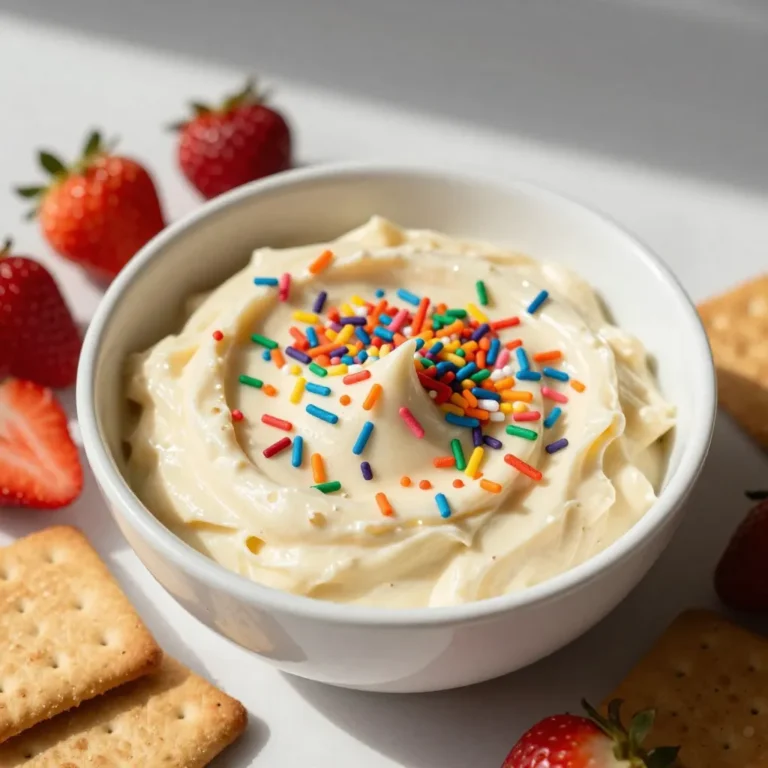
Funfetti Birthday Cake Dip Delightful Dessert Recipe

- 3 medium apples (Granny Smith or Honeycrisp) - 1 cup rolled oats - 1/2 cup all-purpose flour - 1 teaspoon ground cinnamon - 1/2 teaspoon sea salt - 1/4 cup packed brown sugar (divided) - 1/2 cup caramel sauce (store-bought or homemade) - Whipped cream (optional for serving) The main ingredients set the stage for the flavor in Caramel Apple Crisp Cups. I love using Granny Smith or Honeycrisp apples because they add a nice tartness. You want to peel and dice them to get them ready for mixing. Rolled oats and all-purpose flour create the crunchy topping. These two ingredients give the dessert its classic crisp texture. The flavor enhancers, like ground cinnamon and sea salt, boost the taste. Cinnamon adds warmth while salt balances the sweetness. For sweetness, we divide the brown sugar. You use some in the apple mix and some in the crumble. The caramel sauce brings everything together with rich, gooey goodness. Finally, whipped cream can add a creamy touch if you want it. It makes each bite even more delightful. Enjoy every layer of flavor in these tasty cups! {{ingredient_image_2}} First, you need to preheat your oven to 350°F (175°C). This step is key. A hot oven helps the cups bake evenly. It ensures the oat topping gets that nice golden color. Preheating also helps the apples cook just right. Next, let’s prepare the apples. Take 3 medium apples, like Granny Smith or Honeycrisp. Peel and dice them into small pieces. In a big mixing bowl, add the diced apples, 1 teaspoon of ground cinnamon, 1 tablespoon of fresh lemon juice, and 2 tablespoons of brown sugar. Toss everything together gently. This mix makes the apples sweet and tangy. Once mixed, set this bowl aside. Now, we’ll make the oat crumble. In another bowl, mix 1 cup of rolled oats, 1/2 cup of all-purpose flour, 1/2 cup of melted butter, 1/2 teaspoon of sea salt, and the last 2 tablespoons of brown sugar. Stir until it looks like coarse crumbs. You want a mix that is crumbly but sticks together. This will give each cup a nice, crunchy topping. Time to put everything together! Line a standard muffin tin with cupcake liners. Spoon the apple mix into each muffin cup until they are filled halfway. Then, take the oat topping and spread it over the apples. Press it down gently to make a great texture. The layers should look inviting and delicious. Place the muffin tin in your preheated oven. Bake for 20-25 minutes. Check for doneness when the oat topping is golden brown, and the apple filling is bubbling. The smell will fill your kitchen with a warm, cozy aroma. After baking, carefully take the tin out of the oven. Let the cups cool for a few minutes. Drizzle a generous amount of caramel sauce over the tops. If you like, add a dollop of whipped cream for an extra treat. These cups are perfect for sharing, or you might just want to keep them all for yourself! Choosing the right apples makes a big difference. I suggest using Granny Smith or Honeycrisp apples. Granny Smith adds a nice tartness, while Honeycrisp gives a sweet crunch. Both hold their shape well when baked. For the best flavor, always peel and dice your apples into small pieces. This helps them cook evenly and mix well with the spices. Achieving the right crumbly texture is key to a great crisp. Mix the rolled oats, flour, melted butter, sea salt, and brown sugar until it looks like coarse crumbs. You want it to stick together but still fall apart easily. If it feels too wet, add a bit more flour. If too dry, add a splash of melted butter. This balance creates a topping that is crispy yet soft. Serving your Caramel Apple Crisp Cups can be fun! I love to drizzle extra caramel sauce on top for a sweet touch. A dollop of whipped cream adds creaminess and makes it extra special. You can also serve these cups with a scoop of vanilla ice cream. The warm apple filling and cold ice cream create a great contrast. Try sprinkling some extra cinnamon on top for a lovely finish! Pro Tips Choose the Right Apples: Opt for tart apples like Granny Smith or Honeycrisp, as they hold their shape and balance well with the sweetness of the caramel. Customize Your Topping: Feel free to add nuts or spices like nutmeg to the oat crumble for an extra layer of flavor and texture. Serve Warm: These cups are best enjoyed warm, so consider reheating them slightly before serving for maximum enjoyment. Make Ahead: You can prepare the apple mixture and oat topping in advance, storing them separately in the fridge to save time on baking day. {{image_4}} You can make your Caramel Apple Crisp Cups even better by adding nuts. Walnuts or pecans add a nice crunch. Just chop them up and mix them into the oat crumble. This small change gives each bite more texture and flavor. Nuts also add healthy fats, making this dessert a bit more wholesome. If you need a gluten-free option, you can easily swap the flour. Use gluten-free flour instead of all-purpose flour. This change keeps your dessert tasty without gluten. Make sure the other ingredients you choose are also gluten-free. This way, everyone can enjoy these yummy cups without worry. Want to try something new? Experiment with different caramel flavors. You can use salted caramel for a sweet and salty mix. Or, try adding a hint of vanilla or maple to the caramel sauce. Each option adds its own twist and makes your dessert unique. Have fun and find your favorite! To keep your Caramel Apple Crisp Cups fresh, store them in an airtight container. You can refrigerate them for up to four days. If you want to keep them longer, freeze them. Wrap each cup in plastic wrap, then place them in a freezer bag. This way, they stay tasty for up to three months. When you're ready to enjoy your cups again, reheating is key. If you use the microwave, heat them for 20 to 30 seconds. Check to see if they are warm enough. If you prefer the oven, preheat it to 350°F (175°C). Place the cups on a baking sheet and warm them for about 10 minutes. This method keeps the crisp topping crunchy. These cups stay fresh in the fridge for about four days. If frozen, they can last for three months. Just remember to thaw them in the fridge overnight before reheating. This helps maintain their flavor and texture. Enjoy your dessert at its best! Yes, you can use different apple types. The best are Granny Smith and Honeycrisp. These apples balance tartness and sweetness well. They hold up during baking, keeping their shape. Other good choices include Fuji and Braeburn. However, avoid soft apples like Red Delicious. They may turn mushy in the cups. You can keep leftovers for about 3 to 4 days. Store them in an airtight container in the fridge. This keeps them fresh. If you want to save them longer, freeze the cups. Wrap them well in plastic wrap or foil. They can last up to 3 months in the freezer. Yes, you can prepare these cups ahead of time. Make the apple filling and oat crumble in advance. Store them in separate containers in the fridge. When ready to bake, layer them in the muffin tin. Bake as usual. This way, you enjoy fresh cups without stress on serving day. This recipe combines scrumptious apples, oats, and sweet toppings. You learned how to prepare and bake apple crumble cups with easy steps. Remember to choose the right apples for flavor. Try adding nuts or using gluten-free flour for variety. Store them well for tasty treats later. Enjoying this dessert will impress anyone who tries it. Get started on this delicious journey today!

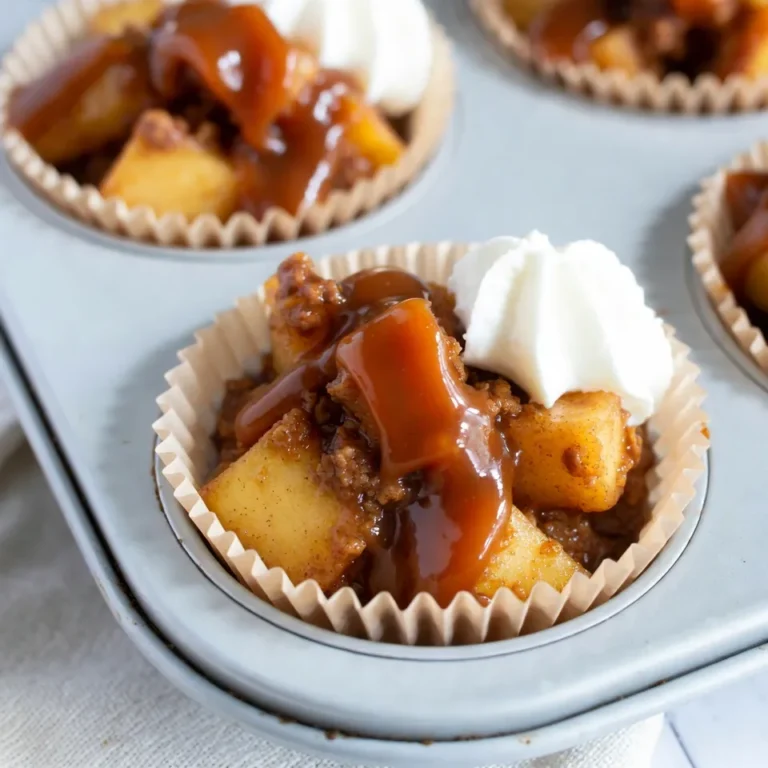
Caramel Apple Crisp Cups Tasty Fall Dessert Treat

To make a delightful Strawberry Shortcake Trifle, you will need these simple ingredients: - 2 cups fresh strawberries, hulled and sliced - 2 tablespoons granulated sugar - 1 cup heavy whipping cream - 1 tablespoon pure vanilla extract - 1 cup shortcake or sponge cake, cut into bite-sized pieces - ½ cup creamy Greek yogurt - Fresh mint leaves for garnish Each ingredient plays a key role in the taste and texture of the trifle. Fresh strawberries provide sweetness and a juicy burst of flavor. The granulated sugar helps enhance the natural sweetness of the strawberries. Heavy cream gives the trifle its rich and creamy texture, while pure vanilla extract adds a warm depth of flavor. Using shortcake or sponge cake creates a light and airy base for the layers. Creamy Greek yogurt adds a hint of tang and richness, balancing the sweetness of the dessert. Lastly, fresh mint leaves not only garnish the trifle but also add a burst of color and a refreshing note. When you gather these ingredients, you set the stage for a beautiful and tasty dessert. Each layer will bring you closer to a delightful experience that celebrates the joy of fresh flavors. {{ingredient_image_2}} To start, you need to prepare the strawberries. Take 2 cups of fresh strawberries and hull them. Slice them into thin pieces. Place the strawberries in a medium bowl. Add 2 tablespoons of granulated sugar to the bowl. Gently toss the strawberries to coat them evenly. This step helps the strawberries release their juices. Let them sit for about 15 minutes at room temperature. This process is called maceration and makes the strawberries sweeter and juicier. While the strawberries sit, make the whipped cream mixture. In a separate mixing bowl, pour in 1 cup of heavy whipping cream. Add 1 tablespoon of pure vanilla extract to the bowl. Use a hand mixer or a whisk to whip the cream until soft peaks form. This should take a few minutes. Once you achieve soft peaks, grab ½ cup of creamy Greek yogurt. Gently fold the yogurt into the whipped cream with a spatula. Make sure the mixture is smooth and well blended. Now, it's time to assemble your trifle. Grab a trifle dish or some individual serving glasses. Start with a layer of shortcake or sponge cake. Cut the cake into bite-sized pieces for easy layering. Place an even layer of cake at the bottom of the dish. Spoon a generous layer of the macerated strawberries on top. Don't forget to include some of the syrup for added flavor. Then, add a layer of your whipped cream mixture over the strawberries. Spread it evenly. Repeat the layering process. Add more cake, strawberries, and whipped cream until you fill the dish. Make sure to finish with a nice layer of whipped cream on top. For the final touch, garnish your trifle with fresh strawberry slices and a few mint leaves. This adds color and freshness to your dessert. Enjoy this delightful and easy strawberry shortcake trifle! - Use even layers. Start with a layer of cake at the bottom. - Add strawberries next. Spoon the macerated strawberries over the cake. - Top with whipped cream. Spread the cream evenly over the strawberries. - Repeat layers. Keep going until you fill your dish. - Finish with cream. Always end with a nice layer of whipped cream. To get the perfect consistency, whip your cream until it forms soft peaks. This gives a light and fluffy texture. When you fold in the Greek yogurt, do it gently. This keeps the cream airy and smooth. - Use clear glass dishes. They show off the colorful layers well. - Garnish with mint. Add fresh mint leaves on top for a pop of color. - Use extra strawberries. Place a few slices on top for added flair. These simple touches make your trifle look stunning. Guests will love the bright colors and fresh taste. Enjoy making your dessert shine! Pro Tips Choose Ripe Strawberries: Select strawberries that are deep red and fragrant for the best flavor and sweetness in your trifle. Whip Cream to the Right Consistency: Be careful not to over-whip the cream; soft peaks are ideal for a light and airy texture. Layering Technique: For better presentation, add different layers of cake, strawberries, and whipped cream instead of repeating the same order to create visual interest. Chill Before Serving: Allow the trifle to chill in the refrigerator for at least an hour before serving to let the flavors meld together. {{image_4}} You can swap strawberries for other fruits. Blueberries and raspberries work great. They add a unique taste and color. Seasonal fruits can also make this trifle special. Think peaches, blackberries, or even cherries. Each fruit brings its fun twist to the dish. You don’t have to stick to shortcake. Angel food cake is a light choice that adds fluff. It soaks up flavors well but keeps its shape. Gluten-free options are perfect for those with diets. Look for gluten-free sponge cake or even almond flour cakes. These choices keep your trifle tasty and friendly for all. To store any leftover strawberry shortcake trifle, cover it tightly with plastic wrap or foil. This keeps the trifle fresh and prevents it from drying out. You can also use an airtight container if you have one. The trifle will stay good in the fridge for about 2 to 3 days for optimal freshness. After that, the layers may start to blend together, losing their lovely look and taste. You can freeze the trifle, but it’s best to freeze only the cake and the strawberries. The whipped cream does not freeze well and can lose its texture. To freeze, layer the cake and strawberries in a freezer-safe dish. Cover it tightly to avoid freezer burn. When ready to enjoy, thaw it in the fridge for several hours or overnight. Serve it cold, but be aware that the texture might change a bit. Enjoy it quickly after thawing for the best taste! Yes, you can make the trifle a day early. This helps the flavors mix well. To prepare ahead, layer the cake and strawberries first. Then, keep the whipped cream separate until serving. This will keep it fresh and fluffy. Store everything in the fridge until you're ready to serve. If you need a substitute for heavy cream, try these options: - Coconut cream for a dairy-free choice - Milk with butter (mix ¾ cup milk and ¼ cup melted butter) - Silken tofu blended until smooth for a healthy twist These alternatives can work well, though they may change the taste a bit. To keep your layers crisp, here are some tips: - Use day-old cake as it is firmer. - Add a layer of yogurt between the cake and strawberries. - Serve the trifle soon after assembling. Following these steps will help keep your trifle looking and tasting great! You now know how to create a delicious fruit trifle. We covered the key ingredients, from fresh strawberries to creamy yogurt. I provided step-by-step instructions to prepare, whip, and layer your trifle perfectly. You also learned useful tips for assembly and presentation, as well as fun variations. Storing your trifle properly keeps it fresh and tasty. Don't hesitate to customize it to fit your taste. Enjoy making this simple yet delightful dessert!

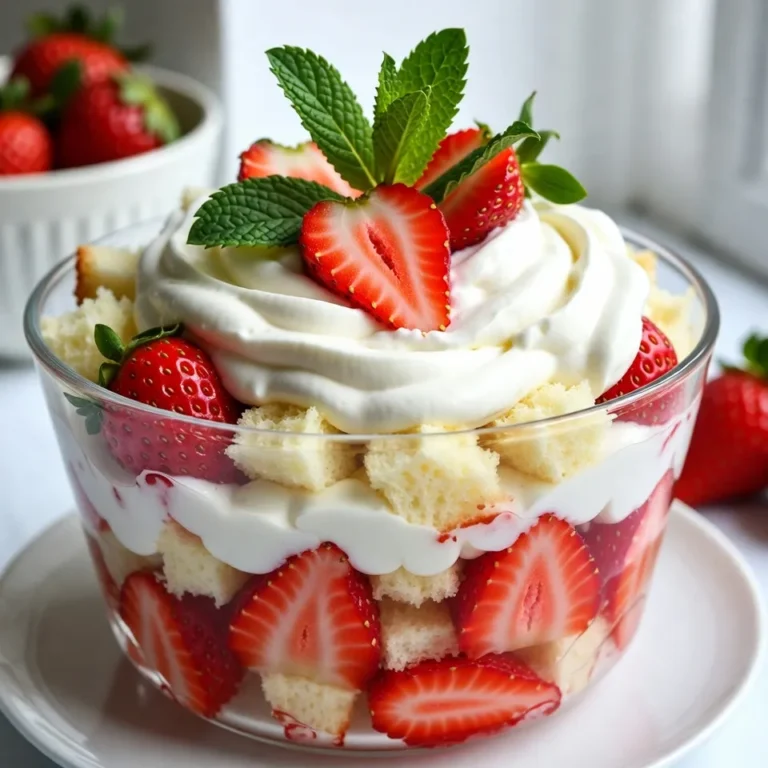
Strawberry Shortcake Trifle Delightful and Easy Recipe

- 1 loaf of challah or brioche bread, cut into 1-inch cubes - 6 large eggs, at room temperature - 2 cups whole milk - 1 cup heavy cream - 1/2 cup packed brown sugar - 1 tablespoon pure vanilla extract - 1 teaspoon ground cinnamon - 1/4 teaspoon freshly grated nutmeg - Pinch of salt The base for this casserole starts with bread. I love using challah or brioche. They have a soft texture that soaks up the egg mixture well. The eggs form the heart of the dish. They give it a rich, custardy feel. Next, the whole milk and heavy cream add creaminess. They make each bite smooth and dreamy. Brown sugar adds a hint of sweetness. It melts and gives the casserole a lovely caramel flavor. Pure vanilla extract brings warmth and depth. Ground cinnamon adds a cozy spice. The freshly grated nutmeg offers a unique twist, making the dish special. A pinch of salt balances the sweetness and enhances all the flavors. - 1 cup mixed berries (such as strawberries, blueberries, and raspberries) - Maple syrup, for serving - Powdered sugar, for dusting Mixed berries add a burst of freshness. You can use strawberries, blueberries, or raspberries. They not only look pretty but also add a sweet-tart flavor. For serving, maple syrup is a must. It brings a rich sweetness to the warm casserole. Finally, a light dusting of powdered sugar makes it feel fancy. It also adds a touch of sweetness that everyone loves. {{ingredient_image_2}} 1. Preheat your oven to 350°F (175°C). This gives a nice base for baking. 2. Generously grease a 9x13-inch baking dish with butter or non-stick spray. This step helps prevent sticking. 1. In a large bowl, whisk together 6 large eggs until frothy. This adds air for a light texture. 2. Next, add 2 cups of whole milk, 1 cup of heavy cream, and 1/2 cup of packed brown sugar. 3. Include 1 tablespoon of pure vanilla extract, 1 teaspoon of ground cinnamon, and 1/4 teaspoon of grated nutmeg. 4. Add a pinch of salt to balance the sweetness. Mix thoroughly until the sugar is fully dissolved. 1. Evenly distribute 1 loaf of cubed challah or brioche bread in the greased baking dish. Make sure they sit in a single layer. 2. Carefully pour the egg mixture over the bread. Use a spatula to press down on the cubes. This helps them soak up the liquid. 3. Evenly scatter 1 cup of mixed berries over the top. Gently press them down into the mixture. 1. Cover the baking dish tightly with aluminum foil. This seals in flavors while chilling. 2. Place it in the refrigerator. Let it chill for at least 1 hour. For even better taste, chill overnight. 1. When ready to bake, take the dish out of the fridge. Let it sit at room temp for 10 minutes. 2. Bake the casserole covered with foil for 30 minutes. This keeps it moist. 3. After 30 minutes, remove the foil. Bake for another 15-20 minutes. Look for a golden brown top and set center. 1. Once baked, take the casserole out and let it cool for about 5 minutes. This helps it set. 2. Just before serving, dust the top with powdered sugar. This adds a sweet touch. 3. Serve warm with maple syrup on the side for drizzling. It enhances the flavor and makes it extra special. - Choosing the right bread: Use challah or brioche. These breads are soft and soak well. They give your casserole a nice, fluffy texture. If you want, try sourdough for a twist, but stay away from regular sandwich bread. - Importance of soaking time: Soaking lets the bread absorb the egg mixture. I like to chill it overnight. This step builds flavor and makes the casserole creamy. If you're short on time, soak it for at least one hour. - Flavor variations: Get creative! Add chocolate chips for sweetness. Try spices like cardamom or ginger for a warm kick. You can even mix in different fruits like bananas or apples. - Substituting sweeteners: Brown sugar works great, but you can switch to maple syrup or honey. If you prefer less sugar, try a sugar substitute. Just make sure it can handle heat. - Complementary side dishes: Serve your casserole with crispy bacon or sausage. Fresh fruit salad adds a nice touch too. A light green salad can balance the dish’s richness. - Beverages that pair well: Freshly brewed coffee is a classic choice. You might enjoy a fruity tea or a cold glass of milk. For something special, serve mimosas for a brunch vibe. Pro Tips Use Day-Old Bread: Using slightly stale challah or brioche will help the bread cubes absorb the egg mixture better, resulting in a richer, more decadent casserole. Customize Your Berries: Feel free to mix and match your favorite seasonal berries! You can also add nuts or chocolate chips for extra flavor and texture. Overnight Soaking: For maximum flavor and ease, prepare the casserole the night before and let it soak overnight in the refrigerator to meld the flavors. Serve with Whipped Cream: For a luxurious touch, top the casserole with freshly whipped cream along with the maple syrup for an indulgent breakfast or brunch experience. {{image_4}} You can use different types of bread for your casserole. Challah and brioche are classic choices. They soak up the egg mixture well. If you need a gluten-free option, try gluten-free bread. It works great and tastes good too. Sourdough is another fun choice. It has a nice tang that adds flavor. Want to jazz up your casserole? Adding chocolate chips is a great idea! They melt and create pockets of sweetness. You can also mix in some nuts like pecans or walnuts. They add a nice crunch and flavor. Try these options to make your dish stand out. Change your casserole with the seasons! In winter, add spices like nutmeg or ginger. For spring and summer, you can include fresh fruits. Berries like strawberries and blueberries are perfect. They bring a burst of color and taste. In fall, think about pumpkin or apple flavors. This keeps your French toast casserole exciting all year round! To store leftovers, place the casserole in an airtight container. Use a glass or plastic dish with a lid. This helps keep it fresh. Store it in the fridge. It will last up to three days. Let it cool to room temperature before sealing. For freezing, wrap the casserole well. Use plastic wrap and then aluminum foil. This keeps out air. You can freeze it for up to three months. When ready to eat, take it out and thaw it in the fridge overnight. When reheating, place portions in the oven. Preheat to 350°F (175°C). Cover the dish with foil. This helps heat evenly. Bake for about 15-20 minutes. You can also use the microwave for quick reheating. Just make sure to cover it to keep moisture. Enjoy it warm to keep the flavor rich! Yes, you can prepare French Toast Casserole the night before. This allows the bread to soak up the egg mixture, making each bite soft and delicious. Cover the dish tightly with foil and place it in the fridge. When you’re ready to bake, let it sit at room temperature for about 10 minutes to remove the chill. This step helps it cook evenly. You will know the casserole is done when the top is golden brown. The center should also feel set, not jiggly. You can use a toothpick to check; if it comes out clean, your casserole is ready. If it’s still wet, bake it a bit longer. If you need a substitute for heavy cream, here are some options: - Whole milk - Half-and-half - Coconut cream Each option will change the flavor and texture a bit. Whole milk will make it lighter, while coconut cream adds a nice twist. Absolutely! You can use many types of fruit. Here are some great choices: - Bananas - Apples - Peaches - Seasonal berries Using seasonal fruit can enhance the flavor and add color to your dish. Yes, French Toast Casserole is freezer-friendly. To freeze, wrap the cooled casserole tightly in plastic wrap and then in foil. This helps prevent freezer burn. When you’re ready to eat it, thaw it overnight in the fridge and bake as usual. You can also bake it straight from the freezer, but it may take longer to cook. This blog post covered how to make a delicious French toast casserole. We looked at main and optional ingredients, like brioche bread and berries. You learned step-by-step how to prepare the dish, mix the ingredients, and bake it to perfection. We also shared tips for custom flavors and how to store leftovers. In conclusion, you now have all you need to create your own perfect casserole. Enjoy the process and don't hesitate to try new flavors. Happy cooking!

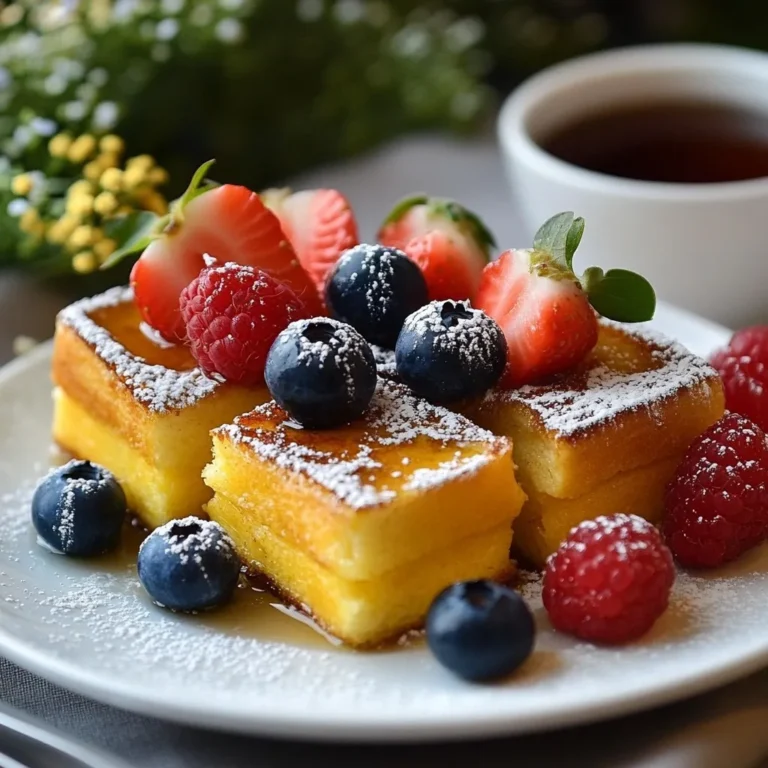
Best French Toast Casserole Simple and Tasty Recipe

- 1 cup rolled oats - 1 cup almond milk (or any milk of your choosing) - 1 medium apple, diced into small cubes - 1 tablespoon chia seeds - 1 teaspoon ground cinnamon The main ingredients for apple cinnamon overnight oats are simple and healthy. Rolled oats form the base. They give you fiber and energy. Almond milk keeps it creamy and dairy-free. You can use any milk you like, too. Diced apple adds sweetness and crunch. Chia seeds boost nutrition and help thicken the mix. Ground cinnamon gives a warm, rich flavor. - 1 tablespoon maple syrup (or honey, if preferred) - 1/2 teaspoon vanilla extract - A pinch of salt Sweeteners and flavor enhancers make the dish special. Maple syrup adds natural sweetness. Honey is a great substitute if you prefer it. Vanilla extract brings a lovely aroma. Just a pinch of salt helps balance the flavors. Together, these ingredients make the oats taste amazing. - Chopped nuts (such as walnuts or pecans) - Extra apple slices - Dash of additional cinnamon Toppings add fun and texture. Chopped nuts like walnuts or pecans give a nice crunch. Extra apple slices make it look pretty and fresh. A dash of cinnamon can enhance the flavor even more. You can mix and match toppings to suit your taste. {{ingredient_image_2}} - In a medium bowl, combine: - 1 cup rolled oats - 1 tablespoon chia seeds - A pinch of salt Stir gently to mix these dry ingredients. This step sets a strong base for your oats. - In another bowl, whisk together: - 1 cup almond milk - 1 tablespoon maple syrup - 1/2 teaspoon vanilla extract Make sure everything blends well. This mixture adds flavor and moisture to your oats. - Carefully fold in: - 1 medium apple, diced into small cubes - 1 teaspoon ground cinnamon Gently combine these with the oat mixture. The apple brings sweetness and texture. - Divide the mixture into two jars or containers. Seal them tightly. - Place in the fridge overnight, or for at least 4 hours. This allows the oats to soak up the flavors and soften nicely. - When ready to eat, stir the oats well. If they seem too thick, add a splash of milk. - Top with your choice of: - Chopped nuts (like walnuts or pecans) - Extra apple slices - A dash of additional cinnamon These final touches make your breakfast even more delightful and nutritious. Enjoy each bite! You can make multiple servings of Apple Cinnamon Overnight Oats. This saves time on busy mornings. Just prepare a few jars at once. Store them in your fridge for quick breakfasts. You’ll enjoy a tasty meal without the fuss. Use airtight containers for your oats. This keeps them fresh and tasty. Sealing them tightly prevents moisture from ruining your oats. Plus, they stay flavorful for days. You can enjoy breakfast without worry about spoilage. Do you like your oats thick or smooth? You can change the liquid amount to suit your taste. Add more almond milk for a creamier texture. Less milk gives you a thicker meal. Play around until you find your perfect mix. Pro Tips Use Old-Fashioned Rolled Oats: For the best texture and flavor, opt for old-fashioned rolled oats instead of instant or quick-cooking oats, as they absorb the liquid better and provide a heartier bite. Customize Your Sweetness: Adjust the amount of maple syrup or honey according to your taste preference. You can also use mashed bananas or unsweetened applesauce for a natural sweetness. Experiment with Spices: While cinnamon is a classic choice, consider adding nutmeg, ginger, or even pumpkin spice for a different flavor profile that can elevate your overnight oats. Meal Prep for the Week: Make a larger batch and divide it into individual containers for easy grab-and-go breakfasts throughout the week. Just add your toppings fresh each morning! {{image_4}} If you want nut-free options, it's easy to adjust this recipe. Simply use oat milk, soy milk, or rice milk instead of almond milk. For toppings, choose seeds like pumpkin or sunflower seeds instead of nuts. This way, you keep it tasty and safe for anyone with nut allergies. Feel free to mix up the fruits. Bananas add creaminess, while berries give a nice tartness. Pears bring a sweet crunch that pairs well with cinnamon. Each fruit changes the flavor, so experiment to find what you like best. Just chop them up and fold into your oats! Want to spice things up? Try adding nutmeg or pumpkin spice. These spices add warmth and complexity to your oats. You can also add a splash of maple extract for even more flavor. These small changes make your breakfast feel special and seasonal. You should store your apple cinnamon overnight oats in the refrigerator. This keeps them fresh and tasty. Use airtight containers or jars to prevent moisture loss. Enjoy your oats within 3-5 days. This ensures the best taste and texture. After a few days, the oats may become mushy. You can freeze the oats for longer storage. Just place them in freezer-safe containers. When ready to eat, thaw them in the fridge overnight. To reheat, add a splash of milk and stir well. Enjoy warm! Yes, you can use steel-cut oats, but they need more time to soften. Steel-cut oats are less processed than rolled oats. This means they take longer to absorb liquid. If you want to use them, soak them overnight in water first. Then, use a little more liquid in your recipe. This will help them soften and blend well with the other ingredients. Absolutely! This recipe is perfect for meal prep. You can make a batch and store it in jars. Seal the jars tightly to keep the oats fresh. They will last in the fridge for up to five days. This makes it easy to grab a quick breakfast. You save time and enjoy a healthy meal every day. Overnight oats are packed with nutrients. They provide a good source of fiber. This helps with digestion and keeps you full longer. The oats also contain vitamins and minerals. The chia seeds add omega-3 fatty acids, which are good for your heart. Apples offer vitamins, antioxidants, and natural sweetness. Using almond milk adds calcium without extra calories. Together, these ingredients create a balanced and energizing meal. You’ve learned how to make tasty overnight oats with simple ingredients. We covered the main ingredients, how to mix them, and tips for great results. You also explored fun variations for different flavors. Remember, these oats can be prepared in advance and stored easily. They’re fresh, filling, and perfect for breakfast or snacks. Now, it's time to experiment and make it your own. Enjoy your meal prep journey!

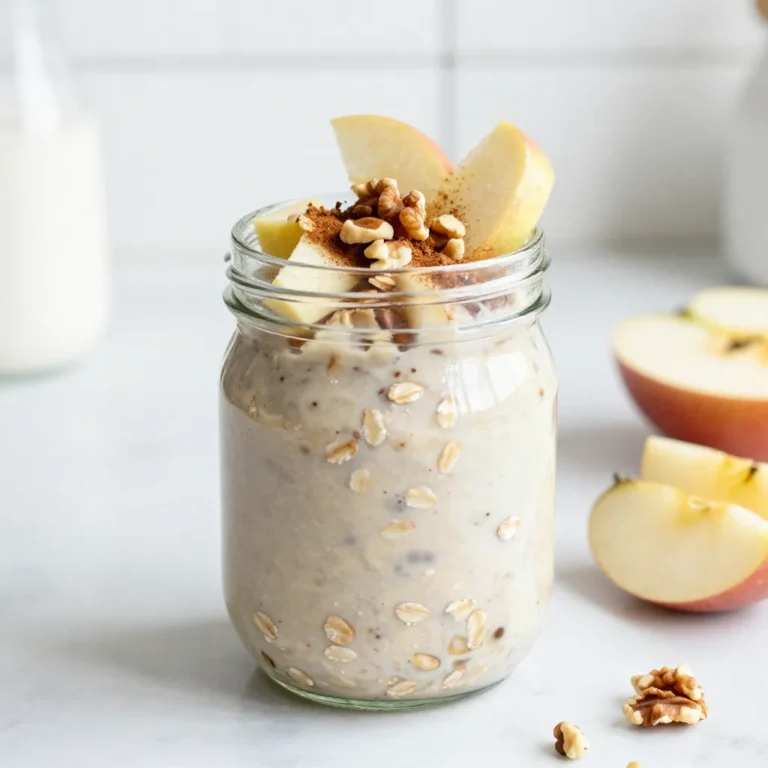
Apple Cinnamon Overnight Oats Energizing Breakfast Meal

- 1 box brownie mix - 2 cups freshly whipped cream - 1 cup chocolate ganache (1 cup chocolate chips, ½ cup heavy cream) - 1 cup crushed Oreo cookies - 1 cup assorted mixed berries (strawberries, raspberries, blueberries) - ¼ cup chocolate shavings - Eggs - Oil - Water Gather these ingredients to create your Brownie Refrigerator Cake. The brownie mix serves as the base, while the whipped cream adds lightness. The chocolate ganache brings richness, and the Oreo cookies give a fun crunch. The assorted berries offer freshness, and the chocolate shavings serve as a lovely garnish. Using a box mix is a time saver, but you can always opt for homemade brownies if you prefer. Just remember to follow the package instructions for the eggs, oil, and water required. This recipe is flexible, making it easy to adapt to your taste. With these simple ingredients, you can make a show-stopping dessert that everyone will love! Feel free to explore options like using different cookie types or berries for a twist. {{ingredient_image_2}} To start, preheat your oven as shown on your brownie mix box. While the oven heats, grease a 9x13 inch pan. This helps the brownies come out easily. Next, mix the brownie ingredients as directed on the package. Pour the mix into the pan and bake until done. Once baked, let the brownies cool completely on a wire rack. This cooling step is key for layering later. Now, let’s create the chocolate ganache. Pour half a cup of heavy cream into a small saucepan. Heat it over medium heat until it simmers, but don’t let it boil. When it simmers, remove it from the heat. Add one cup of chocolate chips and stir. Keep stirring until the mix is smooth and shiny. Let the ganache cool for a few minutes. This helps it thicken slightly for layering. Once your brownies are cool, cut them into small, bite-sized squares. Grab a rectangular serving dish and start layering. First, place a layer of brownie squares at the bottom. Next, add a generous layer of whipped cream on top. Drizzle some chocolate ganache over the cream, and then sprinkle on crushed Oreo cookies. Now, it’s time for the berries! Spread the assorted mixed berries evenly over the Oreo layer. This adds a nice burst of flavor. Repeat the layering process. Add another layer of brownie squares, more whipped cream, more ganache, and more crushed Oreos. Then, add another layer of berries. Keep going until you use up all your ingredients. Finish with a layer of whipped cream on top. Finally, tightly cover the dish with plastic wrap. Place it in the refrigerator and let it chill for at least four hours, or even overnight. This time helps all the flavors blend together and makes it easier to slice. - To achieve stiff peaks, start with cold cream. Whip it in a chilled bowl. Use a hand mixer for the best results. Stop when you see peaks that hold their shape. - If you have leftover whipped cream, store it in an airtight container. It keeps well in the fridge for up to two days. You can also use it for other desserts. - To get the right thickness for ganache, use equal parts chocolate and cream. For a thicker ganache, use less cream. If it’s too thin, refrigerate it for a bit. - You can customize ganache flavors by adding extracts. Try vanilla, almond, or even peppermint for a fun twist. Mix in a pinch of salt for depth. - This cake pairs well with vanilla ice cream or a drizzle of chocolate sauce. Fresh whipped cream on the side adds a nice touch, too. - For a stunning presentation, top each slice with chocolate shavings. It makes the cake look fancy and adds a rich flavor. Enjoy each layer's beauty as you serve it! Pro Tips Use Quality Chocolate: For the ganache, choose high-quality chocolate chips for a richer flavor. The better the chocolate, the more decadent your cake will taste. Chill Whipped Cream: Ensure your whipping bowl and beaters are chilled before whipping the cream. This helps achieve a stable and fluffy texture. Layering Technique: Be generous with your layers for a more visually appealing cake. Aim for an even distribution of brownies, cream, and toppings to enhance the flavor in every bite. Make Ahead: This cake tastes even better the next day! Prepare it a day in advance to allow the flavors to meld beautifully in the refrigerator. {{image_4}} You can switch up the brownie flavor for fun. Instead of classic brownies, try blonde brownies. They have a sweet, buttery taste. You can also use different creams. Mascarpone cheese gives a rich flavor, while cream cheese adds a tangy twist. Both options work great in this cake. Adding toppings can take this cake to the next level. Sliced fruits like bananas or peaches add freshness. Nuts provide a nice crunch, and caramel sauce brings extra sweetness. You can even swap Oreos for other cookies. Graham crackers work well for a new flavor. If you need gluten-free options, look for gluten-free brownie mixes. They taste just as good! For a vegan twist, use coconut cream instead of whipped cream. You can make ganache with dairy-free chocolate. These swaps keep everyone happy and enjoying dessert! To store your brownie refrigerator cake, cover it tightly with plastic wrap. This keeps it fresh and moist. You can also use an airtight container for extra protection. The cake stays good in the fridge for up to 5 days. After that, the layers may start to lose their texture and flavor. If you want to store it longer, freezing is a great option. First, cut the cake into slices for easy serving. Wrap each slice in plastic wrap, then place them in a freezer-safe bag. This helps keep the cake fresh for up to 3 months. When you're ready to enjoy, simply take a slice out and let it thaw in the fridge for a few hours. For best results, avoid thawing at room temperature, as this can make the cake soggy. Check for any changes in smell or appearance. If the cake starts to smell sour or looks moldy, it’s time to throw it away. Also, if the whipped cream layer starts to separate, it may not taste good. Always trust your senses; if it seems off, don’t eat it. Enjoy your brownie refrigerator cake safely! Yes, you can follow your favorite homemade brownie recipe. Making brownies from scratch adds a personal touch. I love using rich chocolate and fresh ingredients. It boosts the flavor and texture. Just ensure your brownies are cool before layering. This way, they won’t melt the whipped cream. It’s best to chill for at least 4 hours or overnight. Chilling helps the layers set well. This time allows the flavors to blend together. When you serve it cold, every bite is refreshing and delicious. I often make it the night before for the best results. Yes, frozen berries can be used, but be sure to thaw and drain them before layering. Thawing is key, as it prevents excess water. This keeps your cake from becoming soggy. I love the taste of mixed berries in this cake. They add a sweet and tart burst of flavor! This blog post shared a simple recipe for a delicious brownie refrigerator cake. You learned about the key ingredients, including brownie mix, whipped cream, and berries. We walked through step-by-step instructions to prepare, assemble, and chill the cake. Plus, we explored tips for perfecting texture and storage tips for keeping your dessert fresh. In the end, this treat is not only easy to make but also allows for creativity. Enjoy your baking journey!

Brownie Refrigerator Cake Delightful No-Bake Treat

- 1 cup unsalted butter - ¾ cup powdered sugar - 1 teaspoon pure vanilla extract - 1 teaspoon almond extract - 2 cups all-purpose flour - ½ teaspoon baking powder - ¼ teaspoon salt I love using unsalted butter because it gives me control over the salt in the cookies. The powdered sugar makes the cookies sweet and smooth. Vanilla and almond extracts add rich flavors. All-purpose flour gives the cookies structure, while baking powder helps them rise. A pinch of salt balances the sweetness. - 1 cup crushed candy canes - 24 Hershey's Candy Cane Kisses Crushed candy canes add a fun crunch and a burst of peppermint flavor. I like to use about four to five candy canes for one cup. The Hershey's Candy Cane Kisses melt beautifully on top. They make the cookies look festive and add a chocolatey taste. - Mixing bowls - Electric mixer - Baking sheets - Parchment paper You need mixing bowls for combining the dough. An electric mixer makes creaming the butter and sugar easy. Baking sheets hold the cookies while they bake. Parchment paper keeps the cookies from sticking. These tools make the process smooth and fun. {{ingredient_image_2}} 1. First, preheat your oven to 350°F (175°C). Line two baking sheets with parchment paper. 2. In a large bowl, add 1 cup of softened unsalted butter and ¾ cup of sifted powdered sugar. Mix them with an electric mixer for about 3-5 minutes. You want it light and fluffy. 3. Next, add 1 teaspoon of pure vanilla extract and 1 teaspoon of almond extract. Mix until smooth and well blended. 1. In another bowl, whisk together 2 cups of all-purpose flour, ½ teaspoon of baking powder, and ¼ teaspoon of salt. This helps spread the flavors evenly. 2. Gradually mix the dry ingredients into the wet mixture. Use low speed until a smooth dough forms. 1. Now, gently fold in 1 cup of crushed candy canes. This adds a festive crunch. 2. Take a tablespoon of dough and roll it into a ball. Place each ball about 2 inches apart on your baking sheets. 3. With your thumb or the back of a teaspoon, make a small indentation in each dough ball. 4. Bake the cookies for 10-12 minutes. The edges should be lightly golden and the centers set. 5. When you take them out of the oven, press a Hershey's Candy Cane Kiss into the center of each cookie. Let it melt slightly to create a chocolate swirl. 6. Let the cookies rest for five minutes on the baking sheets. Then, transfer them to wire racks to cool completely. Enjoy these festive treats! To get the best dough consistency, start with softened butter. It helps mix better with sugar. Beat the butter and powdered sugar until light and fluffy. This usually takes about 3 to 5 minutes. When adding flour, mix on low speed to avoid a mess. The dough should be soft but not sticky. For baking, preheat your oven to 350°F (175°C). Bake the cookies for 10 to 12 minutes. The edges should turn golden while the centers look set. This timing helps keep the cookies soft and chewy. If your dough is crumbly, try adding a splash of milk. This will help bind the dough better. Mix it in gradually until the dough holds together. If your cookies bake unevenly, make sure your oven is calibrated. Rotate the baking sheets halfway through baking for even heat. A light dusting of powdered sugar gives a snowy look to your cookies. You can also arrange the cookies on a festive platter. For a fun touch, add whole candy canes or small holiday decorations. This makes your presentation colorful and inviting. Pro Tips Chill the Dough: If your dough is too soft or sticky, chill it in the refrigerator for about 30 minutes. This will make rolling the cookies easier and help them maintain their shape while baking. Use Fresh Candy Canes: For the best flavor and crunch, use fresh candy canes. Stale candy canes can lose their texture and flavor, affecting the overall taste of your cookies. Don’t Overbake: Keep an eye on the baking time. It's better to underbake slightly, as cookies will continue to firm up while cooling on the baking sheet. Customize Toppings: Feel free to experiment with different toppings. You can use white chocolate chips or peppermint bark instead of Candy Cane Kisses for a unique twist! {{image_4}} You can switch up the sweet flavors in these cookies. Try using different flavored Kisses. You might like peanut butter or caramel Kisses for a twist. Each type adds a new taste and fun to your cookies. Incorporating chocolate chips is another great option. Use semi-sweet or white chocolate chips. They mix well with the candy canes and create a rich flavor. You can even blend chocolate chips with Kisses for double the treat. Making these cookies gluten-free is simple. Use a gluten-free flour blend in place of regular flour. This swap keeps the cookies soft and tasty. You can enjoy the same festive treat without gluten. For vegan substitutes, replace the butter with coconut oil or vegan butter. Use flax eggs instead of regular eggs. These changes keep your cookies plant-based and just as yummy. Want to boost the peppermint flavor? Adding peppermint extract is a great choice. Just a little will make your cookies extra minty and fresh. This is perfect for holiday vibes. You can also include zest from citrus fruits. Lemon or orange zest brightens the flavor. It adds a surprising twist that blends well with the peppermint. Try it out for a unique cookie experience! To keep your Candy Cane Kiss Cookies fresh, use airtight containers. Glass jars or plastic bins work great. Store them at room temperature away from sunlight. These cookies will stay fresh for about one week. If you want to save some for later, freezing is a good option. First, let the cookies cool completely. Place them on a baking sheet in a single layer. Freeze for about an hour. Then, transfer them to a freezer bag. Squeeze out as much air as possible. They can last up to three months in the freezer. To thaw, simply take the cookies out of the freezer. Leave them at room temperature for about 30 minutes. This helps them regain their soft texture. When you want to enjoy warm cookies, reheating is easy. Preheat your oven to 300°F (150°C). Place the cookies on a baking sheet for about 5 minutes. This warms them without losing their crunch. You can also use the microwave. Heat them for 10-15 seconds. Enjoy the melty chocolate and festive flavor! Yes, you can make the dough in advance. After mixing, wrap it in plastic wrap. Store it in the fridge for up to three days. When you are ready to bake, let it sit at room temperature for 10-15 minutes. This makes it easier to roll into balls. Candy Cane Kiss Cookies stay fresh for about a week. Store them in an airtight container at room temperature. If you want to keep them longer, you can freeze them. They will last for up to three months in the freezer. Absolutely! You can use different flavored Kisses if you like. Milk chocolate, dark chocolate, or even peanut butter Kisses work well. Just remember that this will change the flavor of your cookies, but it can be fun to experiment! Yes, these cookies are great for shipping! They hold their shape well during transport. Just make sure to pack them tightly in a sturdy container. Add some cushioning like bubble wrap to keep them safe. If you can't find Candy Cane Kisses, don't worry! You can use regular Hershey's Kisses or even chocolate chips. You can also top the cookies with crushed candy canes after baking for that festive touch. Making Candy Cane Kiss Cookies is easy and fun. We covered the key ingredients, tools, and steps to make these festive treats. Plus, I shared great tips for perfect cookies and fun variations. You can adapt these recipes to your taste, whether you want gluten-free or vegan options. Enjoy baking and sharing these cookies with friends and family. They’re sure to bring joy to any celebration!

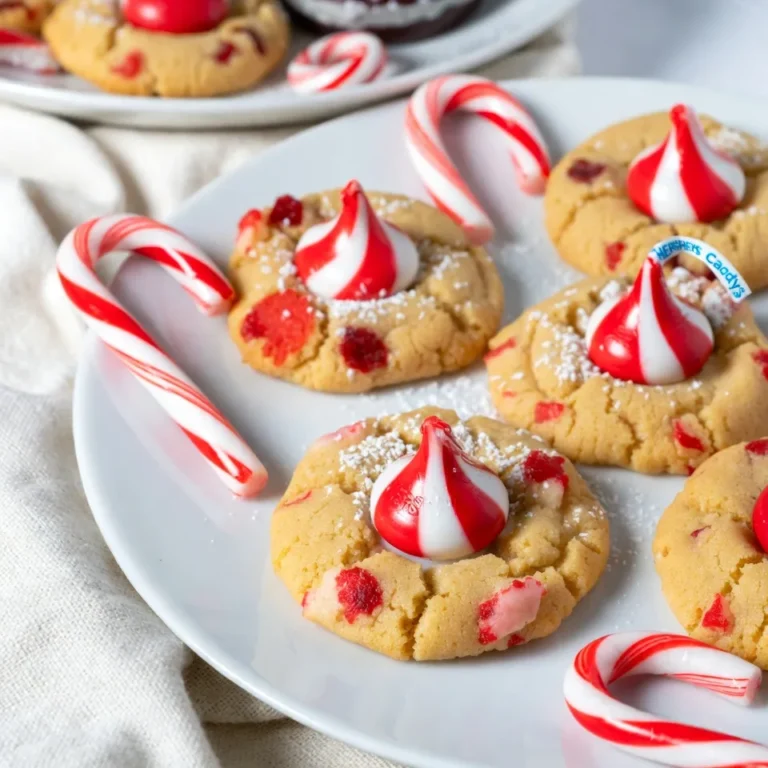
Candy Cane Kiss Cookies Festive and Sweet Delight

- 1 cup unsulfured molasses - 1/2 cup packed brown sugar - 1/2 cup granulated sugar - 1/2 cup unsalted butter, softened - 1 large egg - 2 1/2 cups all-purpose flour - 1 teaspoon baking soda - 1 teaspoon ground ginger - 1 teaspoon ground cinnamon - 1/2 teaspoon ground cloves - 1/4 teaspoon salt - 1/4 teaspoon black pepper (optional) - Extra sugar for rolling I choose unsulfured molasses for its rich flavor and deep color. It gives the cookies their signature taste and sweetness. Brown sugar adds moisture and a hint of caramel. Granulated sugar helps the cookies spread and gives them a nice texture. Softened butter blends well with other ingredients, making the dough easy to mix. The egg binds everything together and adds richness. All-purpose flour provides the right structure for cookies. Baking soda makes them rise slightly, keeping them soft. Spices like ginger, cinnamon, and cloves add warmth and depth. Salt enhances all the flavors. Black pepper is optional but adds a fun kick. Rolling the cookies in sugar before baking creates a sweet crust. If you don't have unsulfured molasses, you can use light molasses. For a different flavor, try honey or maple syrup. Instead of brown sugar, use all granulated sugar if needed. You can swap unsalted butter with coconut oil or margarine. For a vegan option, replace the egg with a flax egg or applesauce. If you're gluten-free, use a gluten-free flour blend. {{ingredient_image_2}} To make super soft molasses cookies, start by getting your oven ready. Preheat it to 350°F (175°C). Next, line your baking sheets with parchment paper. This keeps the cookies from sticking and helps them bake evenly. 1. In a large bowl, mix 1/2 cup of softened butter with 1/2 cup of brown sugar and 1/2 cup of granulated sugar. Use an electric mixer or a wooden spoon. Beat until the mix is light and fluffy, about 2-3 minutes. 2. Add 1 large egg and 1 cup of unsulfured molasses to the bowl. Mix until everything is well blended. 3. In another bowl, whisk together 2 1/2 cups of all-purpose flour, 1 teaspoon of baking soda, 1 teaspoon of ground ginger, 1 teaspoon of ground cinnamon, 1/2 teaspoon of ground cloves, 1/4 teaspoon of salt, and optional black pepper. Make sure the dry ingredients are mixed evenly. 4. Gradually add the dry mix to the wet ingredients. Stir gently until just combined. The dough should be soft and a little sticky. 5. Use a small cookie scoop or a tablespoon to drop rounded balls of dough onto the lined sheets. Leave about 2 inches of space between each cookie. 6. Roll each dough ball in extra granulated sugar. Then, gently flatten each ball with your palm. 7. Bake the cookies in your preheated oven for 8-10 minutes. The edges should be set while the centers stay soft and slightly puffed. Watch them closely to avoid overbaking. 8. After baking, take them out and let them cool on the sheets for about 5 minutes. This helps them set before moving them to wire racks to cool completely. When you mix the wet and dry ingredients, be careful not to overmix. The dough should remain soft. For shaping, don’t stress about making perfect balls. Using a cookie scoop helps create even-sized cookies. Rolling in sugar gives a nice sparkle and adds sweetness. Flattening them slightly helps them bake evenly. Enjoy the process and the lovely scents that fill your kitchen! To make your cookies super soft, focus on the dough. Use unsulfured molasses for rich flavor and moisture. Cream the butter and sugars well to add air. This step makes your cookies light. Do not overmix when adding dry ingredients. Overmixing can make cookies tough. Aim for a soft, slightly sticky dough. This helps keep them soft when baked. Bake them just until the edges set. The centers should look puffy and soft. Avoid these common mistakes for the best results: - Do not use cold butter. It must be softened first. - Skip the granulated sugar rolling step. This adds a nice crunch. - Do not overbake your cookies. Check them closely. - Avoid using too much flour. It can make cookies dry and hard. - Never skip the chilling step if you see it in other recipes. For these, it’s not needed. Having the right tools makes baking easier. Here are my top picks: - Mixing bowls: Use large ones for easy mixing. - Electric mixer: It saves time and helps with even mixing. - Cookie scoop: This helps make even-sized cookies. - Baking sheets: Use ones lined with parchment paper or silicone mats. - Wire racks: These cool your cookies evenly. With these tips and tools, you can make the perfect super soft molasses cookies every time. Enjoy baking! Pro Tips Chill the Dough: For an even softer cookie, chill the dough for about 30 minutes before baking. This helps the cookies maintain their shape and prevents them from spreading too much. Fresh Spices: Use fresh ground spices for the best flavor. If your spices are older than six months, consider replacing them for a more vibrant taste. Perfect Baking Time: Keep an eye on the cookies while they bake. They should look slightly underbaked in the center when you take them out; they will continue to cook on the baking sheet as they cool. Experiment with Mix-ins: Get creative! Consider adding chocolate chips, nuts, or dried fruit to the dough for a unique twist on these classic cookies. {{image_4}} You can spice up your molasses cookies by adding black pepper. This gives them a warm, zesty flavor. To do this, mix in 1/4 teaspoon of black pepper into your dry ingredients. This little kick makes your cookies stand out. They become a fun treat that surprises your taste buds! If you need gluten-free cookies, you have options! Use a gluten-free flour blend instead of all-purpose flour. Look for a blend that has xanthan gum. This helps your cookies hold together. The taste will still be rich and tasty. You won’t miss the gluten at all! Add your favorite extras to make these cookies your own! Try mixing in chocolate chips for a sweet twist. Nuts like walnuts or pecans add a nice crunch. Dried fruit works well too, like raisins or cranberries. These add-ins make each bite unique and fun. To keep your super soft molasses cookies fresh, store them in an airtight container. This helps keep moisture in and cookies soft. You can layer parchment paper between cookies to prevent sticking. Place the container in a cool, dry place, away from direct sunlight. These cookies stay fresh for up to a week, making them a perfect treat for any occasion. Freezing is a great way to extend the life of your cookies. Wait until the cookies are completely cool. Then, arrange them in a single layer on a baking sheet. Freeze them for about an hour. Once frozen, transfer them to a freezer-safe bag or container. Label it with the date. You can keep the cookies in the freezer for up to three months. When you crave a soft cookie, simply thaw them at room temperature or warm them in the oven for a few minutes. If your cookies become stale, don't worry! You can bring them back to life. Place a slice of bread in the container with the cookies. The moisture from the bread will soften the cookies within a day. If you prefer a quicker fix, microwave the cookies for about 10 seconds. This warms them up, making them soft again. Enjoy your cookies as if they were fresh! The secret to super soft molasses cookies lies in the ingredients and baking method. The unsulfured molasses adds moisture, making the cookies chewy. The combination of butter and sugars creates a light, fluffy base. Using just enough flour keeps the dough soft and slightly sticky, which helps to achieve that perfect texture. Baking them for a short time ensures the centers stay soft while the edges set. Yes, you can easily make this recipe in advance. Prepare the dough and scoop it into balls. Then, place the cookie dough balls on a baking sheet and freeze them until solid. Once frozen, transfer them to a zip-top bag for easy storage. You can bake them straight from the freezer. Just add a minute or two to the baking time. This way, you can enjoy fresh cookies whenever you want! To know when your cookies are done, keep an eye on the edges. They should look set and slightly golden. The centers will remain puffed and soft. If you press them gently, they should spring back. Remember, underbaking is key for that soft texture. If you overbake, your cookies will turn hard. Follow the baking time of 8-10 minutes closely for the best results. This blog post offered a complete guide on making soft molasses cookies. You learned about selecting the best ingredients, step-by-step baking instructions, and useful tips. I shared fun variations, storage tips, and answered common questions that arise during baking. Remember, the right choices lead to the perfect cookie. So, have fun experimenting with flavors and techniques. Happy baking!

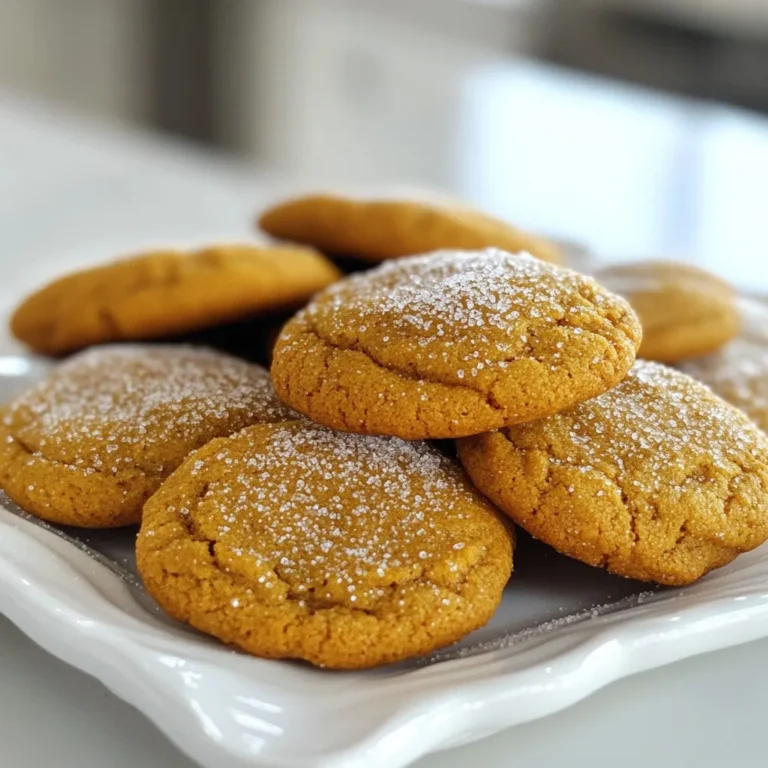
Super Soft Molasses Cookies Simple and Tasty Treat

- 1 medium yellow onion, finely diced - 3 cloves garlic, minced - 2 large carrots, peeled and diced - 2 celery stalks, finely diced - 1 large red bell pepper, chopped - 2 cups fresh spinach leaves, rinsed and chopped - 1 can (14 oz) diced tomatoes - 2 cups low-sodium vegetable broth - 1 can (15 oz) white beans (cannellini or great northern) - 1 teaspoon dried oregano - 1 teaspoon dried basil - 1/2 teaspoon smoked paprika - Salt and freshly ground black pepper - 2 tablespoons extra virgin olive oil The ingredients in this stew create a rich and vibrant taste. The fresh produce and aromatics form a solid base. The onion adds sweetness, while garlic brings depth. Carrots and celery add crunch and flavor. The red bell pepper brings a sweet touch, and spinach adds color and nutrients. We use canned tomatoes for their juiciness. The white beans add creaminess and protein. Low-sodium vegetable broth is key for a balanced flavor. For spices, dried oregano and basil are must-haves. They give the stew its Italian flair. Smoked paprika adds a warm, smoky note. Adjust salt and pepper to fit your taste. The extra virgin olive oil enhances the dish and brings everything together. With these ingredients, you're set for a tasty meal. {{ingredient_image_2}} Start by heating 2 tablespoons of extra virgin olive oil in a large pot over medium heat. Once the oil is hot, add 1 medium yellow onion, finely diced. Sauté the onion until it turns translucent and fragrant, about 5 minutes. This step builds the base flavor of your stew. Next, stir in 3 cloves of minced garlic. Then add 2 large carrots, peeled and diced, 2 finely diced celery stalks, and 1 large red bell pepper, chopped into bite-sized pieces. Cook this mix for another 5 to 7 minutes. You want the vegetables to soften and blend their flavors nicely. Now it’s time to build up your stew. Pour in 1 can of diced tomatoes, including their juices. Follow this with 2 cups of low-sodium vegetable broth. Then add 1 can of white beans, either cannellini or great northern, drained and rinsed. To season your stew, incorporate 1 teaspoon of dried oregano, 1 teaspoon of dried basil, and 1/2 teaspoon of smoked paprika. Add salt and freshly ground black pepper to taste. Stir everything together until well combined. This creates a hearty and flavorful base for your stew. Increase the heat to bring the stew to a gentle boil. Once boiling, reduce the heat to low and cover the pot. Let it simmer for about 20 minutes. Stir occasionally to prevent sticking. This is where the magic happens, as all the flavors meld together. After 20 minutes, add 2 cups of fresh spinach leaves, rinsed and roughly chopped. Stir the spinach into the stew and let it simmer for another 5 minutes. The spinach will wilt and turn vibrant green. Finally, taste your stew and adjust the seasoning with more salt and pepper if needed. If you prefer a thicker stew, use a potato masher to lightly mash some of the beans. This adds creaminess to the broth. Serve your stew hot, garnished with fresh chopped parsley. Enjoy! To make your stew thick, you have a few options. First, you can let it simmer longer. This helps the liquid reduce and the flavors blend. Another great way to thicken the stew is by using a potato masher. Lightly mash some of the beans in the pot. This adds creaminess and a nice texture without losing the bean chunks. For extra depth in your stew, consider adding spices like thyme or crushed red pepper. These spices create warmth and richness. You can also add more garlic for that extra kick. Taste the stew as it cooks. Adjust the salt and pepper to fit your liking. Don’t be afraid to experiment with your favorite herbs. Serving the stew in deep, rustic bowls makes it inviting. Pair it with crusty bread for dipping. You can also serve it over fluffy quinoa for a heartier meal. To make the dish pop, sprinkle fresh parsley on top. For a cheesy note, try adding nutritional yeast. This simple touch boosts both flavor and visual appeal. Pro Tips Prep Your Veggies: Chop all your vegetables before starting to cook. This will streamline the cooking process and ensure everything cooks evenly. Season Gradually: Always taste and adjust the seasoning as you go. This helps to build layers of flavor and prevents over-salting. Use Fresh Herbs: Fresh parsley adds a burst of flavor and color. You can also try adding other fresh herbs like basil or cilantro for a unique twist. Make It Your Own: Feel free to add other vegetables or spices that you enjoy. This stew is versatile and can be customized to suit your taste! {{image_4}} You can make this stew even better! Try adding in some veggies like zucchini or kale. Both add great flavor and nutrition. You can also swap in tofu or tempeh for extra protein. These options help make the dish heartier and more filling. Experiment with herbs and spices for new tastes! Try thyme, rosemary, or even cumin for a twist. If you like heat, sprinkle in some chili flakes. This adds a kick and brings the flavors alive. If you need gluten-free options, use gluten-free broth. This keeps the stew tasty without the gluten. For a low-sodium version, choose low-sodium beans and broth. Your stew will still taste great and be healthier! After you make your vegan tomato white bean stew, you may have leftovers. Store them in an airtight container. This keeps the stew fresh and tasty. Put the container in the fridge. Your stew will last about 3 to 4 days. If you want to keep it longer, consider freezing it. Use freezer-safe containers or bags. Make sure to leave some space for expansion. The stew can last up to 3 months in the freezer. When you’re ready, thaw it in the fridge overnight. When you’re ready to enjoy your leftovers, reheating is key. I recommend using the stove for the best flavor. Just pour the stew into a pot over low heat. Stir often and heat until it’s warm. If you’re in a hurry, you can use the microwave. Put the stew in a microwave-safe bowl. Heat it in short bursts, stirring in between. This method keeps the texture nice. To keep the flavors strong, add a splash of vegetable broth while reheating. This helps restore moisture and keeps the stew tasty. Enjoy your meal! Vegan tomato white bean stew lasts about 3 to 5 days in the fridge. To store it, let it cool first. Then, place it in an airtight container. This keeps it fresh and tasty. If you see any mold or off smells, toss it out. Always check before you eat! Yes, you can freeze vegan tomato white bean stew. To do this, let it cool completely. Then, pour it into freezer-safe containers. Leave some space at the top for expansion. It can stay good in the freezer for up to 3 months. When you’re ready to eat, thaw it overnight in the fridge. Heat it on the stove or in the microwave until hot. You can serve vegan tomato white bean stew with many tasty sides. Here are some ideas: - Crusty bread for dipping - Fluffy quinoa for a filling meal - A fresh green salad for crunch - Steamed rice for extra texture - A sprinkle of nutritional yeast for a cheesy flavor These pairings make the meal even better! This blog post covered how to make a tasty vegan tomato white bean stew. We explored fresh produce and canned ingredients. I shared step-by-step instructions, plus tips for texture and flavor. You learned about variations and how to store your stew. In conclusion, this stew is easy to make and packs healthy ingredients. Enjoy experimenting with flavors that match your taste. Your kitchen adventure awaits!

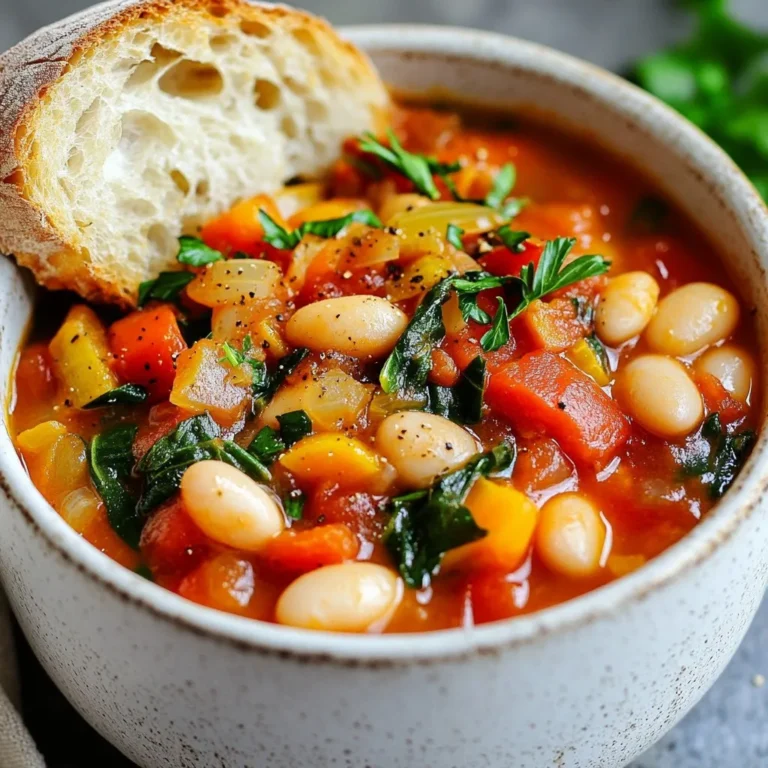
Vegan Tomato White Bean Stew Flavorful and Easy Meal

- 2 boneless, skinless chicken breasts - 6 cups chicken broth - 1 medium onion, finely diced - 2 cloves of garlic, minced - 2 medium carrots, peeled and diced - 2 stalks of celery, diced - 1 cup corn kernels, fresh or frozen - 1 teaspoon dried thyme - 1 teaspoon dried oregano - 1/2 teaspoon red pepper flakes - Salt and freshly ground black pepper, to taste - 1 cup heavy cream - Fresh parsley, chopped, for garnish When choosing fresh ingredients, look for bright colors and firm textures. - For chicken, pick breasts with no discoloration. - Choose onions that feel heavy and have smooth skins. - Carrots should be firm and not wrinkled. - Fresh herbs should smell strong and look vibrant. - Corn can be fresh or frozen; just ensure it is high quality. You can easily swap some ingredients based on what you have. - For chicken, use rotisserie chicken for a quicker option. - If you don’t have chicken broth, vegetable broth works well. - Use shallots instead of onion for a milder taste. - Replace heavy cream with coconut milk for a lighter soup. - You can add other veggies, like bell peppers or zucchini, for more flavor. {{ingredient_image_2}} Making Marry Me Chicken Soup is simple and quick. First, you cook the veggies and chicken together. Then, you shred the chicken and mix in cream and corn. Finally, you serve it hot with fresh parsley. 1. Start by heating 1 tablespoon of olive oil in a large pot over medium heat. 2. Add the finely diced onion and sauté for 3-4 minutes until it looks clear and smells good. 3. Next, stir in the minced garlic and cook for 1 minute, so it releases its nice aroma. 4. Add the diced carrots and celery, cooking for 5-6 minutes. This softens the veggies and builds flavor. 5. Sprinkle in the dried thyme, oregano, red pepper flakes, salt, and black pepper. Mix well. 6. Place the chicken breasts into the pot and pour in the chicken broth. Bring it to a gentle boil. 7. Lower the heat to simmer and cover the pot. Let it cook for 15-20 minutes until the chicken is cooked through. 8. Take out the chicken and shred it using two forks. Return the shredded chicken back into the soup. 9. Stir in the corn and heavy cream. Let it simmer for another 5 minutes, adjusting seasoning to taste. 10. Ladle the soup into warm bowls and garnish with chopped parsley. To shred chicken quickly, let it cool for a few minutes after cooking. Use two forks to pull apart the meat. If you want, you can also use a stand mixer with a paddle attachment. This method works great and saves time. To make your Marry Me Chicken Soup shine, I have a few tasty tips. First, use fresh herbs whenever you can. Fresh thyme and oregano add a vibrant touch. You can also add a splash of lemon juice for brightness. This small addition can lift the flavors and make the soup pop. Another great way to enhance flavor is to brown the chicken before adding it to the pot. This step adds depth, making the soup richer. Try sautéing the garlic until golden, too. This brings out its sweet notes. Avoid overcooking the chicken. It can turn dry and tough. Cook it just until it’s no longer pink. Also, don’t skip seasoning until the end. Season as you go. This builds layers of flavor that make every bite amazing. Be careful with the cream. If added too early, it can curdle. Stir it in right before serving for a smooth finish. Lastly, don’t forget to taste! Adjust salt and spice as needed. This ensures the best taste for your soup. If you want a thicker soup, there are some easy tricks. A simple way is to mash some of the cooked vegetables. Just take a few from the pot and mash them with a fork, then stir them back in. You can also add a slurry of cornstarch and water. Mix one tablespoon of cornstarch with two tablespoons of water, then stir it into the soup. Let it simmer for a few minutes to thicken. Another option is to let the soup simmer longer. This reduces the liquid and thickens the soup naturally. Just keep an eye on it to avoid burning. Pro Tips Use Fresh Ingredients: Whenever possible, opt for fresh vegetables and herbs to enhance the flavor and nutritional value of your soup. Customize the Spice Level: Adjust the amount of red pepper flakes to suit your taste; you can even omit them for a milder soup. Make it Ahead: This soup can be made in advance and stored in the refrigerator for up to 3 days, allowing flavors to meld beautifully. Garnish for Appeal: A sprinkle of fresh parsley not only adds color but also a burst of freshness that complements the creamy soup. {{image_4}} To make your Marry Me Chicken Soup dairy-free, swap the heavy cream. Use coconut milk or almond milk instead. These options add a nice creaminess without dairy. Both options will change the flavor slightly, but they still taste great. Just remember to check for added sugars in the milk you choose! Boost the nutrition of your soup by adding more veggies. Consider adding: - Spinach - Kale - Zucchini - Bell peppers These vegetables bring color, flavor, and extra vitamins. You can add them in step 3 with the carrots and celery. They’ll cook down nicely and blend well with the soup. If you enjoy a bit of heat, spice up your soup! Start by increasing the red pepper flakes. You can also add fresh jalapeños or crushed chili peppers. Another great choice is hot sauce. Just a few drops can take your soup to the next level. Adjust the spice to your taste and enjoy the warmth! To keep your Marry Me Chicken Soup fresh, let it cool down first. This helps prevent condensation in the storage container. Use airtight containers for the best protection. Store the soup in the fridge for up to three days. If you plan to eat it later, it's best to freeze it. For long-term storage, freeze the soup in portions. Use freezer-safe bags or containers. Make sure to leave some space for the soup to expand as it freezes. This soup can last for up to three months in the freezer. Always label the bags with the date to track freshness. When you’re ready to enjoy the soup again, thaw it overnight in the fridge. Reheat it on the stove over low heat. Stir often to keep it from sticking. If it looks too thick, add a splash of chicken broth or water. This will help restore its creamy texture and flavor. Enjoy! Marry Me Chicken Soup is a rich, creamy soup made with chicken and veggies. It gets its name from the idea that anyone who tastes it will fall in love. The soup includes chicken breasts, onion, garlic, carrots, celery, corn, and seasonings. It is hearty and packed with flavor. The heavy cream adds a smooth texture, making it feel like a warm hug in a bowl. Yes, you can make Marry Me Chicken Soup in a slow cooker. Start by sautéing the onion and garlic in a pan. Then, add all the ingredients to the slow cooker. Include the sautéed onion and garlic, chicken, broth, veggies, and seasonings. Cook on low for 6-8 hours or on high for 3-4 hours. Shred the chicken before adding the cream in the last 30 minutes of cooking. To make Marry Me Chicken Soup gluten-free, use gluten-free chicken broth. Most chicken broths are gluten-free, but always check the label. Use fresh veggies and the other ingredients listed. This soup is naturally gluten-free without any flour or gluten-containing items. Always double-check your seasonings for hidden gluten. Enjoy a bowl of comfort without worry! In this post, we explored all aspects of Marry Me Chicken Soup. We discussed key ingredients, tips for freshness, and easy substitutions. The step-by-step guide made cooking simple and stress-free. I also shared ways to improve flavor and avoid mistakes. Variations, like dairy-free or spicy options, add fun to the recipe. Finally, we covered storage tips to keep leftovers tasty. Enjoy your cooking and make this soup a go-to dish!

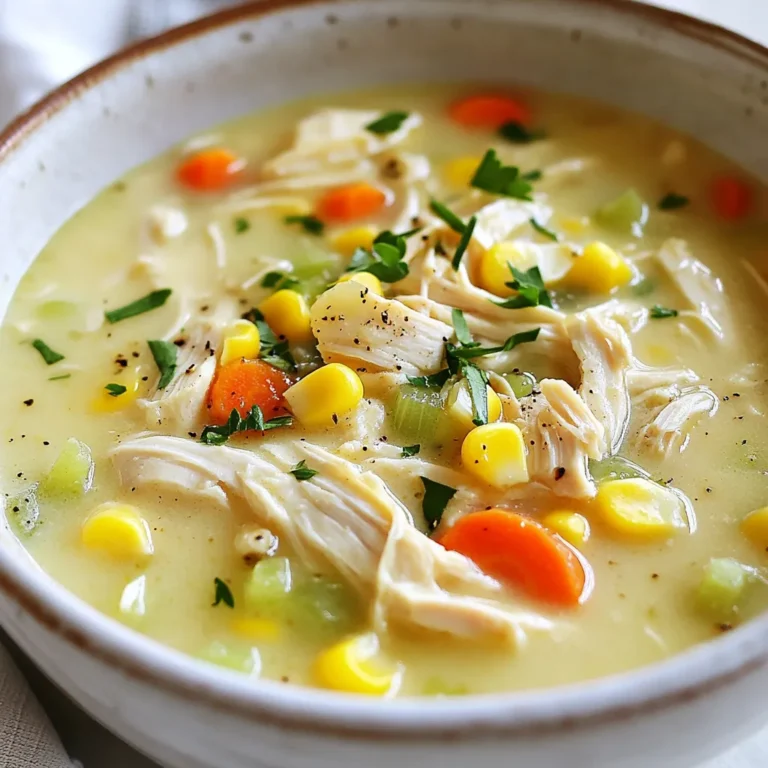
Marry Me Chicken Soup Quick and Flavorful Recipe

PREV 1 … 31 32 33 … 44 NEXT
yummybiterecipes

explore

DessertsDinnerAppetizersDrinks

Our Policies

  • Cookie Policy
  • Copyright Policy
  • Disclaimer
  • GDPR Policy
  • Terms Of Use
Back to Top
  • About
  • Contact Us
  • Privacy Policy
© 2025 yummybiterecipes