FREE DINNER EBOOK! Get your copy!
  • Cookie Policy
  • GDPR Policy
  • Disclaimer
  • Terms Of Use
  • Visit my other site: Fun Cookie Recipes
yummybiterecipes
  • Home
  • Dinner
  • Desserts
  • Drinks
  • Appetizers
  • Contact
  • About
  • Privacy Policy
  • Home
  • Dinner
  • Desserts
  • Drinks
  • Appetizers
  • Contact
  • About
  • Privacy Policy
  • Cookie Policy
  • GDPR Policy
  • Disclaimer
  • Terms Of Use
Visit my other site: Fun Cookie Recipes

HOME / CATEGORIES /

Latest

- 1 pound ground beef - 1 medium onion, diced - 1 green bell pepper, diced - 1 cup provolone cheese, shredded - 2 cloves garlic, minced - 1 tablespoon Worcestershire sauce - 1 teaspoon smoked paprika - 1 cup beef broth - 1 tablespoon olive oil - Salt and freshly ground black pepper, to taste - Fresh parsley, chopped - Optional extra cheese Gathering these ingredients makes cooking easy and fun. Ground beef is the star here, offering rich flavor. The diced onion and green bell pepper bring sweetness and crunch. Provolone cheese melts beautifully, adding creaminess. For seasoning, garlic adds depth, while Worcestershire sauce gives a savory kick. Smoked paprika brings warmth, and beef broth keeps it juicy. Olive oil helps cook the veggies and ground beef. Don’t forget salt and pepper to taste. As for toppings, fresh parsley adds color and a fresh taste. For cheese lovers, sprinkle more cheese on top for extra gooeyness. This dish is all about layers of flavor and texture. Enjoy every bite! {{ingredient_image_2}} 1. Heat 1 tablespoon of olive oil in a large skillet over medium heat. 2. Once hot, add 1 diced onion and 1 diced green bell pepper. Sauté for about 5 minutes. The veggies should soften and smell great. 3. Add 2 minced garlic cloves to the skillet. Cook for another minute, stirring often. You want the garlic to be fragrant and lightly golden. 4. Now, add 1 pound of ground beef. Use a spatula to break it up as it cooks. Cook until the beef is brown and fully cooked, about 5 to 7 minutes. If there's excess grease, drain it off. 1. Stir in 1 tablespoon of Worcestershire sauce, 1 teaspoon of smoked paprika, some salt, and black pepper. 2. Pour in 1 cup of beef broth. Increase the heat slightly to bring the mixture to a gentle simmer. 3. Reduce the heat to low and let it simmer for about 5 to 10 minutes. Stir occasionally. This helps the flavors blend and the mixture thicken a bit. 1. Once thickened, sprinkle 1 cup of shredded provolone cheese on top. Cover the skillet with a lid. 2. Let it cook for another 2 to 3 minutes until the cheese melts and becomes gooey. 3. While the cheese melts, toast 4 hamburger buns in another skillet or toaster until golden brown and slightly crispy. 4. To serve, spoon a generous amount of the cheesy beef mixture onto each toasted bun. Optionally, sprinkle fresh chopped parsley on top for color and flavor. To boost the flavor of your Philly Cheesesteak Sloppy Joes, adjust the seasonings. Try adding a pinch of cayenne or crushed red pepper for heat. You can also mix in some Italian seasoning for a herbaceous twist. This brings a new layer of taste to your dish. When browning the beef, make sure your skillet is hot. This helps the meat sear well and prevents it from steaming. Break apart the beef as it cooks to ensure even browning. If you see extra grease, carefully drain it off. This keeps your Sloppy Joes from being too oily. For a great look, serve your Sloppy Joes on a big platter. Spoon the cheesy beef mixture onto each bun, then sprinkle fresh parsley on top. This adds a pop of color. Consider pairing them with crispy fries or a fresh salad for a complete meal. Pro Tips Use Fresh Ingredients: Opt for fresh vegetables and high-quality ground beef to enhance the flavors of your Sloppy Joes. Customize Your Cheese: Feel free to experiment with different cheeses like cheddar or mozzarella for a unique twist on the classic flavor. Adjust the Spice: Add a pinch of cayenne pepper or red pepper flakes if you prefer a bit of heat in your Sloppy Joes. Perfect Your Toast: Toast the buns just before serving to keep them warm and crispy, adding to the overall texture of the dish. {{image_4}} You can switch up the cheese! Try using mozzarella or cheddar. Both will melt nicely and add great flavor. If you want a creamier texture, consider using a cheese sauce. For veggies, add mushrooms or spinach. They will boost nutrition and flavor. Simply sauté them with the onions and bell peppers. Want to make it gluten-free? Use gluten-free buns made from rice or corn. They taste great and hold up well. For a vegetarian version, swap the ground beef for lentils or diced mushrooms. You can also use a meat substitute like tempeh or tofu. Season them well to keep the taste rich and satisfying. Different areas have fun takes on Sloppy Joes. In some places, they add barbecue sauce for a sweet twist. Others mix in hot sauce for a kick. You can also add local spices to make it unique. Think about using Cajun seasoning or even taco spices for a new flavor profile. Each twist brings something special to the table! To keep your Philly Cheesesteak Sloppy Joes fresh, store leftovers in the fridge. Use airtight containers for best results. I suggest glass or plastic containers that seal tightly. This helps avoid any funky smells and keeps the flavors intact. Before storing, let the dish cool down to room temperature. This step prevents condensation inside the container, which can make the dish soggy. If you want to save some for later, freezing is a great option. First, let the sloppy joe mixture cool completely. Then, scoop it into freezer-safe bags or containers. Remove as much air as possible before sealing. This will prevent freezer burn. When ready to enjoy, thaw the mixture overnight in the fridge. Reheat it on the stove over low heat. Stir often to ensure it warms evenly. In the fridge, Philly Cheesesteak Sloppy Joes last about 3 to 4 days. If you freeze them, they can last up to 3 months. Always check for signs of spoilage before eating. If you notice an off smell or unusual texture, it's best to toss it out. Trust your senses; they are often the best guide for food safety. How to store Philly Cheesesteak Sloppy Joes? You can store your Sloppy Joes in an airtight container. Let them cool first. They last up to three days in the fridge. When ready to eat, just reheat them on the stove or in the microwave. Can I make this recipe ahead of time? Yes, you can make this dish ahead of time. Cook the filling and store it. Keep the buns separate. When you're ready, heat the filling and toast the buns. What can I use instead of provolone cheese? If you don't have provolone, try mozzarella or cheddar. Both melt well and add great flavor. You can even use pepper jack for a spicy kick. How long does it take to cook ground beef? Cooking ground beef takes about 5 to 7 minutes. Break it apart with a spatula as it cooks. Make sure it's browned all the way through. Can I make this in a slow cooker? Yes, you can! Brown the beef and veggies first, then transfer them to the slow cooker. Cook on low for about 4 hours. Add the cheese right before serving. What are the best buns to use? Soft hamburger buns work great. You can also try hoagie rolls or brioche buns for more flavor. Make sure they are sturdy enough to hold the filling. How can I make Sloppy Joes less messy? To make them less messy, use a thicker sauce. You can also serve the filling in small bowls. This way, everyone can add what they like. What sides pair well with Philly Cheesesteak Sloppy Joes? Fries or sweet potato fries are great sides. You can also serve a fresh salad or coleslaw. These add crunch and balance the rich flavors of the Sloppy Joes. You now have all the details needed to make delicious Philly Cheesesteak Sloppy Joes. We covered the main ingredients, from ground beef to provolone cheese. You learned how to mix flavors and build your dish step by step. Tips for enhancing flavor and making dietary adaptations are also shared. Whether you prefer classic flavors or a regional twist, this recipe is sure to please. Remember to store leftovers properly for the best taste. Enjoy making this tasty meal that fits your style!

Philly Cheesesteak Sloppy Joes Delicious and Simple Dish

For the Lemon Raspberry Cookies, you will need: - 1 cup unsalted butter, softened at room temperature - 1 cup granulated sugar - 1 large egg - 1 teaspoon pure vanilla extract - Zest of 1 large lemon (about 1 tablespoon) - 2 tablespoons freshly squeezed lemon juice - 2 cups all-purpose flour - 1 teaspoon baking powder - ½ teaspoon baking soda - ¼ teaspoon fine salt - 1 cup fresh raspberries (or use frozen raspberries, thawed and thoroughly drained) - ½ cup powdered sugar (for dusting) You can swap unsalted butter for coconut oil. This will give a unique flavor. For a dairy-free option, use a plant-based butter. If you need a sugar substitute, consider using coconut sugar. You can also use egg replacers like flaxseed meal mixed with water. If you don't have fresh lemons, bottled lemon juice works. However, fresh juice gives the best taste. For a lovely finish, dust your cookies with powdered sugar. You can also add fresh raspberries on top. A sprig of mint adds a nice touch too. These garnishes make your cookies look extra special. They can impress your guests and brighten up your dessert table. Enjoy these delightful cookies with a cup of tea or coffee! {{ingredient_image_2}} Start by gathering all your ingredients. This makes the process smooth and simple. You need butter, sugar, an egg, vanilla, lemon zest, lemon juice, flour, baking powder, baking soda, salt, raspberries, and powdered sugar. Preheat your oven to 350°F (175°C). Line two baking sheets with parchment paper to prevent sticking. 1. Cream Butter and Sugar: In a large bowl, use an electric mixer to beat the softened butter and sugar. Mix until light and fluffy, around 3-4 minutes. 2. Incorporate Wet Ingredients: Add the egg, vanilla, lemon zest, and lemon juice to the bowl. Mix on low speed until everything is smooth. 3. Mix Dry Ingredients: In a separate bowl, whisk together the flour, baking powder, baking soda, and salt. 4. Combine Mixtures: Gradually add the dry mix to the wet mix. Stir gently until just combined. Be careful not to overmix. 5. Fold in Raspberries: Gently fold in the fresh raspberries. Use a spatula to keep their shape and color. 6. Scoop Dough: Use a spoon or cookie scoop to drop dough onto the prepared sheets. Leave about 2 inches of space between each cookie. 7. Bake: Place the sheets in the oven. Bake for 12 to 15 minutes. Look for lightly golden edges and set centers. After baking, remove the cookies from the oven. Let them cool on the baking sheets for about 5 minutes. Then transfer the cookies to a wire rack to cool completely. Once cool, lightly dust them with powdered sugar for a sweet finish. Enjoy your lemon raspberry cookies! To get cookies that are soft and chewy, use room-temperature butter. This helps blend nicely with sugar. Mix until the mix is light and fluffy. Avoid overmixing when you add flour. This keeps your cookies tender. Raspberries are delicate. To prevent crushing, rinse them gently in cold water. Pat them dry with a paper towel. When you fold them into the dough, do it slowly. This keeps their shape and color bright. To keep your cookies fresh, store them in an airtight container. Place a piece of parchment paper between layers to avoid sticking. They stay good for about a week. If you want to keep them longer, freeze them. Just wrap each cookie in plastic wrap before freezing. Pro Tips Chill the Dough: If the dough becomes too soft while mixing, chill it in the refrigerator for about 30 minutes. This will help the cookies hold their shape while baking. Use Room Temperature Ingredients: Make sure your butter and egg are at room temperature. This helps create a smoother batter and better texture in your cookies. Fresh Ingredients Matter: Use fresh raspberries for the best flavor and texture. If using frozen, ensure they are completely thawed and drained before folding them into the dough. Don’t Overbake: Keep a close eye on the cookies as they bake. They should be lightly golden on the edges; overbaking can lead to dry cookies. {{image_4}} To make gluten-free lemon raspberry cookies, swap all-purpose flour for a gluten-free blend. Look for a blend that includes xanthan gum. This will help the cookies stay soft and chewy. Mix the gluten-free flour with the other dry ingredients as you would in the original recipe. The taste will still be delightful, and your cookies will be safe for those with gluten issues. If you love blueberries, try making lemon blueberry cookies. Simply replace the raspberries with fresh or frozen blueberries. The tartness of the lemon pairs well with the sweet blueberries. You will still follow the same steps in the recipe. Your cookies will have a beautiful color and a taste that brightens any day. You can also add nuts or other flavorings to your cookies. Chopped almonds or walnuts bring a nice crunch. You can mix in a half cup of your chosen nuts during the step where you fold in the raspberries. For a unique twist, try adding white chocolate chips or a hint of almond extract. This adds depth and makes your cookies special. To keep your lemon raspberry cookies fresh, store them in an airtight container. This helps prevent them from drying out. Place a piece of parchment paper between layers to avoid sticking. Keep the container at room temperature for up to one week. If you notice any signs of moisture, eat them right away. You can freeze these cookies for later enjoyment. Start by letting them cool completely. Then, arrange them in a single layer on a baking sheet. Freeze for about one hour. Once frozen, transfer the cookies to a zip-top freezer bag. They will stay fresh for up to three months. Label the bag with the date so you can keep track. When you’re ready to eat your frozen cookies, preheat your oven to 350°F (175°C). Place the cookies on a baking sheet. Heat them for about 5 to 7 minutes. This warms them up and brings back their soft texture. If you want, dust them with powdered sugar again for a fresh touch. To make these cookies vegan, replace the egg with a flaxseed egg. Mix one tablespoon of ground flaxseed with two and a half tablespoons of water. Let it sit for five minutes until it thickens. Use vegan butter instead of regular butter. This change keeps the cookies soft and tasty. If you can't find fresh raspberries, frozen raspberries work great. Just thaw and drain them well. You can also use blueberries or chopped strawberries for a fun twist. These fruits add color and flavor to your cookies. Yes, you can make the dough ahead of time! After mixing it, wrap it tightly in plastic wrap. Place it in the fridge for up to 3 days. When you are ready to bake, scoop the dough onto your baking sheets and bake as usual. This makes it easy to enjoy fresh cookies anytime! We explored the ingredients for delicious cookies, from substitutions to optional garnishes. Next, we covered step-by-step baking instructions to ensure success. I shared tips for perfect texture, handling raspberries, and storing leftovers. We also discussed tasty variations and storage methods. Baking cookies is fun and rewarding. Try new flavors, share with friends, and savor each bite. Enjoy your baking journey!

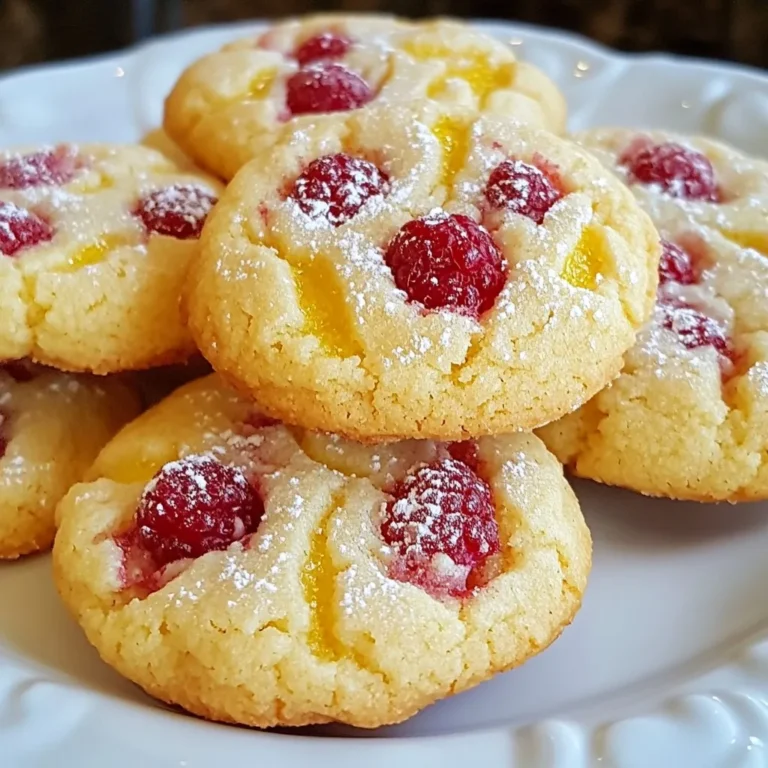
Lemon Raspberry Cookies Delightful and Easy Recipe

To make these tasty cookies, you need a few simple ingredients: - 1 cup fresh strawberries, diced - 1/2 cup granulated sugar, divided - 1 1/2 cups all-purpose flour - 1 teaspoon baking powder - 1/2 teaspoon baking soda - 1/4 teaspoon salt - 1/2 cup unsalted butter, softened - 1 large egg - 1 teaspoon vanilla extract - 1/3 cup heavy cream - 1/2 cup powdered sugar - 1 teaspoon fresh lemon juice These ingredients work together to create a soft and sweet cookie that highlights the fresh strawberries. Here are the tools you will need for this recipe: - Mixing bowls - Electric mixer - Whisk - Spatula - Baking sheet - Parchment paper - Cookie scoop or two tablespoons - Small bowl for the glaze These tools will help you mix, bake, and glaze the cookies easily. To make your cookies even more special, consider these garnishes: - Whole strawberries for decoration - A light dusting of powdered sugar - Serve on a colorful plate for a fun look These small touches can make your cookies look even more appealing on the table! {{ingredient_image_2}} Start by washing your fresh strawberries. Dice them into small pieces. In a small bowl, mix the diced strawberries with 2 tablespoons of granulated sugar. Stir gently to coat the strawberries. Set the bowl aside for 15-20 minutes. This process is called maceration. It helps soften the strawberries and draws out their sweet juices. Preheat your oven to 350°F (175°C). Line a baking sheet with parchment paper to prevent sticking. In a medium bowl, whisk together 1 1/2 cups of all-purpose flour, 1 teaspoon of baking powder, 1/2 teaspoon of baking soda, and 1/4 teaspoon of salt. In a large mixing bowl, beat 1/2 cup of softened butter with 1/4 cup of granulated sugar. Mix until light and fluffy, about 2-3 minutes. Add in 1 large egg and 1 teaspoon of vanilla extract. Mix well. Gradually add the dry ingredients to the wet mixture. Mix gently until just combined. Carefully fold in the macerated strawberries and their juices. Use a cookie scoop or two tablespoons to drop mounds of dough onto the prepared baking sheet. Space them about 2 inches apart. Bake for 12-15 minutes, until the edges are lightly golden. Let the cookies cool on the baking sheet for a few minutes. Then, transfer them to a wire rack to cool completely. While the cookies cool, prepare the lemon glaze. In a small bowl, mix together 1/2 cup of powdered sugar, 1/3 cup of heavy cream, and 1 teaspoon of fresh lemon juice. Whisk until smooth and free of lumps. Adjust the glaze's thickness by adding more cream for a thinner glaze or more powdered sugar for a thicker glaze. Once the cookies are cool, drizzle the lemon glaze generously over each cookie. This adds a sweet and tangy finish that makes them even more delightful. To get the best texture for your cookies, cream the butter and sugar well. Beat them until they are light and fluffy. This step helps aerate the dough, making it soft. Use room temperature butter for easier mixing. Ensure you mix in the dry ingredients gently. Overmixing can lead to tough cookies. One common mistake is skipping the maceration of strawberries. This step draws out juices that enhance flavor. Avoid using cold butter as it won’t blend well. Also, don’t pack the flour tightly when measuring. This can make your cookies dry. Lastly, keep an eye on the baking time. Remove cookies when the edges are lightly golden. Always wash and dry your strawberries before using. Dice them into small, even pieces for best results. Macerate them properly by mixing with sugar. This step releases juices that mix well in the dough. Use fresh strawberries for the best flavor. They add a vibrant color and sweetness to your cookies. Pro Tips Use Fresh Strawberries: Always opt for fresh, ripe strawberries for the best flavor. Frozen strawberries can alter the texture of the cookies. Maceration is Key: Allowing the strawberries to macerate in sugar not only enhances their sweetness but also prevents excess moisture from making the cookies soggy. Don’t Overmix: When combining wet and dry ingredients, mix until just incorporated. Overmixing can lead to tough cookies. Customize the Glaze: Feel free to experiment with different citrus juices, like lime or orange, in the glaze for a unique twist on flavor. {{image_4}} You can make gluten-free strawberry shortcake cookies easily. Just swap all-purpose flour for a gluten-free blend. Look for a blend that includes xanthan gum for the best texture. Follow the same steps in the recipe. Your cookies will still taste great and have a nice texture. If you love chocolate, add a chocolate drizzle! After the cookies cool, melt some chocolate. Use a microwave or a double boiler. Drizzle the melted chocolate over the cookies with a spoon. This adds a rich layer to the sweet strawberry flavor. It’s a fun twist that everyone will enjoy. You can change the fruit in your cookies. Try blueberries, raspberries, or peaches instead of strawberries. Just chop the fruit to a similar size. Each fruit brings its own taste. You can also add spices like cinnamon or nutmeg for extra flavor. This keeps your cookies fresh and exciting every time you bake! To keep your strawberry shortcake cookies fresh, store them in an airtight container. Make sure to layer parchment paper between the cookies if stacking. This helps prevent them from sticking together. Keep the container at room temperature for up to three days. If you live in a humid area, the fridge is a better option. Freezing is a great way to save your cookies for later. Allow the cookies to cool completely. Then, place them in a single layer on a baking sheet. Freeze them for about one hour. Once frozen, transfer the cookies to a freezer bag. Be sure to remove as much air as possible. They can last up to three months in the freezer. When you're ready to enjoy your cookies again, reheating is simple. Preheat your oven to 300°F (150°C). Place the cookies on a baking sheet and warm them for about 5-7 minutes. This will revive their soft texture. You can also use a microwave. Heat each cookie for about 10-15 seconds, but be careful not to overcook them. Enjoy the fresh taste once more! To make these cookies vegan, swap the egg for a flax egg. Mix 1 tablespoon of ground flaxseed with 3 tablespoons of water. Let it sit for 5 minutes until it thickens. Use vegan butter instead of unsalted butter. For cream, use coconut cream or almond milk as a substitute. This keeps the cookies soft and tasty. Yes, you can use frozen strawberries. Thaw them first and drain extra juice, so the dough doesn't get too wet. Chop them into small pieces before adding them to the cookie mix. This will still give you that sweet strawberry flavor. These cookies pair well with whipped cream or vanilla ice cream. You can also serve them with fresh fruit or a scoop of yogurt for a light dessert. Try a cup of tea or coffee for a cozy treat. Strawberry shortcake cookies last about 3-5 days in an airtight container. Keep them at room temperature for the best texture. If you want to store them longer, freeze them. They can last up to 3 months in the freezer. Just thaw them before serving. Strawberry shortcake cookies are a delightful treat that you can easily make at home. With fresh strawberries, a tasty lemon glaze, and fun variations, you can customize them to your liking. Remember to follow the tips for the best cookie texture and avoid common mistakes. Store them properly to enjoy later, or try freezing for future treats. These cookies bring joy to any occasion, and now you have the know-how to make them. Enjoy every bite and share your delicious results!

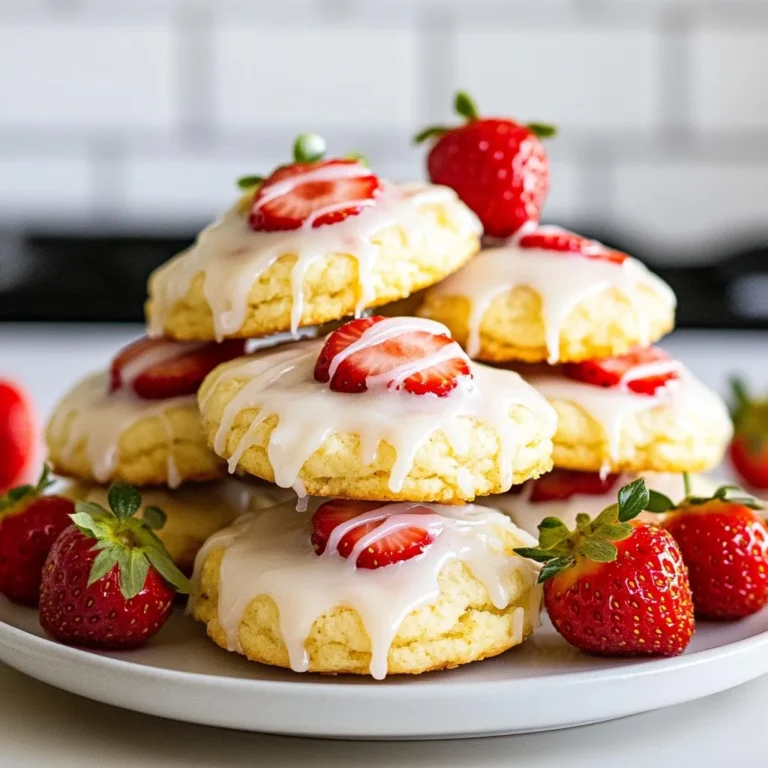
Strawberry Shortcake Cookies Delightful and Simple Treat

- 1 cup long-grain white rice, thoroughly rinsed - 1 lb ground turkey or beef (your choice) - 1 medium onion, finely diced - 2 cloves garlic, minced - 1 packet taco seasoning (about 1 ounce) - 1 (15 oz) can black beans, drained and rinsed - 1 (15 oz) can diced tomatoes with green chilies - 2 cups chicken or vegetable broth - 1 cup corn kernels (can use frozen or canned) - 1 ½ cups shredded cheddar cheese - 2 tablespoons olive oil - Salt and pepper to taste - Fresh cilantro, chopped (for garnish) - Sour cream (for serving, optional) Using long-grain white rice works best in this dish. It cooks evenly and absorbs flavors well. Ground turkey is lean, while beef adds richness. Choose what you enjoy. Using fresh garlic and onion gives great flavor. Canned tomatoes with green chilies add a nice kick. Black beans boost protein and fiber. Always rinse them to cut sodium. Broth adds depth. You can pick chicken or vegetable broth based on your preference. Corn adds sweetness and texture, while cheddar cheese gives that gooey goodness. For a vegetarian option, swap ground meat for mushrooms or lentils. Use vegetable broth to keep it plant-based. If you want a spicy kick, add jalapeños or extra chili powder. Instead of black beans, try kidney beans or pinto beans. If you don’t have cheddar cheese, use Monterey Jack or pepper jack for a twist. You can also skip the cheese for a lighter version. When fresh cilantro isn’t available, use parsley or omit it entirely. {{ingredient_image_2}} First, gather all your ingredients. You will need: - 1 cup long-grain white rice, thoroughly rinsed - 1 lb ground turkey or beef - 1 medium onion, finely diced - 2 cloves garlic, minced - 1 packet taco seasoning (about 1 ounce) - 1 (15 oz) can black beans, drained and rinsed - 1 (15 oz) can diced tomatoes with green chilies - 2 cups chicken or vegetable broth - 1 cup corn kernels - 1 ½ cups shredded cheddar cheese - 2 tablespoons olive oil - Salt and pepper to taste - Fresh cilantro, chopped (for garnish) - Sour cream (optional) Heat 2 tablespoons of olive oil in a large skillet over medium heat. Once hot, add the diced onion. Sauté for about 3-4 minutes until the onion is clear. Next, add the minced garlic and the ground turkey or beef. Cook this mixture for 5-7 minutes. Break up the meat with a spatula. Cook until the meat is brown and no longer pink. Then, sprinkle in the taco seasoning. Stir well to coat the meat with the spices. Allow it to cook for another minute to let the flavors shine. Pour in the chicken or vegetable broth and add the rinsed rice. Stir everything together, making sure the rice is fully submerged in the broth. Bring it to a gentle boil over medium-high heat. Once boiling, reduce the heat to low. Cover the skillet with a lid. Let it simmer for 15 minutes to allow the rice to soak up the broth. After 15 minutes, carefully lift the lid. Be cautious of the steam. Stir in the black beans, diced tomatoes, and corn. Mix everything until it’s combined well. Now, sprinkle the shredded cheddar cheese evenly on top. Replace the lid and let it simmer for an additional 5 minutes. This will melt the cheese and heat the dish through. Taste it and add salt and pepper as desired. Finally, remove the skillet from the heat. Garnish with chopped cilantro for a fresh touch. Serve it straight from the skillet for a fun family meal. Enjoy every bite of your cheesy taco rice skillet! To make your Cheesy Taco Rice Skillet shine, use fresh ingredients. Fresh cilantro adds a burst of flavor. Always choose quality broth, as it boosts the dish's taste. If you like heat, add diced jalapeños or a pinch of cayenne pepper. This will enhance the taco flavor. Taste your dish as you cook. Adjust salt and pepper to suit your palate. Start by sautéing the onion until it’s soft. This builds a sweet base for your meal. When you add garlic, stir it for just a minute. This keeps the garlic from burning. Use a lid while simmering. It traps steam and helps the rice cook evenly. Stir the rice occasionally to prevent it from sticking. This keeps every grain fluffy. Serve the Cheesy Taco Rice Skillet hot from the pan. This creates a fun, shared meal. Top each serving with a dollop of sour cream. It adds creaminess and balances the spices. Fresh cilantro on top brightens the dish visually and flavor-wise. For a complete meal, pair it with a simple salad or tortilla chips. Enjoy the flavors and textures! Pro Tips Use Homemade Broth: For a richer flavor, consider using homemade chicken or vegetable broth instead of store-bought. It enhances the overall taste of the dish. Experiment with Proteins: Feel free to swap ground turkey or beef with other proteins like chicken, pork, or even plant-based alternatives for a unique twist. Add Extra Veggies: Boost the nutritional value by adding additional vegetables such as bell peppers, zucchini, or spinach to the skillet along with the other ingredients. Let It Rest: After cooking, let the skillet sit covered for a few minutes before serving. This allows the flavors to meld and the rice to firm up slightly. {{image_4}} You can easily make this dish vegetarian or vegan. Swap the ground turkey or beef for a plant-based meat alternative. Options like lentils or crumbled tofu work great too. Use vegetable broth instead of chicken broth for a full vegan meal. Also, choose dairy-free cheese for a vegan-friendly option. Don’t have all the ingredients? No problem! If you lack black beans, try kidney beans or chickpeas instead. For the corn, frozen or canned works well. You can also use brown rice if you prefer a healthier grain, but adjust the cooking time. Feel free to mix in other veggies like bell peppers or zucchini for added flavor and nutrition. If you like it spicy, add more taco seasoning or fresh jalapeños. For a milder dish, use less seasoning or omit it entirely. You can also try adding a pinch of cayenne pepper or smoked paprika. Taste as you go to find the right heat for you. After enjoying your cheesy taco rice skillet, let it cool. Transfer the leftovers to an airtight container. Store them in the fridge for up to three days. If you want to keep them longer, freezing is a great option. To reheat, you can use the microwave or stovetop. For the microwave, place the skillet in a bowl and cover it. Heat for 1-2 minutes, stirring halfway. On the stovetop, add a splash of broth to a pan. Heat over medium heat until warm. Stir to prevent sticking. For freezing, pack the cooled dish in a freezer-safe container. Make sure to leave some space at the top for expansion. It can stay good for up to three months. Label the container with the date. When ready to eat, thaw it overnight in the fridge before reheating. Yes, you can make Cheesy Taco Rice Skillet ahead. Cook the dish fully, then cool it. Store it in an airtight container in the fridge for up to three days. When ready to eat, just reheat it on the stove or in the microwave. This makes meal prep easy and quick! Adjusting the serving size is simple. If you need more servings, just double the recipe. For fewer servings, cut the ingredients in half. Use the same cooking method and time. Keep in mind that the flavors may intensify as the dish cooks. Cheesy Taco Rice Skillet pairs well with many sides. Here are some options to consider: - A fresh green salad with lime vinaigrette - Crispy tortilla chips with salsa or guacamole - Grilled corn on the cob with lime and chili powder - Sour cream and fresh cilantro for garnish These sides add variety and make your meal even more delightful! We covered many important points for making Cheesy Taco Rice Skillet. Start with the right ingredients, and consider swaps when needed. Follow easy steps to cook it well. Enhance the flavor with my tips and explore tasty variations. Remember to store any leftovers safely. You can even reheat or freeze for later meals. With this guide, you are ready to impress anyone at your table. Enjoy creating this dish!

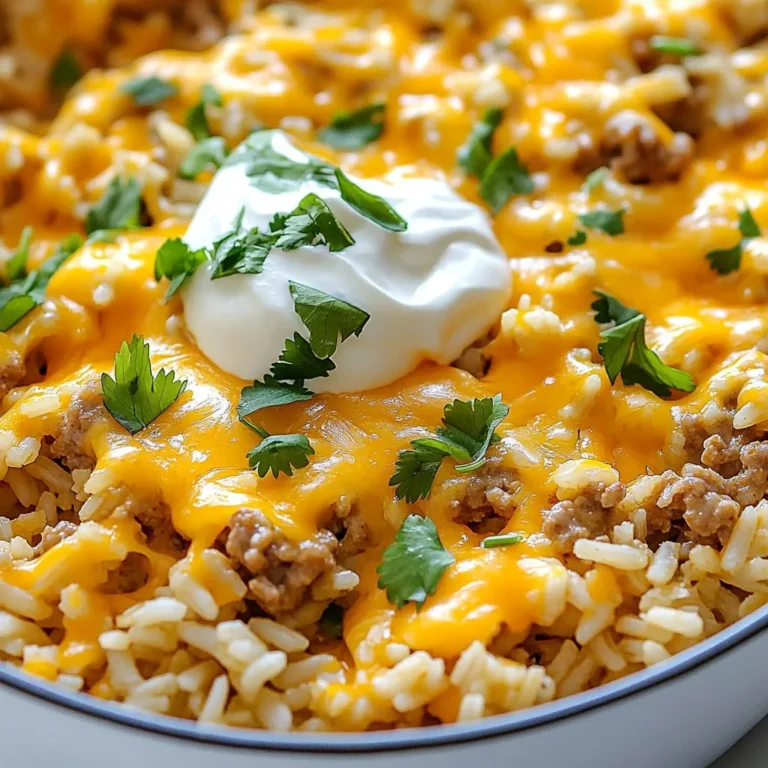
Cheesy Taco Rice Skillet Flavorful One-Pan Meal

To make Minute Cranberry Meatballs, gather these key ingredients: - 1 pound ground beef or turkey - 1 cup breadcrumbs - 1/4 cup finely chopped onion - 1/4 cup fresh parsley, chopped - 1 large egg - 1 teaspoon garlic powder - 1/2 teaspoon salt - 1/2 teaspoon black pepper - 1 cup cranberry sauce (preferably whole berry) - 1 tablespoon soy sauce - 1 tablespoon Dijon mustard - 1 teaspoon Worcestershire sauce - Fresh cranberries for garnish (optional) These ingredients create a savory meatball with a sweet and tangy sauce. Accurate measurements make a big difference in cooking. Here are some tips: - Use dry measuring cups for solids like breadcrumbs. - For liquids, use a liquid measuring cup. - Level off dry ingredients for precision. - Use a kitchen scale for ground meat. These tips help ensure your meatballs turn out perfect every time. You can customize this recipe easily. Here are some substitutions: - Use ground chicken or plant-based meat for a lighter option. - Swap breadcrumbs with crushed crackers for a different texture. - Substitute fresh parsley with dried herbs or other fresh greens. - Use low-sodium soy sauce for a healthier sauce. These substitutions keep the recipe flexible and fun! {{ingredient_image_2}} To start, grab a large mixing bowl. Add 1 pound of ground beef or turkey. Next, sprinkle in 1 cup of breadcrumbs. This gives the meatballs great texture. Now, add 1/4 cup of finely chopped onion. It adds flavor and moisture. Toss in 1/4 cup of fresh parsley. This step brightens the flavor. Crack in 1 large egg. The egg acts as a binder. Then, add 1 teaspoon of garlic powder, 1/2 teaspoon of salt, and 1/2 teaspoon of black pepper. Mix these gently. Overworking the meat can make it tough. Once your mixture is ready, it’s time to shape the meatballs. Take a small amount of the mixture. Roll it between your hands. Aim for about 1 inch in diameter. This size cooks evenly and is easy to eat. You should get around 20 meatballs. Make sure they are all about the same size for even cooking. Now, heat a non-stick skillet over medium heat. Wait for the pan to get hot. Place the meatballs in a single layer. Cook for about 5 minutes, turning them occasionally. You want them browned on all sides. This step locks in the flavor and gives them a nice crust. While the meatballs are cooking, prepare the sauce. In a small bowl, mix 1 cup of cranberry sauce, 1 tablespoon of soy sauce, 1 tablespoon of Dijon mustard, and 1 teaspoon of Worcestershire sauce. Stir until smooth. Once the meatballs are browned, lower the heat slightly. Pour the cranberry sauce mix over the meatballs. Stir gently to coat them well. Cover the skillet and let it simmer on low heat for about 10 minutes. This allows the flavors to blend. After 10 minutes, remove the lid and let it simmer for an extra 5 minutes. This will thicken the sauce a bit. Now your meatballs are ready to serve! To keep your meatballs moist, don’t overmix the meat. Mix just until combined. Adding breadcrumbs helps too. They soak up moisture and add texture. Use fresh breadcrumbs for the best results. You can also add a little extra egg if you prefer. This will add some richness and help bind the meatballs. Cook the meatballs for about 5 minutes on each side. They should be brown and cooked through. After browning, simmer them in the sauce for 10 minutes. This allows the meatballs to soak up the sauce. Check for doneness; they should reach 160°F for beef or turkey. Serve your meatballs on a decorative platter. Drizzle them with the cranberry sauce for a nice touch. Fresh cranberries make a great garnish. You can also sprinkle parsley for color. For a fun twist, add toothpicks for easy serving. These meatballs pair well with rice or mashed potatoes. You can also serve them as appetizers at parties. Enjoy the burst of flavor! Pro Tips Use Fresh Ingredients: Always opt for fresh parsley and quality cranberry sauce for the best flavor in your meatballs. Don't Overmix: When combining the meatball ingredients, mix just until combined to keep them tender. Simmer for Flavor: Allow the meatballs to simmer in the sauce for at least 10 minutes to enhance the flavor profile. Garnish for Appeal: Adding fresh cranberries and parsley as garnishes not only enhances presentation but also adds a pop of flavor. {{image_4}} You can easily swap ground beef for ground turkey or chicken. These options are lower in fat. They still give you tasty meatballs. Just follow the same steps in the recipe. You’ll enjoy the same great taste with less guilt. The sauce is key to these meatballs. You can mix it up! Try using barbecue sauce for a smoky flavor. Or, use sweet and sour sauce for a tangy twist. Each sauce adds a unique taste to your dish. Experimenting with different sauces can keep meals exciting. Want a meatless option? You can make these meatballs with plant-based ground meat. Use lentils or beans for a hearty texture. Replace the egg with a flaxseed mixture to bind them. For the sauce, all the same ingredients work well. Enjoy the flavors without meat! To keep your Minute Cranberry Meatballs fresh, store them in an airtight container. Place them in the fridge if you plan to eat them within three days. Make sure they cool down before sealing the container. This helps prevent moisture buildup and keeps the meatballs tasty. If you want to save some for later, freezing is a great option. Let the meatballs cool completely. Then, arrange them in a single layer on a baking sheet. Freeze them for about an hour until firm. Once frozen, transfer the meatballs to a freezer-safe bag. Squeeze out excess air and label the bag with the date. They can last for up to three months in the freezer. When you're ready to enjoy the frozen meatballs, thaw them in the fridge overnight. For reheating, use a skillet over medium heat. Add a splash of water or extra cranberry sauce to keep them moist. Cook until heated through. You can also microwave them, but be cautious to avoid drying them out. Add a damp paper towel over the meatballs to keep them juicy. Minute Cranberry Meatballs can last in the fridge for about 3 to 4 days. Store them in an airtight container to keep them fresh. If you want to keep them longer, consider freezing them. They can stay good in the freezer for up to 3 months. Yes, you can make meatballs ahead of time. You can prepare the meatball mixture and shape them. Place them on a baking sheet and freeze them. Once frozen, store them in a bag. This way, you can cook them fresh later. Cranberry meatballs pair well with many sides. Here are some tasty options: - Rice or quinoa for a hearty meal. - Mashed potatoes for a comforting side. - A crisp salad to balance flavors. - Fresh bread for dipping in sauce. Yes, you can use gluten-free breadcrumbs. Many brands offer great options made from rice or corn. You can also make your own by processing gluten-free crackers or bread. This way, everyone can enjoy these tasty meatballs! You now have all the tools to make delicious Minute Cranberry Meatballs. We covered key ingredients and how to measure them well. You learned the proper way to shape and cook meatballs and how to make the sauce. Tips helped to keep your meatballs moist, while variations let you explore new flavors. Lastly, we discussed storage and reheating for future meals. With this guide, tasty meatballs are just a recipe away. Enjoy your cooking!

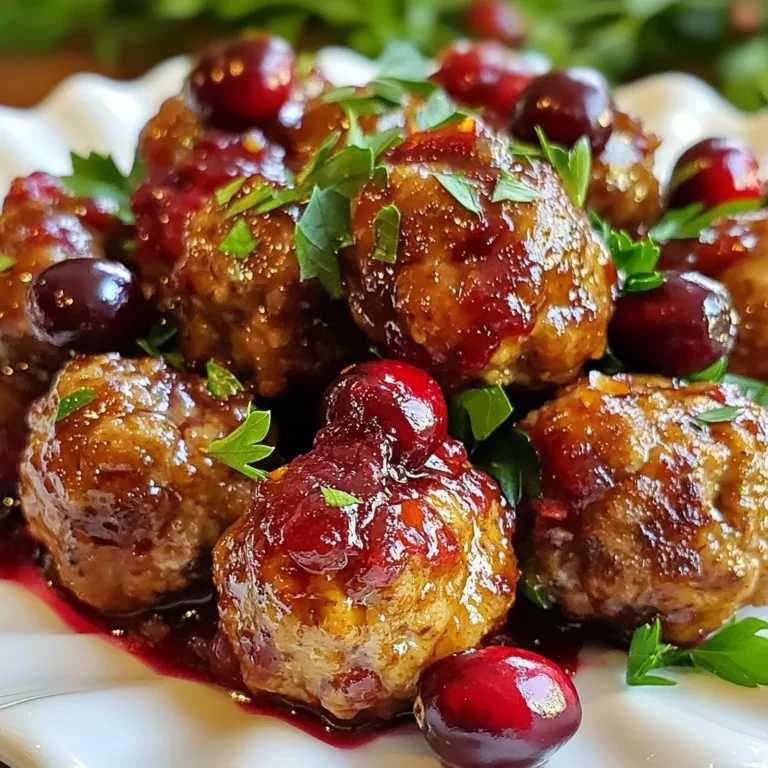
Minute Cranberry Meatballs Flavorful and Easy Recipe

- 2 large chicken breasts, thinly sliced - 3 tablespoons extra virgin olive oil - 2 tablespoons fresh lemon juice (about 1 lemon) - 3 cloves garlic, minced - 2 teaspoons dried oregano - 1 teaspoon smoked paprika - Salt and freshly ground black pepper to taste The base of the Greek Chicken Gyro Bowls is tender chicken. I use two large chicken breasts, sliced thin. This helps them cook quickly and evenly. Olive oil and lemon juice create a bright marinade. I add minced garlic for depth. Dried oregano gives a classic Greek flavor, and smoked paprika adds a hint of warmth. Don’t forget the salt and pepper to balance the taste. - 1 cup cucumber, diced - 1 cup cherry tomatoes, halved - 1 cup red onion, thinly sliced - 1 cup crumbled feta cheese - 1/2 cup kalamata olives, pitted and sliced - Fresh parsley, finely chopped for garnish Fresh vegetables make this bowl vibrant and colorful. I love crunchy cucumbers, sweet cherry tomatoes, and sharp red onion for layers of taste. Crumbled feta cheese adds creaminess, while kalamata olives bring a briny note. Finally, I sprinkle fresh parsley to brighten the dish and add a pop of color. - 1 cup cooked quinoa (can substitute with brown rice or couscous) For the base, I often choose cooked quinoa. It’s healthy and hearty. You can also use brown rice or couscous. Each option adds texture and flavor. The base holds all the toppings together, making each bite satisfying. {{ingredient_image_2}} To start, you need to make a flavorful marinade. In a medium bowl, mix together: - 3 tablespoons extra virgin olive oil - 2 tablespoons fresh lemon juice - 3 cloves garlic, minced - 2 teaspoons dried oregano - 1 teaspoon smoked paprika - Salt and freshly ground black pepper to taste Whisk these ingredients well until combined. This mixture is key to infusing flavor into the chicken. Next, take your sliced chicken breasts and coat them in the marinade. Make sure each piece is covered well. You can use a bowl or a zipped bag for this. Cover the bowl with plastic wrap or seal the bag. Refrigerate for at least 30 minutes. This rest time helps the flavors blend and soak into the chicken. While the chicken marinates, preheat your grill pan or outdoor grill to medium heat. If using a grill pan, add a little olive oil to prevent sticking. Grill the marinated chicken for about 5-7 minutes on each side. Check for nice grill marks and ensure the chicken is cooked through. Once done, remove the chicken and let it rest for about 5 minutes before slicing it into bite-sized pieces. Now it’s time to put everything together. Start with a base layer of cooked quinoa in each serving bowl. This is nutritious and filling. Then, on top of the quinoa, arrange the sliced grilled chicken, diced cucumber, halved cherry tomatoes, thinly sliced red onion, crumbled feta cheese, and sliced kalamata olives. This creates a colorful and tasty dish. To finish, sprinkle chopped parsley over each bowl. If you like, you can drizzle a bit of olive oil or squeeze fresh lemon juice over the top for extra flavor. Enjoy your delicious Greek Chicken Gyro Bowls! To get the best grill marks, start with a hot grill. Preheat your grill pan or outdoor grill over medium heat. This helps lock in flavor and gives a nice char. Brush the grill with a bit of olive oil to stop sticking. Grill the chicken for 5-7 minutes on each side. Look for those beautiful grill marks! Always check the chicken's doneness with a meat thermometer. It should reach 165°F. Let the chicken rest for 5 minutes before slicing. This keeps it juicy and tender. Meal prep makes weeknight dinners easy. Start by marinating the chicken ahead of time. You can do this the night before or in the morning. Slice the veggies and store them in separate containers. Quinoa can be cooked in advance too. Store it in the fridge for quick assembly. This way, you can throw your bowls together in no time. Meal prepping cuts down cooking time and keeps things fresh. To make your gyro bowls pop, think about extra dressings or spices. A drizzle of tzatziki adds a creamy touch. You can also squeeze fresh lemon juice over the top. This brightens the flavors. Try adding spices like sumac or za’atar for a twist. You can even mix in some hot sauce if you love heat. Playing with flavors can turn a good dish into a great one. Pro Tips Marinate Longer for More Flavor: If time allows, marinate the chicken for up to 2 hours or even overnight. This will deepen the flavors and make the chicken even more tender and juicy. Use Fresh Ingredients: Opt for fresh herbs and vegetables whenever possible. Fresh parsley, ripe tomatoes, and crisp cucumbers can elevate the dish's taste and presentation. Customize Your Bowls: Feel free to add other toppings like avocado, roasted red peppers, or even hummus. This allows everyone to personalize their bowls to their liking. Grill for Smoky Flavor: If you can, use an outdoor grill for cooking the chicken. The smoky flavor from the grill enhances the overall taste and adds authenticity to the gyro experience. {{image_4}} You can change up the proteins in your bowl. If you prefer chicken, try beef or lamb. For a plant-based option, use chickpeas or grilled tofu. Each choice brings a unique taste and texture. Quinoa is a great base, but you can swap it out. Brown rice is a hearty alternative. Couscous is light and fluffy too. Each base adds its own flavor and nutrition. While tzatziki is classic, you can use other sauces. A lemon vinaigrette adds brightness. A spicy harissa sauce brings heat. Each dressing can change the whole vibe of your bowl. To store leftovers, let the bowls cool down first. Place each bowl in an airtight container. This keeps the food fresh. You can store them in the fridge for up to 3 days. Make sure to keep the toppings separate if possible. This helps maintain their crunch. If you want to freeze the Greek Chicken Gyro Bowls, start with the chicken and quinoa. Let them cool completely. Place them in freezer-safe bags or containers. You can freeze them for up to 2 months. Remember, fresh veggies do not freeze well. Add those when you reheat the bowls. To reheat, use an oven or microwave. If using an oven, preheat it to 350°F (175°C). Place the bowl in the oven for about 15 minutes. This keeps the chicken juicy. If you use a microwave, cover the bowl with a damp paper towel. Heat in 1-minute bursts until warm. Drizzle a little olive oil or lemon juice to keep flavors bright. To make Greek Chicken Gyro Bowls gluten-free, choose gluten-free grains. Quinoa is already gluten-free. If you prefer rice, use brown rice. Avoid couscous, as it contains wheat. Always check labels on any packaged items, like feta cheese and olives, to ensure they are free from gluten. Yes, you can use frozen chicken. Just remember to thaw it first. Thaw the chicken in the fridge overnight for best results. This keeps the meat juicy and safe to eat. After thawing, follow the recipe as usual, marinating and grilling the chicken. You can serve many sides with Greek Chicken Gyro Bowls. Some great options include: - Pita bread - Tzatziki sauce - Greek salad - Roasted vegetables These sides add variety and enhance the meal's flavors. To serve more people, simply multiply the ingredients. For example, use four chicken breasts instead of two. Adjust the grains, veggies, and toppings accordingly. You can also prepare the bowls in batches. This makes serving easier and keeps everything fresh. This blog post covered how to create delicious Greek Chicken Gyro Bowls. We discussed key ingredients like chicken, olive oil, and fresh veggies. You learned how to marinate and grill chicken to perfection. I shared proper assembly tips and some helpful meal prep tricks. Don't forget to customize your bowls with different proteins or bases. These meals are easy to store and reheat. Enjoy your cooking and the tasty meals you'll create!

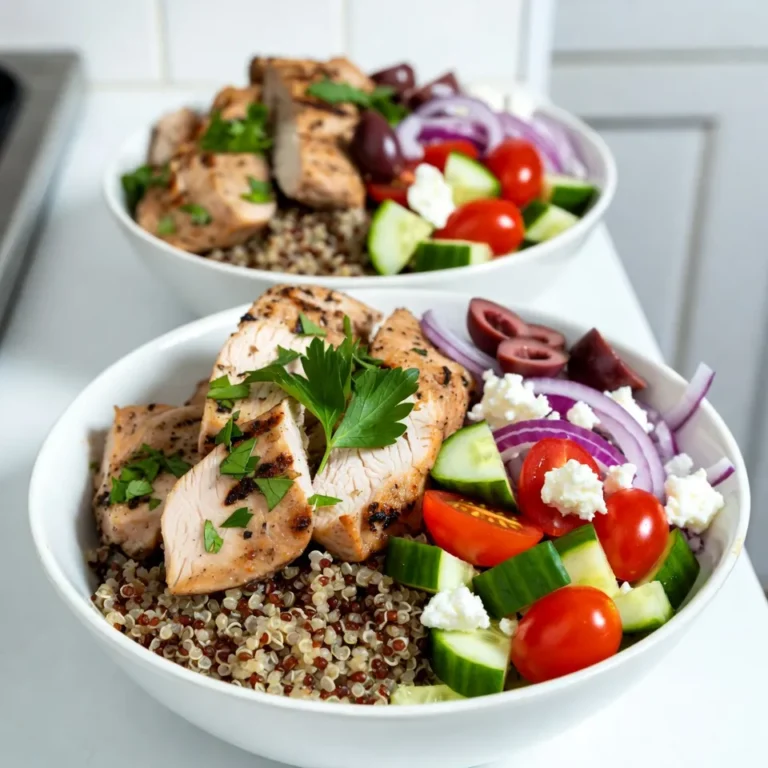
Greek Chicken Gyro Bowls Flavorful and Fresh Meal

Here are the simple and tasty ingredients you'll need for hot hazelnut coffee: - 2 cups freshly brewed coffee - 1/4 cup hazelnut syrup - 1/2 cup milk (whole, almond, or oat) - 1 tablespoon unsweetened cocoa powder - 1 teaspoon vanilla extract - Whipped cream - Chopped hazelnuts - Flaky sea salt Each ingredient plays an important role. The coffee gives you the base, while hazelnut syrup adds sweetness and a nutty flavor. The milk brings creaminess. Cocoa powder adds depth, and vanilla gives a nice aroma. Topping it all with whipped cream and hazelnuts adds flair and crunch. A sprinkle of flaky sea salt at the end balances the sweetness and enhances the flavors. Choose your favorite coffee blend for the best taste. Whole milk will make it rich, while almond or oat milk offers a lighter option. Enjoy personalizing this drink to match your taste! {{ingredient_image_2}} To brew your coffee, pick your favorite blend. A strong coffee gives the best flavor. You can use a drip coffee maker or a French press. Make sure to brew it hot and fresh. This will help the hazelnut flavor shine through. Heat your milk in a small pot over medium heat. Stir it often so it does not burn. When the milk starts to steam, add cocoa powder and vanilla. Whisk it well until it is smooth and frothy. This mix adds a rich taste. In a large mug, pour in the hot coffee. Add the hazelnut syrup and stir well. This helps the syrup blend in. Next, carefully pour in your frothy milk. Stir gently so all the flavors mix nicely. Taste your hot hazelnut coffee. If you want it sweeter, add more hazelnut syrup. You can also add a pinch of flaky sea salt. This little touch adds depth and balance to the drink. Top your coffee with whipped cream for a special treat. Sprinkle chopped hazelnuts on top for a nice crunch. For a fun look, serve in clear mugs. Pair it with shortbread cookies for a sweet snack. For a perfect hot hazelnut coffee, pick a bold coffee. Dark roasts work well. They give a strong base for the rich hazelnut flavor. Try blends that include chocolate or nutty notes. These can enhance your drink. If you prefer lighter coffee, go for a medium roast. It still pairs nicely with hazelnut syrup. You can choose different milks based on your taste. Whole milk gives a creamy texture. Almond milk adds a nutty twist, while oat milk is smooth and sweet. Each milk has a unique flavor. When frothing, heat the milk gently. Use a whisk or a frother to create foam. This makes your drink feel special. To make your hazelnut coffee even better, consider adding spices. A dash of cinnamon or nutmeg can elevate the taste. You can also try flavored syrups. Caramel or vanilla syrup offers a sweet kick. If you're looking for healthier swaps, use less syrup. You can add a splash of milk instead. This keeps the flavor rich without extra sugar. Pro Tips Use Freshly Ground Coffee: For the best flavor, grind your coffee beans just before brewing. Freshly ground coffee will enhance the overall taste of your Hot Hazelnut Coffee Delight. Experiment with Milk Alternatives: Try different types of milk such as coconut, soy, or cashew for unique flavor profiles. Each milk will give a different creaminess and taste to your coffee. Adjust Sweetness to Taste: Don’t hesitate to modify the amount of hazelnut syrup based on your personal sweetness preference. Taste as you go to achieve the perfect balance. Add a Flavor Boost: Consider adding a hint of cinnamon or nutmeg to the cocoa-infused milk for an extra layer of warmth and spice that complements the hazelnut beautifully. {{image_4}} To make decaf hazelnut coffee, start with decaf coffee beans. You can brew it just like regular coffee. Use the same amounts of hazelnut syrup and milk. The taste remains rich and smooth. You still enjoy all the flavors without the caffeine kick! For iced hazelnut coffee, brew your coffee and let it cool. Fill a glass with ice. Pour the cooled coffee over the ice. Add hazelnut syrup and mix well. Then, pour in cold milk and stir. Top with whipped cream and chopped hazelnuts for a refreshing drink. If you want a vegan version, swap regular milk with almond or oat milk. Use your favorite plant-based milk to keep it creamy. The hazelnut syrup adds sweetness, while the cocoa gives depth. You still get the same rich taste without dairy! To keep your coffee fresh, store it in an airtight container. This helps keep out moisture and light. Place it in a cool, dark place, like a pantry. Avoid keeping coffee in the fridge, as it can absorb nearby smells. For hazelnut syrup, keep it in the fridge. Use a glass bottle or jar with a tight lid. It can last for about a month if stored properly. Always check for any changes in smell or color before using. For reheating brewed coffee, the best method is to use the stove. Pour your cold coffee into a small saucepan. Heat it over low to medium heat, stirring gently. This helps keep the flavor intact. Avoid boiling, as it can change the taste. If you need to reheat milk, use a small saucepan too. Heat it slowly over low heat. Stir it often to prevent scorching. You can also use a microwave. Heat in short intervals, checking often. This way, your milk stays smooth and warm. Hot hazelnut coffee is a warm drink that mixes coffee with hazelnut syrup, milk, and cocoa. This drink has a rich, nutty flavor that warms you up. The whipped cream on top adds a creamy touch. Chopped hazelnuts give it a nice crunch. It’s perfect for cold days or when you need a treat. Yes, you can! If you don’t have hazelnut syrup, try using vanilla syrup or caramel syrup instead. You can even use ground hazelnuts for a natural flavor. Just add them directly to your coffee. You can also play with flavors like almond or chocolate to make it your own. Hazelnut coffee can have some health perks. Coffee is full of antioxidants, which help fight free radicals in your body. Hazelnuts are rich in healthy fats and vitamins. They can promote heart health and boost brain function. Just remember to enjoy in moderation, especially with added sugar and cream. To serve hot hazelnut coffee to many people, scale up the recipe. Brew a larger pot of coffee, using 10 cups instead of 2. Use 1 1/4 cups of hazelnut syrup and 2 1/2 cups of milk. Heat the milk in a big pot, adding cocoa and vanilla. Mix everything in a large bowl and pour into cups. Don’t forget the whipped cream and hazelnuts on top! You now have all the tools to make delicious hot hazelnut coffee. We covered the key ingredients, easy steps, and tips for the best taste. Remember to experiment with different coffees and milk types. Try out variations like iced or decaf to suit your mood. Use these tips for storage and reheating to enjoy your drink longer. With a few additions, you can impress your friends and family. Enjoy every sip of your homemade creation!

Hot Hazelnut Coffee Rich and Flavorful Beverage Recipe

- 1 cup sushi rice - 1 1/4 cups water - 4 sheets nori (seaweed) - 1 small cucumber, julienned - 1 carrot, peeled and julienned - 1 ripe avocado, sliced - 1 small bell pepper (any color), thinly sliced - 1 radish, thinly sliced - 1 tablespoon rice vinegar - 1 teaspoon sugar - 1/2 teaspoon salt - Sesame seeds for garnish - Soy sauce for dipping Each ingredient in these sushi rolls adds flavor and nutrition. - Sushi rice: This sticky rice holds everything together. It gives the roll its classic texture. - Nori: Seaweed adds a salty taste and is rich in vitamins. It also keeps the roll intact. - Cucumber: Crunchy and refreshing, cucumber adds hydration and fiber. - Carrot: Carrots bring sweetness and bright color. They are full of beta-carotene, good for your eyes. - Avocado: Creamy avocado provides healthy fats. It also adds a nice smooth texture. - Bell pepper: These sweet peppers come in many colors. They are high in vitamin C and add crunch. - Radish: Radishes give a peppery bite and are low in calories. They also help digestion. - Rice vinegar: This adds tang and balances the flavors. It also helps to season the rice. - Sugar and salt: These enhance the overall taste, bringing out the flavors of the veggies. - Sesame seeds: They add a nutty flavor and a nice crunch on top. Choosing fresh veggies makes your sushi rolls taste better. Here are some tips: - Cucumber: Look for firm, smooth cucumbers without wrinkles. They should feel heavy for their size. - Carrot: Choose bright orange carrots that feel firm and not soft. Avoid any with dark spots. - Avocado: Pick avocados that yield to gentle pressure. They should feel slightly soft but not mushy. - Bell pepper: Select peppers that are firm and shiny. Check for any blemishes or soft spots. - Radish: Look for small, round radishes that are bright red. They should feel firm and crisp. Using fresh ingredients will make your Rainbow Veggie Sushi Rolls vibrant and tasty! {{ingredient_image_2}} Start by rinsing 1 cup of sushi rice under cold water. Rinse until the water is clear. This step removes extra starch. Drain the rice well after rinsing. Next, combine the rinsed rice with 1 1/4 cups of water in a medium pot. Bring it to a boil over medium heat. When it boils, cover the pot and lower the heat. Let it simmer for 15 minutes. After that, remove the pot from heat but keep it covered. Let it steam for another 10 minutes. While the rice cooks, make the seasoning. In a small bowl, mix 1 tablespoon of rice vinegar, 1 teaspoon of sugar, and 1/2 teaspoon of salt. To help the sugar dissolve, microwave this mixture for about 20 seconds. Stir it until the sugar is fully dissolved. After the rice is done cooking, fluff it gently with a fork. Fold the vinegar mixture into the rice. Make sure the seasoning spreads evenly. Let the rice cool to room temperature. Lay a bamboo sushi mat on a flat surface. Place one sheet of nori, shiny side down, on the mat. Wet your hands lightly to prevent sticking. Take about 1/4 of the sushi rice (about 1/2 cup) and spread it evenly over the nori. Leave a 1-inch border at the top. Next, arrange a colorful line of julienned cucumber, carrot, avocado, thinly sliced bell pepper, and radish in the center of the rice. Be creative with your layout! Now, start rolling the nori from the bottom edge, using light pressure. Roll it away from you. Once you reach the top edge, dampen it with a bit of water to seal the roll. Use a sharp knife to cut the roll into 6-8 equal pieces. Wipe the knife with a damp cloth between each cut. This keeps the slices clean and neat. Finally, place the sushi rolls on a serving plate and sprinkle sesame seeds on top for garnish. To make great sushi, you need perfect rice. Start by rinsing the sushi rice. Use cold water and rinse until it runs clear. This removes extra starch. Next, combine the rinsed rice with 1 1/4 cups of water in a pot. Bring it to a boil. Once boiling, reduce the heat, cover it, and simmer for 15 minutes. After that, let it sit for another 10 minutes. This method gives you fluffy, sticky rice, ideal for rolling. Rolling sushi takes practice, but you can do it! Place a bamboo mat on your work surface. Lay a sheet of nori, shiny side down. Wet your hands lightly so the rice won’t stick. Take about 1/4 of the rice and spread it on the nori. Leave a 1-inch border at the top. Arrange your veggies in a colorful line down the center. Start rolling from the bottom edge, applying light pressure. Seal the roll by dampening the top edge of the nori. Use a sharp knife to slice the roll into 6-8 pieces. Wipe the knife between cuts for clean slices. Make your sushi look as good as it tastes. Serve the rolls on a beautiful bamboo platter. Add small bowls of soy sauce for dipping. For a touch of flair, garnish with pickled ginger and a bit of wasabi. This not only enhances the flavor but also makes your dish pop visually. A well-presented plate shows your guests you care about the whole dining experience! Pro Tips Use Fresh Ingredients: The key to vibrant sushi rolls is using the freshest vegetables and ripe avocados. This not only enhances the flavor but also improves the overall appearance of your sushi. Rolling Technique: When rolling the sushi, apply gentle but firm pressure to ensure a tight roll. This will help prevent the filling from falling out when slicing. Knife Skills: Use a sharp knife to cut the sushi rolls. Wipe the knife with a damp cloth between cuts to keep the slices clean and prevent sticking. Presentation Matters: Serve your sushi on a beautiful platter, and consider adding garnishes like sesame seeds, pickled ginger, and wasabi to elevate the dish visually and flavor-wise. {{image_4}} You can change up the veggies in your sushi rolls. Try using different colors and textures. Here are some great options: - Zucchini, finely julienned - Spinach or arugula for greens - Shredded purple cabbage for crunch - Sweet potato, roasted and thinly sliced These choices add flavor and make your rolls even more colorful. Mix and match to find your favorite combos! Adding protein boosts your sushi's nutrition. You can use: - Firm tofu, sliced or cubed - Tempeh, marinated and grilled - Cooked shrimp for seafood lovers - Sliced chicken or turkey for a meat option These proteins add a satisfying texture and flavor. Just be sure to prepare them well for the best taste! Dipping sauces can elevate your sushi experience. Here are some great ideas: - Spicy mayo, made with mayo and sriracha - Ponzu sauce for a citrus twist - Sesame sauce for a nutty flavor - Wasabi-infused soy sauce for a kick Feel free to explore these sauces. They can change the whole taste of your rolls! To keep leftover sushi rolls fresh, wrap them in plastic wrap. This seals in moisture and prevents them from drying out. Place the wrapped rolls in an airtight container in the fridge. They taste best if eaten within 24 hours. To keep your sushi ingredients fresh, follow these tips: - Store nori sheets in a cool, dry place. - Keep vegetables like cucumber and avocado in the fridge. - Use airtight containers for cut veggies. - To stop avocados from browning, sprinkle lemon juice on the slices. Yes, you can freeze sushi rolls! Wrap each roll tightly in plastic wrap, then place them in a freezer bag. They can last up to a month in the freezer. When ready to eat, thaw them in the fridge overnight. Avoid refreezing once thawed. Yes, you can make Rainbow Veggie Sushi Rolls ahead of time. They taste best when fresh, but you can prepare them a few hours in advance. Store the rolls in the fridge, wrapped in plastic wrap. This keeps them moist. Just remember to eat them within a day for the best quality. The best rice for sushi is sushi rice, also known as short-grain rice. This type of rice has a high starch content. It becomes sticky when cooked, making it perfect for rolling. You can find sushi rice in most grocery stores or Asian markets. To keep your sushi rolls from falling apart, here are some tips: - Use enough sushi rice to cover the nori. - Ensure the rice is sticky and well-seasoned. - Roll tightly but not too tight. You want the filling to stay inside. - Dampen the edge of the nori before sealing. This helps it stick well. - Use a sharp knife to slice the rolls. Wipe the knife between cuts to keep it clean. You now know how to make rainbow veggie sushi rolls from start to finish. We covered the best ingredients, how to prepare sushi rice, and creative ways to roll your sushi. You learned tips for perfect results and how to store your rolls. Remember, you can customize your sushi with different veggies or proteins. This dish is colorful, healthy, and fun. Dive in and enjoy your sushi-making journey!

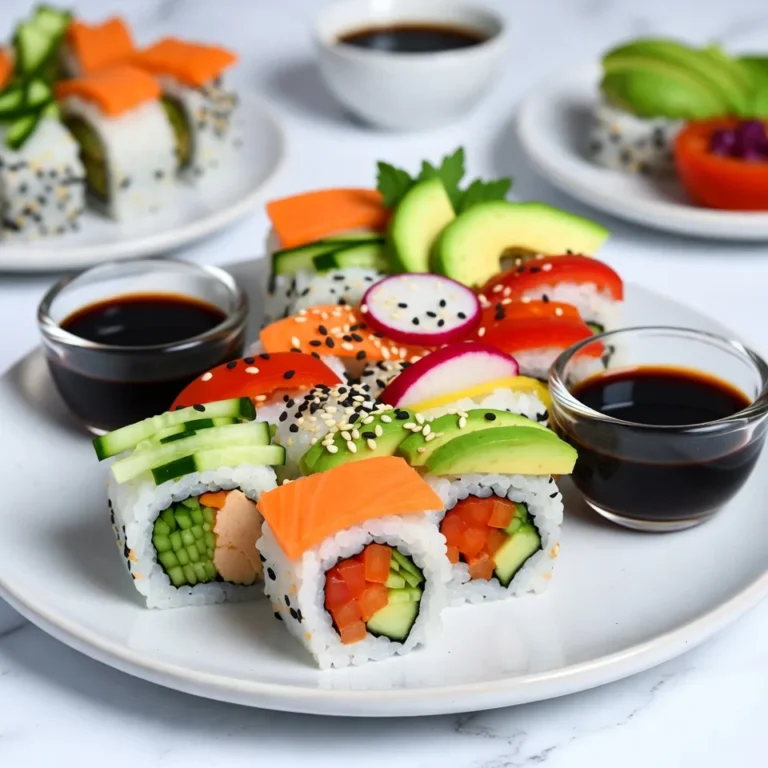
Rainbow Veggie Sushi Rolls Fresh and Colorful Delight

To make this tasty soup, gather these items: - 4 large russet potatoes, peeled and cut into 1-inch cubes - 1 medium onion, finely chopped - 3 cloves garlic, minced - 4 cups vegetable broth (homemade or store-bought) - 1 cup heavy cream (or coconut milk for a dairy-free option) - 2 cups frozen corn kernels - 1 cup shredded carrots (fresh is best for flavor) - 1 teaspoon dried thyme - 1 teaspoon smoked paprika - Salt and black pepper, to taste You can swap some ingredients if needed. Use sweet potatoes instead of russet potatoes for a sweeter taste. If you lack vegetable broth, use chicken broth instead. For a lighter soup, replace heavy cream with almond milk. You can also skip the corn or carrots if you prefer a simpler version. Toppings can elevate your soup. Try these: - Chopped chives - Shredded cheese, like cheddar - Crispy fried onions These toppings add flavor and a nice crunch, making your soup even better. Enjoy experimenting with different combinations! {{ingredient_image_2}} To make this potato soup, start by gathering your ingredients. You need four large russet potatoes, one medium onion, three cloves of garlic, and four cups of vegetable broth. You also need one cup of heavy cream or coconut milk, two cups of frozen corn, and one cup of shredded carrots. Lastly, grab some dried thyme, smoked paprika, salt, and black pepper. 1. Peel and Cut the Potatoes: First, peel the potatoes. Cut them into one-inch cubes. This size helps them cook evenly. 2. Chop the Onion and Garlic: Next, finely chop the onion and mince the garlic. These add great flavor. 3. Combine Ingredients: In your crockpot, add the potatoes, onion, garlic, vegetable broth, frozen corn, and carrots. Sprinkle in the thyme, smoked paprika, salt, and pepper. 4. Mix Well: Gently stir everything to combine. This ensures that the flavors mix well together. You can cook this soup on low or high heat, depending on your time. - Low Heat: If you choose low heat, cook for 6 to 8 hours. This gives the soup a rich flavor. The potatoes will be very tender. - High Heat: If you're short on time, set the crockpot to high heat. Cook for 4 to 5 hours. The potatoes will still be tender, but the flavors may not meld as deeply. To get that creamy texture, you can mash some of the potatoes. Here’s how: 1. Mash the Potatoes: After the soup cooks, take a potato masher or an immersion blender. Mash a portion of the potatoes. This will create a creamy base but keep some chunks for texture. 2. Add Cream or Coconut Milk: Stir in your choice of heavy cream or coconut milk. Let it heat for an additional 30 minutes on low. This step adds richness and makes the soup velvety. 3. Taste and Adjust: Before serving, taste your soup. If it needs more flavor, add a pinch of salt and pepper. To make your potato soup shine, focus on seasoning early. Use salt and pepper in layers. Add herbs like thyme and smoked paprika for depth. Fresh garlic boosts the flavor too. You can sauté the onion and garlic in a pan before adding them to the crockpot. This small step can add a rich taste. For more flavor, try adding a splash of lemon juice before serving. This gives a fresh kick that brightens the soup. One big mistake is not cutting the potatoes evenly. If the pieces are too large, some will be hard while others become mushy. Another error is adding too much liquid. Keep the broth amount steady to ensure a thick soup. Don't skip the cooking time. The potatoes need enough time to soften. Lastly, avoid over-mixing when blending. If you make it too smooth, you lose texture. If your soup is too thick, add more broth or water a little at a time. Stir well after each addition. For creaminess, blend in more heavy cream or coconut milk. You can also mash more potatoes into the soup. For a lighter option, use less cream. If you like a chunky soup, blend just half of the potatoes. This keeps some in pieces while making it creamy. Pro Tips Use Fresh Ingredients: Fresh carrots and high-quality vegetable broth will enhance the flavor of your soup significantly. Adjust Creaminess: For a creamier texture, blend more of the potatoes into the soup, but leave some chunks for added texture. Customize Seasoning: Don’t hesitate to adjust the seasoning based on your taste—experiment with herbs like rosemary or parsley for a unique twist. Perfect Toppings: Add toppings like crispy fried onions or shredded cheese just before serving for a delicious crunch and extra flavor. {{image_4}} To make this soup dairy-free, simply swap heavy cream with coconut milk. Coconut milk gives a rich, creamy texture without any dairy. You can also use almond milk or oat milk, but they may change the flavor. This keeps the soup light and tasty. Want to add protein? Cooked bacon or diced ham works great. You can also use shredded chicken for a heartier soup. Add it in during the last hour of cooking. For a vegetarian option, try adding cooked lentils or chickpeas. They boost protein without meat. Use seasonal veggies for extra flavor and nutrition. Try adding diced zucchini or spinach. In the fall, stir in some pumpkin or squash. In the spring, fresh peas or asparagus can brighten the dish. These changes make the soup fun and unique each time you cook it. To store leftovers, let the soup cool first. Once cool, pour it into airtight containers. Make sure to leave some space at the top for expansion. Seal the containers tightly. Store them in the fridge for up to four days. Always label the containers with the date. You can freeze this soup for later use. Pour the cooled soup into freezer-safe bags or containers. If using bags, lay them flat to save space. Remove as much air as possible before sealing. Freeze for up to three months. When ready to eat, thaw in the fridge overnight. To reheat the soup, pour it into a pot over medium heat. Stir often to prevent sticking. Heat until warm, about ten minutes. If the soup is too thick, add a splash of broth or water. You can also reheat in the microwave. Use a microwave-safe bowl and cover it loosely. Heat in 1-minute intervals, stirring in between. Yes, you can use other types of potatoes. Red or Yukon Gold potatoes work well. They add a nice flavor and texture. Just keep the same size when cutting them. Make sure to peel them if you want a creamier soup. The soup lasts about 4 to 5 days in the fridge. Store it in an airtight container. Make sure to cool the soup before you put it in the fridge. Yes, you can make this soup in advance. It tastes even better the next day! Just let it cool and store it in the fridge. You can reheat it on the stove or in the microwave. In this post, we covered the key ingredients needed for a tasty soup. We explored substitutes, optional toppings, and shared a step-by-step cooking guide. I gave tips to avoid mistakes and customize your soup’s flavor and texture. We also discussed storage options and answered common questions about ingredients and leftovers. Soup is simple to make and fun to adapt. Enjoy your cooking journey and create something special!

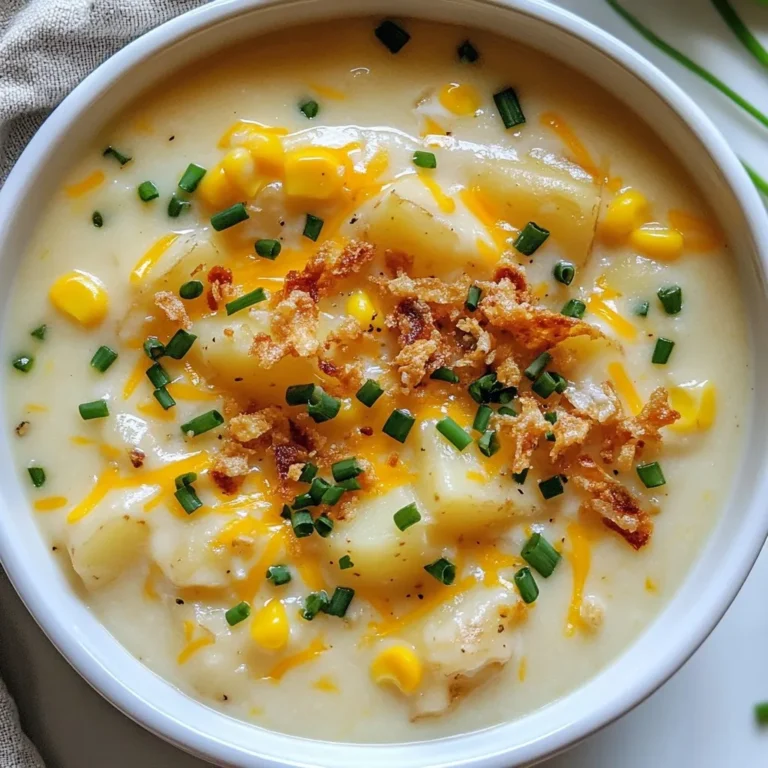
Family Favorite Crockpot Potato Soup Recipe Simple Prep

To make everything bagels, you need some key ingredients: - 4 cups all-purpose flour - 1 packet (2 ¼ teaspoons) active dry yeast - 1 ½ cups warm water (about 110°F) - 1 tablespoon granulated sugar - 1 tablespoon fine sea salt - 2 tablespoons honey (for boiling) Fresh yeast is vital for the best bagels. It helps the dough rise well. When yeast is active, it makes the bagels fluffy. To check if the yeast is fresh, look for a frothy mix after a few minutes. If it bubbles, it's ready! Honey plays a special role in boiling. It adds a slight sweetness and color. This helps the bagels turn golden and shiny when baked. You can make your bagels unique with toppings. You can create your own everything bagel seasoning! Use a mix of: - 1 tablespoon garlic powder - 1 tablespoon onion powder - 1 tablespoon poppy seeds - 1 tablespoon sesame seeds - 1 teaspoon coarse sea salt Feel free to add other toppings too! Try seeds, cheese, or herbs for extra taste. Gather these tools for a smooth process: - Mixing bowls and measuring cups - Tools for kneading and shaping, like a bench scraper - Baking sheet and a large pot for boiling These tools help you mix, shape, and cook the bagels evenly. Having the right equipment makes cooking fun and easy! {{ingredient_image_2}} To activate yeast, mix warm water, sugar, and yeast in a bowl. Use water around 110°F. Stir gently to dissolve. Let it sit for 5-10 minutes. You know the yeast is ready when it bubbles and foams. This means the yeast is alive and waiting to work its magic. First, whisk together all-purpose flour and fine sea salt in a large bowl. Create a well in the center of the dry mix. Pour in the activated yeast mixture. Using a wooden spoon, mix until a shaggy dough forms. It might look messy, but that's normal! Kneading is key for great bagels. It develops gluten, which gives bagels their chewiness. Transfer the shaggy dough to a floured surface. Fold the dough over itself and push it with your hands. Rotate the dough every so often. Knead for about 8-10 minutes until it feels smooth and elastic. Shaping is fun! After kneading, punch down the dough to release air. Divide it into 8 equal pieces. Roll each piece into a ball by tucking the edges into the center. Poke a hole in the middle of each ball with your finger. Gently stretch the dough to form an even ring shape. Boiling is what makes bagels unique. It gives them a chewy crust. Fill a large pot with water and bring it to a boil. Add honey to the boiling water for flavor. Carefully drop 2-3 bagels in at a time. Boil them for 1 minute on each side. Use a slotted spoon to remove them, then place them back on the baking sheet. Preheat your oven to 425°F (220°C). Bake the bagels for 20-25 minutes until golden brown. Before baking, add toppings while the bagels are still wet. Mix garlic powder, onion powder, poppy seeds, sesame seeds, and coarse sea salt in a bowl. Sprinkle this mix on top for extra flavor. To know if the dough is ready, look for a smooth, elastic feel. It should spring back when you poke it. If it’s sticky or dry, adjust with more flour or water. Common mistakes include over-kneading or under-kneading. Knead just until smooth. Avoid adding too much flour, as this can make the bagels tough. Enhance flavors by mixing spices into the dough. Garlic powder and onion powder add rich taste. Try adding more seeds or spices on top for extra crunch. For serving, nothing beats cream cheese, but butter or avocado also work great. Pair with smoked salmon for a classic treat. If bagels turn out too hard, they may have baked too long. Reduce baking time next round. If they’re too soft, check the dough hydration. Adding more flour can help. For high altitude baking, reduce the yeast slightly. This helps the dough rise without collapsing. Adjust boiling time too, by reducing it to 30 seconds per side. Pro Tips Use Fresh Yeast: Always check the expiration date of your yeast to ensure it’s active and fresh for optimal rise. Boiling Temperature: Make sure the water is at a rolling boil before adding the bagels; this aids in achieving that chewy texture. Customize Your Toppings: Feel free to experiment with different seeds and spices in your topping mix for unique flavors. Store Properly: To keep bagels fresh, store them in an airtight container at room temperature or freeze for longer shelf life. {{image_4}} For gluten-free bagels, use a blend of gluten-free flours. Almond flour and tapioca starch work well. You may need to add xanthan gum for better texture. This will help bind the dough and give it elasticity. Expect a different texture, but they can still be tasty! You can take your bagels beyond the classic "everything" mix. Try adding roasted garlic for a savory twist. Grated cheese, like cheddar or parmesan, can add a rich flavor. Fresh herbs like chives or dill can also brighten each bite. Mix and match your favorites to create a unique bagel each time. To make mini bagels, cut the dough into smaller pieces, about 2 ounces each. Shape them the same way, but remember to adjust cooking times. Mini bagels need only about 30 seconds in the boiling water. You can also make bagel bites or shapes like pretzels for fun variations. Just keep an eye on them while baking to avoid overcooking. To keep your bagels fresh, store them in a paper bag. This helps absorb moisture. Avoid plastic bags, as they trap moisture and make bagels soggy. Place the bag in a cool, dry spot. A bread box works well. - Best practices: Use a paper bag or bread box. - Ideal conditions: Keep at room temperature for up to 2 days. Freezing bagels is a great way to save extras. First, let them cool completely. Then, wrap each bagel tightly in plastic wrap. Place wrapped bagels in a freezer bag. This keeps them fresh for up to 3 months. - How to freeze: Wrap tightly and use a freezer bag. - Reheating methods: Thaw overnight in the fridge. Toast them straight from the freezer for a warm, crispy bite. Do not toss stale bagels! You can turn them into tasty treats. Slice bagels into chips and bake until crispy. Or make croutons for soups or salads. Both options add great flavor and crunch. - Creative uses: Bagel chips or croutons. - Recipes: For bagel chips, slice thinly, brush with oil, and bake at 350°F until golden. For croutons, cube bagels, toss with herbs, and bake until crispy. You can prepare bagels ahead of time by following a few easy steps. - Make the dough and let it rise. - Shape the bagels and place them on a baking sheet. - Cover tightly with plastic wrap and refrigerate overnight. - When ready, boil and bake them in the morning. This method keeps the bagels fresh and delicious. Yes, you can swap some ingredients if needed. Here are common substitutions: - Use bread flour instead of all-purpose flour for chewier bagels. - Replace honey with sugar or agave syrup for boiling. - For a gluten-free option, use a gluten-free flour blend. These swaps help you fit dietary needs without losing flavor. Several factors can make bagels lose their chewiness: - Not enough kneading can leave the dough weak. - Using low-protein flour may affect texture. - Skipping the boiling step will make them soft. Make sure to follow the steps closely for the best results. You can tell bagels are done by checking a few signs: - They should be golden brown on the outside. - The bagels will sound hollow when tapped on the bottom. - They should feel firm to the touch, not soft. Follow these tips to ensure perfect bagels every time! Making everything bagels at home is fun and rewarding. You learned the key ingredients, like fresh yeast and honey, and how to use them. I shared step-by-step instructions, from activating yeast to boiling and baking. You discovered tips for perfect dough and fun variations, like gluten-free options. With this knowledge, you can create tasty bagels anytime. Enjoy the process, and don’t hesitate to experiment with flavors and shapes. Perfect bagels are just a recipe away!

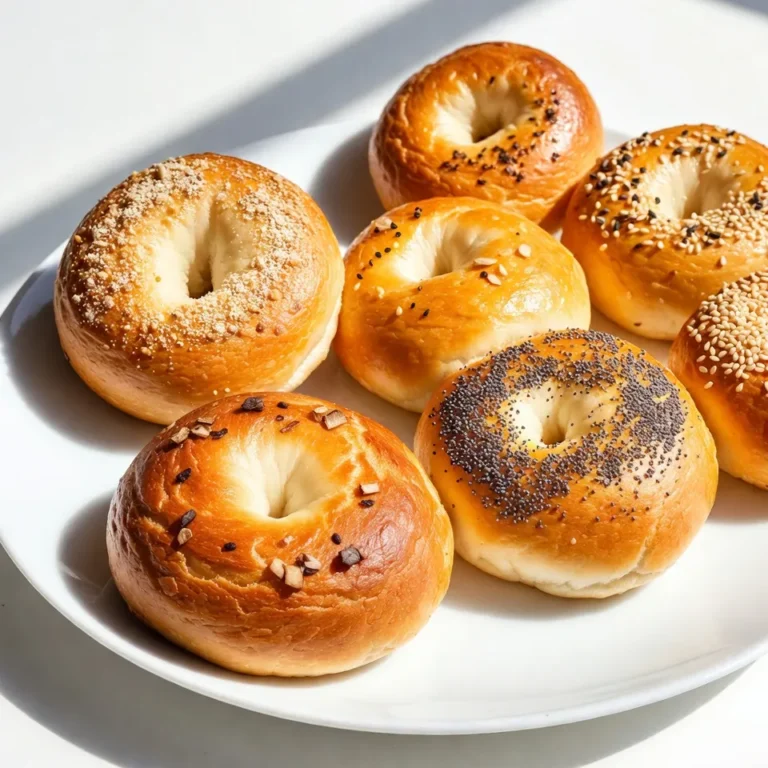
Homemade Everything Bagels Fluffy and Perfectly Easy

PREV 1 … 30 31 32 … 44 NEXT
yummybiterecipes

explore

DessertsDinnerAppetizersDrinks

Our Policies

  • Cookie Policy
  • Copyright Policy
  • Disclaimer
  • GDPR Policy
  • Terms Of Use
Back to Top
  • About
  • Contact Us
  • Privacy Policy
© 2025 yummybiterecipes