FREE DINNER EBOOK! Get your copy!
  • Cookie Policy
  • GDPR Policy
  • Disclaimer
  • Terms Of Use
  • Visit my other site: Fun Cookie Recipes
yummybiterecipes
  • Home
  • Dinner
  • Desserts
  • Drinks
  • Appetizers
  • Contact
  • About
  • Privacy Policy
  • Home
  • Dinner
  • Desserts
  • Drinks
  • Appetizers
  • Contact
  • About
  • Privacy Policy
  • Cookie Policy
  • GDPR Policy
  • Disclaimer
  • Terms Of Use
Visit my other site: Fun Cookie Recipes

HOME / CATEGORIES /

Latest

- 1 lb boneless, skinless chicken thighs, cut into bite-sized pieces - 3 tablespoons extra virgin olive oil - 4 cloves garlic, finely minced - 1 teaspoon smoked paprika - 1 teaspoon dried oregano - 1/2 teaspoon sea salt - 1/4 teaspoon freshly cracked black pepper - 1/4 teaspoon red pepper flakes - 2 tablespoons fresh parsley, chopped - Lemon wedges In this recipe, I focus on simple yet bold flavors. The chicken thighs offer a juicy base. They hold up well to the garlic and spices. You can cut them into bite-sized pieces to ensure quick cooking. Next, I use extra virgin olive oil. This oil adds richness and helps the spices stick. Garlic is another star here; its aroma fills your kitchen as you cook. For spices, I choose smoked paprika and dried oregano. Smoked paprika provides a deep, earthy taste. Oregano brings a touch of Mediterranean flair. Don't forget sea salt and black pepper to balance the flavors. If you like heat, add red pepper flakes. They give a nice kick without overpowering the dish. Fresh parsley serves as a garnish, adding color and freshness. Finally, serve with lemon wedges. A squeeze of lemon brightens each bite. Enjoy the balance of flavors in every piece! {{ingredient_image_2}} - In a medium bowl, combine: - 3 tablespoons extra virgin olive oil - 4 cloves garlic, finely minced - 1 teaspoon smoked paprika - 1 teaspoon dried oregano - 1/2 teaspoon sea salt - 1/4 teaspoon black pepper - 1/4 teaspoon red pepper flakes (optional) - Whisk these ingredients together until smooth. This marinade adds great flavor. - Take 1 pound of boneless, skinless chicken thighs, cut into bite-sized pieces. - Coat each piece thoroughly with the marinade. Use your hands or a spatula. - Cover the bowl with plastic wrap. - Refrigerate for at least 30 minutes. This helps the flavors blend well. - Heat a large skillet over medium-high heat until hot. - Carefully add the marinated chicken bites in a single layer. Cook in batches if needed. - Sauté the chicken for about 5-7 minutes. Turn them occasionally. Look for a golden brown color. - To check doneness, use a meat thermometer. The chicken should reach 165°F (74°C). - Once done, remove the skillet from heat. Follow these steps, and you will have tasty Keto Garlic Chicken Bites ready to serve! - I recommend marinating for at least 30 minutes. - This time allows the spices to soak in well. - To enhance flavor depth, add lemon zest to the marinade. - You can also try fresh herbs like thyme or rosemary. - Avoid overcrowding the skillet when cooking. - If the pieces touch, they won't brown well. - For quicker cooking, use smaller pieces of chicken. - You can also cook in batches for best results. - Serve the chicken on a rustic wooden platter. - This gives a warm, inviting look to the dish. - Garnish with fresh parsley and lemon slices. - These add color and freshness to your plate. Pro Tips Marinate Longer: For even more flavor, consider marinating the chicken for 1 to 2 hours or overnight in the refrigerator. This allows the spices and garlic to penetrate deeper into the meat. Use a Cast Iron Skillet: A cast iron skillet retains heat well and provides a great sear on the chicken bites, enhancing their flavor and texture. Adjust Spice Levels: Feel free to adjust the amount of red pepper flakes based on your heat preference. You can also add other spices like cayenne or chili powder for different flavor profiles. Serve with Dipping Sauce: Consider serving these garlic chicken bites with a keto-friendly dipping sauce, such as a creamy avocado dip or a garlic aioli, for added flavor and variety. {{image_4}} To change the taste of your Keto Garlic Chicken Bites, try adding herbs. Fresh thyme or rosemary adds a nice touch. You can also use different sauces or marinades. A tangy lemon sauce gives a fresh burst. A spicy buffalo sauce can add heat for those who love a kick. If you want low-carb sides, think about cauliflower rice or zoodles. These options go well with the chicken. For gluten-free choices, use gluten-free soy sauce or coconut aminos in your marinades. These keep your meal safe and tasty for anyone avoiding gluten. Air frying is a healthier cooking method for this dish. It makes the chicken crispy without extra oil. Set your air fryer to 375°F and cook for about 10-12 minutes. For oven-baking, preheat to 400°F. Arrange the chicken on a baking sheet and bake for 20-25 minutes. Either method works well to create delicious bites. To store leftover Keto Garlic Chicken Bites, place them in an airtight container. Make sure to let them cool first. This keeps them fresh longer. They will last up to three days in the fridge. When reheating, avoid drying out the chicken. Use a skillet over low heat for best results. You can also use a microwave with a damp paper towel on top. Heat to 165°F (74°C) for safe eating. For freezing, let the chicken bites cool completely. Place them in a freezer-safe bag. Squeeze out as much air as possible. They can last up to three months in the freezer. To thaw, move them to the fridge overnight. You can also use the microwave on the defrost setting. This keeps the chicken moist and tasty. To add spice, try using more red pepper flakes. You can also add cayenne pepper for more heat. If you enjoy smoky flavors, consider adding chipotle powder. Adjust the spice to match your taste. Yes, you can use chicken breast. Chicken thighs are juicier and more flavorful. Breasts can dry out more easily. If using breasts, cook them carefully and check for doneness sooner. For a well-rounded meal, serve these chicken bites with a fresh salad. Steamed broccoli or green beans are great sides too. Cauliflower rice pairs well for a keto-friendly option. You can also add a dipping sauce for extra flavor. This post covered how to make Keto Garlic Chicken Bites from start to finish. You learned about the main ingredients and how spices enhance flavor. I shared tips for marinating and cooking, plus ideas for variations. Storing and reheating tips ensure you enjoy leftovers too. Embrace your creativity and try different flavors. Cooking should be fun and rewarding. Enjoy your delicious chicken bites!

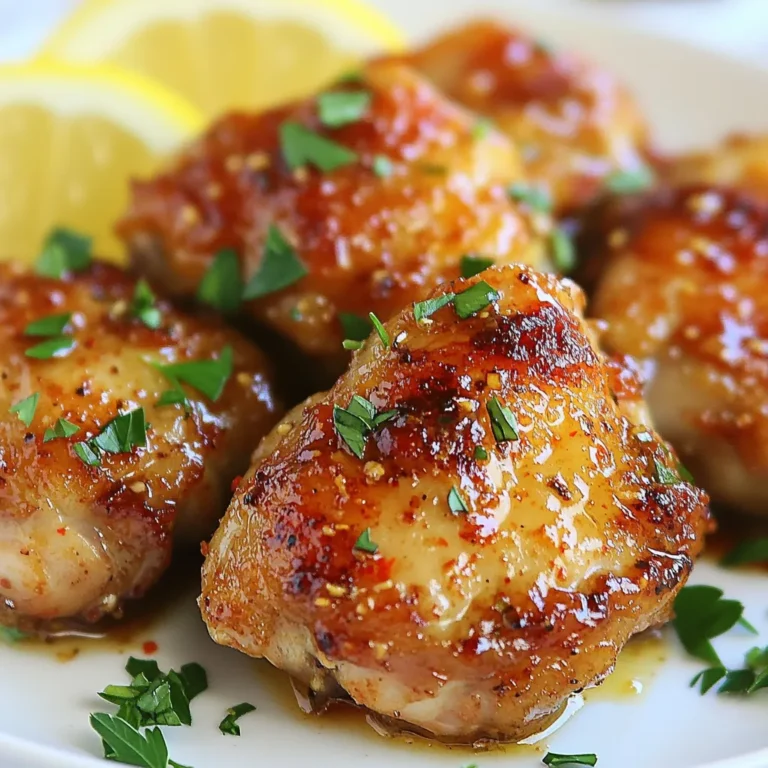
Keto Garlic Chicken Bites Flavorful and Easy Recipe

To make Baked Chicken Parmesan, you will need the following ingredients: - 4 boneless, skinless chicken breasts - 1 cup Italian-seasoned breadcrumbs - 1/2 cup grated Parmesan cheese - 1 teaspoon garlic powder - 1 teaspoon dried oregano - 1 teaspoon dried basil - 2 large eggs, beaten - 2 cups marinara sauce - 1 cup shredded mozzarella cheese - Fresh basil leaves for garnish - Salt and pepper to taste - Olive oil spray or 1 tablespoon olive oil Using fresh ingredients makes a big difference in flavor. Fresh chicken gives a juicy bite. Fresh herbs like basil and oregano add vibrant taste. When you use good quality marinara sauce, it boosts the dish. Always check the dates on your products. Fresh ingredients lead to a better meal. They enhance the texture and aroma, making your dish more enjoyable. You can switch out some ingredients if you need to. For chicken, you can use turkey breasts as a leaner option. Instead of Italian-seasoned breadcrumbs, plain breadcrumbs work too. You can mix in some Italian herbs for flavor. If you do not have Parmesan cheese, try Pecorino Romano instead. For a non-dairy option, use vegan cheese instead of mozzarella. These swaps can still make your Baked Chicken Parmesan tasty and enjoyable. {{ingredient_image_2}} First, preheat your oven to 375°F (190°C). This step is key for even cooking. A hot oven helps the chicken get crispy. Make sure to use a reliable oven thermometer for accuracy. In a shallow bowl, mix the breadcrumbs, Parmesan cheese, garlic powder, oregano, basil, salt, and pepper. This blend gives the chicken flavor. In another bowl, beat the eggs until they are smooth. Dip each chicken breast in the eggs, then coat it in the breadcrumb mix. Press the crumbs onto the chicken to help them stick well. Place the coated chicken on a baking sheet lined with parchment paper. For extra crispiness, lightly spray the tops with olive oil or brush them with a bit of oil. Bake the chicken in the preheated oven for 20 to 25 minutes. The chicken should reach an internal temperature of 165°F (75°C). Look for golden brown breadcrumbs. Once done, take the chicken out and pour marinara sauce over each piece. Make sure to cover them evenly. Next, sprinkle shredded mozzarella cheese on top. Return the chicken to the oven for another 10 minutes. Wait for the cheese to melt and bubble. After baking, let the chicken rest for a few minutes. Finally, garnish with fresh basil leaves for added flavor before you serve. To cook your chicken evenly, follow a few simple steps. Start by preheating your oven to 375°F (190°C). Make sure your chicken breasts are of similar size. This helps them cook at the same rate. Use a meat thermometer to check the internal temperature. Chicken is done when it reaches 165°F (75°C). Letting the chicken rest for a few minutes helps keep it juicy. For that perfect crispy texture, coating is key. Use Italian-seasoned breadcrumbs mixed with grated Parmesan cheese, garlic powder, oregano, and basil. After dipping each chicken breast in beaten eggs, coat them well in the breadcrumb mix. Press down gently to ensure the crumbs stick. Lightly spray the tops with olive oil before baking. This adds extra crunch. Baking the chicken on parchment paper also prevents sticking while allowing air to circulate. If you prefer different cooking methods, you have options. You can use an air fryer for a healthier version. Set the air fryer to 375°F (190°C) and cook for 15-20 minutes. Flip the chicken halfway for even cooking. You can also grill the chicken. Marinate it first for extra flavor. Cook on medium heat until done. Each method gives a unique twist to your baked chicken Parmesan. Pro Tips Use Fresh Ingredients: Opt for fresh herbs and high-quality marinara sauce to enhance the overall flavor of the dish. Perfectly Crispy Chicken: For an extra crispy coating, consider double-dipping the chicken in the egg and breadcrumbs. Let It Rest: Allow the baked chicken to rest for a few minutes after baking for juicier meat and better flavor absorption. Cheese Variations: Experiment with different types of cheese like provolone or fontina for a unique twist on the classic mozzarella topping. {{image_4}} To make a healthier Baked Chicken Parmesan, swap regular breadcrumbs for whole wheat ones. Whole wheat breadcrumbs offer more fiber and nutrients. They still give a great crunch and flavor. Just use the same amount as the recipe calls for. This small change makes a big difference in nutrition without losing taste. If you want a vegetarian version, replace chicken with eggplant or zucchini. Slice the vegetables into thick rounds. Follow the same steps of coating and baking. They will soak up the marinara sauce and cheese just like chicken. This option gives you a tasty and hearty meal that’s meat-free. Feel free to experiment with different cheeses. Swap mozzarella for provolone or gouda to change the taste. You can also mix in some feta cheese for a tangy kick. Using a blend of cheeses adds depth and richness to the dish. Try different combinations to find your favorite mix. To store your baked chicken Parmesan, let it cool first. Place leftover chicken in an airtight container. It stays fresh in the fridge for up to three days. Make sure to separate the sauce if you want the chicken to stay crispy. When you're ready to enjoy leftovers, preheat your oven to 350°F (175°C). Place the chicken on a baking sheet. Cover it with foil to keep it moist. Heat for about 15-20 minutes. You can also microwave it for quick reheating, but the oven keeps it crispy. If you want to freeze baked chicken Parmesan, wrap each piece in plastic wrap. Then place them in a freezer-safe bag. This way, you can enjoy it later. It stays good for up to three months. When you're ready to eat, thaw it in the fridge before reheating. The best way to know if chicken is cooked is by checking its internal temperature. Use a meat thermometer. The chicken should reach 165°F (75°C). This ensures it is safe to eat. You can also check the color. The meat should be white, not pink. Juices should run clear when you cut it. Both methods help you avoid undercooking or overcooking your chicken. Yes, you can use frozen chicken breasts, but you need to thaw them first. Thaw the chicken in the fridge overnight for best results. If you need to cook them right away, you can also use the microwave. After thawing, follow the main recipe steps. Make sure to check the internal temperature to ensure they cook fully. Cooking from frozen may lead to uneven cooking, so thawing is best. To make this recipe gluten-free, you can substitute the breadcrumbs. Use gluten-free breadcrumbs or crushed gluten-free crackers. These options give you that crunchy texture. You should also check the marinara sauce. Ensure it is gluten-free, as some brands may add gluten. With these simple swaps, you can enjoy Baked Chicken Parmesan without gluten. This guide covers key points for making delicious chicken. We explored fresh ingredients and tasty swaps for your meals. I shared step-by-step directions for preparing, coating, and baking the chicken to perfection. You learned tips for even cooking and how to make it crispy. I also provided options for healthier, vegetarian, and flavorful variations. Finally, we discussed storage tips to keep leftovers fresh. Enjoy cooking and feel confident with these methods for great results!

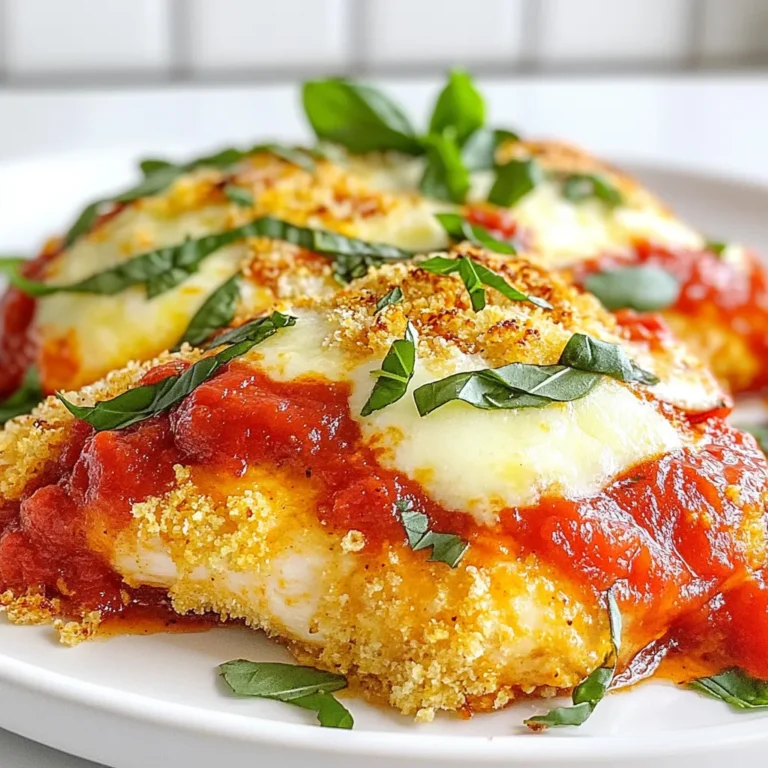
Baked Chicken Parmesan Crispy and Savory Delight

For this tasty chicken salad, you will need: - 2 cups cooked chicken breast, shredded - 1 cup plain Greek yogurt - 1/4 cup celery, finely chopped - 1/4 cup red grapes, halved - 1/4 cup walnuts, roughly chopped - 2 tablespoons fresh dill, chopped - 1 tablespoon fresh lemon juice - Salt and black pepper to taste - 1 head of butter lettuce or romaine, leaves separated These ingredients create a creamy and crunchy mix. The Greek yogurt adds tang and moisture. The chicken gives it protein, while grapes add a sweet touch. You can make your wraps even better with some toppings. Consider adding: - Sliced avocado for creaminess - Chopped apples for extra crunch - A sprinkle of feta cheese for a salty kick - Fresh herbs like parsley or basil for more flavor These add-ins make the dish more exciting. You can switch them based on what you have at home. Each serving of the chicken salad wraps offers: - Calories: Approximately 300 - Protein: 30 grams - Carbohydrates: 12 grams - Fat: 15 grams - Fiber: 2 grams This dish is healthy and filling. It keeps you satisfied without weighing you down. Enjoy this nutritious option for lunch or a light dinner! {{ingredient_image_2}} To start, gather your ingredients. You will need 2 cups of cooked chicken breast, shredded. Place this in a large mixing bowl. Add 1 cup of plain Greek yogurt. Mix these together until the chicken is well coated. Next, chop 1/4 cup of celery finely. Halve 1/4 cup of red grapes and roughly chop 1/4 cup of walnuts. Toss these into the bowl. Then, add 2 tablespoons of fresh dill and 1 tablespoon of fresh lemon juice. Stir everything gently until well combined. Finally, season the salad with salt and black pepper to taste. Now, it’s time to wrap! Take a head of butter lettuce or romaine and separate the leaves. Choose a nice, big leaf for your wrap. Spoon a generous amount of your chicken salad mixture into the center of the leaf. Fold the sides of the leaf over the filling. Then, roll it up tightly from the bottom to create your wrap. For the best taste, serve these wraps right away. Arrange them on a serving platter for a nice look. You can garnish with extra dill sprigs or a sprinkle of walnuts. This adds a pretty touch and a bit of crunch. Enjoy every crunchy bite! To make the best chicken salad, start with fresh chicken. Use cooked chicken breast and shred it well. The Greek yogurt should be plain. It adds creaminess without extra calories. Add crunchy celery for texture and sweet grapes for flavor. Don't forget the walnuts! They give a nice crunch and nutty taste. Fresh dill brightens the salad and adds a lovely flavor. Use fresh lemon juice to keep it zesty. Season with salt and black pepper to taste. If you have leftovers, store them in an airtight container. Keep the chicken salad in the fridge. It stays fresh for up to three days. When you're ready to eat, stir it well before serving. If the salad seems dry, add a bit of yogurt or lemon juice. This will bring back the creamy texture. Avoid freezing the chicken salad, as it won't taste as good. These lettuce wraps pair well with many sides. Fresh fruit like berries or apple slices is a great choice. You can also serve them with crunchy veggie sticks. They add extra color and nutrients to your meal. For a quick touch, offer a side of hummus or a light dip. This makes for a fun and healthy lunch. Enjoy your wraps with a sparkling drink for a festive feel! Pro Tips Use Leftover Chicken: This recipe is perfect for repurposing leftover rotisserie chicken or any cooked chicken you have on hand. Customize Your Add-ins: Feel free to swap out walnuts for pecans or add diced apples for a sweeter crunch! Chill Before Serving: For an even fresher taste, chill the chicken salad in the refrigerator for about 30 minutes before serving. Experiment with Herbs: Besides dill, you can try adding fresh parsley, tarragon, or chives for a different flavor profile. {{image_4}} You can swap chicken for other proteins. Try using shredded turkey for a lighter option. Salmon adds a unique flavor and a good amount of omega-3s. If you enjoy tuna, canned tuna works well too. Just drain it and mix it in. Each protein gives a new taste to the salad. If you want a vegetarian option, use chickpeas or tofu. Mash chickpeas for a creamy texture. Dice tofu and mix it with Greek yogurt. For a vegan twist, replace Greek yogurt with a plant-based yogurt. Almond or coconut yogurt can add a nice flavor. This keeps the dish creamy and tasty without dairy. You can change the flavors by adding different herbs and fruits. Basil or parsley can brighten up the dish. Adding diced apples or pears gives a sweet crunch. You may also try adding cranberries for a pop of color and taste. Each change can create a new experience in your wraps. To keep your Greek yogurt chicken salad fresh, store it in an airtight container. Make sure the lid seals tightly. This helps keep moisture in and other smells out. Place the container in the coolest part of your fridge. Avoid the door, as it gets warmer. Leftovers can last up to three days in the fridge. After that, the salad may lose its taste and crunch. Always check for signs of spoilage, like a sour smell or change in color. If it looks or smells off, it’s best to throw it away. Freezing chicken salad is not the best choice. The texture of Greek yogurt can change when thawed. This may make your salad watery and less appealing. However, if you must freeze it, use a freezer-safe container. Make sure to eat it within one month for the best taste. Yes, you can make Greek yogurt chicken salad ahead of time. This salad tastes even better after sitting. I suggest storing it in an airtight container. Keep it in the fridge for up to three days. Just remember to make the lettuce wraps fresh when you are ready to eat. If you want to skip the lettuce wraps, try using whole grain tortillas. You can also use pita bread or even sliced cucumbers. These options add a fun twist to the meal. The key is to use something that holds the chicken salad well. Yes, this recipe is gluten-free. Greek yogurt, chicken, and veggies have no gluten. If you use gluten-free wraps, you can enjoy this dish safely. Always check labels on any packaged ingredients to be sure. This blog post covered how to make Greek yogurt chicken salad. You learned about the main ingredients, optional toppings, and healthy nutrition facts. I shared step-by-step instructions for preparation and serving. Tips on storing leftovers and easy variations help you customize the recipe. In conclusion, this dish is simple to make and very tasty. Enjoy it in wraps, or try other proteins. Greek yogurt adds creaminess while keeping it healthy. Now you can impress your friends with this refreshing meal!

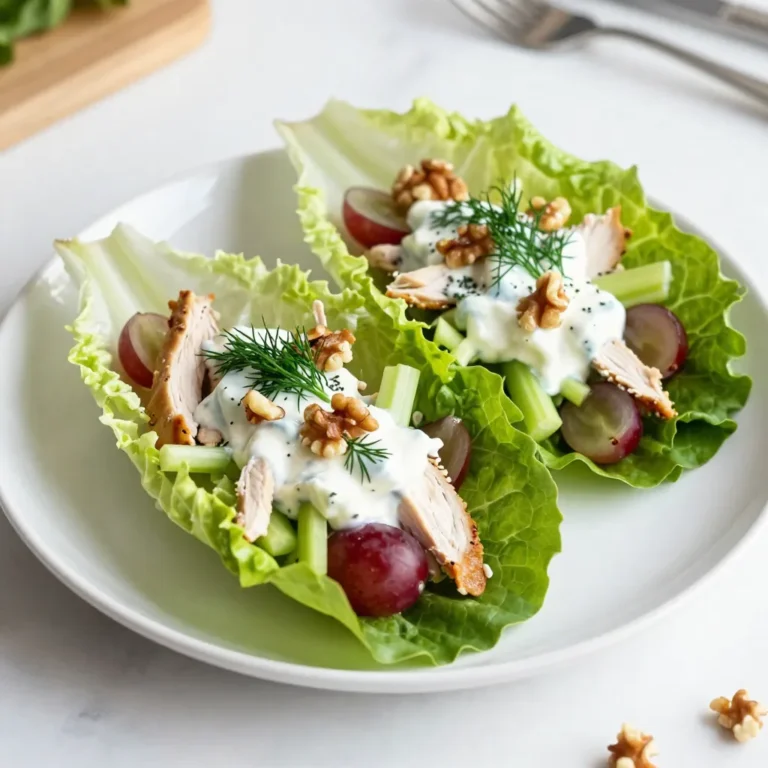
Greek Yogurt Chicken Salad Lettuce Wraps Delight

- 1 cup green or brown lentils, thoroughly rinsed - 1 medium onion, finely diced - 2 cloves garlic, minced - 2 medium carrots, diced into small pieces - 1 celery stalk, finely diced - 1 teaspoon turmeric powder - 1 teaspoon ground cumin - Sea salt and freshly cracked black pepper, to taste - 6 cups vegetable broth (preferably low-sodium) - 1 lemon, zested and juiced - 2 tablespoons extra virgin olive oil - Fresh parsley, chopped, for garnish For this Golden Lemon Lentil Soup, each ingredient plays a vital role. Lentils are the star; they give the soup its hearty base. They pack protein and fiber, making the soup filling. Onions and garlic add depth and flavor. They make the soup smell amazing as they cook. Carrots provide sweetness and color. Celery adds a nice crunch and balances the flavors. The spices here are key. Turmeric brings warmth and health benefits. Cumin gives a slight earthiness that complements the lentils well. I always use sea salt and fresh pepper to enhance the soup's taste. The vegetable broth is the liquid gold of this recipe. It adds richness and depth. I prefer low-sodium broth to control the saltiness. Finally, the lemon zest and juice brighten the soup. They add a fresh, citrus note that lifts the dish. Olive oil adds richness and helps the flavors blend. Don't forget the fresh parsley; it adds color and a fresh taste. Gathering these ingredients sets you up for a delicious and nutritious meal. Enjoy the process, and let the aromas fill your kitchen as you cook! {{ingredient_image_2}} - Rinse the lentils thoroughly to remove any dirt or dust. - Dice one medium onion into small pieces. - Mince two cloves of garlic. - Dice two medium carrots into small cubes. - Finely dice one celery stalk. - Heat two tablespoons of extra virgin olive oil in a large pot over medium heat. - Add the diced onion and sauté for about five minutes. You want it to be soft and clear. - Next, stir in the minced garlic, diced carrots, and celery. Cook for another five minutes. Stir often to cook evenly. - Sprinkle in one teaspoon of turmeric powder and one teaspoon of ground cumin. Mix well and let it cook for two minutes. This helps the spices shine. - Add the rinsed lentils to the pot, then pour in six cups of vegetable broth. Turn up the heat to bring it all to a boil. - Once boiling, reduce the heat to a low simmer. Cover the pot and let it cook for 25 to 30 minutes. Stir now and then to keep it from sticking. These steps create a rich base for your soup. Add zing with lemon zest and juice later for a bright flavor! To get the best lentils, cook them right. For green or brown lentils, the cooking time is key. They need about 25 to 30 minutes to become tender. Stir them often to avoid sticking. If you want a softer texture, cook a bit longer. Rinsing lentils is simple but important. Start by placing them in a fine mesh strainer. Rinse under cold water until the water runs clear. This removes dust and debris. It also helps prevent any off flavors. Want to boost the flavor? Try adding spices like smoked paprika or a pinch of cayenne. They add warmth and depth to the soup. Fresh herbs like thyme or cilantro bring a bright taste. Adjust the lemon flavor to your liking. If you love lemon, add more zest or juice. For a subtle taste, start with half the lemon and taste as you go. Serve your soup in a wide bowl. This makes it look nice and inviting. Add a sprinkle of fresh parsley on top for color. You can also drizzle a bit of olive oil for shine. Pair the soup with some crusty bread or a fresh salad. This makes for a complete meal. A nice glass of white wine can also enhance the experience. Enjoy your delicious Golden Lemon Lentil Soup! Pro Tips Use Fresh Ingredients: Fresh vegetables and herbs can brighten the flavor of your soup and make a significant difference in taste. Adjust Consistency: If you prefer a thinner soup, gradually add more vegetable broth or water until you reach your desired consistency. Enhance with Acidity: A squeeze of fresh lemon juice just before serving can enhance the flavors and add a refreshing zing. Storage Tips: This soup stores well in the refrigerator for 3-5 days and can also be frozen for longer preservation. {{image_4}} You can change the lentils in this soup. Use red lentils for a sweeter taste. They cook faster, so adjust the time. You can also try black or yellow lentils for a different look and flavor. Feel free to add more veggies. Try spinach or kale for greens. Sweet potatoes add a nice touch. Bell peppers can bring more color and taste. Just chop them small so they cook well. This soup is easy to make gluten-free. All the ingredients are naturally gluten-free. Just check your broth to ensure it is safe. This makes it great for those with gluten issues. For vegan options, skip the broth with animal products. You can also add chickpeas for more protein. They blend well with lentils and add texture. This keeps the soup healthy and satisfying. Do you love heat? Add chopped chilies or a pinch of cayenne. This gives the soup a nice kick. Just be careful with the amount if you don’t like it too spicy. Herbs can also change the taste. You can add thyme for a more earthy flavor. Basil brings a sweet and fresh touch. Experiment to find your favorite mix! To keep your Golden Lemon Lentil Soup fresh, store it in an airtight container. This helps maintain its flavor and texture. It’s best to refrigerate the soup within two hours of cooking. In the fridge, it stays good for about 3 to 5 days. The soup may thicken as it sits, but don’t worry; a little broth can fix that. If you want to save some soup for later, freezing is a great option. Let the soup cool completely before you put it in a freezer-safe container. Leave some space at the top, as the soup will expand when frozen. You can freeze it for up to 3 months. When you're ready to enjoy it again, transfer it to the fridge to thaw overnight. To reheat, the best method is using the stove. Pour the soup into a pot and heat it on medium-low. Stir it often to prevent sticking. If the soup seems too thick, add a splash of broth or water. You can also use the microwave. Just heat it in short bursts, stirring in between. This helps avoid overcooking. Always check the soup's temperature before serving. Enjoy your warm and tasty soup! To change the thickness, you have two main options. - Thickening: For a thicker soup, cook it longer. The lentils will break down more. You can also mash some lentils with a fork to create a creamier texture. - Thinning: If your soup is too thick, add more vegetable broth or water. Stir it well and let it heat for a few minutes. This method keeps the flavor strong while adjusting the texture. Yes, you can use canned lentils! They save time and are very convenient. - Benefits: Canned lentils are already cooked, so they cut down on prep time. They are also soft and easy to mix into your soup. - Adjustments: If using canned lentils, add them near the end of cooking. This prevents them from becoming mushy. Reduce the cooking time in your recipe by about 15 minutes. This soup pairs well with many side dishes. - Bread: Serve it with crusty bread or garlic bread. It is perfect for dipping. - Salads: A fresh green salad with light dressing complements the soup. - Rice: You can also serve it over rice or quinoa for a heartier meal. These sides enhance the flavor and make your meal more filling. This blog post covers how to make delicious Golden Lemon Lentil Soup. We discussed essential ingredients like lentils, vegetables, and spices. The step-by-step instructions guide you from preparation to cooking. I shared valuable tips to enhance flavor and presentation. You learned about variations and how to store leftovers. In conclusion, this soup is easy to make and tastes great. It fits many diets and is perfect for meal prep. Enjoy your cooking adventure with this nourishing dish!

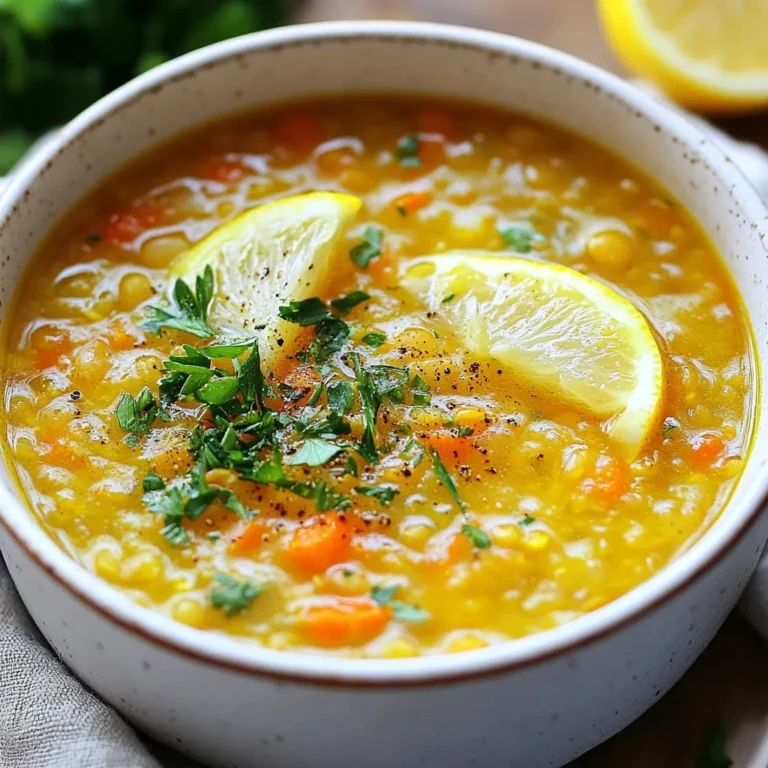
Golden Lemon Lentil Soup Flavorful and Nutritious Dish

- 2 pounds chicken wings - 1 ripe mango, peeled and diced - 2 fresh habanero peppers, seeded and finely chopped - 1/4 cup honey - 2 tablespoons soy sauce - 1 tablespoon apple cider vinegar - 1 tablespoon olive oil - 1 teaspoon garlic powder - 1 teaspoon onion powder - Salt and freshly ground black pepper to taste - Fresh cilantro leaves for garnish - Lime wedges for extra zing {{ingredient_image_2}} Preheat your oven to 400°F (200°C). While the oven warms up, line a baking sheet with parchment paper. This helps the wings not stick. It also makes cleaning much easier later. For the marinade, grab a blender. Add the diced mango and chopped habanero peppers. Pour in the honey, soy sauce, apple cider vinegar, olive oil, garlic powder, onion powder, and a pinch of salt and pepper. Blend everything on high until it's smooth. You want a bright, spicy mix. In a large bowl, put the chicken wings. Pour half of your mango habanero marinade over them. Toss the wings well, so they coat evenly. Save the rest of the marinade for later. Place the wings on your baking sheet in a single layer. Make sure they have space to cook well. Bake the wings for 25-30 minutes. Flip them halfway through to get crispy skin all around. While the wings cook, take the reserved marinade and pour it into a small saucepan. Heat it on medium until it simmers gently. Let it cook for 5-7 minutes until it thickens into a glaze. Watch it closely to avoid burning. When the wings are done, take them out of the oven. Brush the thickened glaze over each wing, covering them well. Put the glazed wings back in the oven for another 5-10 minutes. This helps set the glaze and boost the flavor. After that, let the wings sit for a few minutes. This helps the flavors settle. Just before serving, sprinkle fresh cilantro leaves on top for color and freshness. Enjoy your delicious mango habanero chicken wings! To get crispy chicken wings, start with a hot oven. Preheat it to 400°F (200°C). Using parchment paper on your baking sheet helps wings cook evenly. Space the wings apart on the sheet. This allows hot air to circulate around them. Flip the wings halfway through baking for even browning. For extra crispiness, bake them a bit longer. The key to a great mango habanero marinade is balance. Habaneros add heat, while mango gives sweet flavor. Use one ripe mango for best results. The honey also enhances sweetness, so taste as you mix. If you want less heat, use less habanero. Mix well to ensure all flavors blend. Adjust the honey to suit your taste. Serve these wings on a big platter for sharing. A sprinkle of fresh cilantro adds color. Lime wedges on the side give a zesty kick. Pair wings with crunchy veggies or a fresh salad. They also go well with a cold drink. Try serving them with a creamy dip for extra flavor. Pro Tips Use Fresh Ingredients: Fresh mango and habanero peppers will provide the best flavor. Avoid canned or frozen alternatives for this recipe. Adjust Spiciness: If you prefer milder wings, reduce the number of habanero peppers or remove the seeds and inner membranes to lessen the heat. Let Marinade Soak: For even more flavor, marinate the wings for at least 30 minutes, or even overnight in the refrigerator. Use a Meat Thermometer: Ensure your wings are cooked to a safe internal temperature of 165°F (75°C) for perfect, juicy results. {{image_4}} You can change the spice level by using fewer habanero peppers. If you want less heat, try using just one habanero. You can also substitute with milder peppers, like jalapeños. This will keep the flavor but lower the burn. Adjusting the amount helps make the wings perfect for everyone. You can cook these wings in an air fryer or on the grill. If you use an air fryer, set the temperature to 380°F (193°C) and cook for 25 minutes. Flip them halfway for even crispiness. Grilling adds a smoky flavor. Preheat your grill and cook the wings for about 20 minutes. Make sure to turn them often for great results! Mixing in other fruits can create fun flavors. Try adding pineapple or peach for a sweet twist. You can also add different peppers. Mixing in some sweet bell peppers with habaneros can give a nice balance. Experimenting with flavors can make your wings even more exciting! After enjoying your mango habanero chicken wings, store any leftovers in the fridge. Place the wings in an airtight container. This helps keep them fresh and tasty. Make sure to eat them within 3 to 4 days. If you plan to store them longer, freezing is a great option. To freeze these wings, first, let them cool completely. Place them in a freezer-safe bag. Remove as much air as possible. This keeps the wings from getting freezer burn. They can stay in the freezer for up to 3 months. When you're ready to enjoy them, thaw in the fridge overnight. Reheating is easy! You can use the oven or an air fryer for the best results. To use the oven, preheat it to 350°F (175°C). Place the wings on a baking sheet and heat for about 10-15 minutes. This keeps them crispy. If using an air fryer, heat at 350°F for about 5-7 minutes. Enjoy your wings as if they were just made! You can use jalapeño peppers for a milder heat. Serrano peppers also work well. If you want more heat, consider using Scotch bonnet peppers. Each of these options will give a different flavor. To make mango habanero sauce, blend 1 ripe mango and 2 chopped habanero peppers. Add 1/4 cup honey, 2 tablespoons soy sauce, 1 tablespoon apple cider vinegar, and 1 tablespoon olive oil. Blend until smooth. This sauce can be used as a marinade or glaze. Yes, you can use chicken thighs or drumsticks instead of wings. Just adjust the cooking time to ensure they cook through. Thighs will be juicier, while drumsticks offer a fun, easy-to-hold option. Mango habanero wings pair well with coleslaw for crunch. Rice or quinoa can help balance the heat. Serve with a fresh salad for a light option. Corn on the cob also makes a tasty side. Mango habanero chicken wings offer a fun mix of heat and sweet. We explored the main ingredients, how to prepare the marinade, and tips to achieve crispy wings. You can enjoy these wings baked, or switch things up with grilling. Storing leftovers is easy, and we even covered some tasty side ideas. Feel free to experiment with spices and cooking methods. Now, you can impress friends with this simple and delicious dish. Enjoy your cooking and share your tasty results!

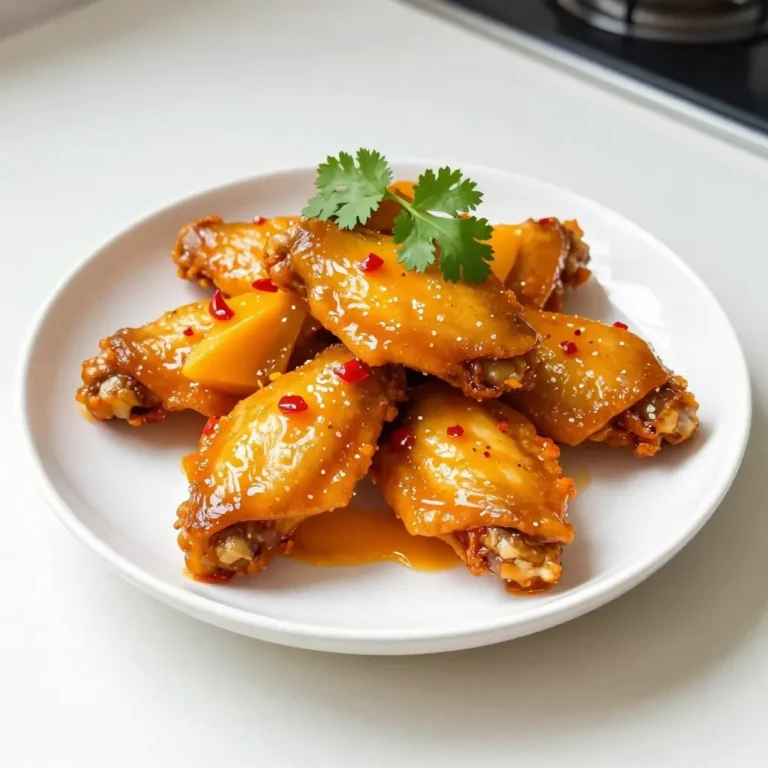
Mouthwatering Mango Habanero Chicken Wings Delight

- 300g beef sirloin, thinly sliced against the grain - 200g fresh rice noodles - 2 tablespoons soy sauce - 1 tablespoon dark soy sauce - 2 tablespoons hoisin sauce - 1 tablespoon oyster sauce For the sticky beef noodles, beef sirloin is key. It gives a rich, meaty flavor. Slice it against the grain for tenderness. Fresh rice noodles are also important. They soak up the sauce well. Soy sauce variations add depth. The mix of regular and dark soy sauce brings a nice balance. Hoisin and oyster sauces add sweetness and umami. - 2 cloves garlic, finely minced - 1-inch piece of ginger, freshly grated - 1 red bell pepper, sliced into thin strips - 1 cup broccoli florets, cut to bite-sized pieces - 1 tablespoon sesame oil - 1 tablespoon vegetable oil - 1 teaspoon sugar - Chopped scallions and sesame seeds for garnish Garlic and ginger give bright, bold flavors. They enhance the beef and noodles. Veggies, like red bell pepper and broccoli, add color and nutrition. Sesame oil adds a nutty taste. Vegetable oil is great for stir-frying. Sugar helps balance the salty sauces. Lastly, scallions and sesame seeds make the dish pop. They add crunch and freshness. {{ingredient_image_2}} To start, you need to make the marinade. In a medium bowl, whisk together these ingredients: soy sauce, dark soy sauce, hoisin sauce, oyster sauce, minced garlic, grated ginger, and sugar. This mix adds depth to the beef. Next, add the thinly sliced beef sirloin to the bowl. Make sure each slice gets a good coat of marinade. Cover the bowl with plastic wrap. Let it sit at room temperature for at least 15 minutes. This waiting time helps the meat absorb all those yummy flavors. While the beef marinates, bring a pot of water to a boil. Add the fresh rice noodles and cook them. Follow the package’s time, usually about 3-5 minutes. Once done, drain the noodles in a colander. Rinse them under cold water. This step stops the cooking and helps prevent stickiness. Set the noodles aside until you're ready to use them. Now it’s time to stir-fry the veggies. Heat a large wok or a non-stick skillet over medium-high heat. Add the vegetable oil, swirling it around to coat the pan. Wait until the oil is hot, then toss in the broccoli florets and sliced red bell pepper. Stir-fry the veggies for about 3-4 minutes. They should be bright in color and slightly tender but still have a crisp bite. When they’re done, take them out and place them in a bowl. In the same wok, add the sesame oil and let it heat up. Carefully add the marinated beef. Spread it out in a single layer. This helps it cook evenly. Sear the beef for 2-3 minutes without stirring. This allows it to brown nicely. Once browned, stir to mix the pieces and remove them from heat. Now, let’s bring it all together. Put the stir-fried vegetables back into the wok. Add the pre-cooked rice noodles next. Gently toss everything together. This step ensures all the flavors mix well. Stir-fry for an extra 2 minutes. This lets the noodles soak up the tasty sauce and heat through. Finally, it’s time to serve! Transfer the sticky beef noodles to a large dish or individual bowls. For a pop of color, sprinkle with chopped scallions and sesame seeds. Serve the dish hot, and enjoy the delightful flavors! To make your sticky beef noodles shine, balance the sauces well. Use soy sauce for saltiness, hoisin for sweetness, and oyster sauce for depth. This mix gives your dish a rich taste. Enhancing umami flavor is key. Add minced garlic and grated ginger to the marinade. They boost the flavor and make each bite exciting. Use fresh ingredients for the best results, as they pack more taste. A good wok is a must. It heats evenly and allows for quick cooking. If you don’t have a wok, a large non-stick skillet works too. These tools help you stir-fry the beef and veggies properly. Use a spatula or wooden spoon for stirring. These tools help you mix everything without scratching your pan. A colander is great for draining the noodles, so you get rid of excess water. Prep your ingredients ahead of time. Slice the beef and veggies before you start cooking. This way, you save time and can focus on cooking. Another shortcut is cooking the noodles while marinating the beef. This lets you speed up your cooking process. Once everything is ready, it all comes together quickly, making dinner easy and fun. Pro Tips Marinate for Flavor: Allow the beef to marinate for at least 15 minutes, but if you have more time, 1-2 hours in the refrigerator will enhance the flavor even further. Use Fresh Noodles: Fresh rice noodles provide the best texture and flavor for this dish. If using dried noodles, be sure to soak them properly before cooking. High Heat Cooking: Ensure your wok or skillet is hot before adding ingredients. High heat helps to achieve that perfect sear on the beef and keeps vegetables crisp. Customize Your Veggies: Feel free to swap in your favorite vegetables or whatever you have on hand, such as snap peas or carrots, for a personal touch. {{image_4}} You can swap beef for chicken or tofu. Chicken works well if you slice it thinly. Tofu gives a nice texture and absorbs flavors well. For chicken, cook it for about 5-7 minutes until it is no longer pink. If using tofu, stir-fry it for about 4-5 minutes until golden brown. This keeps your dish tasty and fresh. Feel free to change the veggies based on what you like or what’s in season. Try snap peas, carrots, or bok choy for variety. You can also add mushrooms for extra umami. Adjust cooking times to keep vegetables crisp. Cook them just until they are bright in color and tender, but not mushy. If you need a gluten-free meal, choose gluten-free rice noodles. They cook similarly to regular rice noodles. You can find them in most stores. For the sauce, use gluten-free soy sauce. This keeps the flavor without gluten. Always check labels to ensure all ingredients are safe for your diet. To store your sticky beef noodles, first cool them down. Place them in a shallow container. This helps the steam escape and keeps the noodles from getting mushy. Use an airtight container to keep them fresh. If you have a lot left, split them into smaller portions. You can store leftovers in the fridge for up to three days. If you want to keep them longer, freeze them. They can last up to three months in the freezer. Make sure to label your containers with the date. When reheating sticky beef noodles, the goal is to keep them tasty. The best method is to use a pan. Heat it on medium-low. Add a splash of water or broth to keep the noodles moist. Stir gently, so they don’t stick together. Avoid using the microwave if you can. It often makes the noodles soggy. If you must use it, heat them in short bursts. Stir in between to help them warm evenly. Leftovers can last in the fridge for three days. They stay safe to eat if kept at the right temperature. If they smell off or look strange, it's best to toss them. In the freezer, the sticky beef noodles last for three months. After this time, they may lose flavor and texture. Always check for signs of spoilage, like a bad odor or discoloration, before eating. You can serve Sticky Beef Noodles with various side dishes. Here are some great options: - Spring rolls: These add a nice crunch and flavor. - Asian slaw: A fresh salad can balance the meal. - Steamed dumplings: They offer a soft contrast to the noodles. For sauces or dips, consider these suggestions: - Sweet chili sauce: It adds a sweet and spicy kick. - Soy sauce: A classic choice for added saltiness. - Peanut sauce: This rich dip pairs well with beef. Yes, you can prepare Sticky Beef Noodles in advance. Here are some meal prep tips: - Marinate the beef: Do this a day before to deepen the flavor. - Cook the noodles: You can cook them a few hours ahead. - Store separately: Keep beef, noodles, and veggies in separate containers. For heating, use these methods: - Microwave: Heat in short bursts, stirring in between. - Stovetop: Reheat in a pan over low heat with a splash of water. To spice up your Sticky Beef Noodles, try these ideas: - Add chili flakes: Sprinkle them into the sauce for heat. - Use sriracha: Mix it into the marinade for a bold kick. - Chili oil: Drizzle it on top before serving for extra flavor. Adjust your spice level by tasting as you go. Start small and add more if needed. To prevent noodles from sticking, follow these cooking techniques: - Use enough water: Boil noodles in plenty of water. - Stir gently: Keep them moving in the pot while cooking. - Don't overcook: Follow the package instructions for timing. For rinsing and storing noodles, keep these tips in mind: - Cold water rinse: After cooking, rinse in cold water to stop cooking. - Toss with oil: A little oil can help keep them separate when stored. Sticky Beef Noodles blend rich flavors with simple techniques. From marinating beef to stir-frying veggies, each step builds taste. Remember, using fresh ingredients boosts texture and nutrition. You can customize this dish easily, too, with protein or veggie swaps. Proper storing and reheating keep leftovers fresh. With these tips, your Sticky Beef Noodles will impress everyone. Enjoy your cooking journey!

Sticky Beef Noodles Flavorful and Easy Dinner Recipe

To make Garden Veggie Quiche Cups, gather these fresh ingredients: - 1 cup diced bell peppers (mix red, yellow, and green) - 1 cup fresh spinach, finely chopped - 1 small zucchini, grated - 1/2 cup cherry tomatoes, halved - 1 small red onion, diced - 4 large eggs, room temperature - 1/2 cup milk (dairy-free options are great too) - 1 cup shredded cheese (cheddar or mozzarella works well) - 1 teaspoon dried oregano - Salt and freshly cracked pepper to taste - 1 package phyllo dough or 12 pre-made pastry shells - Olive oil for greasing You can swap ingredients based on what you like or have at home. Try these ideas: - Use kale instead of spinach for a bolder flavor. - Replace zucchini with shredded carrots for sweetness. - Choose feta cheese instead of cheddar for a tangy twist. - If you’re avoiding dairy, almond or oat milk works perfectly. - Instead of phyllo, use puff pastry or gluten-free shells if needed. Fresh ingredients make a big difference. Here are some tips: - Buy vegetables that are firm and colorful. - Look for eggs that are free-range for the best flavor. - Store veggies in a cool, dry place until you’re ready to cook. - Use fresh herbs right before serving to boost flavor. - Make these quiche cups the day you plan to serve for the best taste. {{ingredient_image_2}} To start, gather your ingredients. You need fresh veggies, eggs, milk, and cheese. Use a mix of colors to make your quiche cups pop. Dice the bell peppers, chop the spinach, and grate the zucchini. Halve the cherry tomatoes and dice the red onion. Preheat your oven to 375°F (190°C). Grease a muffin tin with a bit of olive oil. If using phyllo dough, stack 2-3 sheets. Brush each layer lightly with olive oil. Cut into squares large enough to fit in the muffin tin. Press these squares into the cups. If you use pre-made pastry shells, just place them in the tin. In a large bowl, crack the eggs and pour in the milk. Whisk them until smooth. Add in the diced bell peppers, chopped spinach, grated zucchini, halved cherry tomatoes, diced red onion, shredded cheese, dried oregano, salt, and pepper. Stir until the veggies are well mixed with the egg blend. Carefully pour this mixture into each pastry cup. Fill them about 3/4 full. Bake in your preheated oven for 18-20 minutes. Look for firm eggs and a golden top. Once done, let them cool for a few minutes. Use a knife to loosen the edges, then lift the cups out gently. Enjoy your tasty Garden Veggie Quiche Cups! For the best results, keep an eye on the cooking time. Bake the quiche cups for 18-20 minutes. The eggs should be set, and the tops should rise. If you see a slight jiggle, that’s fine. Just remember to check around the 18-minute mark. Every oven is a bit different, so use your judgment for perfect results. These quiche cups shine at brunch. Pair them with a fresh salad or fruit. A light vinaigrette can add zest to your plate. If you want to add protein, serve with crispy bacon or sausage. They also pair well with a glass of chilled lemonade or iced tea. Feel free to mix and match until you find your favorite! To get that lovely golden color on top, brush the pastry with olive oil before baking. This helps it brown nicely. If you want extra color, place the cups under the broiler for a minute. Keep a close watch, as they can brown quickly. A golden top makes these cups look as good as they taste! Pro Tips Fresh Ingredients: Use fresh vegetables for the best flavor and nutrition. Local farmers' markets often have the freshest produce available. Cheese Variations: Experiment with different types of cheese like feta or goat cheese for a unique twist on flavor. Make Ahead: These quiche cups can be prepared in advance and stored in the refrigerator. Reheat them in the oven for a quick breakfast or snack. Perfect Portioning: Use a measuring cup to pour the egg mixture into the cups for consistent sizing and even baking. {{image_4}} You can change the cheese to fit your taste. Try feta for a tangy flavor. Goat cheese adds creaminess and a bit of zest. For a sharper kick, use Gruyère or Swiss cheese. Mixing different cheeses can create a fun flavor blend. Just remember, cheese makes everything better! Want more protein? Add cooked bacon or ham for a savory touch. You can also use diced turkey or chicken. If you prefer plant-based options, try chickpeas or black beans. They add heartiness and nutrition. Just make sure to chop your protein into small bits for even mixing. Feel free to swap out veggies based on the season. In spring, use asparagus or peas for a fresh taste. Summer brings zucchini and corn, which are great choices. In fall, think of adding squash or sweet potatoes. Winter is perfect for kale or hearty root veggies. This keeps your quiche cups interesting and fresh! After enjoying these quiche cups, store leftovers in an airtight container. Place them in the fridge to keep them fresh. They stay tasty for up to three days. If you want to keep them longer, consider freezing. To reheat, simply place the quiche cups in the oven at 350°F (175°C). Heat for about 10-15 minutes. This way, they regain their warm, fluffy texture. You can also use a microwave. Heat in 30-second intervals until warm, but they may not be as crispy. For meal prep, freeze the quiche cups after they cool. Wrap each cup in plastic wrap, then place them in a freezer bag. They can last up to two months in the freezer. When ready to eat, thaw overnight in the fridge and reheat as mentioned. Yes, you can use many vegetables in these quiche cups. Think about using broccoli, kale, or mushrooms. Just make sure to chop them small so they cook well. Mix and match your favorites. This recipe is very flexible, which makes it fun to create your own version. You can even add herbs like chives or dill for extra flavor. To make the quiche cups gluten-free, swap out the phyllo dough or pastry shells for gluten-free options. You can use gluten-free puff pastry or a gluten-free pie crust. Check the labels to ensure they meet your needs. You can also make a crustless version by simply greasing the muffin tin and pouring in the filling. This way, you skip the crust altogether. These quiche cups pair well with many sides. A fresh salad is a great choice. You can also serve fruit, like berries or melon, for a sweet touch. For drinks, consider a light tea or fresh juice. If you want something heartier, serve them with crusty bread. These sides will enhance the meal and make it more enjoyable. In this blog post, we explored how to make delicious quiche cups. We covered the key ingredients, tips for freshness, and handy substitutes. You learned the step-by-step instructions for prep, baking, and mixing. Tips for cooking times, serving ideas, and storage were also shared. Finally, we discussed fun variations to suit your taste. Enjoy making and sharing these tasty quiche cups. They are easy and fun! You can switch up the flavors and always impress your guests.

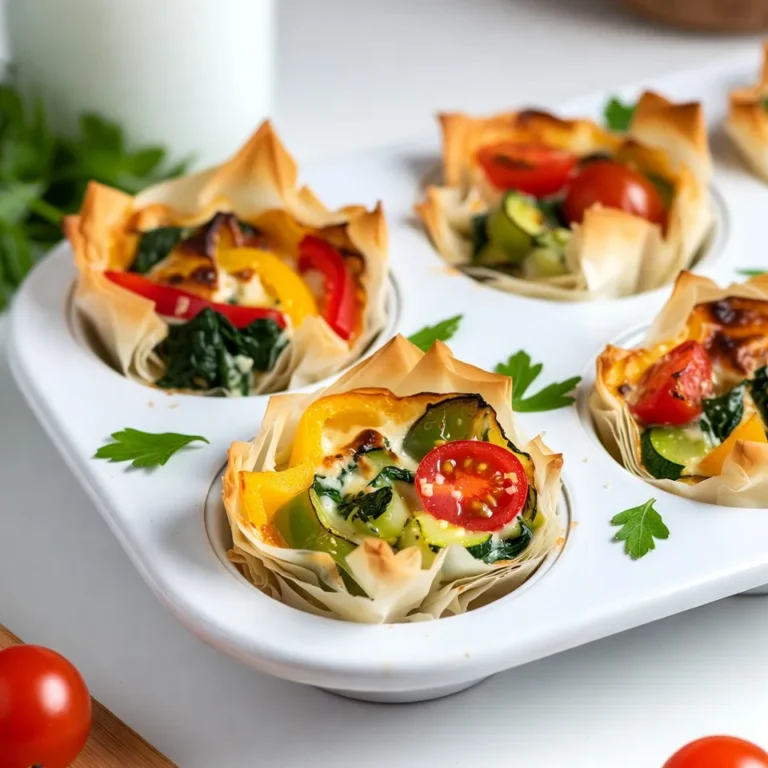
Garden Veggie Quiche Cups Fresh and Flavorful Treat

- 1 cup unsalted butter - 1 cup packed brown sugar - 1 cup granulated sugar - 2 large eggs - 2 teaspoons pure vanilla extract - 2 cups all-purpose flour - 1 teaspoon baking powder - 1 teaspoon baking soda - 1/2 teaspoon fine sea salt - 2 teaspoons ground cinnamon - 1/4 cup granulated sugar (for topping) - Optional: 1/2 cup white chocolate chips To make Snickerdoodle Blondie Bites, you need these key ingredients. Each one plays an important role. The unsalted butter adds richness and moisture. Brown sugar gives a deep flavor, while granulated sugar adds sweetness. Eggs bind everything together and add structure. Vanilla extract enhances the taste. All-purpose flour gives the blondies their chewy texture. Baking powder and baking soda help them rise. Sea salt balances the sweetness. Ground cinnamon adds warmth and spice. If you like, toss in white chocolate chips for extra sweetness. - Alternatives for butter: You can use coconut oil or margarine. - Sugar substitutes: Try using coconut sugar or a blend of stevia and sugar. - Gluten-free flour options: Almond flour or a gluten-free blend works great. These substitutions can help if you have dietary needs. Coconut oil lends a nice flavor. Using coconut sugar gives a hint of caramel. Gluten-free flour allows everyone to enjoy these bites. - Converting ingredients for larger batches: Multiply each ingredient by the number of servings you want. - Metric vs. standard measurements: 1 cup equals about 240 milliliters. Use a scale for precise measurements. If you want to make more Snickerdoodle Blondie Bites, just scale the recipe. This makes it easy to serve at parties or gatherings. Using a scale can help you get the exact amounts. {{ingredient_image_2}} First, you need to preheat the oven to 350°F (175°C). This ensures even baking. Next, prepare your 9x9-inch baking pan. You can grease it lightly or line it with parchment paper. This helps you remove the blondies easily later. In a large mixing bowl, combine 1 cup of melted unsalted butter with 1 cup of packed brown sugar and 1 cup of granulated sugar. Use a whisk to mix well. You want a smooth and creamy texture with no lumps. Next, crack in 2 large eggs and add 2 teaspoons of pure vanilla extract. Whisk everything together until well combined. In a separate bowl, whisk together 2 cups of all-purpose flour, 1 teaspoon of baking powder, 1 teaspoon of baking soda, 1/2 teaspoon of fine sea salt, and 2 teaspoons of ground cinnamon. Gradually add this dry mixture into the wet ingredients. Stir gently until just combined. Be careful not to overmix, or the blondies may become tough. Now, pour the batter into the prepared pan. Smooth the top with a spatula to make it even. For a tasty topping, mix 1/4 cup of granulated sugar with 1 teaspoon of ground cinnamon. Evenly sprinkle this mixture over the batter. Place the pan in the preheated oven and bake for 25-30 minutes. The edges should be golden brown. A toothpick inserted in the center should come out with a few moist crumbs, not wet batter. Once baked, remove the pan from the oven. Let it cool for about 10 minutes. After that, transfer the blondies to a wire rack to cool completely. When they are fully cooled, slice them into small bites or squares. Enjoy these delicious treats! To create the best Snickerdoodle Blondie Bites, keep a few key points in mind: - Avoid overmixing: Stir just until combined. Too much mixing makes the blondies tough. - Checking for doneness: Look for golden edges and a toothpick that comes out with a few moist crumbs. Want to make your blondies even better? Here are some ideas: - Adding different spices: Try nutmeg or allspice for a warm twist. - Incorporating nuts or other mix-ins: Chopped pecans or walnuts add nice crunch and flavor. Make your blondies look as good as they taste: - Serving suggestions: Use a bright plate to showcase the bites. - Decorative elements for serving: Dust with extra cinnamon sugar or drizzle with melted chocolate for flair. Pro Tips Use Fresh Spices: For the best flavor, ensure your ground cinnamon is fresh. Old spices can lose potency and affect the taste of your blondies. Don’t Overmix: When combining wet and dry ingredients, mix until just combined to keep the blondies soft and chewy. Check for Doneness: Use a toothpick to check for doneness; it should come out with a few moist crumbs but not wet batter. Storage Tips: Store any leftovers in an airtight container at room temperature for up to a week to maintain their deliciousness. {{image_4}} You can easily change the flavor of your Snickerdoodle blondies. One fun twist is adding chocolate. Mix in 1/2 cup of semi-sweet chocolate chips for a rich taste. This combo gives you the sweetness of blondies with a chocolatey kick. Another option is to make nutty blondies. You can add 1/2 cup of chopped nuts, like walnuts or pecans. These will add a nice crunch and extra flavor. Just be sure to mix them in gently so they spread evenly. If you follow a vegan diet, you can still enjoy these treats. Replace the eggs with 1/2 cup of unsweetened applesauce. Use a vegan butter alternative in place of regular butter. These swaps keep the blondies moist and delicious. For gluten-free options, simply swap all-purpose flour with a 1:1 gluten-free flour blend. Many blends work well in baking and can give you the same chewy texture. Make sure to check the labels to find a blend that fits your needs. You can make different sizes of blondies for various occasions. If you want mini bites, use a mini muffin tin. Fill each cup about halfway. Bake for about 15-20 minutes. This gives you cute, bite-sized treats that are perfect for parties. If you prefer bars, use a larger baking pan, like a 9x13 inch. Just keep an eye on the baking time. It may take a few minutes longer than the standard 25-30 minutes. Always check for golden edges and a toothpick that comes out clean. Store your Snickerdoodle Blondie Bites in an airtight container. This keeps them soft and fresh. Place parchment paper between layers if you stack them. This helps avoid sticking and keeps the tops nice. These blondies last about one week at room temperature. If you keep them in the fridge, they can last up to two weeks. Look for signs like a dry texture or a change in smell to know if they are bad. You can freeze these blondies for up to three months. To freeze, wrap them tightly in plastic wrap and place them in a freezer-safe bag. When you're ready to eat, thaw them in the fridge overnight. For a warm treat, reheat them in the microwave for about 10-15 seconds. Blondies and brownies are both bar desserts. The main difference lies in the ingredients. Blondies use brown sugar and no cocoa, while brownies contain cocoa powder and chocolate. This gives blondies a caramel flavor, while brownies taste like chocolate. Both are delicious and chewy, but they have unique flavors. Yes, you can use salted butter. Just reduce the added salt in the recipe. Salted butter adds a nice flavor, but it can make the blondies a bit saltier than intended. For a more controlled taste, I recommend using unsalted butter. Check the edges first. They should be golden brown. Insert a toothpick into the center. If it comes out with moist crumbs, the blondies are ready. If there's wet batter on the toothpick, bake them a bit longer. Avoid overbaking for a chewy texture. Absolutely! The blondies will still taste great without them. If you prefer a classic snickerdoodle flavor, just leave them out. You can also swap them for nuts or dried fruit for added texture. You can find pre-made Snickerdoodle Blondie Bites at local bakeries, specialty shops, or online. Many grocery stores also offer them in the bakery section. Check the ingredients to ensure they match your taste. To make your blondies chewier, try these tips: - Use more brown sugar than granulated sugar. - Add an extra egg. - Do not overmix the batter. - Bake for a shorter time for a softer center. These changes will help create that perfect chewy texture. We covered the essential ingredients, their substitutes, and measurements for baking blondies. I shared step-by-step instructions and tips to enhance flavor and presentation. You learned about different variations and storage techniques. In the end, blondies are a fun treat that spark creativity. With these tips, you can bake your perfect batch. Enjoy the sweet rewards of your baking adventure!

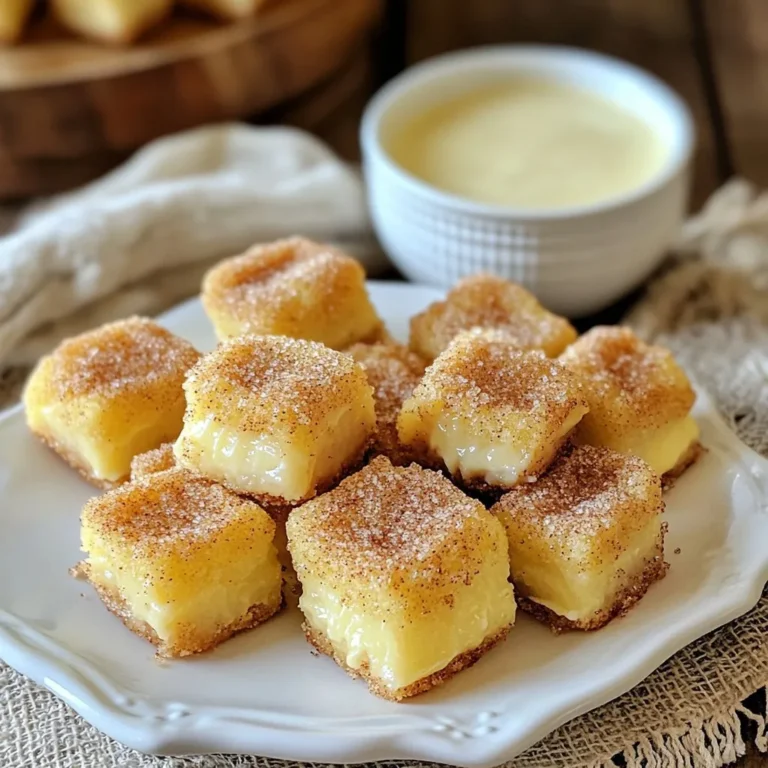
Snickerdoodle Blondie Bites Deliciously Chewy Treat

- 1 pound smoked sausage (Andouille or kielbasa recommended) - 1 cup long-grain rice - 1 bell pepper (red or green) - 1 small onion - 2 cloves garlic - 2 celery stalks - 1 cup chicken broth - 1 cup water - 1 tablespoon Cajun seasoning - 1 teaspoon dried thyme - 1 bay leaf - 2 tablespoons olive oil To make One Pot Dirty Rice with Sausage, gather these simple ingredients. The smoked sausage adds a rich flavor. I love using Andouille for its spice, but kielbasa works well too. The long-grain rice is key for texture. The bell pepper gives a pop of color and sweetness. You can choose red for a sweeter taste or green for a bolder flavor. The onion and garlic are essential for that savory base. Celery adds crunch and depth. For the liquid, I use chicken broth and water. This combo helps the rice cook perfectly. The Cajun seasoning and thyme bring warmth and earthiness to the dish. The bay leaf adds a subtle, aromatic note. Finally, don't forget the olive oil. It helps everything sauté well and brings out all the flavors. - Sliced green onions - Chopped parsley For a fresh touch, I like to garnish with sliced green onions and chopped parsley. They add a nice color and brightness to the dish. {{ingredient_image_2}} - Heat olive oil over medium heat. - Add sliced sausage and brown it well. I love starting with the sausage. It adds a lot of flavor to the dish. As it cooks, the oils release and make the pot smell amazing. You want it to have a nice brown color. This step takes about 5 to 7 minutes. - Add onion, bell pepper, celery, and garlic. - Cook until vegetables are tender. Next, toss in the chopped onion, diced bell pepper, celery, and minced garlic. Stir them often. You want these veggies to soften and become fragrant. This usually takes 3 to 4 minutes. The mix of colors looks so inviting! - Mix in the long-grain rice. - Toast for about 2 minutes. Now, add the long-grain rice. Stir it around in the pot. This helps the rice soak up all the flavors. Toast it for about 2 minutes. This step gives the rice a nice nutty taste. - Pour in chicken broth and water. - Stir in Cajun seasoning, thyme, and bay leaf. Carefully pour in the chicken broth and water. Then, add the Cajun seasoning, dried thyme, and bay leaf. Mix it all well. Bring the mixture to a gentle simmer. This is where the magic starts to happen! - Simmer the mixture. - Cover and cook for 20-25 minutes. Once it's simmering, reduce the heat to low. Cover the pot with a lid. Let it cook for 20 to 25 minutes. This is key! Don't lift the lid during cooking. It keeps the steam in and helps the rice cook perfectly. - Remove bay leaf and fluff the rice. - Adjust seasoning. After cooking, take out the bay leaf. Use a fork to fluff the rice gently. This helps separate the grains. Taste it and adjust the seasoning with salt and pepper if needed. - Plate hot and garnish. Finally, serve it hot. You can garnish with sliced green onions or chopped parsley for a fresh touch. It looks great and tastes even better! To get the best texture, do not lift the lid while cooking. This keeps steam inside. If you peek, you may lose moisture. Adjusting the liquid ratios is key. Use one part rice to two parts liquid for fluffy rice. For extra creaminess, add a bit more broth. Cajun seasoning can vary in heat and flavor. Experiment with brands to find your favorite. You can also add heat with spices like cayenne or red pepper flakes. This adds a kick to the dish. Mix spices in the beginning to let them bloom. Serve this dish in deep bowls to show off the rich colors. Top it with sliced green onions for a fresh look. Chopped parsley adds a nice pop of color, too. For a rustic feel, use a wooden spoon for serving. This makes the meal feel more inviting. Pro Tips Use Quality Sausage: Select high-quality smoked sausage for the best flavor. Andouille adds a spicy kick, while kielbasa provides a milder taste. Don’t Skip Toasting the Rice: Toasting the rice helps to develop a richer flavor and prevents it from becoming mushy during cooking. Let It Rest: After cooking, allow the rice to sit covered for about 5 minutes before fluffing. This helps to further steam the rice and enhances its texture. Customize Your Veggies: Feel free to add other vegetables like diced tomatoes, corn, or even jalapeños for added flavor and color. {{image_4}} You can switch the sausage for chicken or shrimp. Both options work well. Chicken adds a mild taste, while shrimp gives a sweet touch. If you want a vegetarian dish, use beans or lentils instead. They add protein and keep the meal hearty. You can mix in other veggies too. Try corn, peas, or diced carrots to add color and texture. Seasonal changes can inspire you. In summer, use fresh zucchini or bell peppers. In winter, root vegetables like carrots or turnips add warmth. Want more heat? Add cayenne pepper or crushed red pepper flakes. Start small, then adjust to your taste. If you prefer less spice, skip the hot ingredients. Also, keep hot sauce on the table for those who like it spicy! Store your leftover dirty rice in an airtight container. Glass or plastic containers with tight-fitting lids work best. It stays fresh in the fridge for up to four days. If you want to keep it longer, consider freezing it. To reheat, the microwave is quick and easy. Place a portion in a bowl and cover it. Heat in short bursts, stirring in between. You can also reheat on the stove. Just add a splash of water to the pot and warm gently. This keeps the rice moist and tasty. To freeze this dish, let it cool completely. Portion it into freezer-safe bags or containers. Remove as much air as you can before sealing. This helps prevent freezer burn. When you want to eat it, thaw in the fridge overnight. Reheat on the stove or in the microwave until hot. Enjoy your meal just like fresh! Yes, you can use brown rice. It takes longer to cook. Add extra water and simmer for about 40-50 minutes. The dish will have a nuttier flavor. Adjust the cooking time as needed for the best results. To make this dish vegetarian, skip the sausage. Use plant-based sausage or mushrooms for a meaty taste. Replace chicken broth with vegetable broth. Add extra veggies like zucchini or carrots for flavor. Cajun seasoning blends many spices. Common ingredients include paprika, cayenne, garlic powder, and onion powder. It adds warmth and depth to dishes. You can adjust the mix based on your taste. Yes, you can prepare it ahead. Cook the rice and sausage, then cool it quickly. Store it in the fridge for up to three days. Reheat gently in a pot or microwave before serving. You can serve this rice with a simple green salad or roasted veggies. Cornbread is a great side, too. Pairing it with hot sauce or pickled jalapeños can add extra flavor. Enjoy experimenting with different sides! This article guides you through making tasty One Pot Dirty Rice. You learned about key ingredients, like smoked sausage and rice, as well as optional garnishes. I shared step-by-step instructions to help you cook the dish without a hitch. Remember, you can change the protein or spice levels to fit your taste. Use the tips for perfect texture and flavor. Enjoy your cooking, and share this delicious meal with friends!

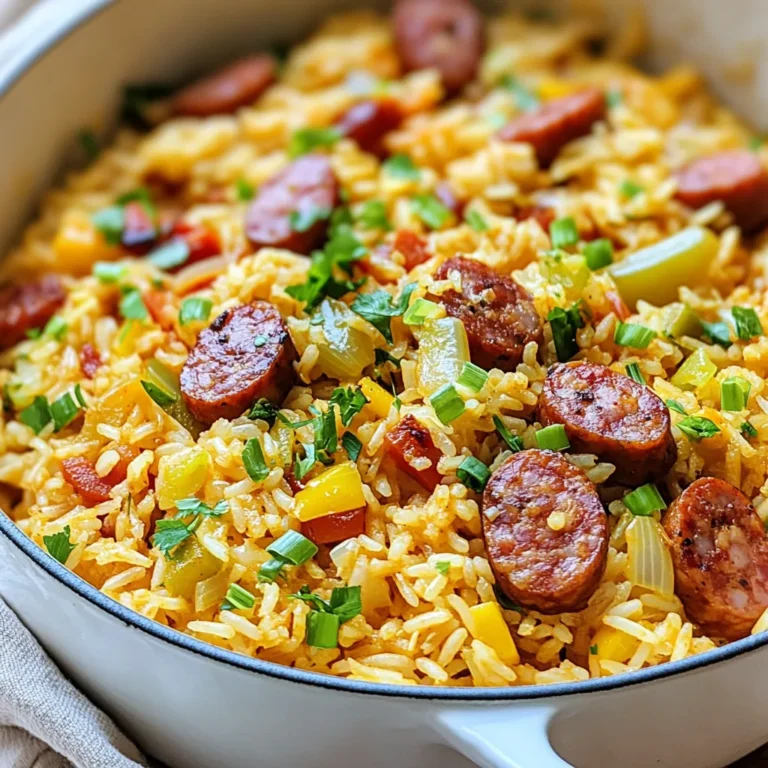
One Pot Dirty Rice with Sausage Flavorful Meal

For this dish, I use simple, fresh ingredients. Here’s what you need: - 200g pasta (penne or fusilli works best) - 200g block of feta cheese - 2 cups cherry tomatoes, halved - 4 cloves garlic, minced These ingredients come together to create a rich and creamy sauce that coats the pasta perfectly. Seasoning is key to bringing out the flavors. Here’s what I add: - 1/4 cup extra-virgin olive oil - 1/2 teaspoon red pepper flakes (optional) - Salt and freshly ground black pepper, to taste The olive oil helps the tomatoes cook down beautifully, while the red pepper flakes add a nice kick if you like heat. Garnishes make a dish look and taste even better. I like to use: - Fresh basil leaves - Grated Parmesan cheese Adding these at the end gives the dish a fresh, vibrant touch and enhances the flavor. They also make for a beautiful presentation! {{ingredient_image_2}} - Preheat your oven to 400°F (200°C). - In a large baking dish, mix together: - 2 cups cherry tomatoes, halved - 4 cloves garlic, minced - 1/2 teaspoon red pepper flakes (optional) - 1/4 cup extra-virgin olive oil - Salt and freshly ground black pepper, to taste Toss the mixture well. Make sure every tomato and garlic piece gets coated in olive oil. - Make a small space in the center of your tomato mixture. - Place a 200g block of feta cheese in that space. - Drizzle a bit more olive oil on top of the feta. - Season it lightly with salt and pepper. - Bake for about 30 minutes. The tomatoes should burst and caramelize. The feta will get soft and golden. - Bring a large pot of salted water to a boil. - Add 200g pasta, like penne or fusilli. - Cook according to package instructions until al dente. - Before draining, reserve about 1/2 cup of the pasta cooking water, then drain the pasta. - Once the feta and tomatoes are baked, use a fork to mash the feta into the tomatoes. - This creates a creamy, flavorful sauce. - Add the drained pasta to the baking dish with the sauce. - Toss everything together until the pasta is coated well. If it’s too thick, add some reserved pasta water until you like the sauce’s consistency. - Taste the pasta and adjust the seasoning with more salt and pepper if needed. - Serve warm, garnished with fresh basil leaves and a sprinkle of grated Parmesan cheese. To get the best texture from your baked feta, you need to know your oven. Baking times can vary. Most ovens will take about 30 minutes at 400°F (200°C). If your oven runs hot, check it a few minutes early. The tomatoes should burst and get a nice caramel color. To make sure the tomatoes caramelize, spread them evenly in the dish. They need space for heat to circulate. If they are too crowded, they will steam instead of caramelize. Sometimes, the sauce can be too thick after mixing. If that happens, add some reserved pasta water. Just a little at a time until you get the right consistency. Want more flavor? Add extra herbs like oregano or thyme. Fresh herbs can boost the taste and make it even better. For sides, crusty bread is a great choice. It helps scoop up the creamy sauce. You can also serve a light salad with it. Pair it with a crisp white wine to enhance the meal. Presentation matters too! Serve the pasta in shallow bowls. A drizzle of olive oil and a sprinkle of basil will impress your guests. Pro Tips Choose the Right Pasta: Opt for pasta shapes that can hold onto the creamy sauce well, such as fusilli or penne, for the best texture. Adjust the Heat: If you prefer a milder dish, skip the red pepper flakes. For extra spice, add more to taste or even a dash of hot sauce before serving. Experiment with Veggies: Feel free to add other vegetables like bell peppers or spinach to the mix before baking for added nutrition and flavor. Make it Extra Creamy: For an even creamier sauce, stir in a splash of heavy cream or a dollop of cream cheese after mashing the feta. {{image_4}} If you want to add protein, chicken or shrimp works great. Just cook them first. After baking the feta and tomatoes, mix in cooked chicken or shrimp. This adds flavor and makes the dish heartier. For a vegetarian twist, try adding chickpeas. They are packed with protein and add a nice texture. Just toss them in with the pasta for a boost. You can swap feta for goat cheese or ricotta. Goat cheese gives a tangy flavor, while ricotta adds creaminess. These cheeses melt well, making a rich sauce. Try mixing different cheeses for unique flavors. Each cheese will change the taste and texture of your dish. Experiment to find your perfect combo! Feel free to add other veggies to your dish. Zucchini and spinach are both great choices. They cook well with the tomatoes. You can also use seasonal veggies like asparagus in spring or squash in fall. This way, your baked feta pasta stays fresh and exciting. Adding more vegetables boosts nutrition too! After you enjoy your Baked Feta Pasta, you might have some leftovers. To store them, let the pasta cool at room temperature first. Then, place it in an airtight container. This helps keep the flavors fresh. You can keep the pasta in the fridge for up to three days. Make sure it's sealed tight to avoid any strong odors from other foods. When you're ready to enjoy your leftovers, you can use either an oven or a stove. If you choose the oven, preheat it to 350°F (175°C). Place the pasta in an oven-safe dish, cover it with foil, and heat for about 15-20 minutes. This keeps the pasta moist. If you prefer using the stove, add a splash of water or olive oil to the pan. Heat it over medium heat, stirring often. This way, you maintain the creamy texture. You can freeze Baked Feta Pasta if you want to save it for later. Just make sure it has cooled completely. Transfer it to a freezer-safe container. It can last in the freezer for up to two months. To thaw, place it in the fridge overnight. When you're ready to eat, reheat it using the above methods. This keeps the flavors intact. I recommend using penne or fusilli for Baked Feta Pasta. These shapes hold the sauce well. Penne’s tubular shape lets the sauce fill each piece. Fusilli’s spirals catch the sauce and bits of feta. Both options give you a tasty bite every time. Yes, you can prep this dish ahead of time. Cook the pasta and store it separately. Combine the baked feta and tomatoes in a dish, cover it, and store. On the day you want to serve it, reheat the mixture and toss with the pasta. You can easily make this dish gluten-free. Use gluten-free pasta like brown rice or quinoa pasta. These options work well and keep the flavor intact. Always check the package for cooking times, as they may vary. If you want heat, add red pepper flakes or diced jalapeños. You can mix them into the tomato mixture before baking. For an extra kick, try adding a dash of hot sauce while serving. This gives the dish a nice spicy twist. Yes, you can make this dish dairy-free. Instead of feta, use a plant-based cheese. Nutritional yeast also adds a cheesy flavor without dairy. You can also try a creamy cashew sauce to keep the dish rich and tasty. This blog post covered how to make Baked Feta Pasta step by step. We explored the main ingredients, like feta, pasta, and tomatoes. I shared tips for baking and seasoning, plus ideas for customizing your dish. In the end, this recipe is simple and fun to make. You can easily adapt it to fit your taste. Enjoy your cooking and the delightful meal that follows!

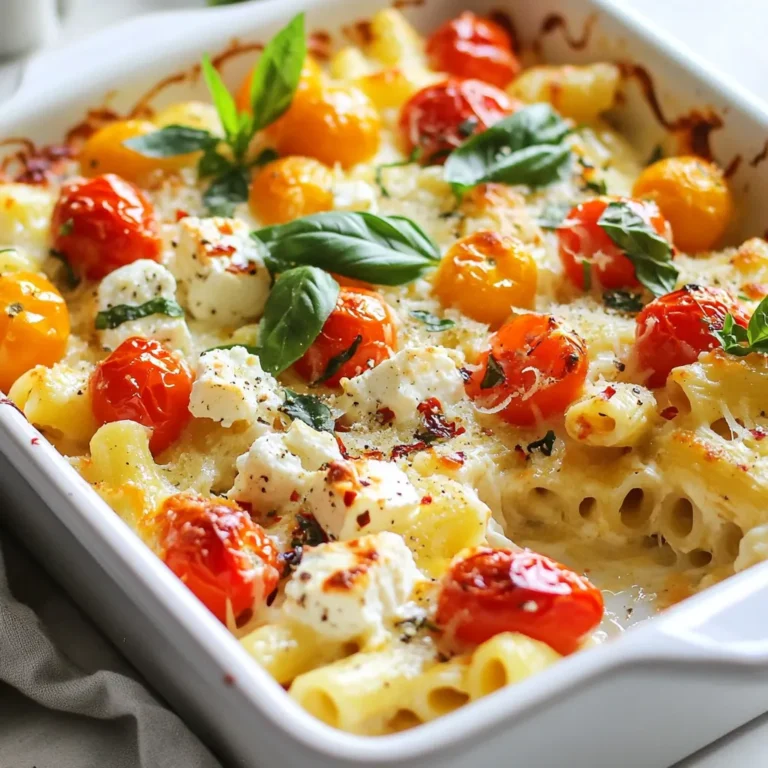
Baked Feta Pasta Simple Yet Flavorful Dish

PREV 1 … 28 29 30 … 44 NEXT
yummybiterecipes

explore

DessertsDinnerAppetizersDrinks

Our Policies

  • Cookie Policy
  • Copyright Policy
  • Disclaimer
  • GDPR Policy
  • Terms Of Use
Back to Top
  • About
  • Contact Us
  • Privacy Policy
© 2025 yummybiterecipes