FREE DINNER EBOOK! Get your copy!
  • Cookie Policy
  • GDPR Policy
  • Disclaimer
  • Terms Of Use
  • Visit my other site: Fun Cookie Recipes
yummybiterecipes
  • Home
  • Dinner
  • Desserts
  • Drinks
  • Appetizers
  • Contact
  • About
  • Privacy Policy
  • Home
  • Dinner
  • Desserts
  • Drinks
  • Appetizers
  • Contact
  • About
  • Privacy Policy
  • Cookie Policy
  • GDPR Policy
  • Disclaimer
  • Terms Of Use
Visit my other site: Fun Cookie Recipes

HOME / CATEGORIES /

Latest

- 1 cup all-purpose flour - 1/2 cup packed brown sugar - 1 teaspoon ground ginger - 1 teaspoon ground cinnamon - 1/2 teaspoon ground nutmeg - 1/2 teaspoon baking soda - 1/2 teaspoon baking powder - 1/4 teaspoon salt - 1/2 cup unsweetened applesauce - 1 large egg, beaten - 1 tablespoon molasses - 1 teaspoon vanilla extract - Cooking spray To make these air fryer gingerbread donuts, gather all your ingredients first. This makes cooking easier and more fun. Each ingredient plays a big role in flavor and texture. The all-purpose flour gives the donuts structure. Brown sugar adds sweetness and a touch of moisture. Ginger, cinnamon, and nutmeg bring warm, festive flavors. Baking soda and baking powder help the donuts rise and stay fluffy. Applesauce keeps the donuts moist and adds natural sweetness. The egg binds everything together. Molasses adds rich flavor, while vanilla gives a warm note. Finally, cooking spray is key. It prevents sticking and helps the donuts come out of the mold easily. Keep these ingredients handy, and let’s get ready to bake! {{ingredient_image_2}} In a large bowl, combine these dry ingredients: - 1 cup all-purpose flour - 1/2 cup packed brown sugar - 1 teaspoon ground ginger - 1 teaspoon ground cinnamon - 1/2 teaspoon ground nutmeg - 1/2 teaspoon baking soda - 1/2 teaspoon baking powder - 1/4 teaspoon salt Whisk everything together well. Mixing evenly is key. This helps the flavors spread throughout the donuts. In another bowl, blend the following wet ingredients: - 1/2 cup unsweetened applesauce - 1 large egg, beaten - 1 tablespoon molasses - 1 teaspoon vanilla extract Stir until the mixture is smooth. A good blend makes your donuts moist and flavorful. Gradually pour the wet mixture into the dry ingredients. Gently stir with a spatula until just mixed. It’s okay if some small lumps remain. Overmixing can make the donuts tough. Preheat your air fryer to 350°F (175°C). This takes about 5 minutes. While it heats, prepare your donut mold. Lightly spray it with cooking spray to help the donuts release easily. Spoon the gingerbread batter into the donut mold. Fill each cavity about two-thirds full. This gives the donuts room to rise. Place the filled mold into the air fryer basket. Cook for 5-7 minutes. The donuts should be golden brown. Use a toothpick to check if they are done. After cooking, let the donuts cool in the mold for a few minutes. Then transfer them to a wire rack to cool completely. Once cool, you can add a dusting of powdered sugar or a glaze. A simple glaze is made by mixing powdered sugar with a splash of water. Enjoy your holiday treat! To make great gingerbread donuts, set your air fryer to 350°F (175°C). This temperature is key for even cooking. Each air fryer is different, so check your model's manual. Some may need a bit more or less time. Keep an eye on the donuts as they cook. Do not overmix the batter. Mix just until combined. A few lumps in the mixture are okay. Overmixing can make the donuts tough. Look for a golden brown color and a clean toothpick when checking for doneness. These signs mean your donuts are ready. For special occasions, present your donuts on a festive platter. A sprinkle of cinnamon or colorful sprinkles adds a nice touch. You can also dust them with powdered sugar or drizzle a simple glaze. These details make your donuts even more appealing. Pro Tips Use Fresh Spices: Ensure your ground spices are fresh for the best flavor. Old spices can lose their potency and affect the taste of your donuts. Don’t Overmix: When combining the wet and dry ingredients, mix just until combined. Overmixing can lead to tough donuts. Check Doneness: Use a toothpick to check if the donuts are done. If it comes out clean, they are ready; if not, give them another minute or two. Experiment with Toppings: Get creative with toppings! Try different types of glazes or toppings like crushed gingerbread cookies for added texture and flavor. {{image_4}} You can easily change the flavor of your gingerbread donuts. Adding chocolate chips brings a sweet twist. Just fold in about 1/2 cup of mini chocolate chips into the batter. If you want a nutty crunch, add 1/4 cup of finely chopped nuts, like walnuts or pecans. For a spicier kick, swap in cardamom or allspice for some of the ginger. This can create a unique taste that surprises your guests. If you need gluten-free donuts, you can swap the all-purpose flour with a gluten-free blend. Many brands offer great options that work well in baking. For a vegan version, replace the egg with an extra 1/4 cup of unsweetened applesauce. This keeps the texture moist and fluffy. You can also use a plant-based egg substitute if you prefer. The applesauce will still add the sweetness you love. The glaze is where you can get creative. A simple glaze can be made with powdered sugar and a splash of water. For added flavor, mix in some vanilla or almond extract. Want something festive? Try a cream cheese frosting. Just blend cream cheese with powdered sugar and a little milk until smooth. For toppings, consider crushed candy canes, sprinkles, or even toasted coconut. These will add a fun touch to your donuts. To keep your Air Fryer Gingerbread Donuts fresh, store them in an airtight container. Place parchment paper between layers to avoid sticking. This method keeps the donuts soft and tasty. Store them in the fridge for up to 5 days. If you want to enjoy them later, refrigeration is a great choice. Freezing your donuts is easy! First, let them cool completely. Then, wrap each donut in plastic wrap. Place the wrapped donuts in a freezer bag. Squeeze out as much air as possible before sealing. You can freeze them for up to 3 months. To reheat, let them thaw in the fridge overnight. Then, warm them in the air fryer for about 3 minutes at 350°F (175°C). When stored properly, these donuts last for about 5 days in the fridge. If frozen, they can stay fresh for up to 3 months. Always check for any signs of spoilage before enjoying. The key to delicious donuts is proper storage! To check if the donuts are done, use a toothpick. Insert it into the center of a donut. If it comes out clean, the donuts are ready. If it has batter on it, cook them a bit longer. I recommend checking around the 5-minute mark. This way, you avoid overcooking. Yes, you can use a normal oven! Just preheat it to 350°F (175°C). Place the filled donut mold on a baking sheet. Bake for 10-12 minutes. Keep an eye on them to ensure they don't dry out. Use the toothpick test to check doneness as well. If you lack a donut mold, you have options! You can use muffin tins instead. Fill them halfway to create donut-shaped muffins. Another option is to shape the batter into rings on a parchment-lined baking sheet. Just make sure they’re thick enough to hold their shape. You can enhance the flavor by adding spices like clove or cardamom. For decoration, try a simple glaze of powdered sugar and milk. Add festive sprinkles on top for color. You could also dust them with cinnamon or drizzle melted chocolate for a fun touch! You now have a complete guide to making delicious air fryer donuts. We covered the ingredients, step-by-step instructions, and tips for perfecting your donuts. There are also fun variations and storage tips to keep them fresh. Use your creativity to customize flavors and presentations. Remember, air frying offers a healthier twist to traditional frying. Enjoy making these tasty treats!

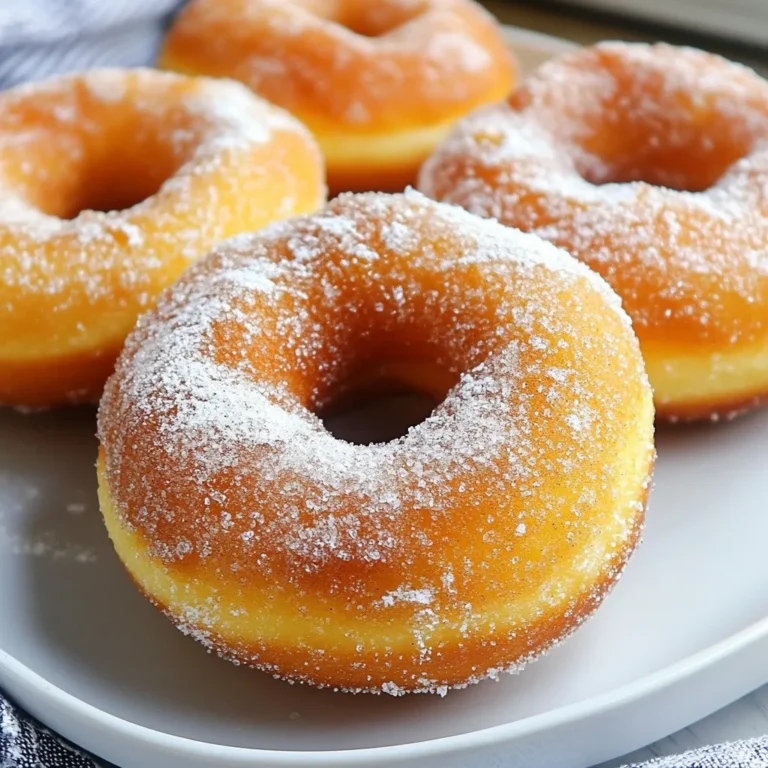
Air Fryer Gingerbread Donuts Delicious Holiday Treat

To make Garlic Butter Beef Bites with Potatoes, you'll need the following ingredients: - 1 lb beef sirloin, cut into bite-sized cubes - 4 tablespoons unsalted butter, divided - 6 cloves garlic, minced - 1 teaspoon fresh thyme leaves - 1 teaspoon smoked paprika - Salt and pepper to taste - 1 lb baby potatoes, halved - 2 tablespoons olive oil - Fresh parsley, chopped (for garnish) Each ingredient plays a key role in the dish. The beef sirloin provides a tender and juicy bite. The unsalted butter adds richness, while garlic gives it that amazing flavor. Fresh thyme adds a nice herbal note, and smoked paprika gives a warm, smoky depth. Don't forget the salt and pepper; they enhance all the flavors. The baby potatoes, roasted to crispy perfection, balance the meal with a hearty side. The olive oil helps the potatoes crisp up nicely, and the parsley is perfect for a fresh touch. Make sure to gather all these ingredients before you start. Being prepared makes cooking more enjoyable and stress-free. {{ingredient_image_2}} Preheating your oven is key. Set it to 400°F (200°C). This step helps cook the potatoes evenly. If the oven is not hot enough, the potatoes may turn out soggy. Grab a big bowl and place the halved baby potatoes inside. Drizzle two tablespoons of olive oil over them. Sprinkle salt, pepper, and smoked paprika on top. Toss everything well. This ensures the potatoes soak up all the flavors. Lay the seasoned potatoes flat on a baking sheet. Roast them for about 20-25 minutes. Flip them halfway through. This way, you get crispy edges all around. While the potatoes roast, prepare the beef. Heat two tablespoons of butter in a skillet over medium-high heat. Season the beef cubes with salt, pepper, fresh thyme, and smoked paprika. Make sure each piece is coated well. Once the skillet is hot, add the seasoned beef. Cook them in a single layer. Sear for 2-3 minutes on each side. You want a nice brown crust. If the skillet feels crowded, cook in batches. This helps them cook evenly. After the beef bites are cooked, lower the heat to medium-low. Add the remaining butter and minced garlic to the skillet. Sauté for 1-2 minutes. Stir often to keep the garlic from burning. You want it fragrant and golden, not dark brown. Now comes the fun part. Toss the crispy roasted potatoes into the skillet with the beef and garlic butter. Mix gently to coat everything well. Allow it to heat through for one more minute. For a beautiful finish, serve the dish warm. Sprinkle freshly chopped parsley on top for color. Enjoy your meal! To make your beef bites tender, start with good quality meat. I recommend using beef sirloin. Cut it into uniform cubes. This helps them cook evenly. Sear the beef in a hot skillet. This gives a nice crust. Cook the beef for just a few minutes on each side. Don't overcrowd the pan; this ensures they brown well. Want to boost flavor? Add fresh herbs like rosemary or oregano. You can also sprinkle in some red pepper flakes for heat. Try using garlic powder along with fresh garlic. This creates a more robust garlic taste. A splash of Worcestershire sauce can add depth too. Feel free to experiment with your favorite spices. Presentation matters! Serve your garlic butter beef bites on a rustic wooden board. Arrange the crispy potatoes next to the beef for a colorful display. Garnish with fresh parsley for a pop of green. You can place a small bowl of garlic butter on the side for dipping. Pair this dish with a fresh salad or steamed vegetables. This adds a nice crunch and balances the meal. Pro Tips Use High-Quality Beef: Choosing a good cut of beef, like sirloin, ensures a tender and flavorful bite. Look for marbling, which adds richness to the meat. Don’t Overcrowd the Pan: Searing beef in batches if necessary gives each piece enough space to brown properly, preventing steaming and ensuring a nice crust. Monitor Garlic Closely: Garlic can burn quickly, so keep an eye on it while sautéing. Once it’s fragrant, remove it from heat to avoid bitterness. Rest the Meat: Let the beef bites rest for a couple of minutes after cooking. This allows the juices to redistribute, keeping the meat tender and juicy when served. {{image_4}} You can switch up the beef for your bites. Try using ribeye, tenderloin, or flank steak. Each cut has its own flavor and texture. Ribeye offers rich marbling, while flank steak is leaner and great for marinating. Cut the beef into similar bite-sized pieces. This helps them cook evenly. If you want a meat-free option, replace beef with mushrooms or tofu. Portobello mushrooms give a hearty texture. You can marinate them just like beef for added flavor. For tofu, use firm or extra-firm varieties. Press out excess moisture before cooking. This helps it soak up flavors well. You don’t have to stick with baby potatoes. Try using Yukon gold, red potatoes, or sweet potatoes. Each type brings its own flavor. Yukon golds are creamy, while red potatoes are waxy and hold shape well. Sweet potatoes add a hint of sweetness. You can also add vegetables like carrots or bell peppers for more color and taste. After enjoying your garlic butter beef bites, store any leftovers in the fridge. Use an airtight container to keep them fresh. These bites stay tasty for up to three days. When reheating, use a skillet over medium heat. This method helps retain their flavor and texture. You can also microwave them, but be careful not to overcook. Just heat until warm. To keep these beef bites longer, consider freezing them. First, let the dish cool completely. Then, pack them into a freezer-safe container or bag. Remove as much air as possible to avoid freezer burn. You can freeze the beef bites and potatoes for up to three months. When ready to eat, thaw them overnight in the fridge. Reheat in the skillet for best results. Garlic butter beef bites can last in the fridge for three days. If you freeze them, they stay good for about three months. Always check for any signs of spoilage before eating. If they smell off or look strange, it’s best to toss them. Proper storage helps keep your meal fresh and tasty! Yes, you can use frozen beef. Just make sure to thaw it first. Place it in the fridge overnight. If you need it fast, submerge the beef in cold water for about an hour. Once thawed, pat it dry. This helps the beef sear better. Cook the beef bites as usual. You may need a minute longer to cook them through. Garlic Butter Beef Bites pair well with many sides. Here are some tasty options: - Creamy mashed potatoes - Steamed green beans - Roasted carrots - A fresh garden salad - Rice or quinoa for a heartier meal These sides add color and flavor to your plate. They also balance the richness of the beef. Yes, you can prep this dish ahead of time. Cook the beef bites and potatoes, then cool them down. Store them in airtight containers in the fridge. They last for up to three days. When ready to eat, reheat in a skillet over medium heat. Add a bit of butter for extra flavor. To check if the beef is done, use a meat thermometer. Aim for 130°F for medium-rare and 140°F for medium. If you don’t have a thermometer, cut a piece in half. The inside should be warm and slightly pink. Remember, the beef will cook more after you take it off the heat. This is called carryover cooking. This blog post covers the steps to make garlic butter beef bites with baby potatoes. We discussed key ingredients, clear instructions, tips for perfecting your dish, and various options for customization. You can easily adjust this recipe for your taste, whether you prefer different cuts of beef or vegetarian options. Remember to store leftovers properly for later enjoyment. Enjoy making this simple yet flavorful meal, whether you are a beginner or an experienced cook. Your next delicious dinner is just a few steps away!

Garlic Butter Beef Bites with Potatoes Satisfying Meal

To make Moroccan Chicken Briouats, gather these tasty ingredients: - 1 lb ground chicken - 1 medium onion, finely chopped - 2 cloves garlic, minced - 1 tsp ground cumin - 1 tsp ground cinnamon - 1/2 tsp ground ginger - 1/2 tsp cayenne pepper (adjust based on your spice preference) - 1/2 cup fresh parsley, chopped - 1/4 cup dried apricots, finely chopped - 1/4 cup slivered almonds, toasted - 1 package phyllo dough (approximately 16 sheets) - 1/2 cup unsalted butter, melted - Salt and freshly ground black pepper to taste - Honey, for drizzling (optional) If you want a different twist, consider these options: - Ground turkey works well for a leaner choice. - Ground lamb adds rich flavor and a touch of tradition. - For a vegetarian version, try using cooked lentils or mushrooms. - Shredded rotisserie chicken can save time and still taste great. When choosing phyllo dough, keep these points in mind: - Look for fresh phyllo dough in the freezer section. - Check the package for any tears or holes. - Make sure it is not expired for the best results. - Thaw it in the fridge overnight for even use. - Keep the phyllo covered with a damp cloth while working to prevent drying. With these ingredients and tips, you're ready to create delicious Moroccan Chicken Briouats! {{ingredient_image_2}} Start by heating a large skillet over medium heat. Add the finely chopped onion. Sauté the onion for about 3-4 minutes until it becomes soft and clear. This step builds the first layer of flavor. Next, toss in the minced garlic. Cook for one more minute. You want the garlic to smell great, which means it's ready for the next step. Now it's time to add the ground chicken. Stir in the ground cumin, ground cinnamon, ground ginger, cayenne pepper, salt, and black pepper. Cook this mixture for 6-8 minutes. It should turn golden and fully cooked. Once done, take the skillet off the heat. Mix in the chopped parsley, dried apricots, and toasted almonds. Let this filling cool for about 10 minutes. This cooling time makes it easier to handle later. Preheat your oven to 375°F (190°C). Grab a sheet of phyllo dough and place it on a clean surface. Lightly brush it with melted butter. Add another sheet on top and brush that with butter too. Cut the phyllo into strips that are about 4 inches wide. At one end of each strip, place a tablespoon of the chicken filling. Now, fold the phyllo over the filling to create a triangle. Keep folding along the strip to maintain that triangle shape. Brush the completed briouats with more melted butter. Place them on a baking sheet lined with parchment paper. Repeat this until all the filling is used. Bake the briouats for 20-25 minutes until they turn golden and crispy. If you like a hint of sweetness, drizzle honey over them before serving. To get a crispy texture, follow these tips: - Use fresh phyllo dough: Fresh dough gives the best crunch. Check the date on the package before buying. - Butter layers: Always brush melted butter between layers of phyllo. This adds flavor and helps with crispiness. - Don’t crowd the baking sheet: Give each briouat space on the sheet. They need room for hot air to circulate. - Bake on high heat: Set your oven to 375°F (190°C). This helps the phyllo crisp up quickly. Here are some common mistakes to avoid for perfect briouats: - Not cooking the filling enough: Make sure your chicken is fully cooked before you wrap it. This prevents soggy briouats. - Skipping the cooling step: Let the filling cool before using it. Hot filling can steam the phyllo and make it soggy. - Using too much filling: Less is more. Overfilling can cause the phyllo to tear or break. - Ignoring the brushing: Don’t skip buttering the tops before baking. This gives them a golden color. Serve your Moroccan Chicken Briouats with these ideas: - Honey drizzle: A light drizzle of honey adds a sweet touch. It pairs well with the spices. - Mint garnish: Fresh mint leaves add color and a refreshing taste. Place them on the platter for a pop. - Dipping sauces: Consider serving with yogurt or spicy harissa sauce. These add a nice contrast to the crispy bites. - Side salads: A light salad with citrus dressing complements the rich flavors of the briouats. These tips will help you make the best Moroccan Chicken Briouats. Enjoy the process and the delicious results! Pro Tips Make it Crispier: For extra crunch, consider sprinkling a little cornmeal between the layers of phyllo dough before rolling them up. Flavor Variations: Experiment with different nuts and dried fruits, such as pistachios or figs, to give your briouats a unique twist. Keep Phyllo Covered: Always keep your phyllo dough covered with a damp cloth while working to prevent it from drying out. Serving Suggestions: Pair these briouats with a refreshing cucumber yogurt dip for a delicious contrast to the spiced chicken filling. {{image_4}} You can easily make briouats without meat. Use vegetables or legumes instead. A mix of spinach, mushrooms, and feta works well. Here’s how: - Sauté chopped onions and garlic. - Add spinach and cook until wilted. - Mix in crumbled feta and spices. This filling offers a fresh taste. It’s just as crispy and delicious. If you love heat, add more spice! Use extra cayenne pepper in the filling. You can also add diced jalapeños. Just remember, spice levels vary. Start slow, and taste as you go. The result is a flavorful kick in every bite. Think about adding some fun ingredients. You can mix in raisins for sweetness. Chopped olives add a briny twist. Try using fresh herbs like mint or cilantro. Each add-in gives a new twist to the classic recipe. The more you experiment, the more unique your briouats will be! To store leftover Moroccan Chicken Briouats, let them cool first. Place them in an airtight container. Keep the container in the fridge for up to three days. Make sure they are sealed well to avoid drying out. When you want to enjoy your briouats again, preheat your oven to 350°F (175°C). Place the briouats on a baking sheet. Bake them for about 10-15 minutes. This helps them regain their crispy texture. You can also reheat them in a skillet on medium heat. Just flip them to heat evenly. If you want to freeze briouats, follow these steps. First, let them cool completely. Then, arrange them in a single layer on a baking sheet. Freeze until solid, which takes about an hour. Once frozen, transfer them to a freezer-safe bag. They can last for up to three months. To cook frozen briouats, bake them straight from the freezer. Just add a few extra minutes to the baking time. Chicken briouats come from Morocco. They are traditional Moroccan pastries. These treats often feature a mix of spices, chicken, and nuts. The use of phyllo dough makes them crisp and flaky. They reflect the rich culinary history of Morocco. Many cultures in the region enjoy similar recipes. Briouats are popular at celebrations and family gatherings. Yes, you can make briouats ahead of time. You can prepare the filling a day before. Store it in the fridge for best results. You can also assemble the briouats earlier. Just keep them covered in the fridge. Before serving, bake them fresh. This keeps them crispy and delicious. You can pair briouats with many sides. A fresh salad adds crunch and color. Consider a simple cucumber and tomato salad. You can also serve them with yogurt sauce. This adds a cool contrast to the warm pastries. For a special touch, drizzle honey over the briouats. Enjoy with mint tea for a true Moroccan experience. In this article, we explored how to prepare delicious Chicken Briouats. We covered the key ingredients and offered substitutions for ground chicken. You learned tips for selecting phyllo dough and cooking the filling. I shared ways to ensure a crispy finish and avoid common mistakes. Finally, we discussed variations and storage options. Cooking can be fun and rewarding. With practice, your Chicken Briouats will impress everyone. Enjoy your cooking journey!

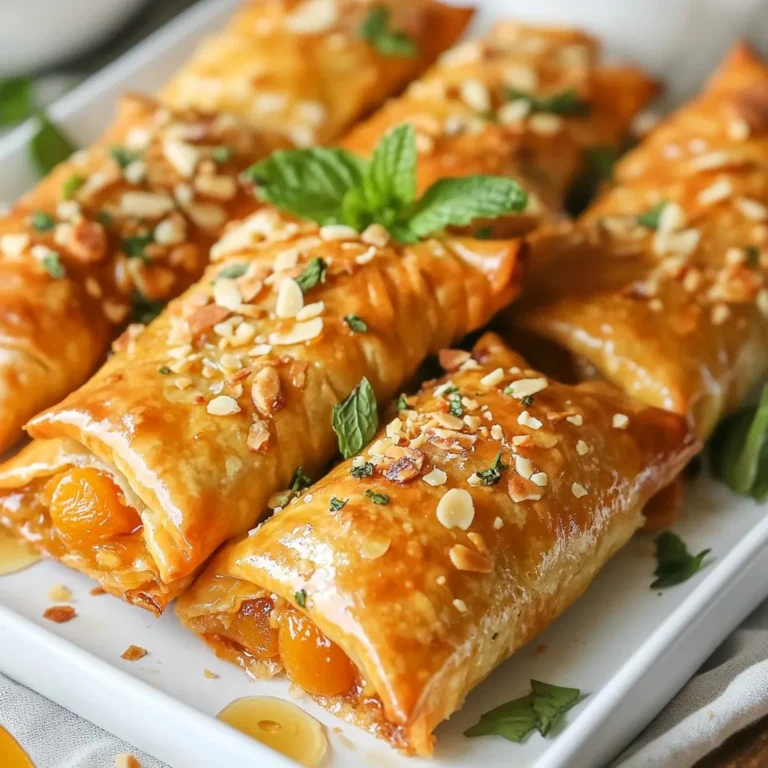
Moroccan Chicken Briouats Crisp and Flavorful Treat

- 1 lb boneless, skinless chicken thighs - 4 cloves garlic - ¼ cup plain yogurt - 3 tablespoons extra virgin olive oil - 4 large pita breads or flatbreads - Ground cumin - Ground coriander - Smoked paprika - Turmeric - Ground cinnamon - Salt and freshly ground black pepper - 1 cup shredded romaine lettuce - 1 large ripe tomato - ½ cucumber - ¼ red onion - ¼ cup tahini sauce or creamy garlic sauce Gathering the right ingredients is key. Start with chicken thighs. They stay juicy and full of flavor. Garlic is your flavor hero, bringing depth to the marinade. Yogurt adds creaminess and tenderizes the chicken. Olive oil keeps everything moist during cooking. Next, let's spice things up! You need cumin and coriander for warmth. Smoked paprika adds a lovely smokiness. Turmeric brings a bright color and earthy flavor. A touch of cinnamon gives a hint of sweetness. Salt and black pepper are must-haves to balance all tastes. Finally, fresh ingredients make your wrap shine. Shredded romaine lettuce adds crunch. Diced tomatoes and cucumbers provide freshness. Thin slices of red onion add a zesty bite. Don't forget the tahini or creamy garlic sauce! It adds that final touch of creaminess. Now you have everything to make these garlic chicken shawarma wraps a hit! {{ingredient_image_2}} - In a medium bowl, combine minced garlic, cumin, coriander, smoked paprika, turmeric, cinnamon, yogurt, olive oil, salt, and pepper. - Coat the chicken thighs well in the marinade. - Cover the bowl with plastic wrap and refrigerate for at least 1 hour. For the best taste, marinate overnight. - Preheat your grill or a skillet over medium-high heat. - Take the chicken out of the fridge and let excess marinade drip off. - Cook the chicken thighs for about 6-7 minutes on each side. They should be charred and cooked through, reaching 165°F (75°C). - Once done, let the chicken rest for 5 minutes. Slice it into thin strips. - Warm the pita breads on the grill or skillet for about 1 minute on each side. - On each warmed pita, add a layer of shredded romaine lettuce. - Top with diced tomatoes, cucumbers, and red onion slices. - Place the sliced chicken on the veggies, then drizzle with tahini or garlic sauce. - Carefully roll up each pita, folding in the sides to secure the filling. You can cut them in half for easier handling. - Opt for overnight marination for deeper flavor. - Adjust seasoning levels to your taste. This lets you control the spice. Marinating your chicken is key. I recommend letting it sit overnight. This allows the spices to soak in fully. If you like it spicier, add a pinch more paprika or garlic. You can also try adding lemon juice for a zesty twist. - Use a meat thermometer for best results. - Manage heat to avoid burning chicken. Cooking the chicken just right is vital. The meat should reach 165°F (75°C) inside. I use a meat thermometer for this. It's easy and helps avoid undercooking. When cooking, keep the heat at medium-high. This helps to get a nice char without burning the outside. - Serve with fresh herbs. - Pair with dipping sauces. When serving, I love to add fresh herbs like parsley or mint. This adds color and freshness. Place your wraps on a wooden board, cut in half to show off the fillings. A small bowl of tahini sauce on the side is perfect for dipping. Pro Tips Marination Matters: Allowing the chicken to marinate overnight will yield a more intense flavor, as the spices and garlic penetrate the meat more deeply. Grill Marks: For those beautiful char marks, ensure your grill or skillet is well preheated before adding the chicken. This helps to sear the meat and lock in juices. Pita Perfection: Warm the pita bread just until pliable; overcooking can make them stiff and difficult to wrap. A light toast enhances the flavor and texture. Freshness is Key: Use fresh vegetables and herbs for your wraps. They not only add vibrant color but also contribute to the overall freshness and crunch of each bite. {{image_4}} You can swap the chicken for beef or lamb. Both meats add a rich flavor. Beef works well with the same spices, creating a hearty dish. Lamb offers a unique taste that pairs nicely with the garlic and spices. For a plant-based option, try marinating tofu or tempeh. These substitutes soak up the same spices, giving them great flavor. Experimenting with sauces can elevate your wraps. Try a yogurt sauce or a spicy harissa. Yogurt adds creaminess, while spicy sauces can kick up the heat. Adjust the spice levels to fit your taste. If you like mild flavors, keep it simple. For bold flavors, add extra chili or garlic to your sauce. Adding more vegetables can make your wraps even better. Bell peppers add crunch and color, while avocado gives a creamy texture. You can also use different types of lettuce or greens. Spinach or kale can make your wraps even healthier. Mix and match to find your favorite combination. To keep your garlic chicken shawarma wraps fresh, refrigerate them. They stay good for up to 2 days. If you want the best taste, store the wraps and their fillings separately. This will help keep everything fresh and tasty. You can freeze cooked chicken for later meals. First, let it cool down. Then, wrap it in airtight containers. This keeps the chicken safe and prevents freezer burn. You can enjoy it anytime without losing flavor. To reheat your chicken, thaw it in the refrigerator overnight. This helps the chicken warm evenly. You can then reheat it in a skillet or microwave. If using a skillet, heat it over medium heat until hot. In the microwave, use short bursts to warm it up. Enjoy your wraps just like they were fresh! To marinate chicken well, mix ingredients in a bowl. Use garlic, spices, yogurt, and oil. Make sure the chicken is fully coated. Cover the bowl and chill it in the fridge. The best marinating time is at least 1 hour. For deeper flavor, marinate overnight. This allows the spices to soak in well. Yes, you can prep garlic chicken shawarma wraps in advance. Marinate the chicken a day before. Cook it and store the chicken in the fridge. You can also chop the veggies ahead of time. Keep the veggies in separate containers. This keeps them fresh. Assemble the wraps just before eating. This way, you keep the pita soft and tasty. There are many great sides to serve with shawarma wraps. You can pair them with a fresh salad. Try tabbouleh or a simple cucumber salad. Hummus also makes a great side dip. For drinks, serve with mint tea or lemonade. These will balance the meal and add flavor. Enjoy your wraps with these tasty sides! In this guide, you explored the key ingredients for delicious garlic chicken shawarma wraps. You learned the best ways to marinate, cook, and assemble the wraps. I also shared tips for storage and variations, so you can customize your meal. Embrace these steps, and you'll create tasty wraps that impress everyone. Enjoy experimenting with flavors, and make each wrap your own!

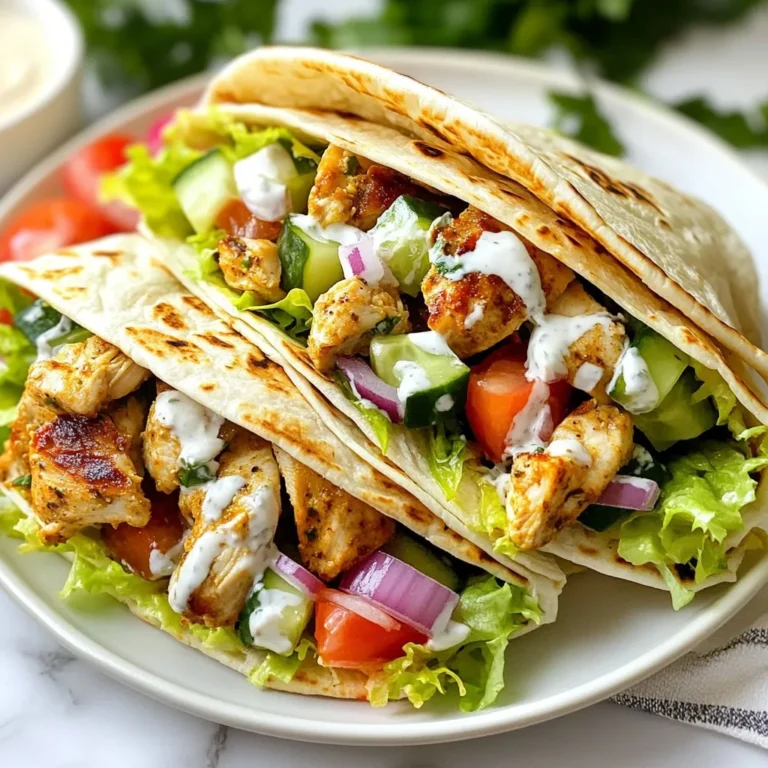
Garlic Chicken Shawarma Wraps Savory and Flavorful Meal

- 2 tablespoons olive oil - 1 medium onion, diced - 2 cloves garlic, minced - 3 medium carrots, sliced - 2 celery stalks, chopped - 1 teaspoon dried thyme - 1 teaspoon dried rosemary - 6 cups chicken broth - 2 cups shredded cooked chicken - 1 cup frozen peas - Salt and freshly ground pepper, to taste - Fresh parsley, finely chopped, for garnish Each ingredient plays a key role in your chicken soup. Olive oil helps cook the veggies and adds a rich taste. Onion and garlic bring depth and aroma to the soup. Carrots and celery add sweetness and crunch, while dried thyme and rosemary give it that cozy flavor. Chicken broth serves as the soup's base, making it warm and hearty. Using shredded cooked chicken, especially rotisserie, saves time and enhances flavor. Frozen peas add color and a sweet bite. Don't forget to season it well with salt and pepper. Finally, a sprinkle of fresh parsley brightens the dish and adds freshness. Having these ingredients ready helps you make a comforting chicken soup that warms the soul. {{ingredient_image_2}} In a large pot, heat olive oil over medium heat. When the oil is hot, add the diced onion. Sauté the onion for 3-4 minutes until it looks soft and clear. Next, stir in the minced garlic. Cook it for one more minute until it smells great. Be careful not to burn the garlic, as it can turn bitter. Now, add the sliced carrots and chopped celery. Stir the mix occasionally. Cook for another 5 minutes. You want the veggies to soften and let out their natural flavors. Sprinkle in the dried thyme and rosemary. These herbs will add depth to your soup. Stir well to mix the spices with the vegetables. After that, carefully pour in the chicken broth. Increase the heat to bring the soup to a gentle simmer. Once the soup is simmering, add the shredded chicken and frozen peas. Let the soup cook for another 10-15 minutes. This allows the flavors to blend nicely. Before you serve, taste the soup. Adjust the seasoning with salt and freshly ground pepper based on your liking. Enjoy your warm soup, garnished with a sprinkle of fresh parsley for a pop of color. For a great chicken soup, start with good chicken broth. A rich broth adds depth to your soup. You can use store-bought or homemade. If you choose store-bought, look for low-sodium options. This helps you control the salt in your dish. When it comes to vegetables, fresh is best. Fresh veggies bring bright flavors. However, frozen vegetables work well too. They are often picked at peak ripeness. This keeps their taste and nutrients intact. Adding a splash of acidity can brighten your soup. A squeeze of lemon juice works wonders. It balances the flavors and adds a fresh zing. You can also try vinegar for a different twist. Don't be afraid to experiment with spices. Besides thyme and rosemary, consider adding bay leaves or dill. Each herb brings a unique taste. Play around and find what you love! Using a heavy-bottomed pot is key. It distributes heat evenly and prevents burning. This ensures your soup cooks well without sticking. Maintain a gentle simmer as you cook. A rolling boil can make your soup cloudy. It also overcooks the chicken. Simmering allows flavors to blend beautifully. It creates that cozy comfort you crave in chicken soup. Pro Tips Use Rotisserie Chicken: For a quicker meal, grab a rotisserie chicken from the store. It adds great flavor and saves you time on cooking the chicken from scratch. Fresh Herbs for Flavor: If available, use fresh thyme and rosemary instead of dried. Fresh herbs will enhance the aroma and taste of your soup significantly. Adjusting Consistency: If you prefer a thicker soup, you can blend a portion of the soup and mix it back in. This will give your soup a creamy texture without adding dairy. Freezing Tips: This soup freezes well! Store in airtight containers for up to 3 months. Just reheat on the stove when you’re ready to enjoy it again. {{image_4}} You can swap the chicken for turkey. This change works well, especially during the holidays. Turkey adds a nice flavor, and the soup remains comforting. For a vegetarian option, try using beans or lentils. They provide protein and keep the soup hearty. You can also add tofu for a different texture. Adding lemon or lime can brighten your soup. Just a squeeze before serving can lift the taste. You can also experiment with fresh herbs like basil or cilantro. They add freshness and a unique twist to your soup. Try mixing in dill for a warm, cozy flavor. Including noodles or rice makes the soup more filling. Egg noodles cook quickly and soak up flavors. If you prefer rice, use cooked rice to avoid mushiness. You can also boost the soup with extra vegetables. Spinach or corn adds color and nutrients. Peas are great, but feel free to get creative! To store leftover chicken soup, place it in an airtight container. Make sure it cools before sealing. You can keep it in the fridge for about 3 to 4 days. If you want to enjoy it later, freezing is a great option. Chicken soup lasts up to 4 days in the fridge. It may lose flavor after a few days. Always check for any off smells or signs of spoilage before eating. To freeze chicken soup without losing flavor, let it cool first. Pour it into freezer-safe containers. Leave some space at the top for expansion. You can also use freezer bags for easy storage. Just make sure to remove as much air as possible. When you’re ready to eat, thaw the soup in the fridge overnight. For quick thawing, place the container in cold water. Reheat it gently on the stove over low heat. Stir often to make sure it heats evenly. You can also use a microwave, but be careful not to overheat it. Enjoy your cozy soup again! The best way to make chicken soup from scratch is to use fresh ingredients. Start with good chicken broth for a rich base. Sauté onions and garlic in olive oil for flavor. Then, add carrots and celery for sweetness and crunch. Let everything simmer together to meld the flavors. Yes, you can use raw chicken. If you use raw chicken, cook it first in the pot. Sauté it until it is browned. Then, add the broth and other ingredients. Let it simmer until the chicken is cooked through. Shred the chicken before serving. To make chicken soup healthier, use low-sodium broth. Add more vegetables, like spinach or kale, for extra nutrients. You can also use herbs like parsley for flavor without added salt. Lastly, opt for skinless chicken to reduce fat content. Absolutely! You can add vegetables like green beans, corn, or zucchini. Just make sure to chop them into small pieces. This way, they cook evenly and blend well with the soup. Feel free to get creative with your favorite veggies! Chicken soup pairs well with many sides. You can serve it with crusty bread or soft rolls. A fresh salad also complements the soup nicely. For a heartier meal, try it with a side of rice or quinoa. You learned how to make easy homemade chicken soup packed with flavor. From choosing fresh ingredients to adjusting spices, you can customize your soup to fit your taste. Remember, using high-quality broth and simmering gently makes a difference. You can even switch proteins or add extras like noodles. Always store your leftovers well for later enjoyment. With these tips, you can create a comforting meal that warms the heart, no matter the season. Happy cooking!

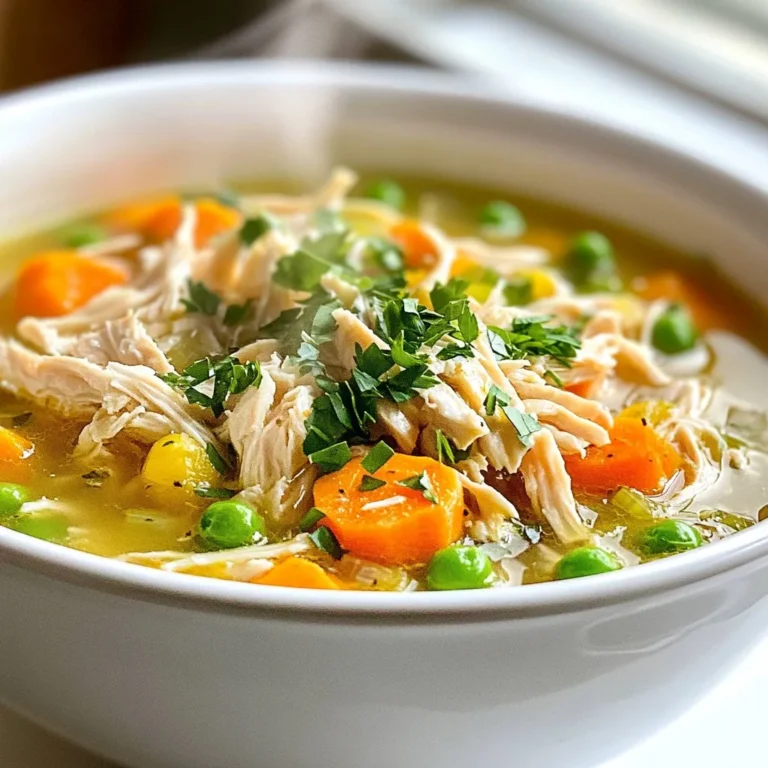
Easy Homemade Chicken Soup Flavorful Comfort Recipe

To make a no-bake Oreo cheesecake, you need simple ingredients. Here’s a list of what you will need: - 24 Oreo cookies (plus 4 extra, crushed, for topping) - 1/4 cup unsalted butter, melted - 16 oz cream cheese, softened to room temperature - 1/2 cup powdered sugar - 1 teaspoon pure vanilla extract - 2 cups heavy whipping cream, chilled - 1/4 cup chocolate sauce for optional drizzling This dessert is easy to prepare. It combines rich cream cheese with sweet Oreos. The buttery crust holds everything together. You can use chocolate sauce for extra flavor or skip it. The crushed Oreos on top add a nice crunch. Each ingredient plays a role in creating a creamy delight. {{ingredient_image_2}} To start, I take 24 Oreo cookies and place them in a food processor. I pulse them until they turn into fine crumbs. The texture should feel like sand. Next, I pour in 1/4 cup of melted butter. I pulse it again a few times until the mix sticks together. Now, I transfer this cookie mixture to a 9-inch springform pan. Using the back of a flat-bottomed glass, I press the mix into the bottom. I make sure it is packed down tightly and evenly. After packing, I place the crust in the fridge for at least 15 minutes to set. For the filling, I grab a large mixing bowl. I add 16 oz of softened cream cheese and beat it with a hand mixer on medium speed. I mix until it looks smooth and creamy, which takes about 2 minutes. I then slowly add 1/2 cup of powdered sugar and 1 teaspoon of vanilla extract. I keep mixing until there are no lumps left. In a separate bowl, I pour in 2 cups of chilled heavy whipping cream. I whip it on high speed until stiff peaks form. This takes a little time, but it’s worth it. I carefully fold the whipped cream into the cream cheese mix, doing this in batches. I use a spatula and make sure not to deflate the whipped cream. Next, I remove the crust from the fridge. I pour the cheesecake filling over the crust, spreading it out evenly. For an extra touch, I sprinkle 4 crushed Oreo cookies on top of the filling. This gives it nice texture and flavor. I cover the cheesecake with plastic wrap and place it back in the fridge. I let it chill for at least 4 hours. For the best flavor, I recommend chilling it overnight. The longer it sits, the better it tastes! Using room temperature ingredients is key. It helps the cream cheese blend smoothly. Cold cream cheese can cause lumps. Allow it to sit out for 30 minutes. This simple step makes a big difference. To avoid lumps in the filling, mix slowly at first. Gradually add the sugar and vanilla. Always scrape down the bowl to catch any lumps. Lastly, fold in the whipped cream gently. This keeps the mixture light and airy. For an elegant serve, slice the cheesecake neatly. Use a sharp knife dipped in hot water. Wipe the knife between cuts for clean edges. Present the slices on decorative plates for a fancy touch. Garnishing can enhance your cheesecake. Add a dollop of whipped cream on each slice. You can also place a whole Oreo on top. This makes it look extra special and inviting. Drizzling chocolate sauce adds a rich touch. Pour it over each slice before serving. It adds sweetness and a nice look. You can use store-bought sauce or homemade. If you want to mix it up, try other toppings. Fresh fruit like strawberries or raspberries works well. You can also use crushed nuts or caramel sauce. These options add fun textures and flavors. Pro Tips Use Cold Cream Cheese: Ensure your cream cheese is at room temperature for easy mixing. If you forget to take it out in advance, you can cut it into small pieces and microwave it for about 10-15 seconds to soften it quickly. Chill the Whipping Cream: For the best results, make sure your heavy whipping cream is thoroughly chilled before whipping. This helps achieve stiff peaks more easily. Experiment with Flavors: Feel free to customize your cheesecake by adding different extracts like almond or coconut, or by folding in mini chocolate chips for extra texture and flavor. Longer Chill Time for Better Texture: Although you can serve the cheesecake after 4 hours, allowing it to chill overnight will enhance the flavors and improve the cheesecake's overall texture. {{image_4}} You can easily change the flavor of your no-bake Oreo cheesecake. One fun way is to add fruit purees. Think strawberries, raspberries, or even mango. Just mix in about half a cup of the puree when you make the filling. This gives a fresh taste and bright color. Another way to switch it up is by trying different cookie types. Instead of Oreos, use chocolate wafers, peanut butter cookies, or even vanilla cookies. Each type will give your cheesecake a new twist. If you need a gluten-free option, use gluten-free cookies. Many brands offer gluten-free versions that taste great. You can swap the regular Oreos for these without changing the recipe too much. For a vegan cheesecake, you can replace cream cheese with a vegan cream cheese. Use coconut cream or whipped coconut milk in place of the heavy cream. This way, you can enjoy a creamy dessert without dairy. Making mini cheesecakes is a fun twist. Just use a muffin tin instead of a springform pan. Line each cup with cupcake liners to make serving easy. When using a muffin tin, reduce the chilling time. Check them after about 2 hours. They should feel firm to the touch. Removing them from the tin can be tricky; let them chill completely to make it easier. To keep your no-bake Oreo cheesecake fresh, store leftovers in the fridge. Place the cheesecake in an airtight container. If you don't have one, cover it tightly with plastic wrap. This helps keep it moist and tasty. You can freeze slices or the whole cheesecake. Wrap the cheesecake well in plastic wrap and then foil. This keeps out air and prevents freezer burn. For best results, thaw the cheesecake in the fridge overnight. This helps regain its creamy texture. Your cheesecake stays fresh for about 5 days in the fridge. Look for signs like a sour smell or mold. If you see either, it's best to toss it. Always trust your senses to ensure your dessert is safe to eat! Yes, you can use other cookies for the crust. Here are some great options: - Chocolate graham crackers - Digestive biscuits - Vanilla wafers - Oreos with different flavors, like mint or peanut butter Feel free to mix and match! Each cookie adds a unique taste. The cheesecake needs at least 4 hours to chill. For the best taste and texture, let it sit overnight. This allows the flavors to blend nicely. Cover it tightly to keep it fresh while it chills. Yes! Making this cheesecake a day ahead is a smart choice. It saves you time on the day you plan to serve it. Plus, the flavors become richer as they meld together. Store it in the fridge to keep it fresh. No springform pan? No problem! You can use a regular pie pan or an 8x8 baking dish. Just press the crust firmly into the bottom. If using a pie pan, you may need to scoop out the cheesecake slices carefully. Enjoy the fun of making it your own! You can make a great Oreo cheesecake with simple steps and easy ingredients. We covered how to prepare the crust, make the filling, and chill it properly. I shared tips for perfecting the texture and serving ideas to impress your guests. You can even try fun variations and storage methods to keep it fresh. Enjoy this sweet treat and feel free to experiment with flavors. Making this cheesecake brings joy to any gathering. You’ll impress everyone with your skills and taste!

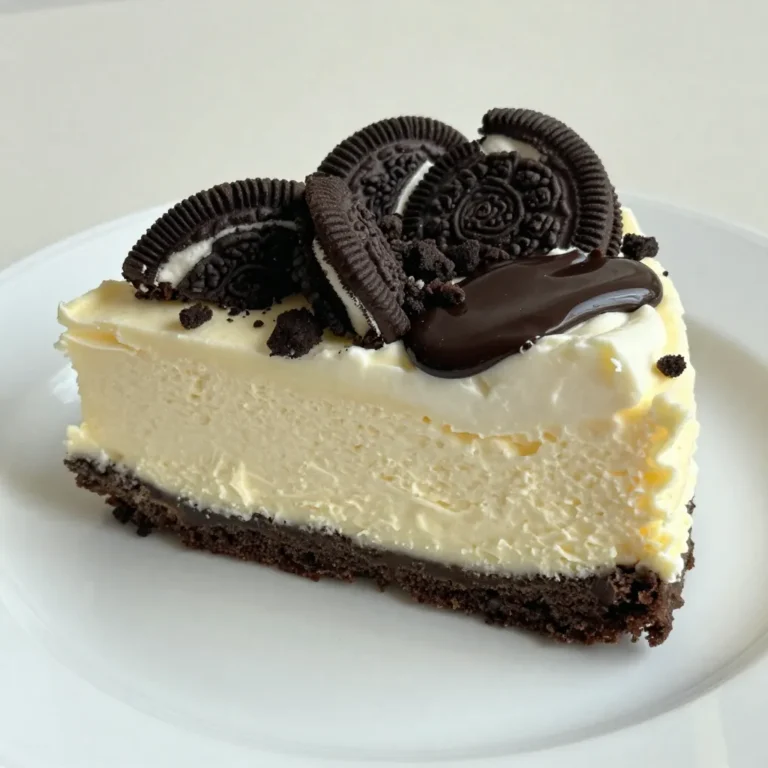
No-Bake Oreo Cheesecake Creamy Dessert Delight

To make the perfect gingerbread hot chocolate, you need a few key items: - Milk options: Use 2 cups of milk. You can choose dairy or non-dairy like almond, soy, or oat. - Chocolate types: Use 1/2 cup of semi-sweet chocolate chips. For a richer taste, dark chocolate works well too. - Spices for gingerbread flavor: You will need ground ginger, ground cinnamon, and ground nutmeg to add warmth and depth. Toppings can elevate your gingerbread hot chocolate experience: - Whipped cream varieties: Top your drink with whipped cream for a creamy finish. You can use regular or flavored whipped cream. - Crushed gingerbread cookies: Add crushed gingerbread cookies on top for crunch and extra flavor. - Additional garnishes: Consider using cinnamon sticks or a slice of gingerbread for a delightful touch. These ingredients and toppings will help you create a cozy and inviting drink, perfect for cold days. Enjoy your gingerbread hot chocolate! {{ingredient_image_2}} 1. Start by grabbing a medium saucepan. Pour in 1 cup of fresh water and 2 cups of milk. You can use dairy or a non-dairy option like almond, soy, or oat milk. 2. Set the saucepan over medium heat. Warm the mixture until it gently simmers. Watch closely to avoid boiling. This keeps the drink creamy. 3. Once the milk and water are warm, add 1/2 cup of semi-sweet chocolate chips. You can swap these for dark chocolate if you like a richer taste. 4. Add 2 tablespoons of unsweetened cocoa powder. Use a whisk to stir constantly. Keep mixing until the chocolate melts and the mix is smooth. 1. After the chocolate is melted, add flavor! Stir in 1 teaspoon of ground ginger, 1 teaspoon of ground cinnamon, and 1/4 teaspoon of ground nutmeg. 2. Add 2 tablespoons of brown sugar. Adjust this based on how sweet you want your drink. Mix well until the spices and sugar blend evenly. 3. Remove the saucepan from heat. Stir in 1 teaspoon of pure vanilla extract. This gives a nice touch of sweetness and aroma. 1. Carefully ladle the gingerbread hot chocolate into your favorite mugs. Fill them generously. 2. Top each mug with a fluffy cloud of whipped cream. 3. For a festive finish, sprinkle crushed gingerbread cookies on top. You can also add a cinnamon stick or a slice of gingerbread for extra charm. To make your gingerbread hot chocolate creamy, avoid boiling the milk and water. If you let it boil, you may lose that smooth texture. Instead, heat the mixture until it simmers gently. This keeps everything rich and velvety. Also, use a whisk while stirring. It helps blend the chocolate and cocoa powder smoothly. A whisk makes the drink feel light and fluffy. You can easily tweak the sweetness of your hot chocolate. Start with the 2 tablespoons of brown sugar in the recipe. If you like it sweeter, add more. If you prefer it less sweet, reduce the amount. You can also explore other sweeteners. Try maple syrup or honey for a different taste. These options add unique flavors to your drink. To give your hot chocolate some extra flair, think about adding more spices. A pinch of allspice or cloves can bring warmth and depth. You can also try flavored syrups. For example, a hint of caramel or hazelnut syrup can make your drink special. These little additions can turn your gingerbread hot chocolate into a cozy treat. Pro Tips Use Fresh Spices: Freshly ground spices can significantly enhance the flavor profile of your hot chocolate, adding a vibrant kick of warmth and aroma. Experiment with Chocolate: Try blending different types of chocolate, such as white chocolate or flavored chocolate, to create unique variations of your gingerbread hot chocolate. Chill for Iced Version: For a refreshing iced treat, prepare the hot chocolate as directed, allow it to cool, and serve it over ice with whipped cream on top. Garnish Creatively: Use crushed peppermint candies, a drizzle of caramel, or a sprinkle of cocoa powder as alternative garnishes for an exciting twist to the traditional presentation. {{image_4}} You can easily make this drink dairy-free. Use almond, soy, or oat milk instead of regular milk. Each option adds a unique taste. Almond milk gives a nutty flavor, while oat milk is creamy. Adjust the flavors slightly to match your choice. If you choose almond milk, add a pinch more cinnamon for balance. For soy milk, you may want to reduce sugar for a less sweet drink. You can switch up the chocolate for your hot cocoa. Use milk chocolate for a sweeter treat. Dark chocolate offers a richer taste. The type you choose changes the drink's flavor profile. You can also add flavored chocolate chips, like mint or caramel. This simple swap can create a whole new drink experience. You can create fun seasonal versions of gingerbread hot chocolate. For a peppermint twist, add peppermint extract or crushed candy canes. This adds a refreshing taste that pairs well with ginger. You can also adapt the drink for other holidays. Try adding pumpkin spice for fall or nutmeg for winter warmth. Each variation gives a new twist on this cozy delight. To keep your gingerbread hot chocolate fresh, let it cool first. Then, pour any leftovers into a clean container. Seal it well to avoid odors from the fridge. Store it in the refrigerator for up to three days. After that, the flavor may fade. When you want to enjoy your gingerbread hot chocolate again, reheating is key. Pour it into a saucepan and warm it over low heat. Stir gently to keep the smooth texture. Avoid boiling, as that can change the taste. Top it with fresh whipped cream and more crushed gingerbread cookies. This adds a nice touch. Yes, you can freeze gingerbread hot chocolate! Allow it to cool completely before freezing. Use an airtight container, leaving some space for expansion. It will stay good for up to a month in the freezer. To thaw, move it to the fridge overnight. Reheat it gently to enjoy that cozy flavor again. To make gingerbread hot chocolate, follow these simple steps: 1. Heat water and milk in a saucepan. 2. Add chocolate chips and cocoa powder. 3. Stir until smooth. 4. Mix in spices and brown sugar. 5. Add vanilla and serve. Key ingredients focus on: - Milk (dairy or non-dairy) - Semi-sweet chocolate chips or dark chocolate - Ground ginger, cinnamon, and nutmeg for that gingerbread flavor Yes, you can. Use cocoa powder as the main chocolate flavor. You can also add a bit of sweetener for taste. Try using chocolate syrup or a non-chocolate base, like caramel or butterscotch, for a twist. I suggest pairing it with snacks like: - Gingerbread cookies - Marshmallows - Biscotti Complementary holiday treats include: - Peppermint sticks - Snickerdoodles - Pecan pie slices You now know how to make delicious gingerbread hot chocolate. We covered key ingredients, from milk choices to spices. You learned the steps for preparation and flavoring. Plus, I shared tips for texture and sweetness. Try out variations like dairy-free options or seasonal flavors. Store leftovers smartly to enjoy later. This drink is warm and cozy, perfect for any holiday. Now it’s time to get creative and enjoy a cup of gingerbread hot chocolate!

Gingerbread Hot Chocolate Cozy and Inviting Delight

- Crusty bread options (ciabatta or baguette) - Fresh basil pesto - Mozzarella cheese - Cherry tomatoes - Sun-dried tomatoes - Extra virgin olive oil - Seasoning (salt and pepper) - Garnish options (fresh basil leaves) You need a few key items for your pesto mozzarella stuffed bread. First, pick your crusty bread. Ciabatta or baguette work best to hold all the yummy filling. Next, grab some fresh basil pesto. You can buy it or make it at home. You will also need mozzarella cheese, which adds a rich, creamy taste. Cherry tomatoes bring a burst of sweetness, while sun-dried tomatoes add depth. Don't forget extra virgin olive oil; it makes everything richer. Season with salt and pepper to bring out the flavors. Lastly, fresh basil leaves will make a beautiful garnish. With these ingredients, you will create a delightful dish that is sure to impress! {{ingredient_image_2}} 1. Preheat your oven to 375°F (190°C). This temperature is perfect for baking. 2. Take your loaf of bread and slice it in half lengthwise. You now have a top and bottom. 3. Use your fingers or a spoon to hollow out some soft bread from the center. This leaves a sturdy shell to hold your filling. 1. In a medium bowl, mix together the shredded mozzarella cheese, halved cherry tomatoes, and chopped sun-dried tomatoes. 2. Add a generous pinch of salt and freshly cracked black pepper to the cheese mixture. Stir until all flavors blend well. 1. Spread a thick layer of fresh basil pesto on both halves of the bread. Cover the whole surface for the best flavor. 2. Evenly distribute the cheese and tomato mixture over the pesto-covered sides. Press down lightly to pack it in. 3. Drizzle extra virgin olive oil over the stuffed bread. This adds richness to the filling. 1. Gently press the two halves of the stuffed bread together. Wrap them loosely in aluminum foil to keep moisture in. 2. Place the wrapped bread in your preheated oven. Bake for 15-20 minutes. You'll know it's ready when the cheese melts and the crust is golden. 3. After baking, remove the bread from the oven and carefully unwrap the foil. Let it cool for a few minutes. 4. Slice the stuffed bread into hearty portions. Garnish with fresh basil leaves for a nice touch before serving. Choosing between homemade and store-bought pesto affects taste. Homemade pesto shines with fresh basil and garlic. Store-bought pesto saves time but may lack depth. For a twist, add lemon zest or a pinch of chili flakes. These simple changes boost the flavor profile. To get the perfect crust, use ciabatta or baguette. They have a nice crunch. Bake it until golden brown. This gives a satisfying texture. To prevent soggy bread, hollow out some soft bread. This creates space for filling without too much moisture. Pair your stuffed bread with dips like marinara or a fresh salad. A crisp salad adds balance and freshness. For a lovely presentation, serve on a wooden board. Add a small bowl of extra pesto for dipping. This makes the dish even more inviting. Pro Tips Choose the Right Bread: A crusty bread like ciabatta or a baguette will hold up better against the moist filling and provide a satisfying crunch. Customize Your Filling: Feel free to add other ingredients such as cooked spinach, roasted red peppers, or even different cheeses for a unique twist. Serve Fresh: For the best flavor and texture, serve the stuffed bread immediately after baking while the cheese is still melty and the crust is crispy. Perfect Pesto: If you're making homemade pesto, consider adding a squeeze of lemon juice for brightness and a bit of garlic for extra flavor. {{image_4}} You can change up the filling to suit your taste. Adding veggies like spinach or bell peppers gives a nice crunch. They also add color and nutrients. You can also try different cheeses. Fontina or goat cheese can bring a new flavor to the dish. Mixing cheeses can create a unique taste that is fun to explore. If you need a gluten-free option, use gluten-free bread. Many brands offer tasty choices that work well. For those who want a vegan dish, swap mozzarella for a plant-based cheese. You can also use a vegan pesto made from nuts and herbs. These swaps keep the dish delicious without losing the joy of flavor. Using seasonal produce can elevate your stuffed bread. In summer, add roasted veggies like zucchini or eggplant. During the holidays, think of adding cranberries or nuts for a festive touch. These seasonal ingredients make the dish feel fresh and special, no matter the time of year. To keep your pesto mozzarella stuffed bread fresh, wrap it tightly in plastic wrap or aluminum foil. Store it in the fridge. It should stay good for up to three days. When you want to reheat it, preheat your oven to 350°F (175°C). Unwrap the bread and place it on a baking sheet. Heat for about 10-15 minutes until warm. This method keeps the crust crispy while warming the filling. If you want to save some for later, freezing is a great option. First, let the stuffed bread cool completely. Wrap it tightly in plastic wrap, then in aluminum foil. This double wrap helps prevent freezer burn. You can freeze it for up to three months. To thaw, move the bread to the fridge for several hours or overnight. When ready to eat, preheat your oven to 350°F (175°C). Unwrap the bread and bake it for 20-25 minutes. This will ensure the filling heats up and the crust gets crispy again. Enjoy your delicious bread anytime! For stuffing, I recommend using crusty bread like ciabatta or a baguette. These breads have a firm outside that holds up well. Their soft inside is great for soaking up flavors. A crusty loaf also gives a nice crunch when baked. You want bread that can stand strong against the filling. Yes, you can make this dish ahead of time. Prepare the bread and filling, then assemble it. Wrap it tightly in foil and store it in the fridge. When you're ready, just bake it. This makes it perfect for parties or quick meals. You will know the bread is done when the crust turns golden brown. The cheese should be melted and bubbly. If you press on the crust, it should feel firm. Trust your nose, too! The smell will be enticing when it’s ready. There are many tasty dipping sauces for stuffed bread! Some popular choices are marinara sauce, garlic butter, or extra basil pesto. You can also try a spicy aioli or a tangy balsamic glaze. These dips add another layer of flavor to the stuffed bread. You’ve learned how to make delicious Pesto Mozzarella Stuffed Bread. We covered the right ingredients, from crusty bread to cherry tomatoes. You now know the steps to prepare, assemble, and bake. I shared tips for flavor and texture, plus variations to suit your taste. Keep these ideas in mind the next time you want a tasty dish. With every bite, you'll enjoy the effort put into making this dish special. Enjoy creating and sharing this treat with others!

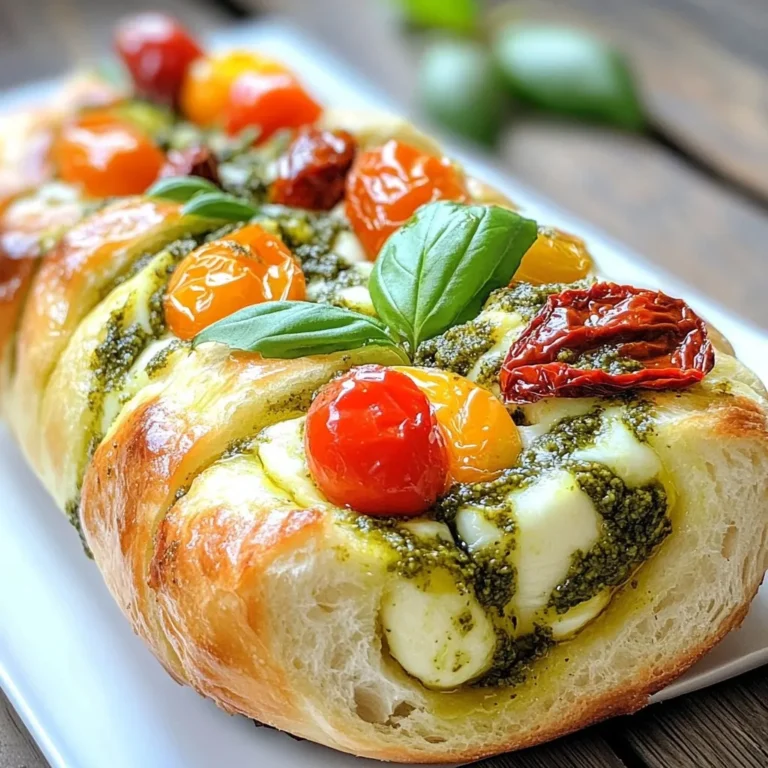
Pesto Mozzarella Stuffed Bread Savory Delight Recipe

To make these tasty blondies, you need the following items: - 1 cup unsalted butter (for browning) - 1 cup packed brown sugar - 1/2 cup granulated sugar - 2 large eggs - 1 teaspoon vanilla extract - 2 cups all-purpose flour - 1 teaspoon baking powder - 1/2 teaspoon baking soda - 1/2 teaspoon salt - 1 cup chocolate chips (semi-sweet or milk chocolate) These ingredients create a rich, buttery base that brings out the flavors. You can add a few extras to make your blondies unique: - 1/2 cup chopped nuts (walnuts or pecans) - Sea salt for sprinkling on top Adding nuts gives extra crunch. A sprinkle of sea salt enhances the sweet taste. If you need to swap some ingredients, here are a few ideas: - Use coconut oil instead of unsalted butter for a dairy-free version. - Substitute brown sugar with coconut sugar for a lower glycemic option. - Use almond flour instead of all-purpose flour for a gluten-free version. These swaps help you create a dish that fits your needs while keeping the taste great. {{ingredient_image_2}} Browning butter is key to adding rich flavor. First, use a medium saucepan. Melt 1 cup of unsalted butter over medium heat. Stir it often. You will see foam start to rise. After about 5 to 7 minutes, the butter will turn golden brown. It will smell nutty and sweet. Remove it from heat and let it cool slightly. This step gives your blondies a warm, deep flavor. Next, we mix the sugars. In a large bowl, combine the cooled brown butter, 1 cup of packed brown sugar, and 1/2 cup of granulated sugar. Use a whisk to blend them well. This creates a smooth and creamy base. After that, add 2 large eggs, one at a time. Whisk well after each egg. Finally, stir in 1 teaspoon of vanilla extract. This adds even more flavor to your blondies. Now, it’s time to bake. Preheat your oven to 350°F (175°C). Line an 8x8-inch baking dish with parchment paper. This helps with easy removal later. In a separate bowl, mix 2 cups of all-purpose flour, 1 teaspoon of baking powder, 1/2 teaspoon of baking soda, and 1/2 teaspoon of salt. Slowly add this dry mix to your wet mix. Stir gently until just combined. Do not overmix; this keeps your blondies soft and chewy. Finally, fold in 1 cup of chocolate chips and any chopped nuts you like. Spoon the batter into the prepared dish and spread it evenly. Bake for 25 to 30 minutes. The edges should look golden brown. A toothpick inserted in the center should have some moist crumbs. Let the blondies cool for 15 minutes before lifting them out. Transfer to a wire rack to cool completely before cutting. Enjoy your delicious, chewy treats! When making brown butter blondies, avoid these common slip-ups: - Overheating the butter: Watch it closely. Too much heat will burn it. - Overmixing the batter: Mix until just combined. Overmixing makes them tough. - Using cold eggs: Always use room temperature eggs for better blending. - Skipping the parchment paper: This helps you lift the blondies out easily. For soft and chewy blondies, follow these tips: - Use brown sugar: It adds moisture and a rich flavor. - Don’t overbake: Pull them out when a toothpick shows moist crumbs. - Let them cool: Letting them cool in the pan helps them set. - Add chocolate chips: They melt slightly, adding to the chewy texture. Having the right tools makes baking easier and more fun: - Medium saucepan: For browning the butter. - Mixing bowls: Use one for wet and one for dry ingredients. - Whisk: Perfect for mixing sugars and eggs. - Spatula: Great for combining ingredients without overmixing. - 8x8-inch baking dish: Ideal size for the perfect blondies. - Parchment paper: Helps with easy removal and cleanup. Pro Tips Brown the Butter Well: Ensure you watch the butter closely while browning to achieve that rich nutty flavor without burning it. The key is to look for a golden brown color and a pleasant aroma. Don’t Overmix: When combining the wet and dry ingredients, mix until just combined. Overmixing can lead to tough blondies, so be gentle! Customize Your Mix-Ins: Feel free to substitute or add different types of chocolate chips, or incorporate dried fruits like cranberries for an extra flavor twist. Store Properly: To keep your blondies fresh, store them in an airtight container at room temperature for up to a week, or freeze for longer storage. {{image_4}} You can change up the flavors in your blondies by adding different mix-ins. Here are some great ideas: - Nuts: Chopped walnuts or pecans add crunch and flavor. - Chocolate: Use dark chocolate chips for a rich taste. You can even mix semi-sweet and milk chocolate for variety. - Fruits: Dried fruits like cranberries or apricots give a sweet twist. - Spices: A pinch of cinnamon or nutmeg can warm up the flavor profile. Have fun experimenting with these options. Each add-in can make your blondies unique! If you want to try something new, here are some creative blondie ideas: - Salted Caramel Blondies: Swirl in some caramel sauce before baking for a sweet and salty treat. - Peanut Butter Blondies: Mix in creamy peanut butter to take your blondies to a new level. - S'mores Blondies: Add mini marshmallows and crushed graham crackers for a campfire classic. These recipes will surprise your family and friends. Everyone loves a good twist on a classic! You can make blondies that fit different diets too. Here’s how: - Gluten-Free: Replace all-purpose flour with almond flour or a gluten-free blend. Make sure your chocolate chips are gluten-free. - Vegan: Substitute eggs with flax eggs (1 tablespoon flaxseed meal + 2.5 tablespoons water per egg) and use coconut oil instead of butter. Choose dairy-free chocolate chips for a fully vegan treat. These options ensure everyone can enjoy the deliciousness of blondies. No one will miss the original recipe! To keep your brown butter blondies fresh, store them in an airtight container. Place a piece of parchment paper between layers to prevent sticking. Keep the container in a cool, dry place. Avoid direct sunlight. This method keeps the blondies soft and chewy. You can enjoy them for days without losing texture. For long-term storage, freezing is a great option. First, let the blondies cool completely. Cut them into squares, then wrap each piece tightly in plastic wrap. Place the wrapped blondies in a freezer-safe bag or container. Label it with the date. These can last up to three months in the freezer. When you want to enjoy them, thaw them in the fridge overnight. Brown butter blondies last up to one week when stored properly at room temperature. If you keep them in the fridge, they can last up to two weeks. Always check for freshness before eating. If you notice any changes in smell or texture, it’s best to discard them. Enjoy your delicious treats while they are at their best! Brown butter has a rich, nutty flavor. You make it by cooking unsalted butter until it turns golden brown. This process also gives it a deeper taste than regular butter. Regular butter just adds fat. Brown butter adds flavor and depth to your blondies. You'll notice a lovely aroma as it cooks, too. Yes, you can! Brown sugar is crucial for the chewy texture. Granulated sugar helps it spread evenly. You can experiment with other sugars, like coconut sugar or honey. Just know that this might change the taste and texture a bit. Stick to some brown sugar for the best results. To check if your blondies are done, look for golden edges. The center should be set but slightly soft. A toothpick test works well too. Insert it in the middle; it should come out with a few moist crumbs. If it’s wet with batter, bake a little longer. You can! To replace eggs, try using unsweetened applesauce or mashed bananas. Use 1/4 cup of either for each egg. This keeps your blondies moist. They might be a bit denser, so adjust your baking time. Try it out for a fun twist on the classic recipe. You learned how to make delicious brown butter blondies with the right ingredients and techniques. Remember to experiment with optional add-ins and substitutions for a unique twist. Avoid common mistakes to get the best texture, and use proper storage methods to keep them fresh. Blondies can be made gluten-free or vegan too. Baking is fun, and these tips will help you create the perfect treat every time. Enjoy your baking journey!

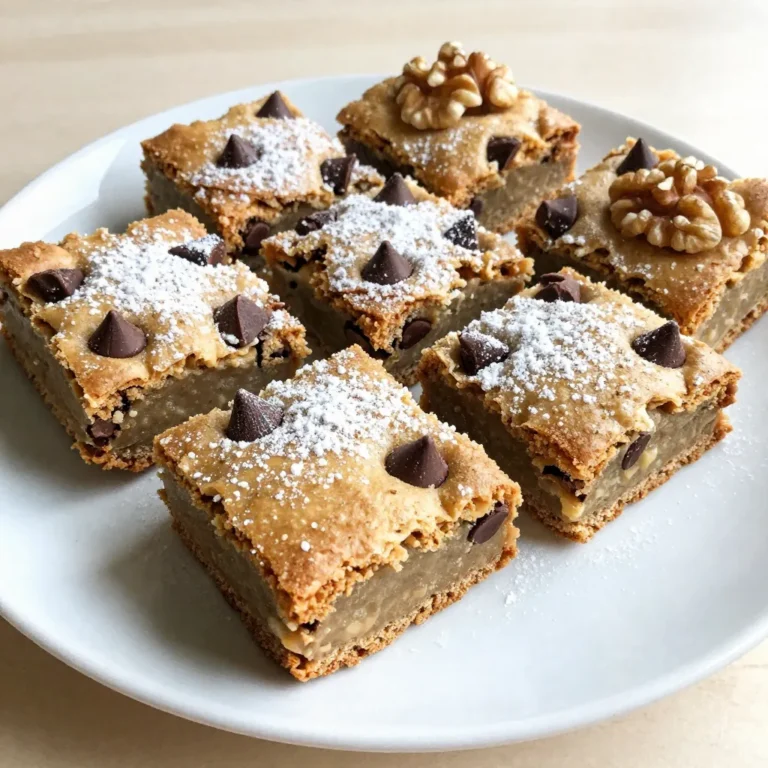
Brown Butter Blondies Soft and Chewy Dessert Delight

To make One-Pan Tuscan Chicken, you'll need: - 4 boneless, skinless chicken breasts - 2 tablespoons olive oil - 3 cloves garlic, minced - 1 cup cherry tomatoes, halved - 1 cup fresh spinach - 1/2 cup sun-dried tomatoes, chopped - 1 teaspoon dried oregano - 1 teaspoon dried basil - 1/2 teaspoon red pepper flakes - 1/2 cup cream (heavy or coconut) - 1/2 cup grated Parmesan cheese - Salt and pepper to taste - Fresh basil leaves for garnish You can easily adjust this recipe to fit your needs. Here are some ideas: - Dairy-Free: Use coconut cream and nutritional yeast instead of cream and cheese. - Low-Carb: Skip the sun-dried tomatoes or use fewer tomatoes. - Gluten-Free: This recipe is naturally gluten-free, so no changes are needed. You don't need fancy tools for this dish. Here’s what you'll need: - A large skillet for cooking - A cutting board for chopping - A sharp knife for easy cutting - A spoon for stirring - A meat thermometer to check chicken doneness With these ingredients and tools, you are ready to create a tasty One-Pan Tuscan Chicken meal! {{ingredient_image_2}} First, season the chicken breasts. Use salt, pepper, dried oregano, and dried basil. Rub the spices on both sides. Make sure each piece is coated well to get great flavor. Heat olive oil in a large skillet over medium-high heat. When the oil shimmers, add the seasoned chicken. Sear it for 5-6 minutes on each side. Look for that golden brown crust. Once seared, take the chicken out and place it on a plate. In the same skillet, add minced garlic. Cook it for about 30 seconds. Stir the garlic so it does not burn. When the garlic smells good, add halved cherry tomatoes and chopped sun-dried tomatoes. Sauté these for 2-3 minutes. Stir often until the tomatoes soften and release their juices. Next, add fresh spinach to the mix. Cook it just until it wilts, which takes about a minute. Now, pour in the cream and sprinkle red pepper flakes. Stir everything well. Let it come to a gentle simmer. This will blend all the nice flavors together. Return the seared chicken to the skillet. Spoon the creamy sauce over the top. Sprinkle grated Parmesan cheese evenly on the chicken. Cover the skillet and let it simmer for 8-10 minutes. Check the chicken's temperature; it should reach 165°F/75°C. Taste the sauce and adjust the seasonings if needed. Finish with fresh basil leaves for a beautiful look. To cook chicken breasts well, start with even thickness. Use a meat mallet or rolling pin to pound them to about 1 inch thick. This helps them cook evenly. Always season your chicken well. Use salt, pepper, oregano, and basil. Let the chicken sit for a few minutes after seasoning. This allows the flavors to soak in. When you sear the chicken, use medium-high heat. This gives a nice crust without drying it out. For spice, start with red pepper flakes. If you want more heat, add more! If you prefer mild flavors, use less. For creaminess, use heavy cream for a rich sauce. If you want a lighter option, coconut cream works well too. Taste the sauce before serving. You can always add a little more cream or spices to fit your taste. A great-looking dish makes meals more special. Serve the chicken on a bed of sautéed spinach. Drizzle the creamy tomato sauce over the top. Use fresh basil leaves as a garnish for color and aroma. For a final touch, sprinkle some extra Parmesan cheese on top. This makes the dish look inviting and delicious. Pro Tips Rest the Chicken: Let the seared chicken rest for a few minutes before serving. This allows the juices to redistribute, ensuring a moist and tender bite. Adjust the Cream: For a lighter sauce, consider substituting half of the cream with chicken broth or vegetable broth. This keeps the flavor while reducing richness. Enhance the Flavor: Add a splash of white wine to the skillet after sautéing the garlic for added depth and acidity in the sauce. Season After Cooking: Always taste and adjust the seasoning of the sauce after cooking. Fresh herbs and spices can enhance the final dish significantly. {{image_4}} You can easily make this dish vegetarian. Instead of chicken, use firm tofu or portobello mushrooms. Both options absorb flavors well. Cut the tofu into thick slices and press it to remove moisture. For mushrooms, clean and remove stems, then slice them. Cook them just like you would the chicken. This swap keeps the meal rich and satisfying. To make this dish dairy-free, switch the cream and cheese. Use coconut cream instead of heavy cream. It adds a nice sweetness. For the cheese, nutritional yeast works great. It gives a cheesy flavor without dairy. You can also use cashew cream for a creamy texture. Just blend soaked cashews with water until smooth. Herbs and spices can change your dish's taste. If you like a zesty kick, try adding lemon zest or juice. Fresh herbs like thyme or rosemary can also add depth. For more heat, consider using smoked paprika instead of red pepper flakes. Experimenting with these options can make your One-Pan Tuscan Chicken unique every time. To store leftover One-Pan Tuscan Chicken, let it cool first. Place it in an airtight container. This keeps the chicken fresh and tasty. Store it in the fridge for up to 3 days. If you want to keep it longer, freezing is a good option. When you are ready to eat leftovers, reheat gently. You can use the stove or microwave. If using the stove, warm it on low heat. Add a splash of cream or broth to keep it moist. Stir often to prevent burning. In the microwave, cover the dish to trap steam. Heat in short bursts, checking often. This helps avoid overheating. Freezing One-Pan Tuscan Chicken is simple. Place it in a freezer-safe container. Make sure to label it with the date. It will stay good for about 2 months. When you want to eat it, move the container to the fridge. Let it thaw overnight. Once thawed, reheat as mentioned above. Enjoy your delicious meal! You can pair One-Pan Tuscan Chicken with many sides. Here are some great options: - Rice: White or brown rice soaks up the creamy sauce well. - Pasta: Serve over your favorite pasta for a filling meal. - Salad: A fresh green salad adds a nice crunch and balance. - Bread: Crusty bread is perfect for dipping in the sauce. These sides enhance the meal and bring out the flavors of the chicken. Yes, you can prepare One-Pan Tuscan Chicken ahead of time. Cook the chicken and sauce, then store it in the fridge. It stays fresh for up to three days. To reheat, warm on low heat until hot. This saves time on busy days while keeping the meal tasty. To check if the chicken is done, use a meat thermometer. The internal temperature should reach 165°F (75°C). You can also cut into the chicken. If the juices run clear and the meat is no longer pink, it’s ready to eat. This ensures a safe and delicious dish every time. One-Pan Tuscan Chicken is simple and fun to make. We've covered the ingredients, cooking tips, and variations for everyone in your family. You can enjoy this dish with friends or save leftovers for later. Remember, adjusting spices or adding veggies can make it your own. I hope you feel ready to create a delicious meal that everyone will love. Happy cooking!

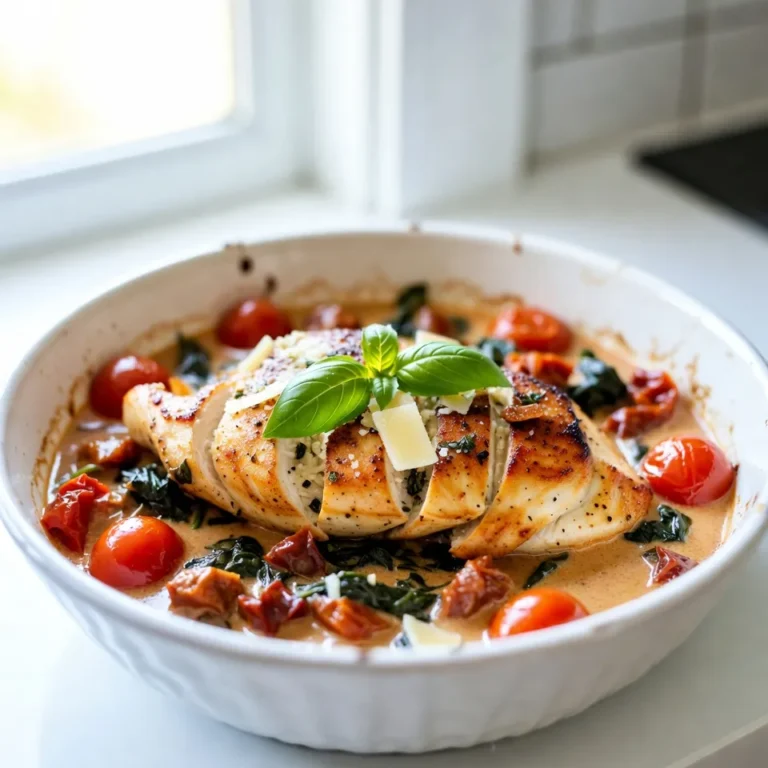
One-Pan Tuscan Chicken Easy and Flavorful Recipe

PREV 1 … 24 25 26 … 44 NEXT
yummybiterecipes

explore

DessertsDinnerAppetizersDrinks

Our Policies

  • Cookie Policy
  • Copyright Policy
  • Disclaimer
  • GDPR Policy
  • Terms Of Use
Back to Top
  • About
  • Contact Us
  • Privacy Policy
© 2025 yummybiterecipes