FREE DINNER EBOOK! Get your copy!
  • Cookie Policy
  • GDPR Policy
  • Disclaimer
  • Terms Of Use
  • Visit my other site: Fun Cookie Recipes
yummybiterecipes
  • Home
  • Dinner
  • Desserts
  • Drinks
  • Appetizers
  • Contact
  • About
  • Privacy Policy
  • Home
  • Dinner
  • Desserts
  • Drinks
  • Appetizers
  • Contact
  • About
  • Privacy Policy
  • Cookie Policy
  • GDPR Policy
  • Disclaimer
  • Terms Of Use
Visit my other site: Fun Cookie Recipes

HOME / CATEGORIES /

Latest

- 2 cups creamy vanilla ice cream - 1 cup milk (dairy or non-dairy) - 1/2 cup pure pumpkin puree - 1 tablespoon pumpkin pie spice To create a delicious pumpkin spice milkshake, start with the essentials. The creamy vanilla ice cream gives it a rich base. I love using a full-fat ice cream for extra creaminess. Next, add milk to adjust the thickness. You can choose dairy or a non-dairy milk like almond or oat. The pumpkin puree adds that warm, fall flavor we crave. Make sure it is pure pumpkin, not pumpkin pie filling. Finally, the pumpkin pie spice brings all the cozy flavors together. It’s a mix of cinnamon, nutmeg, and ginger. - 2 tablespoons maple syrup (or honey) - 1 teaspoon vanilla extract - Whipped cream for topping - Ground cinnamon for garnish - Crushed graham crackers for rim You can customize your milkshake with optional ingredients. Maple syrup or honey adds sweetness. I often go for maple syrup for its unique flavor. A splash of vanilla extract enhances the taste too. When serving, top it with whipped cream for a fun treat. Ground cinnamon on top adds a festive touch. If you want to impress, use crushed graham crackers around the rim. This adds a crunchy texture and extra flavor. For the full recipe, check the detailed steps to make this creamy seasonal delight! Start by adding the following to your blender: - 2 cups creamy vanilla ice cream - 1 cup milk (dairy or non-dairy) - 1/2 cup pure pumpkin puree - 1 tablespoon pumpkin pie spice - 2 tablespoons maple syrup (or honey) - 1 teaspoon pure vanilla extract These ingredients create your delicious base. Make sure your pumpkin puree is smooth for the best flavor. Blend all the ingredients on high speed. You want a smooth and creamy mix. This usually takes about 30 seconds. If you see any bits stuck, stop the blender. Use a spatula to scrape down the sides, then blend again. If you want a thicker milkshake, add more ice cream. For a lighter shake, just add a splash of milk. To make your milkshake special, prepare your glasses. Moisten the rim with a little milk. Dip it in crushed graham crackers for a fun crunch. Carefully pour the milkshake into the glasses. Fill them as much as you like. Top each milkshake with whipped cream. Finish with a sprinkle of ground cinnamon. Serve right away with colorful straws and enjoy the creamy, spiced goodness of your homemade pumpkin spice milkshake! You can find the full recipe if you want to try it at home. To make your pumpkin spice milkshake just right, adjust the thickness. If the shake is too thick, add more milk. A splash will help. If it is too thin, add more ice cream. Keep blending until you find the perfect mix. Want to spice it up even more? Try adding a dash of nutmeg or ginger. These flavors pair nicely with pumpkin. You can also use flavored syrups like vanilla or caramel for a twist. Experiment and find what you love! Make your milkshake look as good as it tastes. Use whipped cream on top for a fun touch. Add a sprinkle of cinnamon for color. For a crunch, dip the glass rim in crushed graham crackers. This adds flavor and makes it more fun to drink! Check out the Full Recipe to see how to prepare these delicious garnishes. {{image_4}} To make a vegan pumpkin spice milkshake, swap out a few ingredients. Use coconut or almond milk instead of dairy milk. Replace the vanilla ice cream with a creamy vegan ice cream. You can also use maple syrup for sweetness. This keeps the rich flavor while being plant-based. It’s still just as tasty. If you're looking for a low-sugar treat, use unsweetened almond milk. You can also swap maple syrup for a low-calorie sweetener, like stevia. This way, you cut down on sugar but keep the delicious taste. It’s perfect for those watching their sugar intake. Want to spice things up? Add flavors like caramel or chocolate. A drizzle of caramel syrup can add a rich sweetness. You can also mix in chocolate syrup for a fun twist. These add-ons make your milkshake even more festive and enjoyable. To keep your pumpkin spice milkshake fresh, store it in the fridge. Use an airtight container for the best results. This helps slow down melting and keeps flavors strong. If you have a lot left, consider using a freezer-safe jar. This way, your creamy treat stays tasty for longer. You can freeze your milkshake for later. Just pour it into a freezer-safe container. Leave some space at the top, as liquids expand when they freeze. It will keep well for up to two months. When you want to enjoy it again, simply take it out and thaw it. When you’re ready to drink your frozen milkshake, place it in the fridge for a few hours. This keeps the texture smooth. If you need it faster, you can thaw it on the counter for about 30 minutes. Avoid using the microwave, as it can change the texture. After thawing, give it a good stir before serving. Enjoy your delicious pumpkin spice milkshake anytime with these easy tips! You can make your milkshake healthier with a few easy swaps. Use low-fat ice cream instead of regular. Choose unsweetened almond milk for fewer calories. You can also add more pumpkin puree for fiber and nutrients. It tastes great and is good for you! Replace maple syrup with a sugar-free sweetener if you like. This way, you enjoy the same creamy flavor but with fewer sugars. Yes, you can use canned pumpkin for this milkshake. Canned pumpkin is easy and saves time. It is already cooked and pureed. Just make sure to choose the pure pumpkin, not pumpkin pie filling. This way, you avoid extra sugars and spices. Fresh pumpkin is great too, but it takes longer to prepare. Choose what works best for you! A pumpkin spice milkshake pairs well with many treats. You can serve it with warm cookies or a slice of pumpkin pie. It also goes great with spiced nuts or pretzels. The sweet and salty mix makes it even better! For a cozy evening, enjoy it with a piece of chocolate cake. Each bite enhances the milkshake's creamy flavor. You now have all the steps to make a great pumpkin spice milkshake. Start with tasty ingredients and blend them well. Remember to add your special touches to make it yours. You can also try different variations to suit your taste. Store any leftovers properly for later enjoyment. Overall, this milkshake is a wonderful treat for any season. Enjoy the process of creating and sharing this delicious drink!

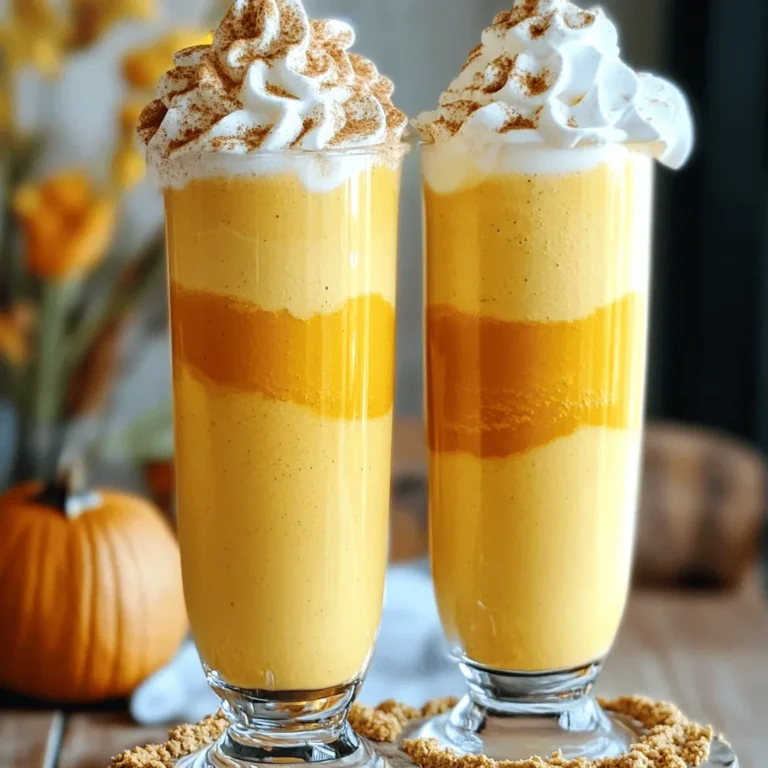
Pumpkin Spice Milkshake Creamy Seasonal Delight

- 2 cups of peeled and sliced apples - 1 cup of caramel sauce - 1 box (15.25 oz) of yellow cake mix - 1/2 cup unsalted butter, melted - 1 teaspoon ground cinnamon - 1/2 cup chopped pecans (optional) - 1 cup of brown sugar - Whipped cream or vanilla ice cream (for serving) You want to use fresh apples for this recipe. I suggest tart apples like Granny Smith or sweet ones like Honeycrisp. They work great with the caramel sauce. The sweetness of the caramel pairs well with the apples. A cup of caramel sauce can be store-bought or homemade. If you’re short on time, grab the store-bought version. If you want to make your own, it’s simple and fun! You will need a box of yellow cake mix. This mix makes it easy to prepare the cake layer. For a buttery flavor, use unsalted butter. Melt it before pouring it over the cake mix. Add a teaspoon of ground cinnamon for a warm spice note. It brings out the flavors in the apples. If you like a crunchy texture, consider adding chopped pecans. They add a nice nutty flavor. Finally, get a cup of brown sugar. This sugar helps form that delicious caramel crust on top. Don't forget to have whipped cream or vanilla ice cream ready for serving. It makes the dessert even more delightful! {{ingredient_image_2}} 1. Preheat the oven to 350°F (175°C). This sets the stage for baking. 2. Spread 2 cups of peeled and sliced apples evenly in a 9x13-inch baking dish. I love using Granny Smith for tartness or Honeycrisp for sweetness. 3. Drizzle 1 cup of caramel sauce over the apples. Make sure each slice gets some of that yummy caramel. 1. In a medium bowl, combine 1 box of yellow cake mix, 1 teaspoon of ground cinnamon, and 1 cup of brown sugar. Mix well. This will add warmth and sweetness to our dish. 2. Sprinkle the cake mix evenly over the caramel-coated apples. It should cover them nicely. 1. Pour 1/2 cup of melted butter over the cake mix layer. Try to cover as much area as possible. 2. If you want, add 1/2 cup of chopped pecans on top. They add a nice crunch! 3. Bake in the preheated oven for 40-45 minutes. Look for a golden brown top and bubbling edges. 4. Once it's done, take it out and let it cool for about 10 minutes. This helps all the flavors mix together. 5. Serve warm with whipped cream or vanilla ice cream for a delightful treat! - Choosing the right apple varieties I love using Granny Smith apples for their tartness. They balance the sweet caramel well. Honeycrisp apples also work. They add a nice sweetness and crunch. Mix and match apples for a layered flavor. - Tips for a homemade caramel sauce Making caramel sauce is simple. Just heat sugar in a pan until it melts. Stir in butter and cream for richness. This gives your dump cake a fresh taste compared to store-bought sauce. - Using pecans or other nuts Chopped pecans add a great crunch. They pair well with the soft apples and gooey caramel. You can also try walnuts or almonds for a twist. - Alternatives for cake mix If you want a twist, use spice cake mix. It adds a warm, cozy flavor to the cake. You can also try chocolate cake mix for a fun chocolatey touch. - Pairing with ice cream or whipped cream I recommend serving this cake warm. Top it with vanilla ice cream or whipped cream. The cold cream melts into the warm cake, making each bite delightful. - Ideas for garnishing and presentation For a pretty look, drizzle extra caramel sauce on top. Add a sprinkle of cinnamon for color. Place a few pecan halves on the side. It makes the dessert look fancy, even though it’s easy to make. Pro Tips Choose the Right Apples: Opt for a mix of tart and sweet apples to balance the flavors. Granny Smith and Honeycrisp work beautifully together. Homemade Caramel Sauce: If you have the time, try making your own caramel sauce for a richer flavor. It's easier than you think! Even Butter Distribution: When pouring the melted butter, aim for an even coverage to prevent any dry areas in the cake mix. Cool Before Serving: Let the dessert cool for about 10 minutes after baking. This helps the flavors meld and makes it easier to serve. {{image_4}} You can make this dessert even more fun with flavor twists. Try adding dried fruits like raisins or cranberries. They bring a sweet and chewy texture that pairs well with the apples. You can also use different cake mix flavors. A spice cake mix adds warmth and depth. Chocolate cake mix can give a rich twist. Experimenting with flavors can make each bite unique. If you need gluten-free options, many brands offer gluten-free cake mix. Look for ones that match the flavors you love. For a vegan version, swap the butter for a plant-based alternative. You can replace cream with coconut cream for a rich taste. These changes help everyone enjoy this tasty dessert. To keep your Caramel Apple Dump Cake fresh, start by letting it cool. Once it's cool, cover the dish with plastic wrap or foil. This keeps moisture in and prevents drying out. You can also transfer it to an airtight container. Store it in the fridge to keep it safe. - Best practices for refrigeration: Always let the cake cool first. Cover tightly to avoid air exposure. - How long it will last: Properly stored, it will last about 3-4 days in the refrigerator. When you're ready to enjoy the leftovers, reheating is simple. You want it warm and gooey, just like fresh. - Best methods to reheat the cake: You can use the microwave for quick reheating. Place a slice on a plate and heat for 30 seconds. If you prefer, heat in the oven. Preheat the oven to 350°F (175°C) and warm it for about 10 minutes. - Serving cold versus warm: This cake tastes great warm with ice cream. Cold, it is still tasty but less gooey. Warmed, the caramel gets melty and the flavors pop. Enjoy it your way! Can I use frozen apples? Yes, you can use frozen apples. Just thaw them first and drain excess moisture. This helps keep the dump cake from getting too soggy. Can I prepare this dessert in advance? You can prep some parts ahead. Slice the apples and mix them with caramel. Store them in the fridge. You can also mix the dry ingredients. Just bake it all when you are ready. What if the cake mix doesn't cook through? If the cake mix is not cooked, it may need more time. Cover the dish with foil to avoid burning. Check every five minutes until it cooks through. Why is my dump cake too dry? A dry dump cake could mean you used too much cake mix or not enough butter. Ensure you pour enough melted butter over the top layer for moisture. Can I use a different type of cake mix? Absolutely! You can use chocolate or spice cake mix for a fun twist. Each will give a different flavor to the dessert. How do I make this recipe more decadent? To make it richer, add chocolate chips or chunks of caramel. You can also use heavy cream instead of whipped cream for serving. This blog post covers a delicious caramel apple dump cake recipe. We explored key ingredients, simple steps, and helpful tips to perfect your cake. I shared variations to suit different tastes and dietary needs. Don't forget to store leftovers properly for later enjoyment. With this easy recipe, you can create a warm dessert that everyone will love. Enjoy baking and sharing this sweet treat with friends and family!

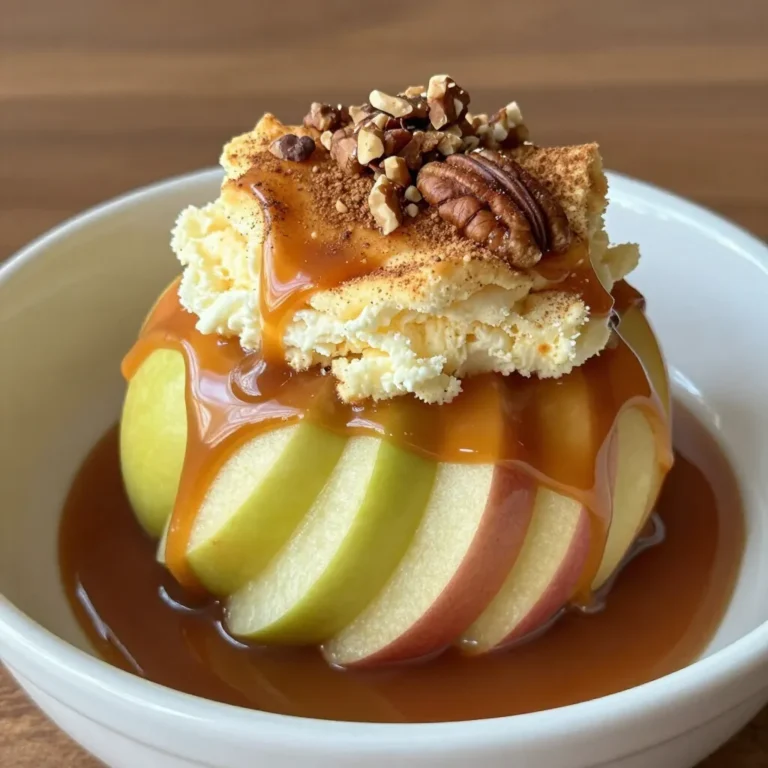
Caramel Apple Dump Cake Easy and Tasty Dessert Recipe

- 1 cup gingerbread cookie crumbs - 2 tablespoons melted butter - 1 cup cream cheese, softened - 1/2 cup powdered sugar - 1 teaspoon vanilla extract - 1 teaspoon ground ginger - 1 teaspoon ground cinnamon - 1/4 teaspoon ground cloves - 1 cup heavy whipping cream - Whipped cream for topping - Additional gingerbread cookie crumbs for garnish You can swap gingerbread cookie crumbs with graham cracker crumbs for a different base. If you want a lighter option, use low-fat cream cheese instead of regular cream cheese. For a dairy-free option, choose a plant-based cream cheese and coconut whipping cream. You can also replace powdered sugar with a sugar substitute if you prefer less sweetness. Using high-quality ingredients makes a big difference in taste. Fresh cream cheese adds creaminess and richness. Pure vanilla extract gives the best flavor, while fresh spices like ginger and cinnamon enhance the gingerbread notes. Good ingredients lead to a more delicious dessert that everyone will love. When you focus on quality, you elevate your dish. {{ingredient_image_2}} First, gather your ingredients. You need gingerbread cookie crumbs and melted butter. In a mixing bowl, combine these two. Mix until every crumb is coated. The mixture should look like wet sand. This step is key to a great crust. Next, take your serving cups or glasses. Press the crumb mixture into the bottoms firmly. Make sure it is evenly spread. This gives a nice base for your cheesecake. Once done, set the cups aside while you prepare the filling. Now, grab a separate bowl for the cream cheese filling. Use softened cream cheese and a hand mixer. Beat the cream cheese until smooth and creamy. It should not have any lumps. Slowly add powdered sugar to the bowl. Keep mixing until the sugar is fully dissolved. Then, add vanilla extract, ground ginger, ground cinnamon, and ground cloves. Stir until all the spices blend well into the cream cheese. This is where the flavor comes alive! In another clean bowl, whip the heavy cream. Use a hand mixer on high speed. Whip until stiff peaks form, which takes about 3-5 minutes. Be careful not to overwhip. If you do, it can become grainy. Now, gently fold the whipped cream into the cream cheese mixture. Use a spatula and a folding motion. This keeps your filling light and fluffy. Mix until the two are well combined and creamy. Time to assemble! Take the cream cheese filling and spoon it over the gingerbread crusts. Fill each cup about three-quarters full. Use the back of a spoon or spatula to smooth the tops. This helps with presentation. Next, cover each cup with plastic wrap. Place them in the fridge for at least 4 hours. If you have time, let them chill overnight. This helps the cheesecake set firmly. When you are ready to serve, add a dollop of whipped cream on top of each cup. For a fun touch, sprinkle extra gingerbread cookie crumbs over the whipped cream. This not only looks great but adds extra flavor too! To get the best texture for your cheesecake cups, start with room temperature cream cheese. Cold cream cheese clumps and does not mix well. When you whip the heavy cream, stop when you see stiff peaks. This keeps the dessert light and fluffy. Folding the whipped cream into the cream cheese mix gently is key. This helps keep air in the mixture. Finally, let the cheesecake cups chill long enough. Four hours is good, but overnight is even better. One common mistake is overwhipping the cream. This can make it grainy and heavy. Another mistake is not pressing the crust firmly enough. If the crust is loose, it may crumble when you serve. Be careful not to skip chilling the cups. If you serve them too soon, the texture will be too soft. Lastly, don’t forget to taste your spices before mixing. Adjusting them can enhance the flavor. For a beautiful presentation, use clear cups to show off the layers. Top each cup with a generous dollop of whipped cream. A sprinkle of gingerbread cookie crumbs adds a nice touch. You can also add a small gingerbread cookie on the rim for fun. If you want to get fancy, drizzle some caramel or chocolate sauce over the cream. This will make your cheesecake cups look festive and inviting! Pro Tips Use Fresh Spices: For the best flavor, use fresh ground spices instead of pre-ground ones. They have a more vibrant taste that will enhance your cheesecake. Chill Thoroughly: Allow the cheesecake cups to chill for a minimum of 4 hours, or overnight. This helps the flavors to meld beautifully and gives a firmer texture. Mixing Technique: When folding the whipped cream into the cream cheese mixture, use a gentle folding motion to keep the mixture light and airy, ensuring a fluffy texture. Garnish Creatively: Get creative with your toppings! Besides whipped cream and cookie crumbs, consider adding a sprinkle of nutmeg or a drizzle of caramel for extra flair. {{image_4}} You can easily switch up the flavors in these cheesecake cups. Use chocolate graham crackers instead of gingerbread for a chocolate twist. Add a hint of peppermint to the cream cheese for a fresh taste. You can also try using pumpkin spice for a fall vibe. Each flavor gives a new spin while keeping the same creamy texture. To make these cheesecake cups gluten-free, choose gluten-free gingerbread cookies. There are many brands available that taste great. For a dairy-free version, swap the cream cheese with a dairy-free alternative, like cashew cheese. Use coconut cream instead of heavy cream for a rich and creamy texture. These adjustments let everyone enjoy this dessert! These cheesecake cups shine during the holidays! For Christmas, add crushed candy canes on top for a festive touch. In the fall, you can mix in apple pie spices to give it a warm flavor. For Easter, try adding pastel-colored sprinkles for a fun look. Each season brings a chance to create something special! To keep your no-bake gingerbread cheesecake cups fresh, cover them tightly. Use plastic wrap or a lid to seal each cup. This keeps out air and moisture. Store the cups in the fridge for best results. They will stay tasty and creamy this way. You can freeze these cheesecake cups for later. To freeze, wrap each cup in plastic wrap. Place them in a freezer-safe container. This helps prevent freezer burn. When you're ready to enjoy them, move the cups to the fridge. Let them thaw overnight before serving. These cheesecake cups last about 5 days in the fridge. After that, they may lose their texture and flavor. If frozen, they can last for up to 2 months. Just remember to check for any signs of freezer burn before eating. Enjoy your festive treat! Yes, you can make these cheesecake cups ahead of time. In fact, I recommend it! Making them a day in advance helps the flavors meld. They stay fresh in the fridge for up to three days. Just be sure to cover each cup with plastic wrap. This keeps them from drying out. You can get creative with toppings! Here are some ideas: - Crushed candy canes for a minty twist. - Chopped nuts like pecans or walnuts for crunch. - Drizzle of caramel or chocolate sauce for added sweetness. - Fresh fruit like berries for a pop of color. Feel free to mix and match to suit your taste! The cheesecake is set when the filling feels firm to the touch. You can also gently shake the cup. If the filling jiggles slightly, it's not ready yet. Refrigerating for at least four hours is key. For best results, let them chill overnight. This gives the dessert time to firm up and develop rich flavors. You learned how to make tasty cheesecake cups with quality ingredients. We covered step-by-step instructions for the crust and filling. I shared tips for the right texture and ways to avoid common errors. You can also try different flavors and adjust for diets. Proper storage ensures leftovers stay fresh. Making cheesecake cups can be fun and rewarding. Enjoy experimenting and creating your own unique treats!

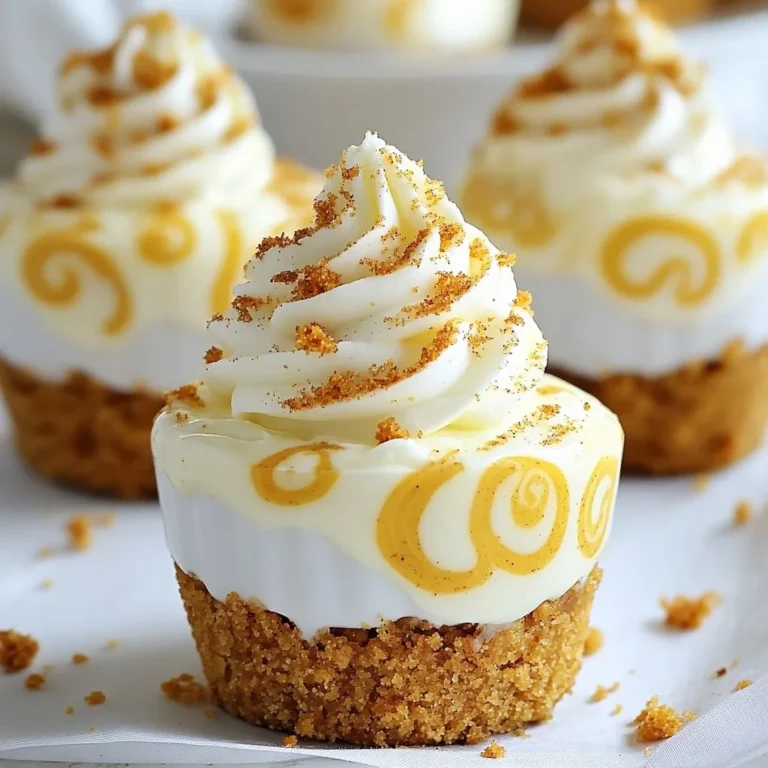
No-Bake Gingerbread Cheesecake Cups Festive Delight

These cookies need simple, easy-to-find items. Here’s what you need: - 1 cup unsalted butter, softened to room temperature - ½ cup powdered sugar, plus more for dusting - 1 teaspoon pure vanilla extract - 2 cups all-purpose flour - 1 teaspoon cornstarch - ½ teaspoon baking powder - ¾ teaspoon ground cinnamon - ¼ teaspoon ground nutmeg - ¼ teaspoon ground ginger - ¼ teaspoon ground cloves - Pinch of salt - ¾ cup pumpkin puree These ingredients create a soft, buttery cookie with the warm taste of pumpkin pie. You can add your twist to these cookies. Here are some fun ideas: - Chopped nuts for crunch - Mini chocolate chips for sweetness - A dash of maple syrup for extra flavor These extras can change the taste and texture, making each batch unique. Sometimes you may not have all the ingredients. Here are some great swaps: - Use margarine instead of butter - Replace all-purpose flour with gluten-free flour - Use brown sugar instead of powdered sugar for a richer flavor These substitutions can keep your cookies tasty while meeting your needs. {{ingredient_image_2}} To start, you need to cream the butter and sugar. In a large bowl, beat 1 cup of softened unsalted butter with ½ cup of powdered sugar. Use an electric mixer on medium speed. Mix for 2-3 minutes until it’s light and fluffy. Next, add 1 teaspoon of pure vanilla extract and mix until smooth. In a separate bowl, sift together 2 cups of all-purpose flour, 1 teaspoon of cornstarch, ½ teaspoon of baking powder, ¾ teaspoon of ground cinnamon, ¼ teaspoon each of nutmeg, ginger, and cloves, plus a pinch of salt. Whisk until all dry ingredients blend well. Gradually add this dry mixture to the creamed butter and sugar. Stir gently with a spatula until just combined. Now, fold in ¾ cup of pumpkin puree. Make sure the dough is smooth and no flour streaks remain. Divide the dough into two equal parts. Shape each part into a log, about 2 inches in diameter. Wrap each log in plastic wrap. Refrigerate for at least 2 hours until the dough is firm. Once the dough is chilled, preheat your oven to 350°F (175°C). Line a baking sheet with parchment paper. After chilling, unwrap the dough. Use a sharp knife to slice each log into ¼-inch thick rounds. Place the cookies on the baking sheet, leaving about 1 inch between each one. Bake the cookies in the preheated oven for 12-15 minutes. They should be lightly golden at the edges and just set in the center. After baking, let the cookies cool on the sheet for 5 minutes. Then, transfer them to a wire rack to cool completely. If you want a sweet touch, dust the cooled cookies with extra powdered sugar before serving. Enjoy these delightful treats! To get a soft and crumbly texture, don’t overmix the dough. Mix just until the flour blends in. The dough should feel smooth but not sticky. Chilling the dough helps too. It firms up, making it easier to slice. Always use pure pumpkin puree, not pumpkin pie filling. The filling has added sugar and spices that change the flavor. Measure your pumpkin carefully. Too much can make your cookies too wet. Stick to the recipe for the best results. These cookies shine when served warm. Pair them with a spiced latte or herbal tea. For a festive touch, add a sprinkle of cinnamon on top. They also look great on a decorative platter. Add some cinnamon sticks for a cozy feel. Pro Tips Chill the Dough: Ensure that you keep the dough refrigerated long enough to firm up. This will make slicing much easier and help maintain the cookie shape during baking. Use Fresh Spices: For optimal flavor, use freshly ground spices rather than pre-ground. This will enhance the warm, aromatic qualities of the cookies. Check for Doneness: Keep an eye on the cookies as they bake; they should be lightly golden around the edges but still soft in the center. They will continue to firm up as they cool. Storage Tips: Store the cooled cookies in an airtight container at room temperature. They can also be frozen for longer storage; just make sure to separate layers with parchment paper. {{image_4}} You can change the spice mix in these cookies. Try adding allspice for a warm flavor. Cardamom also gives a nice twist. Each spice brings a unique taste. Experiment with what you like best. Want to add a new flavor? Chopped chocolate or nuts work great! Dark chocolate chips bring a rich taste. Walnuts or pecans add crunch. Just fold them in with the pumpkin puree. This step makes each bite exciting. You can make these cookies gluten-free. Use a gluten-free flour blend instead of all-purpose flour. This swap keeps the taste and texture. Make sure to check the blend has a good starch mix. Your gluten-free friends will love these cookies! To keep your pumpkin pie shortbread cookies fresh, store them in an airtight container. Line the container with parchment paper to keep moisture away. Place the cookies in a single layer, allowing space between them to prevent sticking. You can also layer them with more parchment paper if you have many cookies. If you want to save some cookies for later, freezing is a great option. First, let the cookies cool completely. Next, arrange them in a single layer on a baking sheet. Freeze them for about an hour. Once frozen, transfer the cookies to a freezer-safe bag or container. Remove as much air as possible to avoid freezer burn. They can last up to three months in the freezer. When stored properly at room temperature, these cookies can last about one week. If you freeze them, they will stay fresh for about three months. Just remember to let them thaw at room temperature before enjoying them. This way, they taste as good as fresh-baked cookies! Yes, you can use fresh pumpkin. Just cook and mash it first. Use the same amount as canned pumpkin. Fresh pumpkin gives a nice taste, but it may have more moisture. Be sure to drain any excess water before mixing. Look for lightly golden edges and a set center. The cookies should not look wet. You can also lightly press a cookie with your finger. If it springs back, it’s done. Baking time is about 12-15 minutes. Dust the cooled cookies with powdered sugar for a sweet touch. You can also add a sprinkle of cinnamon. For more fun, try drizzling some melted chocolate on top. Arrange them on a pretty plate to impress your guests. To make vegan cookies, swap butter for coconut oil or vegan butter. Use powdered sugar that is vegan-friendly. For the egg, you can add a flax egg made from ground flaxseed and water. Make sure your pumpkin puree is also vegan. You now have all the key steps to make tasty pumpkin pie shortbread cookies. We covered ingredients, preparation, baking, and storage. You can use spices, chocolate, and nuts to add fun twists. Remember, fresh pumpkin works well too. With some practice, you’ll bake perfect cookies every time. Enjoy sharing them with friends and family during the season. Happy baking, and may your kitchen fill with warm, sweet smells!

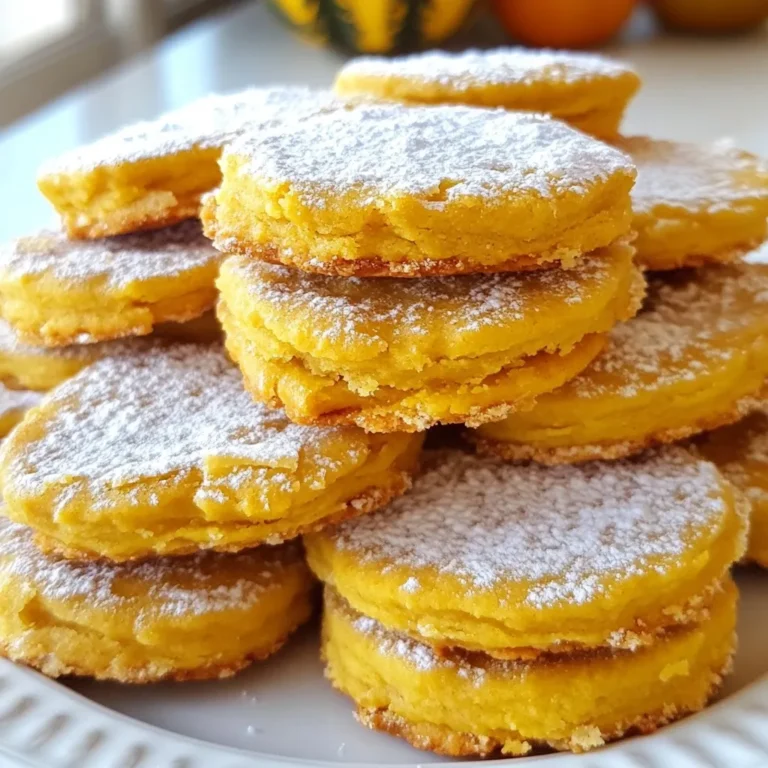
Pumpkin Pie Shortbread Cookies Delightful and Easy

To make Extra Fluffy Milk Bread, gather these simple ingredients: - 4 cups all-purpose flour - 1 cup warm milk (about 110°F) - 1/4 cup granulated sugar - 1/4 cup unsalted butter, softened - 1 large egg - 2 1/4 teaspoons active dry yeast (1 packet) - 1 teaspoon fine sea salt - 1/4 cup heavy cream (for brushing) If you need substitutions, here are some ideas: - You can use almond milk instead of regular milk for a dairy-free option. - Coconut oil works well in place of unsalted butter. - If you don’t have active dry yeast, use instant yeast. Just skip the proofing step. - For gluten-free bread, try a gluten-free flour blend, but the texture may change. Using quality ingredients matters. Fresh yeast helps the dough rise well, making it airy. Good flour provides structure and helps the bread hold its shape. High-quality butter enhances flavor and texture. When you use fresh milk, it adds moisture and softness. Always choose the best you can find. The better the ingredients, the better your bread will taste. This is key to achieving that extra fluffiness we love in milk bread. {{ingredient_image_2}} Start by warming 1 cup of milk to about 110°F. This warm milk wakes up the yeast. Add 1/4 cup of sugar and stir until it dissolves. Then, sprinkle 2 1/4 teaspoons of active dry yeast over the milk. Let this sit for about 5 minutes. You will see bubbles form on top. This means your yeast is ready to work. In a large bowl, pour in 4 cups of all-purpose flour and add 1 teaspoon of fine sea salt. Mix these two together well. This step helps spread the salt evenly. Next, create a well in the center of the flour mix. This well is where you will add the wet ingredients. Pour the yeast mixture into the well you made. Add 1/4 cup of softened butter and 1 large egg. Use a wooden spoon to mix until a rough dough forms. If you prefer, you can use a stand mixer with a dough hook. Knead the dough for about 10 minutes by hand or 5 to 7 minutes with a mixer. You want the dough to be smooth and elastic. After kneading, place the dough in a greased bowl. Cover it with a towel and let it rise in a warm place for 1 to 2 hours. The dough should double in size. Once it has risen, gently punch down the dough to release air. Shape it into a rectangle, fold the edges, and roll it into a log. Place this log in a greased loaf pan. Cover it with a towel again and let it rise for 30 to 45 minutes. Preheat your oven to 350°F. Before baking, brush the top with 1/4 cup of heavy cream. Bake for 30 to 35 minutes, until golden brown. Enjoy the smell as it bakes! To get that fluffy rise, warmth is key. Yeast loves warm spots. Make sure your dough rises in a cozy area, away from drafts. If your kitchen is cool, try putting the bowl in the oven with just the light on. This keeps the dough warm. Also, don’t rush the rising time. Let it double in size; this may take 1 to 2 hours. The longer the dough rises, the fluffier your bread will be. If your bread does not rise, check your yeast. Old yeast may not work well. Always use fresh yeast. If your dough is too sticky, sprinkle in a bit of extra flour when kneading. If it is too dry, add a little water, one teaspoon at a time, until it feels just right. These small changes can make a big difference. For a nice golden crust, brush the top with heavy cream before baking. This adds color and a rich flavor. Also, bake your bread in a preheated oven at 350°F (175°C). Check the bread around 30 minutes. It is done when it is golden brown and sounds hollow when tapped. If the top gets too dark, cover it with foil during baking. This will help it cook evenly without burning. Pro Tips Use Fresh Yeast: Always check the expiration date on your yeast. Fresh yeast will ensure a better rise and fluffier texture in your bread. Knead Thoroughly: Proper kneading develops gluten, which is essential for a chewy texture. Aim for a smooth, elastic dough before the first rise. Warm Environment for Rising: Make sure your dough rises in a warm, draft-free area. You can create this by placing it in an oven that’s turned off but has the light on. Cool Before Slicing: Let the bread cool completely before slicing. This allows the steam to escape, resulting in a better texture and prevents sogginess. {{image_4}} You can boost the taste of your milk bread with simple flavor additions. Try mixing in herbs like rosemary or thyme for a savory twist. Ground cinnamon or nutmeg can add warmth, perfect for breakfast. You could also fold in chocolate chips or dried fruit for a sweet treat. These flavors make the bread special and fun! The topping can change the game for your milk bread. Instead of cream, brush the top with melted butter before baking. You can sprinkle seeds like sesame or poppy for crunch. Cheese lovers can add shredded cheese for a savory crust. These toppings can give each loaf a unique touch. If you need a gluten-free option, don’t worry! Use a gluten-free all-purpose flour blend. Make sure it contains xanthan gum for the best texture. The liquid ratios may need tweaking, so watch the dough closely. This bread can still be fluffy and delicious, even without gluten! To keep your extra fluffy milk bread fresh, wrap it tightly in plastic wrap. You can also place it in a zip-top bag. This will help keep it soft and moist. Store the bread at room temperature for up to three days. If you want to keep it longer, freezing is a great option. To freeze your milk bread, first slice it if you want easy portions. Then, wrap each slice in plastic wrap or aluminum foil. Place the wrapped slices in a freezer-safe bag. This way, you can take out only what you need. Milk bread can stay good in the freezer for up to three months. Just remember to label the bag with the date. When you are ready to enjoy your stored bread, reheating is key. For the best results, you can use an oven. Preheat your oven to 350°F. Place the bread directly on the rack or on a baking sheet for about 10 to 15 minutes. This warms it up and revives its fluffy texture. If you are in a hurry, you can use the microwave. Heat a slice for about 10 to 15 seconds. Be careful not to overheat, or it will get chewy. Enjoy your bread warm for the best taste! Milk bread is extra fluffy due to its unique blend of milk, sugar, and yeast. Warm milk helps activate the yeast, creating bubbles that add air. The sugar feeds the yeast, making it work harder. This process gives the bread its light and airy texture. The kneading also plays a big role. It develops the gluten in the flour, which supports the bread's structure. The longer you knead, the fluffier your bread will be. Plus, letting it rise twice traps even more air, making it soft and fluffy. Yes, you can use whole wheat flour, but the texture will change. Whole wheat flour has more fiber and absorbs more liquid compared to all-purpose flour. This can make your bread denser. If you decide to use it, mix it with all-purpose flour. A good ratio is half whole wheat and half all-purpose. This keeps some fluffiness while adding more nutrients. You may need to add a bit more liquid to get the right dough texture. Experimenting is key to finding your perfect mix! To know if your bread is done, tap the bottom of the loaf. If it sounds hollow, it's ready. You can also check the color. It should be a rich golden brown. A food thermometer can help too. Insert it into the center; it should read around 190°F. If you see a nice golden crust and hear that hollow sound, your bread is perfect. Trust your instincts and enjoy the warm, fluffy goodness! This guide covers making delicious milk bread from key ingredients to baking tips. Quality matters, especially for an airy texture. I shared helpful tricks to fix issues and achieve a beautiful crust. You can even try fun flavors or toppings to make it your own. Storing and reheating your bread can keep it fresh longer. Use these tips to bake your best loaf yet! Enjoy the process, and happy baking!

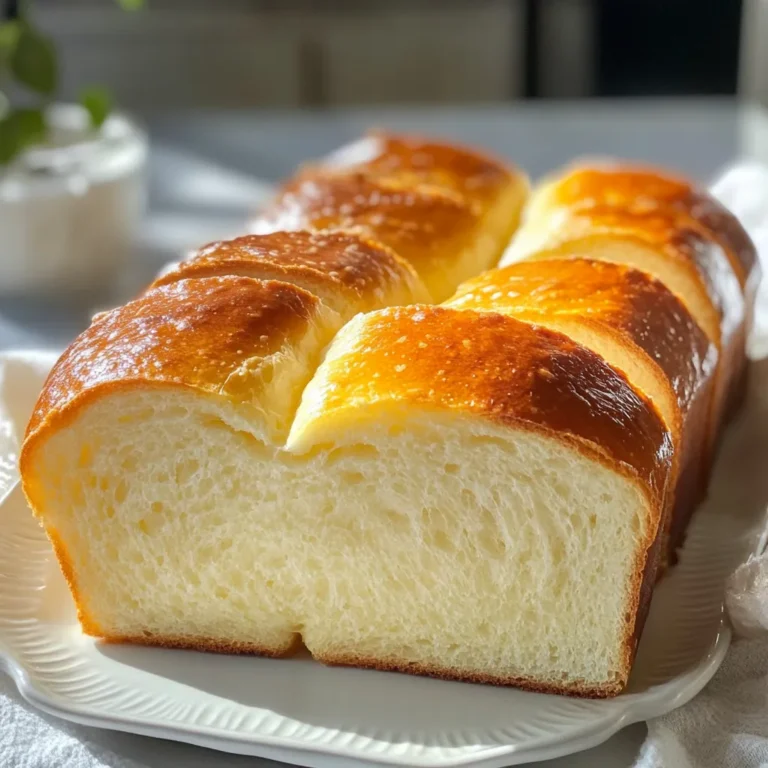
Extra Fluffy Milk Bread Soft and Easy Recipe Guide

- 4 boneless, skinless chicken breasts - 4 oz cream cheese, softened - 1 cup shredded sharp cheddar cheese - 1/2 cup finely chopped jalapeños - 1/4 cup seasoned breadcrumbs - 1 tablespoon garlic powder - 1 tablespoon onion powder - 1 teaspoon smoked paprika - Salt and freshly ground black pepper - 2 tablespoons olive oil - Fresh cilantro leaves for garnish (optional) If you need to swap some items, here are a few ideas: - Use Greek yogurt instead of cream cheese for a lighter filling. - Swap sharp cheddar with mozzarella or pepper jack for different flavors. - For a milder spice, use banana peppers instead of jalapeños. - You can replace seasoned breadcrumbs with crushed cornflakes for extra crunch. Each serving of jalapeño popper stuffed chicken contains about: - Calories: 350 - Protein: 36g - Fat: 20g - Carbohydrates: 8g - Fiber: 1g - Sugar: 2g This dish is a good source of protein and can fit well into a balanced diet. {{ingredient_image_2}} 1. Preheat your oven to 375°F (190°C). This makes sure it’s hot when you bake. 2. In a medium bowl, mix 4 oz of cream cheese and 1 cup of shredded cheddar cheese. Blend until it’s smooth. 3. Add in 1/2 cup of finely chopped jalapeños, 1 tablespoon of garlic powder, 1 tablespoon of onion powder, and 1 teaspoon of smoked paprika. Toss in some salt and black pepper. Mix until everything is well combined. 4. Take each chicken breast and cut a pocket into the thickest part. Don’t cut all the way through. Make sure the pocket is big enough for the filling. 5. Stuff each pocket with the jalapeño cheese mixture. Press gently to keep the filling in without spilling it out. 6. Pour 1/4 cup of seasoned breadcrumbs into a shallow dish. Add a pinch of salt and pepper for extra flavor. 7. Dip each stuffed chicken breast in 2 tablespoons of olive oil. Make sure it’s lightly coated. Roll the chicken in the breadcrumb mix. Press down lightly to help the crumbs stick. 8. Heat a large oven-safe skillet over medium-high heat. Add a drizzle of olive oil. When the oil is hot, place the stuffed chicken in the skillet. Sear each side for 3-4 minutes until golden brown. 9. Transfer the skillet to your preheated oven. Bake for 20-25 minutes until fully cooked. The internal temperature should reach 165°F (74°C). 10. After baking, take the skillet out of the oven. Let the chicken rest for 5 minutes. This helps keep it juicy. Serve the jalapeño popper stuffed chicken hot. You can garnish with fresh cilantro for color. For a balanced meal, place the chicken over rice or alongside roasted veggies. A drizzle of olive oil or a squeeze of lime adds great flavor! To stuff chicken well, start with a sharp knife. Cut a pocket in the thickest part of each chicken breast. Make sure you do not cut all the way through. This helps keep the filling inside. Use a spoon or your fingers to add the jalapeño mixture. Press gently to pack it in without spilling. You want a good amount of filling in each breast for full flavor. Juicy chicken comes from two keys: cooking temperature and resting time. First, sear the chicken in a hot pan. This creates a nice crust and seals in moisture. After searing, bake the chicken in the oven until it reaches 165°F. Always let it rest for about five minutes after cooking. This helps the juices spread out, giving you a tender bite. For extra flavor, consider adding herbs or spices. Fresh cilantro adds a nice touch when serving. You can also experiment with different cheese types. Cream cheese pairs well with cheddar, but mozzarella or pepper jack can add a twist. For heat, use fresh jalapeños or pickled ones based on your taste. Adding a squeeze of lime before serving brightens the dish perfectly. Pro Tips Choose the Right Jalapeños: For a milder flavor, opt for pickled jalapeños. For more heat, use fresh jalapeños, and consider removing the seeds for even less heat. Perfectly Stuffed Chicken: Make sure to cut a deep enough pocket in the chicken to hold the filling without it spilling out during cooking. Searing for Flavor: Searing the chicken before baking helps to lock in moisture and adds a rich, golden crust that enhances the overall flavor. Resting Time: Allow the stuffed chicken to rest after baking. This step ensures that the juices redistribute, resulting in a juicier and more flavorful bite. {{image_4}} You can choose between spicy and mild jalapeños for this dish. Fresh jalapeños bring heat, while pickled ones add a tangy flavor. If you love spice, use fresh jalapeños. For a milder taste, pickled jalapeños work well. You can also remove the seeds from fresh jalapeños to reduce heat. Experiment with your favorite level of spice for a personal touch. Cheese is key to the creamy filling. While cream cheese and sharp cheddar are great, you can switch them out. Try pepper jack for more heat and flavor. Monterey jack also melts well and gives a creamy texture. If you want a unique taste, mix in some feta or goat cheese. Each cheese adds its own twist to the dish. Making this meal gluten-free is easy. Use gluten-free breadcrumbs instead of regular ones. You can find these in most stores. Just check the label to ensure they are safe. If you want to skip breadcrumbs entirely, use crushed gluten-free crackers or oats. This way, you can enjoy Jalapeño Popper Stuffed Chicken without worry. To store leftovers, let the chicken cool down first. Place it in an airtight container. Keep it in the fridge if you plan to eat it soon. This chicken stays fresh for up to 3 days. If you have extra filling, store it separately in another container. When you are ready to reheat, you can use the oven or the microwave. For the oven, preheat it to 350°F (175°C). Place the chicken on a baking sheet and heat for about 15-20 minutes. This will keep the chicken crispy. If using a microwave, put the chicken on a microwave-safe plate. Heat it in short bursts, about 1-2 minutes, until it's warm throughout. If you want to freeze the stuffed chicken, wrap each piece tightly in plastic wrap. Then, place them in a freezer bag or container. They can stay in the freezer for up to 3 months. To cook, thaw in the fridge overnight. Bake them at 375°F (190°C) for about 30-35 minutes. Yes, you can make Jalapeño Popper Stuffed Chicken without cheese. Replace the cheese with mashed avocado or hummus. This keeps the filling creamy while removing dairy. You can also add extra jalapeños to enhance the flavor. Many sides go great with this dish. Here are some tasty options: - Rice: White or brown rice works well. - Vegetables: Roasted broccoli or asparagus adds color and nutrition. - Salad: A fresh green salad brightens the meal. - Corn: Sweet corn on the side adds a nice crunch. These sides balance the rich flavors of the stuffed chicken. You can store leftovers in the fridge for about 3-4 days. Make sure to place the chicken in an airtight container. This keeps the chicken moist and safe to eat. If you want to enjoy it later, consider freezing it. In this post, we covered how to make Jalapeño Popper Stuffed Chicken. I shared a list of key ingredients and their substitutions, along with nutritional facts. Next, I provided step-by-step cooking instructions and serving ideas. You learned tips for keeping chicken juicy and ways to enhance flavors. Variations offered choices for spice levels, cheese, and gluten-free options. Finally, I detailed storage and reheating methods. Now you have all the tools to create a tasty dish! Enjoy cooking and impress your loved ones.

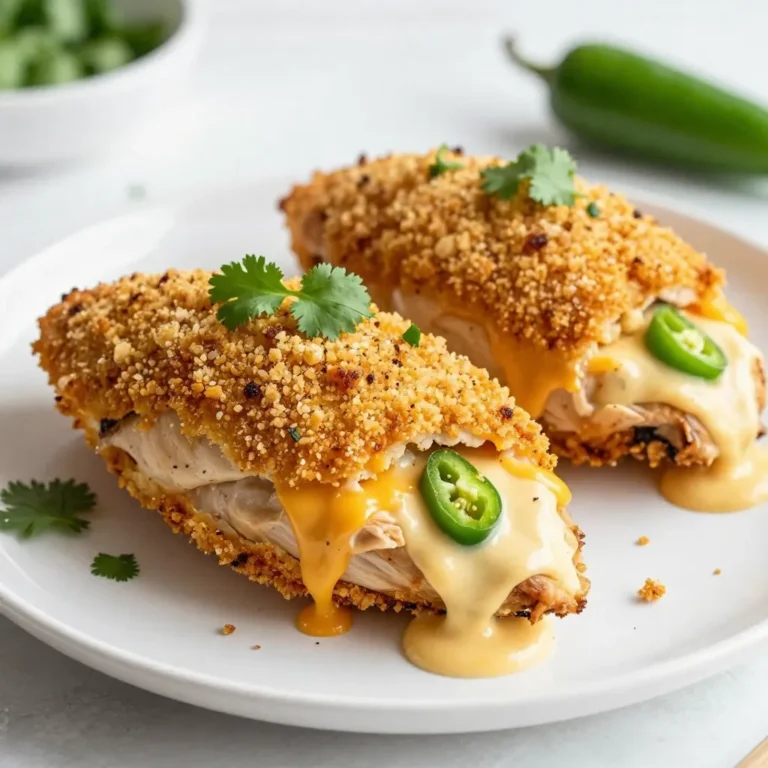
Jalapeño Popper Stuffed Chicken Tasty and Simple Meal

- 2 cups apple cider - 1 cup freshly squeezed orange juice - 1 cup pomegranate juice - ½ cup cranberry juice - 1 teaspoon ground cinnamon - ½ teaspoon ground nutmeg - 1 tablespoon fresh ginger, finely grated - 1 tablespoon honey (optional) - 2 cups seltzer water or ginger ale - Fresh apple slices, orange slices, and pomegranate seeds for garnish Gather these ingredients to create a colorful and tasty Harvest Rum Punch. Each juice adds a unique flavor. Apple cider gives sweetness and warmth. Fresh orange juice adds a bright, zesty note. Pomegranate juice brings a beautiful color and tartness. Cranberry juice adds a nice balance. The spices like ground cinnamon and nutmeg enhance the fall vibe. Fresh ginger gives a spicy kick that wakes up your taste buds. You can add honey if you want it sweeter. Seltzer water or ginger ale makes the drink bubbly and fun. For garnishes, use fresh apple slices, orange slices, and pomegranate seeds. They not only look pretty but also add extra flavor. Make sure to have these on hand to impress your guests! {{ingredient_image_2}} 1. Choose a large pitcher or bowl. 2. Pour in 2 cups of apple cider. 3. Add 1 cup of freshly squeezed orange juice. 4. Include 1 cup of pomegranate juice. 5. Pour in ½ cup of cranberry juice. 6. Stir the juices well to mix them. 7. Measure out 1 teaspoon of ground cinnamon. 8. Add ½ teaspoon of ground nutmeg. 9. Grate 1 tablespoon of fresh ginger. 10. Mix the spices into the juices. Stir well to blend. 1. Take a taste of your juice mix. 2. If you want it sweeter, measure 1 tablespoon of honey. 3. Stir the honey into the juice mix until it dissolves. 4. Cover the pitcher with plastic wrap or a lid. 5. Chill your punch in the fridge for at least 1 hour. This helps the flavors blend. 1. Just before serving, gently fold in 2 cups of seltzer water or ginger ale. 2. This gives your punch a nice fizzy touch. 3. Grab some clear glasses or mason jars. 4. Fill them with ice cubes. 5. Pour the sparkling punch over the ice. 6. For a beautiful look, add fresh apple slices, orange slices, and pomegranate seeds to each glass. Adjusting sweetness and spice levels is key. If you want it sweeter, add more honey. For spice, try more cinnamon or nutmeg. Taste as you go. This helps you find the perfect blend. Chilling the punch makes it better. After mixing, cover it and chill for at least one hour. This gives the flavors time to combine. You can chill it longer if you like. Rimming your glasses with cinnamon and sugar is fun. It adds a sweet touch and looks great. Just wet the rim first to help the mix stick. You can serve the punch in clear glasses or mason jars. Clear glasses show off the drink's colors. Mason jars give a rustic vibe. Both options are lovely and festive. Want to add more flavor? Consider using fresh herbs like mint or basil. These herbs give a fresh twist. You can also try extra spices, like cloves or allspice. Just a pinch can change the taste. Experiment and find what you enjoy! Pro Tips Chill Your Ingredients: For the best flavor experience, chill your juices and cider before mixing. This will keep your punch refreshing without the need for excessive ice, which can dilute the flavor. Experiment with Garnishes: Feel free to add other seasonal fruits like pears or cranberries. They not only enhance the flavor but also add a beautiful touch to your presentation. Make It Ahead of Time: Prepare your punch a day in advance and let it sit in the fridge overnight. This allows the spices to infuse deeply, resulting in a more flavorful drink. Adjust for Sweetness: Depending on the tartness of your juices and your personal preference, adjust the amount of honey used. Start with less, as it's easier to add more than to reduce sweetness. {{image_4}} For a fun twist, you can add rum to the punch. Use dark or spiced rum for depth. Just mix in 1 to 2 cups, depending on how strong you want it. This addition makes the punch festive and warm, perfect for gatherings. If you prefer a non-alcoholic drink, don't worry! You can enjoy this punch without any alcohol. Simply skip the rum. The mix of juices and spices still creates a tasty treat. Everyone can sip and enjoy. As the seasons change, so can your punch! You can add pumpkin spice for a cozy fall flavor. Just sprinkle in 1 teaspoon along with the other spices. This twist gives a warm, inviting taste. Using seasonal fruits is another great option. In fall, try adding sliced pears or figs. In summer, fresh berries work well. These fruits not only taste great but also make your punch look beautiful. Making this punch work for everyone is easy. If you need a gluten-free option, this recipe is already safe! All the juices and spices are gluten-free. For a vegan version, replace honey with maple syrup or agave nectar. Both options add sweetness without any animal products. You can enjoy the flavors and feel good about your choices. Harvest Rum Punch stays fresh for up to three days in the fridge. To keep it tasting great, store it in an airtight container. This helps to lock in the flavors and prevent spoilage. I recommend using a large glass pitcher or a sealed jar. This way, you can see the beautiful colors and enjoy its festive look. Yes, you can freeze Harvest Rum Punch! It will keep well for up to two months in the freezer. Use a freezer-safe container, leaving some space at the top for expansion. When it’s time to enjoy, simply take it out and let it thaw in the fridge overnight. For a quicker thaw, place the container in a bowl of cold water. Avoid using a microwave, as it may change the taste. What type of rum works best for Harvest Rum Punch? You should choose a light or spiced rum. These types mix well with the fruit juices. They add depth without overpowering the taste. If you want a richer flavor, dark rum works too. Just remember, balance is key. Can I make this punch ahead of time? Yes, you can! Prepare the juice base and chill it. Just add the seltzer or ginger ale before serving. This keeps the punch fizzy and fresh. You can make it a few hours ahead for best results. How can I adjust the recipe for larger gatherings? To scale up, simply double or triple the ingredients. Use a big bowl or pitcher to hold it all. Ensure you have enough ice and garnishes for everyone. Keeping the flavors balanced is still important, so taste as you go. Best occasions for serving Harvest Rum Punch This punch shines at fall parties, Thanksgiving, or autumn gatherings. It brings a festive touch to your event. You can also serve it at casual get-togethers or holiday celebrations. Everyone loves a refreshing drink! Pairing with snacks or appetizers Harvest Rum Punch pairs well with cheese platters or fruit trays. Consider serving it with spiced nuts or mini pastries. These snacks complement the punch's fruity flavors. They make for a delightful combination that guests will enjoy. What to do if the punch is too sweet or strong? If it's too sweet, add more juice or seltzer. This helps balance the flavors. For a strong taste, dilute it with more juice or water. Always taste before serving to ensure it’s just right. How to balance flavors if something is missing? If something feels off, consider adding a splash of citrus juice. A bit of lemon or lime can brighten the punch. You can also adjust spices, adding more cinnamon or ginger. Tasting as you go will guide you to perfection. This blog post shared how to make a delicious Harvest Rum Punch. We explored the ingredients, like apple cider, juices, spices, and optional garnishes. Then, we walked through each step, from mixing juices to serving suggestions. Tips helped enhance flavors and improve presentation. We highlighted variations for both alcoholic and non-alcoholic versions. Lastly, we covered storage to keep your punch fresh. In the end, creating this punch can be fun and rewarding. With these steps, you can impress guests or enjoy it yourself. Give it a try and enjoy a delightful drink!

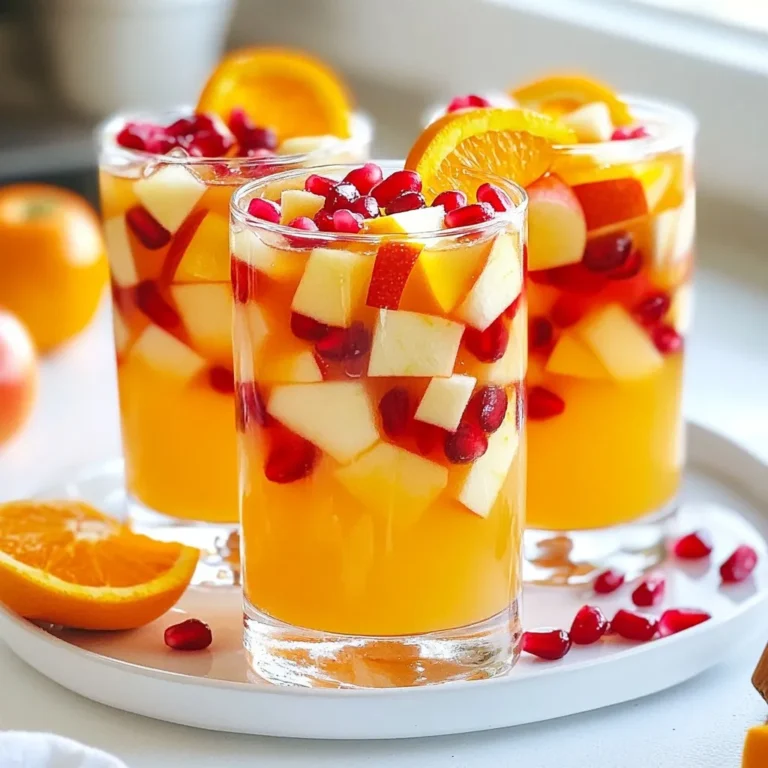
Harvest Rum Punch Refreshing and Festive Drink Recipe

- 1 pound sirloin steak, cut into 1-inch cubes - 4 tablespoons unsalted butter - 5 cloves garlic, finely minced - 1 teaspoon fresh rosemary, finely chopped - 1 teaspoon fresh thyme, finely chopped - Salt and freshly cracked black pepper to taste - 1 tablespoon olive oil - Fresh parsley, coarsely chopped for garnish For Garlic Butter Steak Bites, the ingredients are simple yet full of flavor. The sirloin steak shines as the main star. I love using sirloin because it offers a great balance of taste and tenderness. The unsalted butter adds richness. It melts beautifully, creating a luscious sauce. Fresh garlic brings strong flavor and aroma. Minced garlic cooks quickly, so keep an eye on it. Herbs like rosemary and thyme lift the dish with fresh notes. I chop them finely to get their oils out. Salt and pepper are key to enhancing the natural taste of the steak. Olive oil helps sear the steak, giving it a nice crust. Lastly, fresh parsley adds a pop of color and freshness as a garnish. Gather these ingredients, and you are on your way to a tasty meal! {{ingredient_image_2}} Start by patting the steak cubes dry with paper towels. This step helps create a nice crust. Next, season the cubes with salt and freshly cracked black pepper. Make sure each piece gets a good coat of seasoning. This adds flavor and enhances the taste. Now, heat the olive oil in a large skillet over medium-high heat. You want the oil to shimmer before adding the steak. Carefully place the seasoned steak bites in a single layer. Sear them for about 2-3 minutes on each side. I recommend cooking until they reach medium-rare for the best flavor. Avoid overcrowding the pan. If needed, cook in batches to keep the heat up. Once the steak bites are brown, lower the heat to medium. Push the steak to one side of the skillet. This creates space to add the unsalted butter, minced garlic, rosemary, and thyme. Let the butter melt and the garlic sauté for about 1 minute. Be careful not to burn the garlic. After that, gently toss the steak bites in the garlic butter. This allows each piece to soak up the rich flavors. Cook for another minute to combine everything well. To get a great sear, heat your pan well. A hot pan helps form a nice crust. When you add the steak, it should sizzle loudly. If it doesn't, the pan is not hot enough. Avoid overcrowding the pan. If you add too many steak bites, they will steam instead of sear. Work in batches if needed. This way, each piece cooks evenly and gets that perfect brown color. To make your steak bites even better, think about adding more herbs. Fresh parsley, chives, or even a bit of oregano can enhance the taste. You might also try some red pepper flakes for a little heat. Marinating the steak can also bring out more flavors. A simple mix of olive oil, garlic, and herbs works well. Letting the steak sit for 30 minutes before cooking can make a big difference. Present your garlic butter steak bites on a nice platter. A sprinkle of fresh parsley adds a pop of color. You can serve them on toothpicks for easy eating at parties. Pair these bites with sides like mashed potatoes, roasted veggies, or a fresh salad. A good dipping sauce, like a creamy aioli, can also elevate the dish. Pro Tips Rest the Meat: Allow the steak bites to rest for a few minutes after cooking. This helps the juices redistribute, ensuring each bite is tender and flavorful. Choose the Right Cut: Sirloin steak is great for this recipe, but you can also use ribeye or tenderloin for an even richer flavor and tenderness. Use Fresh Herbs: Fresh rosemary and thyme elevate the dish's flavor. Dried herbs can be used in a pinch, but fresh will provide a more vibrant taste. Control the Heat: Searing the steak at the right temperature is crucial. If the pan is too hot, the garlic can burn before the steak is fully cooked. {{image_4}} You can use different cuts of steak for your bites. Sirloin is great, but other options work well too. Consider using ribeye, tenderloin, or flank steak. Each cut brings its own flavor and texture. Ribeye is richer and more tender. Tenderloin is lean and buttery. Flank steak has a nice chew and strong taste. Adding vegetables can make your steak bites more colorful and healthy. Bell peppers, zucchini, or cherry tomatoes add great flavor. You can also use mushrooms for an earthy taste. They soak up the garlic butter nicely. For butter, try garlic herb blends. They add depth and extra flavor to your dish. If you need a gluten-free option, use gluten-free soy sauce in the garlic butter. This keeps the taste rich while being safe for gluten-free diets. For low-carb versions, skip the butter and use olive oil instead. You can still enjoy great flavors without the carbs. To keep your garlic butter steak bites fresh, store them in the fridge. Place the leftovers in an airtight container. This helps lock in flavor and keeps them safe from other odors. You can keep them in the fridge for up to three days. Make sure they cool down before sealing the container. When you want to enjoy your steak bites again, use gentle heat. The best way to reheat them is in a skillet. Add a tiny bit of butter or oil to the pan. Heat it on low and add the steak bites. Stir them often. This way, they stay juicy and do not dry out. You can also use the microwave. Just place them on a microwave-safe plate, cover them with a damp paper towel, and heat in short bursts. Check often to avoid overcooking. If you have extra steak bites, freezing is a great option. First, let them cool completely. Then, place them in a freezer-safe bag. Squeeze out as much air as possible to prevent freezer burn. They can last up to three months in the freezer. To thaw, move them to the fridge overnight. For quick thawing, place the sealed bag in cold water for about an hour. Once thawed, reheat them as mentioned above for best results. Garlic butter steak bites last about 3 to 4 days in the fridge. To keep them fresh, store them in an airtight container. Make sure they cool down before sealing. This helps to avoid any moisture build-up. Yes, you can use different cuts of steak. Ribeye or tenderloin works well too. Just remember to adjust cooking times based on the thickness. You can serve garlic butter steak bites with many sides. Some great options include: - Mashed potatoes - Steamed vegetables - A fresh green salad - Garlic bread These pairings enhance the meal and add more flavor. You can prepare garlic butter steak bites ahead of time. Cook the steak and make the garlic butter. Store them separately in the fridge. When ready to serve, just reheat the steak in a pan and add the garlic butter. This keeps the bites juicy and tasty. Garlic butter steak bites are easy and delicious. We covered the main ingredients, from sirloin steak to fresh herbs. The step-by-step guide ensures your steak is perfectly seared and bursting with flavor. Don’t forget the tips on enhancing taste and serving. With variations for every preference and storage tips for leftovers, you can enjoy this dish multiple times. I hope you feel ready to create and enjoy these steak bites. They offer great taste with every bite.

Garlic Butter Steak Bites Juicy and Flavorful Dish

To make creamy sausage rigatoni, you need a few simple ingredients that pack a lot of flavor. Here’s the list: - 12 oz rigatoni pasta - 1 lb Italian sausage (choose between mild or spicy, casings removed) - 1 small onion, finely diced - 3 cloves garlic, minced - 1 can (14.5 oz) diced tomatoes, undrained - 1 cup heavy cream - 1 cup freshly grated Parmesan cheese (plus extra for serving) - 2 cups fresh spinach leaves, roughly chopped - 2 tablespoons olive oil - 1 teaspoon Italian seasoning blend - Salt and pepper, to taste - Fresh basil leaves for garnish Each ingredient plays a role. The rigatoni holds the creamy sauce well. The Italian sausage adds a rich, savory flavor. Fresh vegetables like onion and garlic give great depth. Canned tomatoes and heavy cream create a luscious sauce. Finally, the seasoning and basil add the perfect finishing touch. Feel free to mix and match. You can use different types of sausage. You can even add more veggies if you like. The key is to have fun with it! {{ingredient_image_2}} 1. Fill a large pot with water and add a lot of salt. 2. Bring the water to a rolling boil. 3. Add the rigatoni and cook until al dente, about 10-12 minutes. 4. Drain the pasta, but save about 1 cup of the water. Al dente pasta has a slight bite. This texture keeps it from becoming mushy in the sauce. Saving the pasta water helps adjust the sauce later. 1. Heat a large skillet over medium heat. 2. Add olive oil to the hot skillet. 3. Once the oil shimmers, add the Italian sausage. 4. Use a spatula to break the sausage into small pieces. 5. Cook until it’s brown and no longer pink, about 5-7 minutes. A hot skillet helps the sausage brown nicely. This creates great flavor and texture. 1. Add the finely diced onion to the skillet. 2. Stir occasionally for about 3-4 minutes until soft. 3. Add minced garlic and cook for 30 seconds. 4. Be careful; garlic burns quickly! Timing is key here. You want the onion soft and the garlic fragrant. 1. Pour the diced tomatoes, with their juices, into the skillet. 2. Add the heavy cream and stir to mix. 3. Raise the heat to bring it to a gentle simmer. 4. Cook for 3-4 minutes to thicken the sauce. Simmering the sauce helps blend the flavors and thicken it just right. 1. Add the cooked rigatoni and chopped spinach to the skillet. 2. Toss everything together until well coated. 3. If the sauce is too thick, add reserved pasta water a bit at a time. Mixing well is vital for flavor. Adjusting with pasta water gives the sauce a perfect creaminess. 1. Stir in the grated Parmesan cheese and Italian seasoning. 2. Taste and add salt and pepper as needed. 3. Remove the skillet from heat once creamy. For serving, place the creamy sausage rigatoni in bowls. Top with more Parmesan and fresh basil for a lovely look. - Heavy cream is key for a rich sauce. It adds smoothness and depth. - Reserve some pasta water. Adding it helps thin the sauce without losing flavor. - Avoid dry sausage by cooking it gently. Brown it slowly for juicy bites. - Choose your sausage wisely. Mild gives a subtle flavor, while spicy adds a kick. - Fresh herbs like basil or parsley brighten the dish. Add them before serving. - For garnish, use extra Parmesan cheese and a few basil leaves. They add color and taste. Pro Tips Choose Your Sausage: For a flavor-packed dish, select a high-quality Italian sausage. You can opt for mild for a subtle taste or spicy for a kick of heat. Perfectly Cooked Pasta: Always cook your pasta al dente for the best texture. This allows it to hold up in the sauce without becoming mushy. Fresh Spinach Tips: Add the spinach at the end of cooking to retain its vibrant color and nutrients. It will wilt perfectly in the residual heat of the dish. Adjusting Sauce Consistency: If your sauce is too thick, gradually add the reserved pasta water until you reach your desired creaminess. This starchy water enhances the sauce's flavor. {{image_4}} You can make creamy sausage rigatoni healthier with simple swaps. Consider these options: - Whole wheat or gluten-free pasta: Whole wheat adds fiber. Gluten-free pasta works for those with gluten issues. - Low-fat cream substitutes: Swap heavy cream for low-fat options like Greek yogurt or almond milk. This cuts calories while keeping some creaminess. To change the flavor, add new ingredients. Here are some ideas: - Adding vegetables: Bell peppers and mushrooms add nutrition and taste. Sauté them with the sausage for extra flavor. - Alternative proteins: Use chicken or turkey sausage instead of Italian sausage. This option is lighter but still delicious. Cheese can change the dish's taste. Explore these choices: - Exploring other cheese types: Try mozzarella or goat cheese for a different flavor profile. They melt beautifully and enrich the sauce. - Vegan cheese substitutions: For a vegan version, use cashew cheese or nutritional yeast. These options can still give you that cheesy flavor. To keep your creamy sausage rigatoni fresh, use airtight containers. Glass or plastic containers work well. Make sure to cool the pasta before sealing. Store it in the fridge for up to three days. This way, you maintain its great taste and texture. When reheating, add a splash of milk or cream for creaminess. Heat on low in a skillet. Stir often to prevent sticking. If using a microwave, cover it loosely to trap moisture. This helps avoid drying out the dish. Heat in short bursts and stir in between. To freeze, let the dish cool completely. Divide it into portions for easy use later. Use freezer-safe containers or bags. Remove as much air as possible before sealing. For best results, eat it within three months. To thaw, place it in the fridge overnight. Reheat gently for the best texture. The best pasta shape for creamy sauce is rigatoni. Its ridges hold onto the sauce well. This helps every bite be full of flavor. Other good options are penne or farfalle. These shapes also work great with creamy sauces. Yes, you can make this recipe vegetarian. Simply replace the sausage with a plant-based sausage. You can also use mushrooms for a hearty texture. Adding more veggies, like zucchini or bell peppers, boosts flavor too. You know the sausage is fully cooked when it is no longer pink inside. The outside should have a nice brown color. You can also use a meat thermometer. The internal temperature should reach 160°F (71°C) for safety. You can use half-and-half or whole milk as a substitute for heavy cream. For a lighter option, use Greek yogurt or sour cream. If you need a dairy-free option, try coconut milk or cashew cream. To make this dish ahead of time, cook and combine all the ingredients. Let it cool, then store it in the fridge. When ready to serve, reheat on the stove. Add a splash of pasta water to keep it creamy. This blog post covered how to make creamy sausage rigatoni. You learned about the ingredients, instructions, tips, and variations. I shared important steps like cooking pasta al dente, browning sausage, and mixing in fresh vegetables. For a great dish, use the right ingredients and techniques. Experiment with flavors and adapt to your taste. Enjoy your cooking journey and the delicious meals that follow!

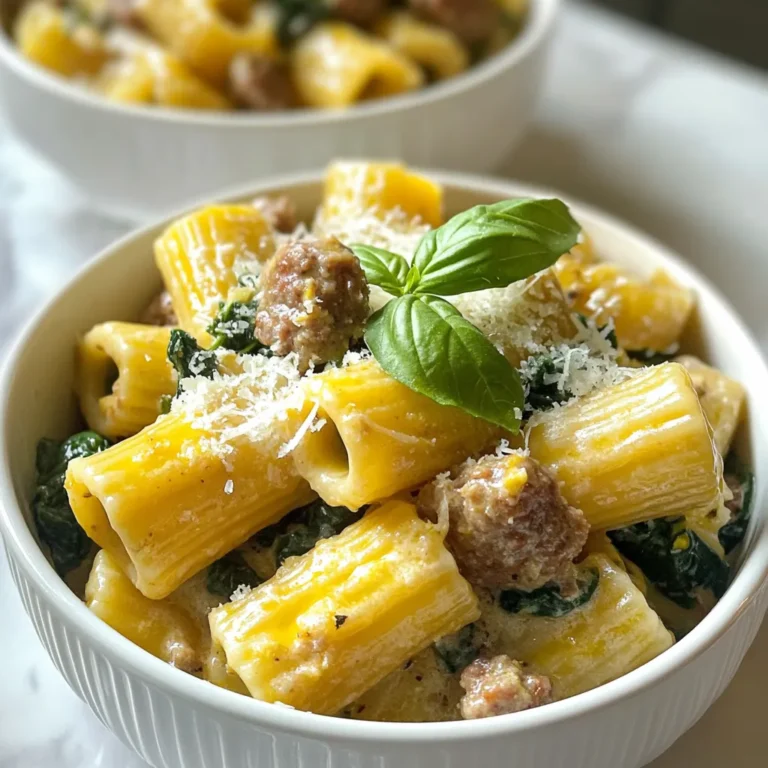
Creamy Sausage Rigatoni Easy and Flavorful Recipe

- 2 tablespoons olive oil - 1 medium onion, finely diced - 3 cloves garlic, minced - 2 medium carrots, peeled and sliced - 1 celery stalk, chopped - 1 medium potato, peeled and diced - 1 zucchini, diced - 1 red bell pepper, chopped - 1 cup fresh green beans, trimmed - 4 cups vegetable broth - 1 cup full-fat coconut milk - 1 tablespoon dried thyme - 1 teaspoon smoked paprika - Salt and pepper to taste - Fresh parsley, chopped When I make this hearty one-pot creamy vegetable soup, I love to gather fresh, vibrant ingredients. Each item adds its own flavor and texture to the dish. I start with olive oil. It gives the soup a rich base. Next, I add a finely diced onion and minced garlic. These two ingredients create a nice aroma as they cook. I then toss in sliced carrots, chopped celery, and diced potato. These veggies add depth and a bit of sweetness. Zucchini and red bell pepper follow, bringing color and crunch. I love how green beans add a fresh taste to the mix. For the liquid, I use vegetable broth and rich coconut milk. This combo makes the soup creamy and comforting. Finally, I season it with dried thyme and smoked paprika. A sprinkle of salt and pepper enhances all the flavors. To finish, I chop fresh parsley for garnish. It adds a pop of green and freshness. Using these ingredients, you can create a warm and satisfying soup that feels like a hug in a bowl. {{ingredient_image_2}} - Sautéing the Onion and Garlic Heat 2 tablespoons of olive oil in a large pot over medium heat. Add 1 medium onion, finely diced. Cook for 3-4 minutes until soft and clear. Then stir in 3 cloves of minced garlic. Cook for 1 more minute. The smell will be amazing! - Adding Vegetables Next, add 2 sliced carrots, 1 chopped celery stalk, and 1 diced potato. Stir them together. Cook for about 5 minutes. This helps the veggies soften a bit. Then, add 1 diced zucchini, 1 chopped red bell pepper, and 1 cup of fresh green beans cut into thirds. Cook for another 3-4 minutes while stirring. - Pouring in Broth and Coconut Milk Carefully pour in 4 cups of vegetable broth. Add 1 cup of full-fat coconut milk and stir well. This mix makes the soup creamy and rich. - Seasoning the Soup Now, season the soup with 1 tablespoon of dried thyme, 1 teaspoon of smoked paprika, salt, and pepper to taste. Bring the soup to a gentle boil. This step helps all the flavors blend together. - Blending for Creaminess Once it boils, reduce the heat to low. Cover the pot and let it simmer for about 20 minutes. Check that all veggies are tender. To make it creamy, use an immersion blender. Blend it slightly but leave some chunks. If you don’t have that, blend half the soup in a regular blender and return it to the pot. - Final Adjustments Taste the soup and adjust the seasoning if needed. Add more salt or pepper for flavor. - Presentation Tips Serve the soup hot in rustic bowls. Garnish with fresh parsley for color. You can also drizzle a bit of coconut milk on top for flair. - Accompaniments Pair the soup with crusty bread for a complete meal. It adds a nice crunch and pairs well with the creamy soup. Enjoy! - To enhance flavor, add spices like cumin or coriander. - Fresh vegetables make a big difference in taste. Choose bright and firm ones. - Pair the soup with crusty bread or a simple salad. - Serve hot for the best taste and warmth. - An immersion blender is easy and quick for blending. - For a smooth soup, use a traditional blender. Blend until you reach your desired texture. Pro Tips Fresh Ingredients: For the best flavor, use fresh, seasonal vegetables. They will enhance the taste of your soup significantly. Texture Control: If you prefer a chunkier soup, blend only a portion of the mixture. This allows for a hearty, rustic texture. Herb Variations: Experiment with different herbs such as basil or cilantro for a unique twist on flavor. Serving Suggestions: Serve with a drizzle of olive oil or a sprinkle of nutritional yeast for added richness and flavor. {{image_4}} For a dairy-free option, use almond or oat milk instead of coconut milk. This keeps the soup creamy but changes the flavor slightly. If you want to swap seasonal veggies, think about using squash in the fall or peas in the spring. These changes can add fresh tastes and colors to your soup. To add protein, consider beans or tofu. Both options will make your soup more filling. You can add a can of drained beans or some diced tofu while cooking. For herbs, try using basil or oregano. Each herb changes the soup's taste and makes it unique. Just sprinkle them in and taste as you go! If you need a gluten-free option, make sure your vegetable broth is gluten-free. Most brands are, but checking is key. For vegan modifications, ensure the broth and any added ingredients are plant-based. This soup can easily fit many diets while keeping it tasty and satisfying. How long will it last in the fridge? This creamy vegetable soup lasts for about 3 to 4 days in the fridge. Make sure to store it in an airtight container. Let it cool before putting it in the fridge to keep it fresh longer. Best practices for freezing soup If you want to freeze the soup, let it cool completely first. Use freezer-safe containers or bags. Leave some space at the top of the container. The soup will expand as it freezes. It’s best to use the soup within 2 to 3 months for the best taste. Reheating frozen soup To reheat, let the soup thaw in the fridge overnight. Then, warm it on the stove over low heat. Stir often to ensure even heating. You can also use a microwave, but be sure to stir halfway through. Creative ways to repurpose leftover soup You can turn leftover soup into a pasta sauce. Just cook some pasta and mix it with the soup. You can also add it to rice or quinoa for a quick meal. Another idea is to use it as a base for a casserole. Just add some cheese and bake until bubbly. Making this soup takes about 40 minutes in total. You will spend around 15 minutes on prep. The cooking time is about 25 minutes. This gives you time to chop the veggies and sauté them. Yes, you can swap out vegetables for your favorites. Here are some great options: - Broccoli florets - Cauliflower pieces - Peas - Spinach or kale - Sweet corn Feel free to mix and match based on what's in your fridge. This soup is perfect for meal prep! You can make it ahead and store it. Here’s how: - Cool the soup completely before storing. - Place it in an airtight container. - It lasts in the fridge for about 3-4 days. - You can also freeze it for up to three months. If your soup is too thick, don’t worry! Here are some quick fixes: - Add more vegetable broth. - Stir in a bit of water or coconut milk. - Heat it gently until it reaches your desired consistency. These simple solutions will help you enjoy a perfect creamy soup! This blog post offered a clear guide to making a delicious one-pot creamy vegetable soup. You learned about the key ingredients, seasonings, and step-by-step instructions. We discussed tips for perfecting flavor and serving ideas to enhance your meal. Remember, soup can be flexible. Feel free to swap ingredients or add your favorite proteins. Whether for a cozy dinner or meal prep, this recipe warms the soul and satisfies. Enjoy trying new variations and making it your own!

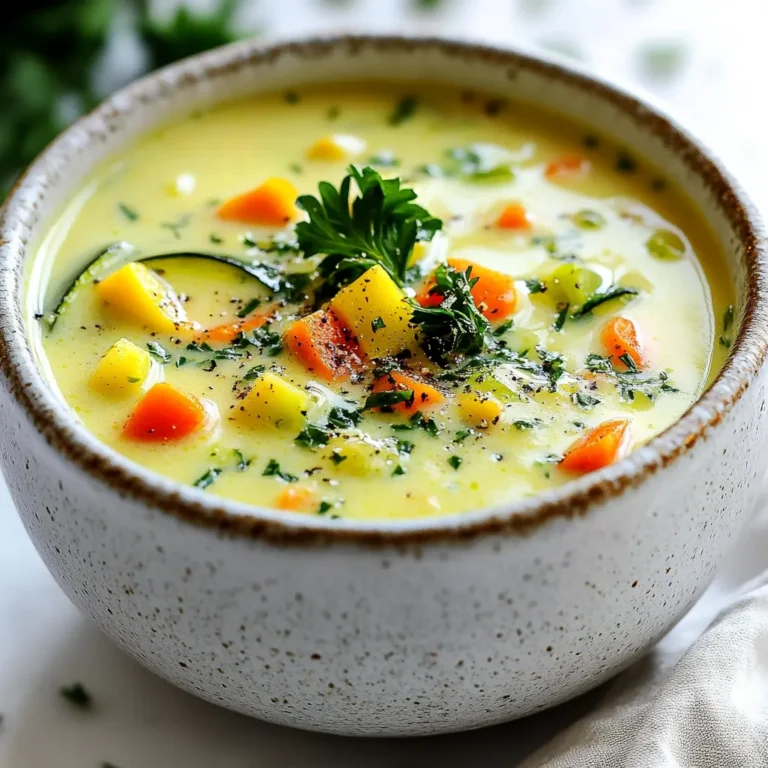
Hearty One-Pot Creamy Vegetable Soup Recipe

PREV 1 … 23 24 25 … 44 NEXT
yummybiterecipes

explore

DessertsDinnerAppetizersDrinks

Our Policies

  • Cookie Policy
  • Copyright Policy
  • Disclaimer
  • GDPR Policy
  • Terms Of Use
Back to Top
  • About
  • Contact Us
  • Privacy Policy
© 2025 yummybiterecipes