FREE DINNER EBOOK! Get your copy!
  • Cookie Policy
  • GDPR Policy
  • Disclaimer
  • Terms Of Use
  • Visit my other site: Fun Cookie Recipes
yummybiterecipes
  • Home
  • Dinner
  • Desserts
  • Drinks
  • Appetizers
  • Contact
  • About
  • Privacy Policy
  • Home
  • Dinner
  • Desserts
  • Drinks
  • Appetizers
  • Contact
  • About
  • Privacy Policy
  • Cookie Policy
  • GDPR Policy
  • Disclaimer
  • Terms Of Use
Visit my other site: Fun Cookie Recipes

HOME / CATEGORIES /

Latest

- 5 cups fresh spinach leaves, thoroughly washed and dried - 2 cups fresh strawberries, hulled and sliced into thin rounds - 1/2 cup red onion, very thinly sliced - 1/4 cup slivered almonds, preferably toasted for enhanced flavor - 1/4 cup feta cheese, crumbled for a creamy contrast - 1/4 cup extra virgin olive oil for richness - 2 tablespoons apple cider vinegar for a tangy kick - 2 tablespoons honey for a touch of sweetness - 1 tablespoon poppy seeds, adding texture - Salt and freshly ground black pepper, to taste I love using fresh spinach in this salad. It gives a crisp base that holds the other flavors well. Strawberries add a sweet burst that brightens each bite. Red onion gives a nice bite and balances the sweetness. Slivered almonds add crunch, and feta cheese brings creaminess. The poppy seed dressing is simple but full of flavor. The olive oil adds richness, while apple cider vinegar gives it a tangy note. Honey sweetens the mix, and poppy seeds create a fun texture. You can adjust the salt and pepper to your liking. For the full recipe, check out the details above. To start, gather your ingredients for the dressing. Combine: - 1/4 cup extra virgin olive oil - 2 tablespoons apple cider vinegar - 2 tablespoons honey - 1 tablespoon poppy seeds Whisk these together in a small bowl. Mix until smooth. Taste it! Adjust with salt and black pepper. This dressing is creamy and sweet. Set it aside to let the flavors blend. Now, take a large bowl and arrange 5 cups of fresh spinach leaves. Make sure they are clean and dry. Spread them out evenly. This will be your vibrant base, ready to hold all the other ingredients. Next, add 2 cups of sliced strawberries and 1/2 cup of very thinly sliced red onion on top of the spinach. The bright red strawberries pair well with the green spinach. The onion adds a nice crunch. Drizzle the poppy seed dressing over the salad. Be sure to cover the greens and strawberries evenly. Then, gently toss the salad using a pair of tongs. Be careful not to bruise the spinach. Finally, sprinkle 1/4 cup of toasted slivered almonds and 1/4 cup of crumbled feta cheese on top. This adds a nice crunch and creaminess to each bite. You can serve it right away or chill it for about 15 minutes. Enjoy your fresh Strawberry Spinach Salad with Poppy Seed Dressing! For a full recipe, check out the complete guide. - Use fresh, seasonal strawberries. They taste better and add more color. - Choose high-quality spinach. Look for bright leaves without wilting or browning. - To toast almonds, heat a dry pan over medium heat. Stir the slivers until they are golden and fragrant. This takes about 3-5 minutes. Keep a close eye on them! - If you want a different cheese, try goat cheese or blue cheese. These add unique flavors. - For gatherings, serve salad in clear bowls. This shows off the bright colors. You can also use individual plates for a nice touch. - This salad pairs well with grilled chicken or salmon. It also complements light pasta dishes. You can enjoy it as a side or a main dish. For the full recipe, check out the Strawberry Spinach Delight! {{image_4}} You can switch up the fruit in this salad easily. Try adding other berries like blueberries or raspberries. These fruits add a new twist and keep it fresh. You can even mix in diced apples or pears for extra crunch. Citrus fruits like oranges or mandarins brighten the flavors. Their juice adds a nice tang that complements the sweetness of strawberries. While the poppy seed dressing is delightful, you can explore other dressings. A balsamic vinaigrette brings a rich flavor that pairs well with spinach. A honey mustard dressing adds a nice kick too. If you prefer, you can use store-bought dressings for convenience. Just check the label for healthy options. This salad can fit many diets. For gluten-free eaters, all the ingredients work well. Just ensure your dressing is gluten-free too. If you want a vegan version, skip the feta cheese. You can add avocado for creaminess instead. This keeps the salad tasty while meeting dietary needs. To keep your strawberry spinach salad fresh, store leftovers in a sealed container. Remove any excess dressing to avoid sogginess. If you can, eat the salad within two days for the best taste. Keep it in the fridge to maintain its crunch. Store the poppy seed dressing separately in a jar. It lasts about a week in the fridge. Homemade dressings are best used fresh, but they can still be tasty after a few days. Before using, give it a good shake to mix any ingredients that may have settled. For the full recipe, check out the recipe section above. Yes, you can make the dressing ahead of time. Store it in a sealed jar in the fridge. It stays fresh for about a week. Just give it a good shake before using. The salad tastes best the day it's made. If you store it in the fridge, it can last up to two days. Keep the dressing separate until you're ready to serve. This keeps the greens crisp and fresh. To make the salad more filling, add grilled chicken or shrimp. You can also use chickpeas or beans for a plant-based option. These add protein and create a heartier meal. Adding nuts or seeds can boost the protein and healthy fats. Try sunflower seeds or walnuts. They add crunch and flavor. You can mix greens with fruits and nuts. Try arugula with oranges and walnuts. This keeps the fresh, vibrant feel of the strawberry spinach salad. If you don't have spinach, use kale or mixed greens. Both provide a nice base and pair well with strawberries. Just make sure to massage kale a bit to soften it. This blog post guides you through crafting a fresh and tasty salad. We explored key ingredients, from spinach to strawberries, and how to make a delightful poppy seed dressing. I shared step-by-step methods and useful tips for storage and serving. Fresh ingredients lead to better taste. You can adjust flavors and textures based on your needs. Try different fruits, dressings, or protein add-ins. Enjoy creating a salad that shines at any meal!

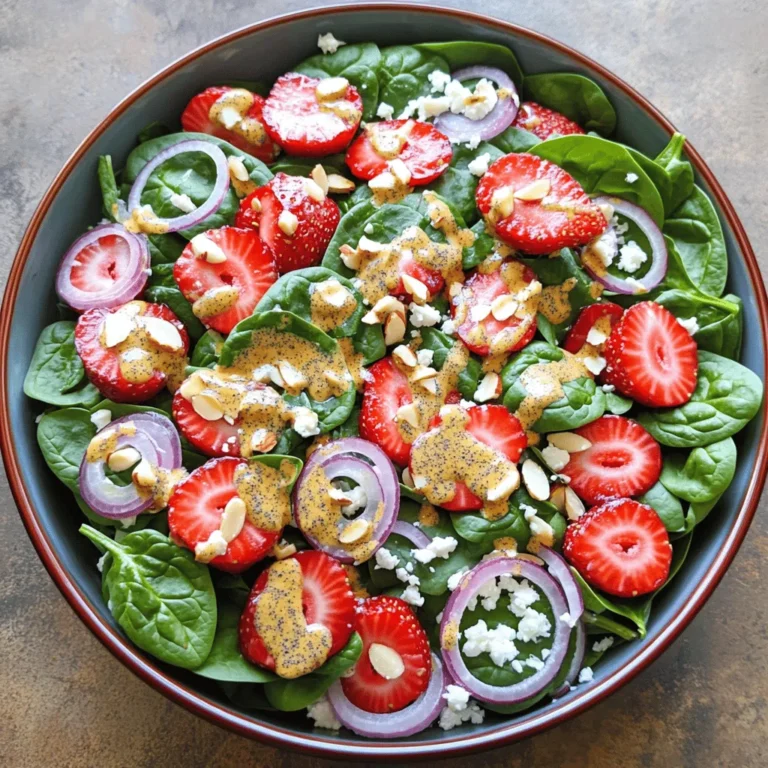
Strawberry Spinach Salad with Poppy Seed Dressing Delight

- 2 boneless, skinless chicken breasts - 2 tablespoons Cajun seasoning - 8 ounces fettuccine pasta - 2 tablespoons olive oil - 1 clove garlic, minced - 1 cup heavy cream - 1 cup freshly grated Parmesan cheese - Salt and freshly ground black pepper to taste - 2 tablespoons chopped fresh parsley (for garnish) Each ingredient plays a key role in creating the dish. The chicken gives protein and a hearty texture. Cajun seasoning adds a bold, spicy flavor. Fettuccine pasta serves as a perfect base, holding onto the sauce well. Heavy cream makes the sauce rich and creamy. Parmesan cheese adds depth and a savory touch. Fresh garlic gives a warm aroma and enhances flavor. Lastly, parsley brightens the dish and adds freshness. You can swap chicken for shrimp or sausage for a different taste. If you want a lighter dish, use half-and-half instead of heavy cream. For a dairy-free option, use coconut cream and nutritional yeast. If you don’t have fettuccine, any pasta like penne or spaghetti works well. Adjust the Cajun seasoning to your spice level. You can also use store-bought Alfredo sauce if you’re short on time. Check out the Full Recipe for more ideas! Start by seasoning the chicken. Take the two boneless, skinless chicken breasts. Coat both sides with Cajun seasoning. Make sure to cover them well. This seasoning adds a bold flavor to your dish. Heat two tablespoons of olive oil in a large skillet over medium heat. Once hot, add the chicken. Cook each side for about 5-7 minutes. Use a meat thermometer to check the internal temperature. It should reach 165°F (75°C). After cooking, remove the chicken and let it rest. Slice it into strips after a few minutes. This keeps the juices inside. Next, let’s cook the fettuccine. Fill a large pot with water and add a good amount of salt. Bring it to a rolling boil. Once boiling, carefully add the 8 ounces of fettuccine pasta. Cook it according to the package instructions. You want the pasta al dente, which means it should be firm to the bite. Before draining, save half a cup of the starchy water. This water helps the sauce later. Once done, drain the pasta and set it aside. Now, let’s create the creamy Alfredo sauce. In the same skillet where you cooked the chicken, add one minced garlic clove. Sauté it for about 30 seconds until it smells great. Pour in one cup of heavy cream. Bring this to a gentle simmer. Gradually add one cup of freshly grated Parmesan cheese. Stir until it melts into a creamy sauce. If the sauce is too thick, add a splash of the reserved pasta water. This keeps the sauce smooth and creamy. Now, toss the cooked fettuccine in the sauce. Make sure each strand is coated well. Finally, add the sliced chicken on top. Fold it gently into the pasta. Taste it and adjust with salt and pepper if needed. To get the best Cajun flavor, use good Cajun seasoning. This spice mix is full of bold tastes. Look for one with paprika, garlic, and onion. You can also make your own mix if you like. Just combine equal parts paprika, garlic powder, onion powder, and cayenne for heat. Sprinkle it evenly on both sides of your chicken. This ensures every bite bursts with flavor. A creamy Alfredo sauce is key to this dish. Start by using heavy cream. It makes the sauce rich and thick. When you add the Parmesan cheese, stir it in slowly. This helps it melt smoothly. If the sauce gets too thick, add a bit of the pasta water. This water has starch that helps the sauce stay creamy without being too heavy. Presentation matters! To serve this dish, twirl the fettuccine into a nest shape. Place it in the center of each plate. Then, add the sliced chicken on top. For a pop of color, sprinkle fresh parsley on the dish. This not only looks good but adds a fresh taste. You can also serve it with a side salad for a complete meal. For the full recipe, check out the details above. {{image_4}} You can make a meat-free version of Cajun Alfredo. Use mushrooms or tofu as your main protein. Slice the mushrooms and sauté them until golden. For tofu, press it to remove extra water, then cube and cook until crispy. Replace chicken in the recipe with these options. The Cajun seasoning adds great flavor to both. You still get that creamy sauce with a twist that many will love. Adding vegetables boosts nutrition and flavor. You can use bell peppers, zucchini, or spinach. Chop them into bite-sized pieces. Sauté these veggies in the same skillet as the chicken. Cook until they are tender but still vibrant. This adds color and makes your dish healthier. Plus, it’s a fun way to sneak in more greens! Adjust the heat to fit your taste. If you love spice, add more Cajun seasoning. For a milder dish, reduce the amount you use. You can also mix in a bit of cayenne pepper for extra kick. Always taste as you go. This way, you can make the dish just right for you and your guests. To keep your Cajun Chicken Alfredo Pasta fresh, place it in an airtight container. Make sure to let the pasta cool before sealing it. Store it in the fridge for up to three days. This helps to keep the flavors intact. If you have a lot of leftovers, consider dividing it into smaller portions for easy meals later. Reheat the pasta gently to avoid drying it out. You can use a microwave or a stovetop. If using a microwave, cover the dish and heat in short bursts, stirring in between. For stovetop reheating, place the pasta in a skillet over low heat. Add a splash of cream or water to help loosen the sauce. Stir until warm, but don’t overcook it. You can freeze Cajun Chicken Alfredo Pasta for longer storage. Place it in a freezer-safe container or bag, removing as much air as possible. It will keep well for up to three months. To thaw, transfer it to the fridge overnight. Reheat it using the stovetop method to keep it creamy. Enjoy your flavorful meal anytime! For the complete recipe, check the Full Recipe above. Cajun Chicken Alfredo Pasta can last about 3 to 4 days in the fridge. To store it, place it in an airtight container. This keeps it fresh and tasty. When you're ready to eat, just reheat it on the stove or in the microwave. The flavors will still be great! Yes, you can make Cajun Chicken Alfredo Pasta ahead of time. This dish is perfect for meal prep. Cook the pasta and chicken, then store them separately. Keep the sauce in another container. When you’re ready to eat, just combine everything and heat it up. It saves time on busy days. You can serve many sides with Cajun Chicken Alfredo Pasta. Here are some tasty options: - Garlic bread for a crunchy contrast - A fresh green salad with a light dressing - Steamed vegetables like broccoli or green beans - A glass of white wine for a lovely pairing These sides enhance your meal and add variety to your plate. For the full recipe, check out the complete guide. Enjoy your cooking! This blog post covered key ingredients for Cajun Chicken Alfredo, from cooking the chicken to making the sauce. I shared tips to perfect the flavor and gave you fun variations to try. Remember to store leftovers properly for the best taste. You can even prepare this dish ahead of time. I hope you feel confident to create a delicious Cajun Chicken Alfredo that your family will love. Enjoy cooking and sharing this flavorful meal!

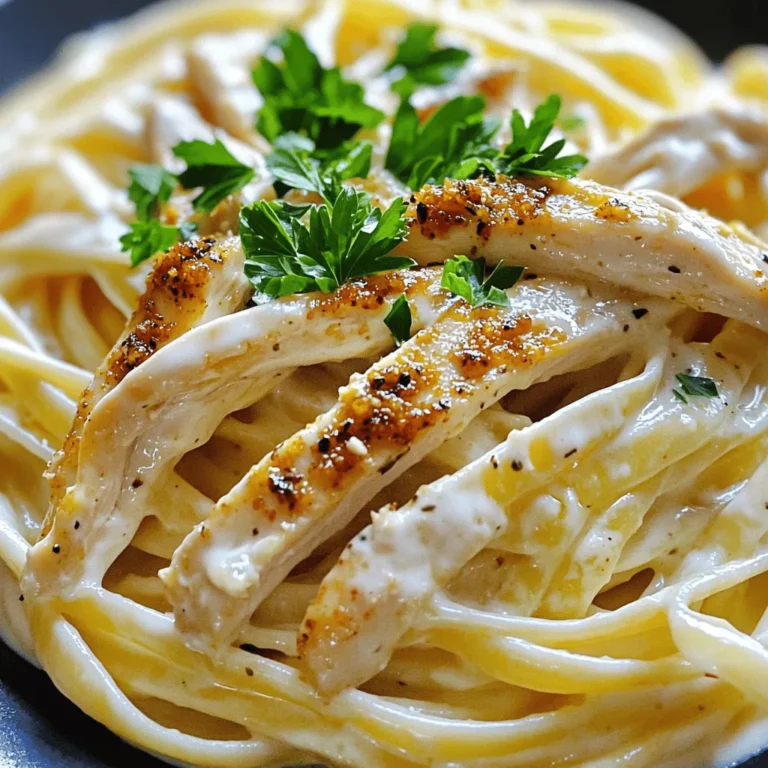
Cajun Chicken Alfredo Pasta Rich and Flavorful Meal

To make S’mores Cookie Bars, you'll need some simple yet delicious ingredients. Each one adds to the flavor and fun of this treat. Here's what you need: - 1 cup unsalted butter - 1 cup packed brown sugar - ½ cup granulated sugar - 2 large eggs - 1 teaspoon pure vanilla extract - 2 ½ cups all-purpose flour - 1 teaspoon baking soda - ½ teaspoon fine sea salt - 1 cup semi-sweet chocolate chips - 1 cup mini marshmallows - 1 cup graham cracker crumbs - Optional toppings: Extra marshmallows, chocolate chips These ingredients combine to create a chewy, gooey delight. The butter makes it rich, while the sugars add sweetness. Eggs give the bars nice structure. The flour and baking soda help them rise. Chocolate chips and marshmallows make every bite a tasty surprise. Graham cracker crumbs bring that classic s’mores flavor. You can even add more marshmallows or chocolate chips on top for extra fun! For the full recipe, check out the details on how to bring this treat to life. Start by preheating your oven to 350°F (175°C). Grease a 9x13 inch baking pan or line it with parchment paper. This makes it easy to remove the bars later. In a large bowl, mix the softened butter, brown sugar, and granulated sugar. Use a hand mixer or stand mixer. Blend until light and fluffy, about 2-3 minutes. Next, add the eggs one at a time. Mix well after each egg. Finally, stir in the vanilla extract for extra flavor. In another bowl, whisk together the flour, baking soda, and salt. Gradually add this dry mix to the wet mix. Stir gently until combined. Be careful not to overmix, as this can affect the texture. Now, it's time to create the delicious dough! Carefully fold in the chocolate chips and graham cracker crumbs. Use a spatula to ensure they are evenly spread in the dough. This adds a great texture and flavor to each bite. Set aside a small amount of mini marshmallows and chocolate chips for later. Next, transfer the dough to your prepared baking pan. Press it down firmly into an even layer. Now, sprinkle the reserved mini marshmallows and chocolate chips on top. Press them gently into the dough. This helps them stick as they bake. Place the baking pan in your preheated oven. Bake for 25-30 minutes. You want the edges to turn golden brown. The center should look set, and a toothpick should come out with a few moist crumbs. Once baked, remove the pan from the oven. Let the cookie bars cool for at least 10 minutes in the pan. After cooling, lift the bars out using the parchment paper. Slice them into squares or rectangles. For a special touch, use a kitchen torch to lightly toast the tops before serving. This gives them a nice, toasted flavor. You can find the full recipe for these delightful bars above. Enjoy every bit of this sweet treat! To make the best S’mores cookie bars, avoid overmixing your dough. When you mix too much, the bars can turn out dense. Mix just until you see no flour. This keeps your bars light and chewy. Layering toppings helps create great texture. Start with a base of chocolate chips, then add graham cracker crumbs and mini marshmallows on top. This gives you a nice crunch as you bite into the soft cookie. For a fun serving idea, cut the cookie bars into fun shapes with cookie cutters. You can also stack them on a plate with extra chocolate squares beside them. This makes a great treat for parties or family gatherings! Garnish the top with a light dusting of graham cracker crumbs. This makes your bars look more like real S’mores. You can also toast some extra mini marshmallows on top for a campfire vibe. Make sure to measure your ingredients accurately. Using too much flour or sugar can change the texture of your cookie bars. Use a kitchen scale for the best results. Recognizing doneness is key. Your bars should be golden brown at the edges. The center might look a bit soft, but it will firm up as it cools. A toothpick should come out with a few moist crumbs, not wet batter. {{image_4}} You can make S'mores Cookie Bars gluten-free. Use gluten-free flour blends. Look for ones that have a good mix of starches. These blends often mimic regular flour well. You might need to add a bit more liquid. This keeps your bars chewy and moist. Want to change the taste? You can add peanut butter or butterscotch chips to the dough. These flavors blend well with chocolate. You can also toss in some assorted nuts. Walnuts or pecans add a nice crunch. Mix and match to find your favorite combo! Try some fun seasonal swaps! In fall, add pumpkin spice for a warm flavor. You can use it in the dough or sprinkle on top. In summer, fresh fruit can brighten your bars. Think strawberries or blueberries for a fresh twist. These small changes can make your treats feel new and exciting. To keep your s’mores cookie bars fresh, use airtight containers. This helps lock in moisture and flavor. Store the bars at room temperature. A cool, dry place is best for keeping them tasty. You can freeze cookie bars for later. First, let them cool completely. Then, wrap them tightly in plastic wrap and place them in a freezer bag. When you want to enjoy them, thaw at room temperature. For the best taste and texture, warm them in the oven for a few minutes. This brings back their soft, chewy goodness. S’mores cookie bars are best eaten within a week. After that, they may lose their charm. Look for signs of spoilage, like a dry texture or off smell. If they feel hard or crumbly, it’s time to toss them. Enjoy these delightful treats while they’re fresh! For the full recipe, check out the earlier section. You can check if the bars are ready by looking for a few key signs. First, the edges should turn a nice golden brown. The center must look set, not jiggly. You can also use a toothpick; if it comes out with a few moist crumbs, they are done. Yes, you can make these cookie bars ahead of time. Simply prepare the dough and store it in the fridge for up to 24 hours. When you are ready, bake them as usual. You can also bake them early and keep them at room temperature for a day. If you want a vegan option, you can replace eggs with applesauce or flaxseed meal. Use ¼ cup of applesauce for each egg. For flaxseed, mix one tablespoon of ground flaxseed with three tablespoons of water and let it sit for five minutes. To keep your cookie bars fresh, store them in an airtight container. This method keeps them soft and chewy. You can also layer parchment paper between layers to avoid sticking. Yes, you can use milk chocolate. It will make your cookie bars sweeter and creamier. The texture might become a bit softer, but the bars will still be delicious. Absolutely! This recipe is simple and straightforward. You only need a few skills, like mixing and baking. The steps are clear, making it great for anyone new to baking. For those wanting more tips, check out the Full Recipe for extra guidance. In this blog post, we explored how to make delicious S’mores Cookie Bars. We covered the essential ingredients, step-by-step instructions, baking tips, and various delicious variations. Remember, perfecting your bars requires attention to mixing and doneness. Feel free to experiment with flavors or options. These treats can bring joy to any occasion. Follow the tips for great results every time. Enjoy your baking journey and share these tasty bars with friends and family!

S’mores Cookie Bars Delightful and Chewy Treat

To make crispy buffalo cauliflower bites, gather these simple ingredients: - Large head of cauliflower - All-purpose flour - Buttermilk (or plant-based alternative) - Garlic powder - Onion powder - Smoked paprika - Salt - Black pepper - Breadcrumbs (Panko for extra crunch) - Buffalo sauce - Olive oil - Fresh parsley for garnish These ingredients bring together a delightful mix of flavors and textures. The cauliflower serves as a healthy base, while the spices add warmth and depth. The buttermilk helps the batter stick, creating that crispy coating you crave. Using Panko breadcrumbs ensures an extra crunch, making each bite satisfying. Don't forget the buffalo sauce! It adds the perfect spicy kick that makes these bites so irresistible. For more details on the preparation, check the Full Recipe. - Preheat the oven to 450°F (232°C). - Line a baking sheet with parchment paper. - In a large bowl, combine the all-purpose flour, garlic powder, onion powder, smoked paprika, salt, and black pepper. - Gradually add the buttermilk to the dry mix. Stir until you reach a smooth, thick batter. - Take your cauliflower florets and dip each one into the batter. Ensure they are fully covered. - Roll the coated florets in breadcrumbs. Place them on the lined baking sheet in a single layer. - Drizzle olive oil over the coated bites. This helps them get crispy. - Bake in the oven for 20-25 minutes. Flip them halfway through for even cooking. - Once golden and crispy, remove the bites from the oven. Toss them in buffalo sauce until fully coated. - Return them to the oven for 5 more minutes. This helps the sauce stick well. Enjoy your crispy buffalo cauliflower bites as a tasty snack! For the complete recipe, check out the Full Recipe section. To get crispy buffalo cauliflower bites, first dry the cauliflower well. Moisture makes it hard to crisp up. Use a clean towel to pat the florets dry. Next, olive oil is key. It helps the breading stick and adds flavor. When you coat the florets, dip them in batter first. Then, roll them in breadcrumbs. Using Panko breadcrumbs gives extra crunch. Avoid overcrowding the baking sheet. If the florets touch, they steam instead of crisp. This will make them soggy. Make sure to space them out. Another mistake is not flipping the bites while baking. Turn them halfway through to ensure even cooking. This way, all sides become crispy and golden. These bites shine when paired with dips. Ranch dressing or blue cheese complements them well. For sides, think about crunchy celery sticks or fresh carrot sticks. They add a nice crunch and balance the heat. As for drinks, a cold beer or sparkling water works great! {{image_4}} To make these crispy buffalo cauliflower bites vegan, swap out a few key ingredients. Use plant-based buttermilk instead of regular buttermilk. You can easily make this by mixing almond milk with vinegar and letting it sit. Also, choose a vegan-friendly buffalo sauce. Most brands offer a great taste without animal products. This way, you can enjoy the same crispy goodness while sticking to your vegan diet. Want to adjust the heat? You can make these bites milder or spicier. For a milder flavor, mix in a bit of honey or maple syrup into the buffalo sauce. This balances the heat. If you like it spicier, add cayenne pepper or extra hot sauce to the buffalo mix. A little goes a long way, so start with a small amount and taste as you go. Enhance the flavor of your crispy bites by adding different seasonings. Mix in some cumin or chili powder into the flour for a unique twist. You can also try marinating the cauliflower in the buffalo sauce for a few hours before coating. This adds a deeper flavor. Another great option is to sprinkle some grated Parmesan cheese on top before baking for a savory touch. For the full recipe, check out the detailed instructions above. Store leftover crispy buffalo cauliflower bites in an airtight container. This keeps them fresh longer. Place them in the fridge for up to three days. Make sure they cool down before sealing. This step helps prevent sogginess. If you want to enjoy them later, consider separating layers with parchment paper. It stops them from sticking together. You can freeze crispy buffalo cauliflower bites for later use. First, let them cool completely. Then, place them in a single layer on a baking sheet. Freeze for about an hour. Once frozen, transfer them to a freezer-safe bag. Try to remove as much air as possible before sealing. You can store them in the freezer for up to three months. This way, you can enjoy your tasty snack anytime! To reheat and keep them crispy, use an oven or air fryer. Preheat your oven to 400°F (200°C). Arrange the bites in a single layer on a baking sheet. Bake for about 10-12 minutes. If using an air fryer, set it to 375°F (190°C) and heat for about 8-10 minutes. Check for crispiness before serving. This method brings back that crunchy texture, making them just as delicious as when they were first made. To make crispy buffalo cauliflower bites in an air fryer, first prep the cauliflower just like in the oven method. Dip the florets in the batter, then coat in breadcrumbs. Place the coated florets in the air fryer basket in a single layer. Set the air fryer to 400°F (200°C) and cook for 12-15 minutes. Shake the basket halfway to ensure even cooking. Toss them in buffalo sauce after cooking. Enjoy a healthier and crispier version! Yes, you can use frozen cauliflower, but it’s best to thaw and drain it first. Frozen cauliflower may not crisp up as well as fresh. If you use it, make sure to pat it dry to remove excess moisture before battering. This helps get that nice crunch. Crispy buffalo cauliflower bites are a great snack option. A serving of four bites has around 150 calories, 6 grams of protein, and 6 grams of fat. They also offer fiber and essential nutrients from cauliflower. Always check your specific ingredients for more accurate numbers. You can store buffalo cauliflower bites in the fridge for about 3-4 days. Make sure to place them in an airtight container. For the best taste, reheat them in an oven or air fryer to regain some crispiness. The best dipping sauces for buffalo cauliflower bites are ranch and blue cheese. Their creamy texture balances the heat of the buffalo sauce. You can also try a garlic aioli or a simple yogurt dip for a fresh twist. This blog post covers a tasty way to make crispy buffalo cauliflower bites. We discussed the key ingredients, detailed preparation steps, and shared tips for perfect crispiness. I provided ideas for variations and best practices for storage, ensuring you enjoy these bites anytime. Now you have a simple, fun recipe to impress your friends and family. Enjoy the bold flavors, and don’t forget to experiment with spices and dips! Happy cooking!

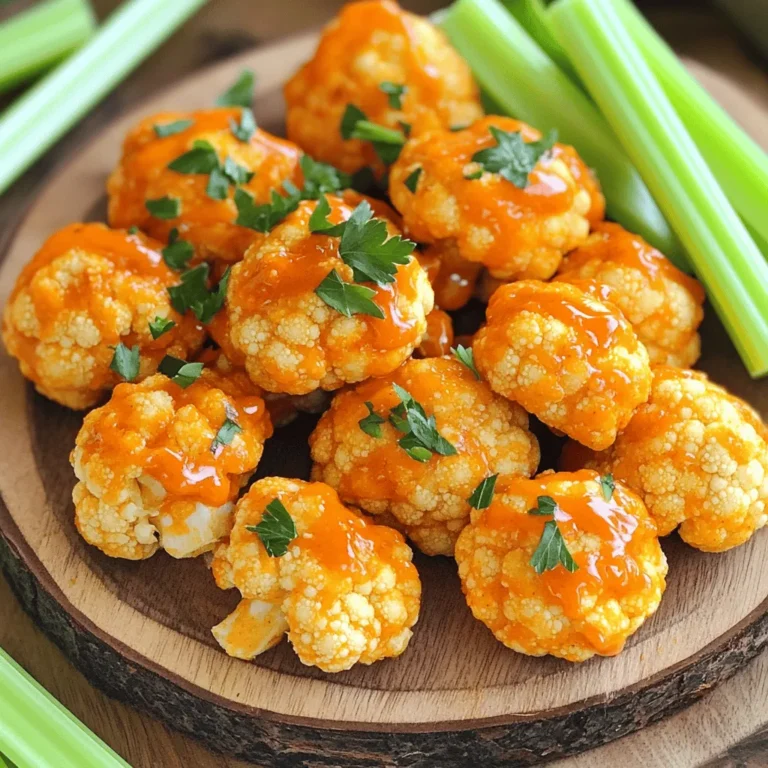
Crispy Buffalo Cauliflower Bites Tasty Snack Idea

- 3 ripe bananas - 1/2 cup unsalted butter - 1 cup packed brown sugar - 2 large eggs - 1 teaspoon pure vanilla extract - 1 teaspoon baking soda - 1/2 teaspoon fine salt - 1 1/2 cups all-purpose flour - 1 cup semi-sweet chocolate chips - 1/2 cup chopped walnuts (optional) The ingredients for chocolate chip banana bread are simple and easy to find. Each item plays a key role in making this bread moist and tasty. - Butter: If you need a substitute, use coconut oil or applesauce. Both add moisture. - Sugar Varieties: You can swap brown sugar for white sugar or honey. This change alters the flavor. - Egg Substitutes: Use flaxseed meal or applesauce for a vegan option. Each works well in baked goods. These substitutions help you customize your banana bread to fit your needs. You can still enjoy a delicious treat! For the full recipe, check out the Choco-Banana Bliss Bread . 1. Preheat your oven to 350°F (175°C). This helps your bread bake evenly. 2. Prepare your baking pan by greasing a 9x5 inch loaf pan. You can use butter or line it with parchment paper. This makes removal easy later. 3. Mash the ripe bananas in a large bowl until they are smooth. Use a fork or potato masher for this. 4. Mix in the softened butter until the blend is creamy. This adds richness to your banana bread. 1. Add the packed brown sugar to the banana-butter mix. Stir well until combined. This gives sweetness and depth. 2. Crack in the eggs and pour in the vanilla extract. Mix until the batter is smooth. Eggs help bind everything together. 3. Sprinkle the baking soda and salt into the batter. Mix gently until combined. Be careful not to overmix, as this can make the bread tough. 4. Gradually fold in the sifted flour using a spatula or wooden spoon. Stop mixing when no flour streaks remain. It’s fine if the batter is a bit lumpy. 5. Fold in the chocolate chips and chopped walnuts if desired. This adds flavor and texture to your bread. 1. Transfer the batter to the prepared loaf pan. Use a spatula to smooth the top. This ensures an even finish. 2. Bake in the preheated oven for 60-70 minutes. Check for doneness by inserting a toothpick in the center. It should come out clean or with a few moist crumbs. 3. Let the banana bread cool in the pan for about 10 minutes. Then, remove it from the pan and cool completely on a wire rack. This helps keep the texture right. Follow these steps carefully to create a delicious chocolate chip banana bread. For the full recipe, check out the ingredients above! To get the best texture in your chocolate chip banana bread, mixing is key. Start by mashing your bananas until smooth. Then, mix in the butter until creamy. When you add the dry ingredients, mix gently. Overmixing can make the bread tough. Aim to stop mixing as soon as the flour disappears. Ripe bananas are also vital. Look for bananas that are brown with spots. They should feel soft to the touch. These bananas add natural sweetness and moisture. If your bananas are too green, they may not mash well. You can easily boost the flavor of your banana bread. Adding spices is one way. Consider a pinch of cinnamon or nutmeg. These spices bring warmth and depth to your bread. You can also add a splash of almond or coconut extract for a twist. When it comes to chocolate chips, your choice matters. Semi-sweet chips are classic, but dark chocolate can add richness. For a fun touch, try adding white or peanut butter chips. Mix different types for a flavor explosion. Serving banana bread can be fun and creative. Slice the bread warm and serve it with butter. A light dusting of powdered sugar on top looks lovely too. For a fancy touch, drizzle chocolate ganache over each slice. You can also add fresh banana slices for decoration. Pair your banana bread with a cup of coffee or tea. It makes for a delightful treat any time of day. To find the full recipe for this delicious chocolate chip banana bread, check out the [Full Recipe]. {{image_4}} You can switch up the nuts in your chocolate chip banana bread. Adding walnuts, pecans, or almonds adds nice crunch. Each nut brings its own flavor. For a richer taste, try using dark or white chocolate chips. These options change the flavor profile and make it fun. Let’s get creative with flavors! You can add spices like cinnamon or nutmeg. Just a pinch can boost the taste. Another fun idea is to mix in coconut or peanut butter. Coconut gives a tropical twist. Peanut butter will make it extra creamy and rich. If you need gluten-free options, use almond flour instead of all-purpose flour. It works well and keeps the bread moist. For low-sugar or sugar-free choices, try using applesauce or a sugar substitute. These adjustments help everyone enjoy this yummy treat without worry. For the full recipe, check the Choco-Banana Bliss Bread section. To keep your chocolate chip banana bread fresh, wrap it tightly in plastic wrap. This keeps the moisture in and prevents it from drying out. You can also place it in an airtight container. Store the bread at room temperature for up to three days. If you want to enjoy it later, freezing is a great option. To freeze banana bread, slice it first. Wrap each slice in plastic wrap, then place them in a freezer bag. This makes it easy to grab a piece whenever you want. Banana bread lasts about a week in the fridge. Store it in an airtight container to keep it fresh. If you notice any mold or an off smell, it’s time to toss it. Other signs of spoilage include a dry texture or a change in color. Always check your banana bread before eating it, especially if it has been stored for a while. To check if your banana bread is done, use a toothpick. Insert it into the center of the loaf. If the toothpick comes out clean or with a few crumbs, it's ready. If it has wet batter on it, bake longer. - Bake for 60-70 minutes. - Rotate the pan halfway for even cooking. - Look for a golden-brown top. Yes, you can add more bananas. They boost the flavor and sweetness. However, too many bananas can change the texture. The bread may become too moist and dense. Stick to the recipe for the best result. - Use bananas that are overripe for the best taste. - Adjust flour if you add more bananas. To keep your banana bread moist, use ripe bananas. They have more natural sugars and moisture. Also, don’t overmix your batter. This helps keep the bread light and fluffy. - Use room temperature eggs and butter. - Store the bread in an airtight container after cooling. - Add a touch of sour cream or yogurt for extra moisture. For the full recipe, check out the Choco-Banana Bliss Bread above! This guide walks you through making delicious banana bread. We covered essential ingredients, step-by-step instructions, and tips for the best texture. I hope these insights help you enjoy baking and sharing this treat. Experiment with flavors and variations to find your favorite twist. Remember, proper storage keeps your banana bread fresh longer. With these tips, you can bake confidently and create something special. Happy baking!

Chocolate Chip Banana Bread Simple and Delicious Recipe

To make a rich and tasty split pea soup, gather these key ingredients: - 1 pound green split peas, thoroughly rinsed and drained - 1 meaty ham bone (or 2 cups of diced smoked ham) - 1 medium onion, finely chopped - 2 cloves fresh garlic, minced - 3 medium carrots, diced into small pieces - 2 celery stalks, diced - 6 cups low-sodium chicken broth or vegetable broth - 1 teaspoon dried thyme - 1 bay leaf - Salt and black pepper to taste - 1 tablespoon extra-virgin olive oil - Fresh parsley, finely chopped (for garnish) These ingredients work together to create a hearty meal. The ham bone adds a deep flavor to the soup. If you prefer diced ham, that works too! Using fresh herbs can brighten your soup. Fresh parsley on top adds color and taste. Dried thyme gives a strong flavor that blends well during cooking. Both have their place, but I prefer fresh herbs when I can. For a delightful finish, consider these garnishes: - Crusty bread or cornbread for dipping - A sprinkle of fresh chives or green onions - A dollop of sour cream for creaminess These options enhance your soup and make it even more enjoyable. {{ingredient_image_2}} Start by gathering your veggies. You need one medium onion, two cloves of garlic, three carrots, and two celery stalks. Chop the onion finely and dice the carrots and celery into small pieces. This helps them cook evenly. In a large pot, heat one tablespoon of extra-virgin olive oil over medium heat. Add the chopped onion, carrots, and celery. Cook these for about five to seven minutes. You want them soft and the onion to be clear. This mix gives a great base for your soup. Next, stir in the minced garlic. Cook it for one to two minutes. You want to smell the garlic but not burn it. Now it’s time to add the main ingredients. Add one pound of rinsed split peas, one meaty ham bone, or two cups of diced smoked ham. Pour in six cups of low-sodium chicken or vegetable broth. Add one teaspoon of dried thyme and one bay leaf. Mix it all together. Bring the pot to a boil, then lower the heat. Cover and let it simmer for about one hour. Stir it now and then. The split peas should be soft and starting to break down. After an hour, it’s time to check on the ham bone. Carefully remove it from the pot. Let it cool for a bit. Once it’s cool enough to handle, shred the meat from the bone with a fork. Make sure to get all the tasty bits. Return the shredded ham to the pot. Now, remove the bay leaf. Season your soup with salt and black pepper to taste. If the soup is too thick, add more broth or water until it looks good. Let it simmer for another ten minutes. This helps all the flavors blend together nicely. Now your savory split pea soup is ready to serve! To make your split pea soup shine, think about spices. I like to use dried thyme and black pepper. These add warmth and depth. You can also try a pinch of smoked paprika for a nice twist. If you enjoy heat, add a bit of cayenne pepper. Always taste as you go. This way, you can adjust the spices to your liking. Many home cooks make a few common errors. First, don’t skip rinsing your split peas. This removes dirt and helps with texture. Second, be careful not to burn the garlic. Add it after the veggies are soft. Lastly, make sure to taste your soup before serving. You might want to add more salt or pepper. These small steps lead to a better soup. The thickness of your soup can change how it feels. If you want a thick soup, let it simmer longer. The peas will break down more. If you prefer a thinner soup, simply add more broth or water. Stir well to mix it in. For the perfect texture, I suggest starting with 6 cups of broth. You can always add more if needed. Pro Tips Soak the Peas: For an even creamier texture, soak the split peas in water for a few hours or overnight before cooking. This helps them cook faster and more evenly. Enhance Flavor: Consider adding a splash of apple cider vinegar or a squeeze of lemon juice before serving to brighten the flavors of the soup. Use Fresh Herbs: Fresh herbs like thyme or rosemary can be added during the last few minutes of cooking for an aromatic finish that elevates the soup. Store Properly: This soup keeps well in the refrigerator for up to 5 days. It also freezes beautifully, so make a big batch and save some for later! {{image_4}} You can make a tasty vegetarian split pea soup. Swap the ham bone for a smoked paprika or liquid smoke. This gives the soup a warm, smoky taste without meat. Use vegetable broth instead of chicken broth. Add in some sautéed mushrooms for extra flavor and texture. This version is just as hearty and satisfying. Feel free to add more veggies to your soup. Chopped potatoes or parsnips work great. You can also throw in greens like spinach or kale for added nutrition. Just add these extras when you cook the onions and carrots. They will blend well with the split peas and make the soup even more colorful. Looking for a kick? Add cayenne pepper or hot sauce to your split pea soup. Start with a small amount, like a pinch of cayenne. Taste, then adjust to your heat level. Hot sauce can also add depth and flavor. Just remember, you can always add more spice, but it’s hard to take it out once it’s in! To store leftover soup, let it cool first. Use a clean container with a tight lid. Pour the soup in, leaving some space at the top. This helps the soup expand if it freezes. Place the container in the fridge. It will last for about 3-5 days. If you want to keep it longer, freezing is a great option. When you are ready to eat, take the soup out of the fridge. Pour it into a pot. Heat it over medium heat. Stir often to avoid burning. If the soup is too thick, add a little broth or water. Heat until it’s hot all the way through. You can also use a microwave. Just cover the bowl and heat in short bursts, stirring in between. To freeze your split pea soup, first cool it down. Pour the soup into freezer bags or containers. Leave some space for expansion. Label the bags with the date. The soup can last up to 3 months in the freezer. When you want to eat it, thaw it overnight in the fridge. Then, reheat as explained above. Split pea soup can last about 3 to 5 days in the fridge. Make sure to store it in an airtight container. This keeps it fresh and safe to eat. You can easily reheat it on the stove or in the microwave. Yes, you can use lentils instead of split peas. Lentils cook faster and have a different texture. You may need to adjust the cooking time. Keep an eye on the soup as it cooks. If you don't have a ham bone, try using diced smoked ham. You can also use a vegetarian option like mushrooms for flavor. These will not give the same depth but can still make a tasty soup. Yes, split pea soup is quite healthy. It is packed with protein and fiber. The ham adds flavor, but you can make it lighter by using less ham or omitting it. The veggies also add vitamins and minerals, making it a wholesome meal. In this blog post, we explored how to make split pea soup. We discussed essential ingredients and compared fresh and dried herbs. You learned how to prepare vegetables and cook the soup, plus tips for shredding ham. We covered tricks to enhance flavor and avoid mistakes, shared variations like vegetarian options, and offered storage tips. Split pea soup is simple and tasty. Now, you can enjoy it in many ways. Experiment, have fun, and make it yours!

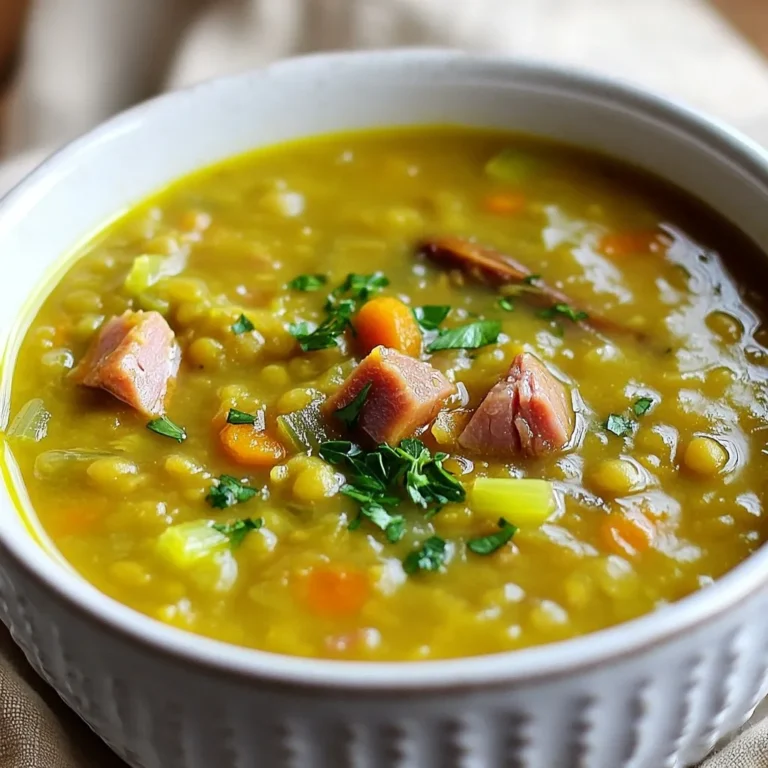
Savory Split Pea Soup with Ham Bone Delight

To make honey garlic chicken thighs, you’ll need: - 4 bone-in chicken thighs, skin-on - 1/2 cup honey - 4 cloves garlic, minced - 2 tablespoons soy sauce (or tamari for gluten-free) - 1 tablespoon apple cider vinegar - 1 tablespoon olive oil - 1 teaspoon ground ginger (or 1 tablespoon fresh ginger, grated) - Salt and pepper to taste These ingredients blend to create a sweet and savory flavor. The honey gives a sticky glaze, while the garlic adds depth. Chicken thighs are ideal for this dish as they stay juicy and tender. Feel free to add your twist with these optional ingredients: - Fresh herbs like thyme or rosemary - Red pepper flakes for heat - A splash of orange juice for brightness - Coconut aminos instead of soy sauce for a different taste These options let you personalize the dish based on your taste. Garnish your honey garlic chicken thighs with: - Chopped green onions - Sesame seeds These add a nice crunch and visual appeal. You can also serve them with a side of fluffy rice or roasted veggies. This makes your meal look great and taste even better. For the full details, check out the Full Recipe. First, gather your ingredients. You need honey, garlic, soy sauce, apple cider vinegar, olive oil, ginger, salt, and pepper. In a medium bowl, whisk these ingredients together. This creates a smooth and tasty marinade. Each flavor in the marinade works together to give the chicken a sweet and savory taste. Next, take your chicken thighs. Place them in a large resealable bag or a shallow dish. Pour the marinade over the chicken. Make sure every piece gets coated well. Seal the bag or cover the dish tightly. Let the chicken marinate in the fridge for at least one hour. For best results, marinate overnight. This helps the flavors soak into the meat. Now, it's time to cook. Preheat your oven to 400°F (200°C). Heat some olive oil in a large oven-safe skillet over medium-high heat. Take the chicken out of the marinade. Set the marinade aside for later use. Place the chicken skin-side down in the skillet. Sear it for about 4-5 minutes. You want the skin to turn golden brown and crispy. After searing, flip the chicken thighs over. Pour the reserved marinade over them evenly. Transfer the skillet to the preheated oven. Bake for 25-30 minutes. Check that the chicken reaches an internal temperature of 165°F (75°C). The skin should look rich and caramelized. Once done, take the chicken out and let it rest for a few minutes. This helps keep it juicy. Before you serve it, sprinkle some chopped green onions and sesame seeds on top. This adds color and flavor to your dish. Enjoy your delicious honey garlic chicken thighs! If you want the full recipe, check out the [Full Recipe]. Marinating adds great flavor to your chicken. Use a large resealable bag or a dish. Pour the marinade over the chicken and seal it tightly. Let it sit in the fridge for at least one hour. For deeper flavor, marinate overnight. The longer it sits, the tastier it becomes. You can also turn the bag every so often to coat all sides. To get that crispy skin, start by drying the chicken thighs with paper towels. Moisture is the enemy of crispiness. Sear the chicken in a hot skillet skin-side down for about 4-5 minutes. This step locks in flavor and gives you that lovely brown. After searing, bake the chicken in the oven to finish cooking while keeping the skin crisp. For perfectly cooked chicken, use a meat thermometer. Insert it into the thickest part of the thigh. The chicken is done when it reaches 165°F (75°C). This ensures it is safe to eat and juicy. If you don’t have a thermometer, cook for about 25-30 minutes in the oven. Always let it rest for a few minutes after cooking. This helps the juices redistribute and keeps the meat tender. For the full recipe, check out the details above. {{image_4}} You can easily make this dish gluten-free. Just swap regular soy sauce for tamari. This simple change keeps the flavor intact while ensuring everyone can enjoy it. Tamari is a great choice because it tastes similar to soy sauce. It adds that rich umami flavor you want in this dish. Always check labels to avoid hidden gluten. Want to spice things up? Add some heat! You can mix in red pepper flakes or hot sauce into the marinade. Start with a small amount, then taste and adjust as needed. This adds a nice kick to the sweet and savory mix. Pair it with cooling sides like cucumber salad to balance the heat. You can also add veggies for a complete meal. Toss in chopped bell peppers, carrots, or broccoli in the same pan while baking. This not only adds color but also boosts nutrition. The veggies soak up the sauce, making them extra tasty. You will have a one-pan meal that is easy to serve and clean up. For the full recipe, check out the sticky honey garlic chicken thighs. After enjoying your honey garlic chicken thighs, store leftovers in an airtight container. Let the chicken cool to room temperature before sealing. This keeps the chicken moist and fresh. Place it in the fridge if you plan to eat it within three days. To reheat, preheat your oven to 350°F (175°C). Place the chicken thighs in an oven-safe dish. Cover with foil to keep the moisture in. Heat for about 15-20 minutes or until hot. You can also use a microwave if you are in a hurry. Just heat in 30-second bursts, checking often to avoid drying out. You can freeze honey garlic chicken thighs for up to three months. First, let the cooked chicken cool completely. Wrap each piece in plastic wrap, then place them in a freezer-safe bag. Remove as much air as possible. When ready to eat, thaw in the fridge overnight and reheat as mentioned above for best results. Yes, you can use boneless chicken thighs. They cook faster and still soak up the flavor. Just be careful not to overcook them. Use a meat thermometer to check if they reach 165°F (75°C). I recommend marinating the chicken for at least one hour. For the best flavor, marinate it overnight. This allows the honey and garlic to really soak into the meat. I love serving these thighs with fluffy steamed rice. You can also add colorful roasted vegetables for a balanced meal. A fresh salad pairs nicely too. These sides complement the sweet and savory chicken well. For more ideas, check the Full Recipe. This blog post shared easy steps for making honey garlic chicken thighs. You learned about the main ingredients, how to marinate, and the best cooking methods. I also provided tips for crispy skin and safe cooking. You can customize recipes with gluten-free options or add veggies. Remember, store leftovers right and reheat carefully. I hope you feel excited to try this dish! Cooking can be fun, and you can impress everyone with your skills. Enjoy your sweet and savory creation!

Honey Garlic Chicken Thighs Flavorful Dinner Recipe

- 1 pound boneless, skinless chicken thighs - 4 tablespoons unsalted butter - 4 cloves garlic, minced - Fresh thyme leaves or dried thyme - Fresh parsley, paprika, salt, and pepper - Juice from 1/2 lemon - Red pepper flakes for heat - Suggested side dishes The essential ingredients create the base for the dish. I love using boneless, skinless chicken thighs for their juicy texture. The unsalted butter adds richness, while garlic brings that bold flavor. For seasoning, fresh thyme and parsley brighten the dish. Paprika gives it a lovely color and a mild kick, while salt and pepper enhance all flavors. A squeeze of lemon juice balances the richness with some acidity. You can add red pepper flakes if you want heat. Garlic Butter Chicken Bites pair well with garlic bread or a light salad. These flavors come together to create an irresistible dish. You can find the full recipe to make this delicious meal. First, season your chicken. Use salt, pepper, and paprika. This gives the chicken a nice flavor. Next, cut the chicken into bite-sized pieces. This helps them cook evenly and stay juicy. Now, heat two tablespoons of butter in a skillet over medium heat. Once the butter melts and bubbles, add the chicken. Spread the pieces out in one layer. This helps them cook well. Cook the chicken for about 5 to 7 minutes. Turn them with tongs until they turn golden brown. Use a meat thermometer to check the temperature; it should reach 165°F. Remove the cooked chicken and set it aside. In the same skillet, add the rest of the butter. Sauté minced garlic in the butter for 1 to 2 minutes. Be careful not to burn it; you want it fragrant. Then, return the chicken to the skillet. Mix it well with the garlic butter sauce. Add fresh thyme and the juice from half a lemon. Cook for another 2 to 3 minutes. This allows the flavors to blend perfectly. Taste your dish and adjust the seasoning if needed. If you like heat, add red pepper flakes. Finally, transfer your garlic butter chicken bites to a serving dish. Garnish with fresh parsley for a pop of color. Enjoy your meal right away for the best taste! For the complete recipe, check the Full Recipe. Cooking chicken bites in batches means they cook evenly. If you crowd the pan, they steam instead of brown. For the best results, heat your skillet to medium. This temperature allows the chicken to develop a nice golden crust. If the skillet is too hot, the outside will burn before the inside cooks. To boost the flavor, taste your garlic butter sauce as you cook. You can adjust the seasoning to your liking. If you want some heat, add red pepper flakes. They bring a nice kick without overpowering the dish. For more depth, try adding a splash of soy sauce or a pinch of smoked paprika. These small tweaks can make a big difference. Garlic butter chicken bites pair well with many sides. Try serving them with garlic bread or a fresh green salad. Both options balance the rich flavors of the chicken. For a nice presentation, use a clean plate and sprinkle fresh parsley on top. This not only looks good but also adds a touch of freshness. For the full recipe, follow the steps outlined above. {{image_4}} You can change the protein in garlic butter chicken bites. Shrimp or tofu works great. Shrimp cooks fast and adds a sweet taste. Tofu is a great choice for a plant-based meal. You can keep the same garlic butter sauce for both. Herbs and spices can change the flavor. You can use rosemary or oregano instead of thyme. Each herb adds its unique taste. Try adding a pinch of cumin for a warm twist. Experiment with your favorites! You can make garlic butter chicken bites in the oven. Preheat your oven to 400°F. Spread the chicken on a baking sheet and bake for 20 minutes. This method gives you a crispy finish. You can also use a grill for a smoky flavor. Just make sure to watch the chicken so it doesn’t dry out. To make this dish gluten-free, use gluten-free sauces. Many brands offer gluten-free options. For a dairy-free version, swap butter with olive oil or coconut oil. Both work well with garlic. If you want a vegan option, replace chicken with mushrooms or jackfruit. Both absorb flavors nicely. Follow the same steps in the recipe to keep the taste. You can find the full recipe above to guide you. After enjoying your garlic butter chicken bites, let them cool first. Place them in an airtight container. They can stay fresh in the fridge for up to three days. If you plan to eat them later, make sure they cool to room temperature before sealing. This helps prevent moisture buildup, which can make them soggy. To freeze your chicken bites, allow them to cool completely. Use a freezer-safe container or a heavy-duty freezer bag. Remove excess air from the bag to avoid freezer burn. They can last up to three months in the freezer. When you're ready to eat, just thaw them overnight in the fridge. When reheating, I recommend using the oven. Preheat it to 350°F. Place the chicken bites on a baking sheet. Cover them with foil to keep them moist. Heat for about 15-20 minutes. This helps keep the chicken tender. If you’re in a hurry, you can microwave them. Use a microwave-safe dish and cover it, but be careful not to overcook. This can make the chicken rubbery. Enjoy your delicious bites just like when they were fresh! Chicken bites usually take around 5-7 minutes to cook. Cook them over medium heat. Make sure they reach an internal temperature of 165°F. Check them with a meat thermometer for best results. If you crowd the skillet, it may take longer. For even cooking, try cooking in batches. Yes, you can use chicken breast. However, chicken thighs give a richer flavor. Breast meat cooks faster, so watch the time. You may need to adjust cooking time to around 4-6 minutes. Chicken breast can dry out, so be careful not to overcook. Garlic butter chicken bites pair well with many sides. Try garlic bread for a tasty option. A light salad adds freshness. Steamed veggies like broccoli or green beans make great choices. Rice or quinoa can soak up the garlic butter sauce, enhancing the meal. To add heat, sprinkle red pepper flakes into the garlic butter sauce. You can also use hot sauce or diced jalapeños. Adjust the amount based on your heat preference. If you enjoy spicy food, don't be shy to experiment. Start with a small amount and adjust as needed. For a smoky flavor, consider adding smoked paprika. For the full recipe, check the Garlic Butter Chicken Bites section above. This blog post covered how to make delicious garlic butter chicken bites. We discussed key ingredients like chicken, butter, and garlic. Seasoning and flavoring made your dish pop with herbs, lemon juice, and optional heat from red pepper flakes. I shared step-by-step instructions for cooking and creating a rich sauce. We also explored tips for serving, variations, and storage. These chicken bites are easy and fun to make. Now it’s your turn to create this tasty meal. Enjoy your cooking adventure!

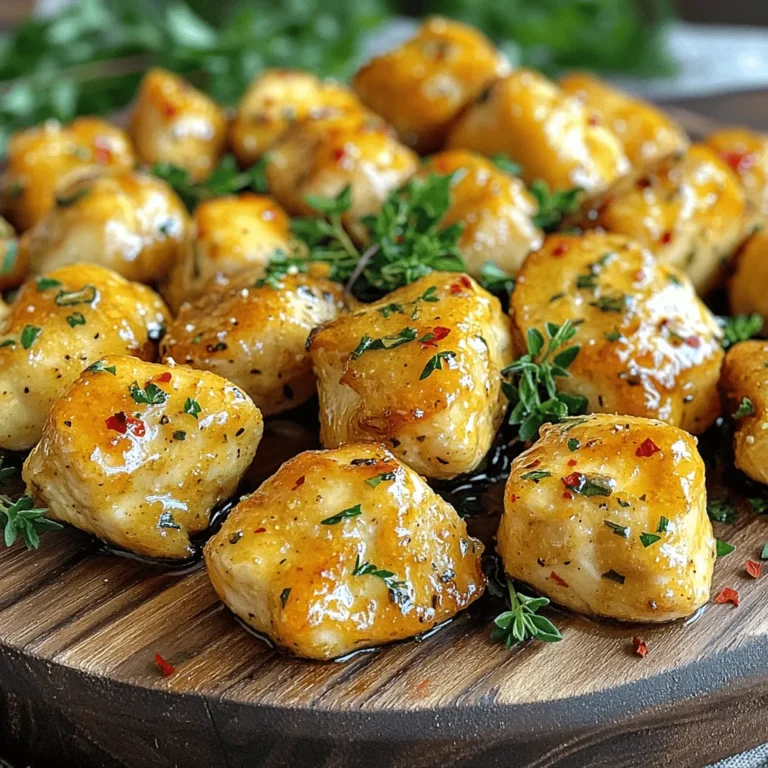
Garlic Butter Chicken Bites Irresistible Flavor Boost

For this dish, you need 2 large chicken breasts. Make sure to pound them to 1/2 inch thick. This helps them cook evenly and stay juicy. You will also need: - 1 cup all-purpose flour (seasoned with salt and pepper) - 2 large eggs (beaten smooth) - 1 cup panko breadcrumbs (for crunch) - 1/2 cup freshly grated Parmesan cheese - 1 teaspoon garlic powder - 1 teaspoon Italian seasoning - 1/2 teaspoon salt - 1/4 teaspoon black pepper These coatings give the chicken a crispy, tasty crust that you will love. For the topping, gather: - 1 cup marinara sauce (your favorite kind works best) - 1 cup shredded mozzarella cheese - Fresh basil leaves (for garnish) These ingredients add flavor and a nice look to your dish. The marinara sauce brings a rich taste, while the cheeses melt beautifully on top. {{ingredient_image_2}} Start by prepping your chicken. Take two large chicken breasts and pound them to an even thickness of 1/2 inch. This step is key. It makes sure the chicken cooks evenly. If the chicken is too thick, it might not cook through. Once pounded, it is ready for seasoning. Now, let's coat the chicken for that crunchy texture. Set up three shallow dishes. In the first dish, mix 1 cup of flour with a pinch of salt and pepper. In the second dish, beat two large eggs until smooth. For the third dish, combine 1 cup of panko breadcrumbs, 1/2 cup of grated Parmesan, 1 teaspoon garlic powder, 1 teaspoon Italian seasoning, 1/2 teaspoon salt, and 1/4 teaspoon black pepper. Take each chicken breast. First, coat it in the flour mix. Shake off the extra flour. Next, dip it in the beaten eggs. Allow the excess to drip off. Finally, press the chicken into the breadcrumb mix. Make sure it's fully coated for the best crunch. Get ready to fry your chicken. In a large skillet, pour enough olive oil to cover the bottom with about 1/4 inch of oil. Heat it over medium-high heat until hot. Carefully place the breaded chicken in the skillet. Fry each side for about 4-5 minutes until golden brown and crispy. Once done, remove the chicken from the skillet. Place it on a baking sheet lined with parchment paper. Top each piece with marinara sauce and a generous sprinkle of mozzarella cheese. Now, it's time to bake. Preheat your oven to 375°F (190°C). Place the baking sheet in the oven and bake for 15-20 minutes. Look for the cheese to melt and bubble. When done, let the chicken rest for a few minutes. Garnish with fresh basil leaves for a nice touch. Enjoy your crispy cheesy chicken Parmesan! To get that perfect crunch, use panko breadcrumbs. They add extra texture. Ensure each chicken piece is evenly coated. Dredge in flour first. This helps the egg stick. Then, dip it in the egg wash. Finally, press it firmly into the breadcrumbs. Fry in hot oil. This creates a golden crust. Boost the taste of your chicken by adding seasonings. Mix garlic powder and Italian seasoning into the breadcrumbs. This gives each bite a burst of flavor. You can also add herbs like oregano or thyme. A sprinkle of red pepper flakes adds a nice kick. Don’t forget to season your flour with salt and pepper. Make your dish look fancy with simple plating tips. Use a colorful plate to make the meal pop. Pour some marinara sauce around the edges. This adds color and flavor. Place a crispy chicken breast in the center. Top it with melted cheese and fresh basil. This not only tastes good but looks great too. Pro Tips Use Panko Breadcrumbs: For an extra crispy texture, always opt for panko breadcrumbs instead of regular breadcrumbs. Let Chicken Rest: After frying, let the chicken rest for a few minutes before baking to allow the juices to redistribute for a juicy bite. Preheat the Oil: Ensure your oil is hot enough before frying; it should shimmer. This helps achieve a golden, crispy exterior. Layer Flavors: Feel free to add sautéed vegetables or extra herbs into the marinara sauce for an added depth of flavor. {{image_4}} You can switch up the classic chicken with seafood. Shrimp or scallops work well. To make this dish, coat the seafood in the same seasoned flour and breadcrumbs. Cook them in hot oil until golden. Use marinara sauce and cheese as you would for chicken. This twist adds a fresh taste and is perfect for seafood lovers. If you want a vegetarian version, try eggplant or zucchini. Slice these vegetables into thick pieces. Salt them to draw out moisture, then rinse and pat dry. Coat them just like the chicken. Fry until crispy and top with marinara and cheese. This option gives you a tasty, meat-free meal that everyone will enjoy. While mozzarella and Parmesan are favorites, you can experiment with other cheeses. Try provolone or gouda for a richer flavor. Blend different cheeses for a unique taste. Just ensure they melt well. This way, you can customize your dish to match your mood or pantry supplies. You should store leftover Crispy Cheesy Chicken Parmesan in the fridge. Place it in an airtight container. It stays fresh for up to three days. Before putting it in the fridge, let it cool down to room temperature. This helps prevent condensation. If you want to keep it longer, freezing is a great option. Wrap each piece tightly in plastic wrap. Then, place it in a freezer-safe bag. This way, it can last for up to three months. Label the bag with the date to track freshness. To enjoy your Crispy Cheesy Chicken Parmesan again, you need to reheat it right. Preheat your oven to 375°F (190°C). Place the chicken on a baking sheet. Cover it loosely with foil to keep it moist. Heat for about 15-20 minutes, or until it's hot throughout. If you want that crispy texture, remove the foil for the last 5 minutes. Enjoy your meal just as delicious as when you first made it! You can use chicken thighs instead of chicken breasts. Thighs stay juicy and have great flavor. You might also try turkey cutlets for a leaner option. If you want something plant-based, use eggplant slices or tofu. Thinly slice these options and follow the same steps in the recipe. Yes, you can prepare this dish ahead of time. Bread the chicken and store it in the fridge for up to a day before frying. You can also cook the chicken and keep it warm in the oven. Just add the marinara and cheese right before serving to keep it fresh. To keep the chicken crispy, place it on a wire rack after frying. This lets air circulate and prevents sogginess. Avoid covering the chicken with foil, as this traps steam. If you are storing it, use an oven to reheat, which helps restore crispness. This blog post covered key steps for making delicious chicken dishes. We talked about selecting your chicken, choosing coatings, and picking tasty toppings. You learned the best techniques for preparing and cooking your chicken to achieve great flavors and crispiness. Remember to try fun variations, like chicken parmesan with seafood. Store your leftovers properly for later enjoyment. No matter your choice, following these tips will help you impress family and friends. Enjoy your cooking journey and savor every bite!

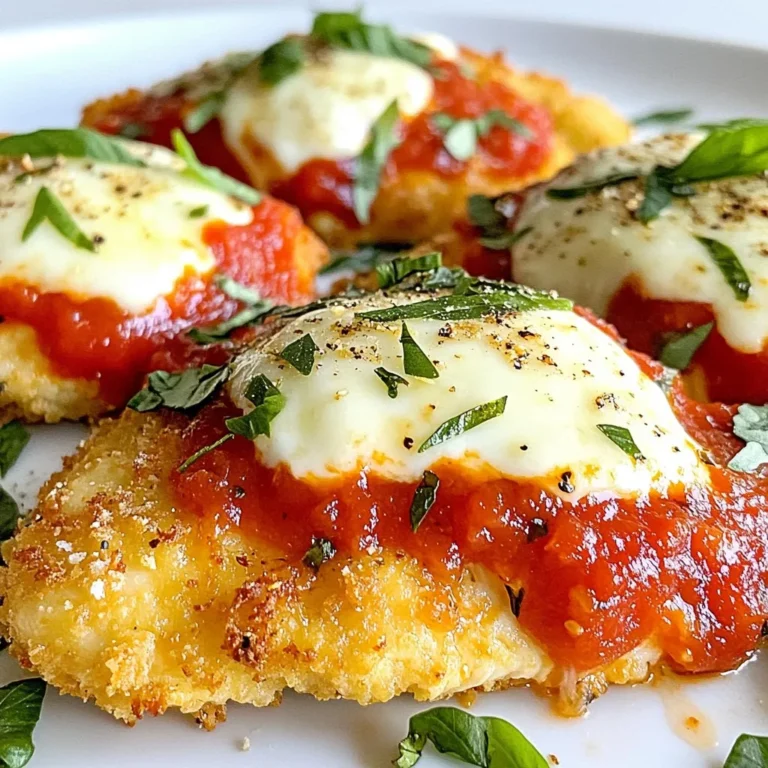
Crispy Cheesy Chicken Parmesan Easy Dinner Recipe

For the Cupcakes: - 1 cup all-purpose flour - 1/2 cup almond flour - 1 tsp baking powder - 1/2 tsp baking soda - 1 tsp ground cinnamon - 1/2 tsp ground nutmeg - 1/4 tsp ground ginger - 1/4 tsp ground cloves - 1/2 tsp salt - 1/2 cup granulated sugar - 1/2 cup brown sugar, packed - 1/2 cup vegetable oil - 2 large eggs - 1 cup pumpkin puree - 1 tsp vanilla extract For the Cream Cheese Frosting: - 8 oz cream cheese, softened - 1/2 cup unsalted butter, softened - 2 cups powdered sugar - 1 tsp vanilla extract - 1/4 tsp ground cinnamon (optional) You need these ingredients to make great pumpkin spice cupcakes. The mix of all-purpose flour and almond flour gives a nice texture. Baking powder and baking soda help them rise. The spices bring the warm flavors of fall right into your kitchen. You will love the sweet touch from both granulated and brown sugar. For the frosting, cream cheese and butter create a rich, creamy topping. Mixing in powdered sugar makes it sweet. Adding a hint of cinnamon gives it extra flavor. You can find the Full Recipe for step-by-step guidance. The cupcakes are perfect for any fall gathering or a cozy night in! - Preheat your oven to 350°F (175°C). - Line a muffin tin with cupcake liners. - In a medium bowl, whisk together: - 1 cup all-purpose flour - 1/2 cup almond flour - 1 tsp baking powder - 1/2 tsp baking soda - 1 tsp ground cinnamon - 1/2 tsp ground nutmeg - 1/4 tsp ground ginger - 1/4 tsp ground cloves - 1/2 tsp salt This blend adds a warm spice that makes these cupcakes shine. - In another large bowl, beat together: - 1/2 cup granulated sugar - 1/2 cup brown sugar - 1/2 cup vegetable oil Beat until smooth. Add in: - 2 large eggs - 1 cup pumpkin puree - 1 tsp vanilla extract Mix until everything is well combined. - Now, gently fold the dry mix into the wet ingredients. - Use a spatula to combine them just until you see no dry flour. Be careful not to overmix. This keeps your cupcakes light and fluffy! - Pour the batter into the lined muffin tin. Fill each liner about two-thirds full. - Bake in the preheated oven for 18-20 minutes. Check doneness with a toothpick. It should come out clean or with a few crumbs. - Let the cupcakes cool in the tin for about 5 minutes. - Then transfer them to a wire rack to cool completely. Prepare the cream cheese frosting while they cool. This is where the magic happens! For the full recipe, follow along with the instructions shared earlier. To keep your cupcakes fluffy, mix the batter gently. Overmixing can make them dense. When you combine the dry and wet ingredients, use a spatula. Fold the mixture until you see no dry flour. It's okay if there are a few lumps. This step is key to light and airy cupcakes. Store any leftover cupcakes in an airtight container. You can keep them at room temperature for up to two days. If you want to keep them longer, place them in the fridge. They stay fresh for about a week this way. Just be sure to let them come back to room temperature before eating. For perfect cream cheese frosting, start with softened cream cheese and butter. Beat them together until smooth. Gradually add powdered sugar while mixing on low speed. This helps to avoid a sugar cloud in your kitchen. If the frosting is too thick, add a tiny splash of milk. This will give you a creamy texture that spreads easily. For a bit of spice, you can mix in some ground cinnamon, too. For the full recipe, check out the section above! {{image_4}} You can change the spices in your cupcakes. Instead of classic pumpkin spice, try adding cardamom for a warm twist. You can also use allspice for a deeper flavor. Feel free to adjust the amounts to suit your taste. A little extra cinnamon can add a nice kick. Remember, spices can change the mood of your cupcakes! If you need gluten-free cupcakes, swap the all-purpose flour for a gluten-free mix. Almond flour works well too, adding a nutty flavor. For a vegan option, replace eggs with flax eggs or applesauce. Use plant-based butter and cream cheese for the frosting. These changes make your cupcakes friendly for everyone. Want to mix things up? Add chocolate chips or chunks to the batter. They melt and provide a delicious contrast. Caramel sauce drizzled on top can create a sweet surprise. You can even fold in nuts like pecans or walnuts for crunch. These little changes can make your pumpkin spice cupcakes even more delightful. For the complete recipe, check out the Full Recipe. To keep your frosted pumpkin spice cupcakes fresh, store them in an airtight container. Place them in the fridge. This helps the cream cheese frosting stay firm and tasty. Avoid stacking them to prevent smudging. You can enjoy them straight from the fridge or let them sit at room temperature for a bit before serving. If you want to save some cupcakes for later, freezing is a great option. First, frost the cupcakes and let them chill in the fridge for about 30 minutes. Then, wrap each cupcake in plastic wrap. Place them in a freezer-safe bag or container. To thaw, simply remove them from the freezer and let them sit at room temperature for a few hours or overnight in the fridge. This way, they remain moist and delicious. These pumpkin spice cupcakes can last about 3-5 days in the fridge. If frozen, they can stay fresh for up to 3 months. Always check for any changes in smell or texture before eating. Storing them properly helps keep their yummy taste and soft texture. For the full recipe, check the section above. Yes, you can use fresh pumpkin. Start by cooking the pumpkin. Cut it in half, scoop out the seeds, and roast it. Bake at 350°F (175°C) for 45-60 minutes until soft. Once it cools, mash it until smooth. You need about one cup of fresh puree. Keep in mind that fresh pumpkin may be a bit more watery. You might need to reduce other liquids in the recipe slightly. This adjustment helps achieve the right batter consistency. To make your cream cheese frosting more stable, use cold cream cheese and butter. Beat them well until fluffy. Gradually add powdered sugar, mixing on low speed. For added stability, you can mix in a bit of cornstarch. If you want a thicker frosting, add more sugar. Avoid overmixing, as this can make the frosting too soft. Chill the frosting for a bit before applying it to the cupcakes. This helps it hold its shape better. Yes, you can prepare these cupcakes ahead of time. Bake the cupcakes and let them cool completely. Store them in an airtight container at room temperature for up to three days. For longer storage, freeze them without frosting. Place them in a freezer-safe bag. They can last up to three months in the freezer. Frost them after thawing to keep the cream cheese fresh. For the full recipe, check the original directions above. You learned how to make delicious pumpkin cupcakes with cream cheese frosting. We covered ingredients, step-by-step instructions, and helpful tips. Remember to mix gently and store them properly to keep them fresh. Feel free to try different spice blends or dietary options for variety. Enjoy baking these treats, and share them with friends and family for smiles all around. Happy baking!

Pumpkin Spice Cupcakes with Cream Cheese Frosting Delights

PREV 1 … 22 23 24 … 44 NEXT
yummybiterecipes

explore

DessertsDinnerAppetizersDrinks

Our Policies

  • Cookie Policy
  • Copyright Policy
  • Disclaimer
  • GDPR Policy
  • Terms Of Use
Back to Top
  • About
  • Contact Us
  • Privacy Policy
© 2025 yummybiterecipes