FREE DINNER EBOOK! Get your copy!
  • Cookie Policy
  • GDPR Policy
  • Disclaimer
  • Terms Of Use
  • Visit my other site: Fun Cookie Recipes
yummybiterecipes
  • Home
  • Dinner
  • Desserts
  • Drinks
  • Appetizers
  • Contact
  • About
  • Privacy Policy
  • Home
  • Dinner
  • Desserts
  • Drinks
  • Appetizers
  • Contact
  • About
  • Privacy Policy
  • Cookie Policy
  • GDPR Policy
  • Disclaimer
  • Terms Of Use
Visit my other site: Fun Cookie Recipes

HOME / CATEGORIES /

Latest

To make delightful Maple Pumpkin Cookies, you will need the following ingredients: - 1 cup canned pumpkin puree - 1/2 cup unsalted butter, softened - 1 cup brown sugar - 1/4 cup pure maple syrup - 1 large egg - 2 teaspoons pure vanilla extract - 2 cups all-purpose flour - 1 teaspoon baking soda - 1 teaspoon baking powder - 2 teaspoons pumpkin pie spice - 1/2 teaspoon salt - 1/2 cup chopped pecans (optional) - 1/2 cup chocolate chips (optional) These simple and fresh ingredients come together to create a warm, cozy flavor. The canned pumpkin adds moisture and a rich taste. The butter and brown sugar give a soft texture. Maple syrup brings a sweet twist, while the spices fill your kitchen with a lovely smell. You can mix in pecans or chocolate chips for extra crunch or richness. I often use both to please different tastes. Each ingredient plays a role, making these cookies a perfect fall treat. For the complete recipe, check out the Full Recipe above. 1. Preheat your oven to 350°F (175°C). This makes sure your cookies bake well. 2. Prepare your baking sheet by lining it with parchment paper. This helps prevent sticking. 3. In a large bowl, beat the softened butter and brown sugar until fluffy. This takes about 2-3 minutes. 4. Mix in the canned pumpkin, maple syrup, egg, and vanilla extract. Blend well until smooth. 1. In a separate bowl, whisk together the all-purpose flour, baking soda, baking powder, pumpkin pie spice, and salt. This helps evenly mix the dry ingredients. 2. Fold the dry mixture into the wet mixture gently. Stir slowly to avoid overmixing. 3. If you want, incorporate chopped pecans or chocolate chips. This adds nice flavor and texture. 1. Use a cookie scoop or a tablespoon to drop dough onto the prepared baking sheet. Space the dough about 2 inches apart. 2. Bake the cookies for 12-15 minutes. The edges should turn golden brown, while the centers may look soft. They will firm up as they cool. 3. Let the cookies cool on the baking sheet for about 5 minutes. Then, transfer them to a wire rack to cool completely. For more details, check out the Full Recipe. To ensure even baking, space your cookie dough balls about 2 inches apart. This gives them room to spread while baking. Also, check your oven's temperature with an oven thermometer. An accurate temperature helps your cookies bake perfectly. Avoid overmixing the dough. This keeps the cookies soft and chewy. Just mix until the dry ingredients disappear; lumps are okay. For serving, place the cookies on a decorative plate. A light dusting of pumpkin pie spice adds a cozy touch. Drizzling warm maple syrup over the cookies creates a beautiful shine. It also adds extra flavor. Consider pairing the cookies with a cup of warm cider for a fall treat. You can use other sweeteners like honey or agave syrup in place of maple syrup. If you want a lighter option, try using whole wheat flour instead of all-purpose flour. For a vegan version, substitute the egg with a flax egg. Mix one tablespoon of ground flaxseed with three tablespoons of water. Let it sit for five minutes to thicken. This makes a great binder for your cookies. For a fun twist, try adding almond flour for extra richness. Check the Full Recipe for more details. {{image_4}} You can easily change the taste of your maple pumpkin cookies. Try adding different spices like cinnamon or nutmeg for a warm twist. You could also add extracts like almond or orange for a unique flavor. If you're a fan of texture, consider mixing in chopped nuts or chocolate chips. Pecans give a nice crunch and pair well with pumpkin. Chocolate chips add sweetness and a rich flavor. Both options can make your cookies even more delightful. For those with dietary needs, there are great alternatives. You can use gluten-free flour to make these cookies gluten-free. Almond flour or coconut flour works well too. Just remember to adjust the liquid to keep the right texture. If you want to cut back on sugar, use a sugar substitute. Stevia or monk fruit sweetener can help. You can also reduce the brown sugar by half. The cookies will still taste great with less sweetness. You can make seasonal variations to fit any holiday. For Halloween, add spooky sprinkles on top. For Thanksgiving, serve them with whipped cream or ice cream for a festive treat. Pairing suggestions also change with the seasons. In fall, enjoy these cookies with warm apple cider. In winter, serve them with hot cocoa. This adds to the cozy feel of the cookies. For more detailed information, check out the Full Recipe for maple pumpkin cookies. To keep your maple pumpkin cookies fresh, store them in an airtight container. This helps prevent them from drying out. Place a piece of bread in the container to help keep cookies soft. Make sure to stack cookies in layers with parchment paper between them. This prevents them from sticking together. I recommend using a glass or plastic container. Both options work great for keeping moisture in. If you have a cookie jar, that also works well. Just ensure it seals tightly. You can freeze cookie dough before baking. This is a great way to save time later. To freeze, scoop the dough onto a baking sheet. Space them apart so they don’t touch. Freeze the sheet for about an hour. Once firm, transfer the dough balls to a freezer bag. Try to remove as much air as possible from the bag. The cookie dough can last in the freezer for up to three months. When you're ready to bake, just pull out the dough and bake straight from frozen. You may need to add a minute or two to the baking time. To reheat your cookies, the best method is the oven. Preheat it to 350°F (175°C). Place the cookies on a baking sheet lined with parchment paper. Heat them for about 5 minutes. This keeps them soft and warm. You can also use a microwave for quick reheating. Just place a cookie on a microwave-safe plate. Heat it for about 10 seconds. This method works well when you want a quick treat. Enjoy your cookies fresh and warm for the best taste! For the full recipe, check out the earlier section. To keep your cookies soft, use the right ingredients. Use brown sugar instead of white sugar. Brown sugar adds moisture and keeps cookies chewy. Also, do not overbake them. Check for a slight softness in the center when they are done. Let them cool on the baking sheet for a few minutes before moving them to a wire rack. This helps them set without drying out. Yes, you can reduce sugar. Try cutting the brown sugar by a quarter. You can also use a sugar substitute like coconut sugar or a stevia blend. Just know that this might change the texture and taste a bit. Always taste as you go to find what works best for you. Pumpkin has a long history in American cooking. It dates back to Native American tribes who used it in many dishes. Maple syrup comes from trees native to North America. Together, these flavors became popular in fall recipes. Today, they blend well in cookies and other treats, making them a favorite during autumn. Yes, you can! Use a gluten-free flour blend instead of all-purpose flour. Look for blends that have xanthan gum to help with texture. Almond flour or coconut flour also works well but may need some adjustments. Experiment to find the right mix that gives you the texture you want. Absolutely! Maple pumpkin cookies are perfect for parties. Serve them on a colorful platter. You can even stack them high for a fun display. Add a light dusting of powdered sugar or drizzle some maple syrup on top for extra flair. They pair well with warm drinks, making them a great treat for gatherings. Check out the Full Recipe for more ideas! In this blog post, we explored a delicious recipe for Maple Pumpkin Cookies. You learned about essential ingredients, step-by-step instructions, helpful tips, and fun variations. Now, you have all the tools to make scrumptious cookies for any occasion. Remember, baking is both an art and a science. Enjoy the process and let your creativity shine. With this recipe, you can share warm cookies with family and friends any time of the year. Happy baking!

Maple Pumpkin Cookies Delightful Fall Treat

To make Vegan Creamy Garlic Potato Soup, gather these main ingredients: - 4 medium potatoes, peeled and diced into uniform pieces - 1 large onion, finely chopped - 6 cloves of garlic, minced - 4 cups vegetable broth (homemade or store-bought) - 1 cup canned coconut milk (or almond milk for a lighter version) - 2 tablespoons extra virgin olive oil - 1 teaspoon dried thyme - 1 teaspoon smoked paprika - Salt and freshly ground black pepper to taste - Fresh chives, finely chopped (for garnish) These ingredients come together to create a rich and flavorful dish. If you want to switch things up, here are some optional substitutions: - You can use yellow potatoes for a creamier texture. - Shallots can replace the onion for a milder taste. - Use fresh garlic instead of minced if you prefer a stronger garlic flavor. - Swap coconut milk with cashew cream for a different taste. Feel free to adjust any ingredient based on what you have on hand. Cooking should be fun and flexible! For the complete recipe, check out the [Full Recipe]. To make Vegan Creamy Garlic Potato Soup, start with simple steps. Gather your ingredients listed in the Full Recipe. First, heat the olive oil in a large pot over medium heat. You want it hot but not smoking. Add the chopped onion and sauté for about 5-7 minutes. Stir it often until the onion gets soft and clear. Next, add the minced garlic. Cook it for 1-2 minutes. Watch it closely; you want it fragrant, not burned. Now, mix in the diced potatoes. Pour in the vegetable broth along with dried thyme and smoked paprika. Bring this mix to a gentle boil. Once you see bubbles, turn down the heat. Cover the pot and let it simmer for 15-20 minutes. You want the potatoes to be tender enough to poke with a fork. For blending, I recommend using an immersion blender. It makes things easy and quick. Just insert it into the soup and blend until it’s smooth. If you don’t have one, pour the soup in batches into a normal blender. Blend until smooth and return it to the pot. Add the coconut milk or almond milk to the soup. Stir well and season with salt and black pepper. Let it warm on low heat for a few minutes, but don’t let it boil again. Timing is key in this recipe. Cooking the onions well brings out their sweet flavor. Keep an eye on the garlic. It cooks fast, and burnt garlic can ruin the dish. Simmering the potatoes long enough is crucial. They need to be soft for easy blending. When blending, be careful. If using a regular blender, let the soup cool slightly first. Hot soup can splatter. Always blend in small batches to avoid spills. After blending, the soup should look creamy and smooth. Finally, taste the soup before serving. This is your chance to adjust the flavors. Add more salt or pepper if needed. Enjoy the warm, rich flavors of your Vegan Creamy Garlic Potato Soup! To get the best flavors in your Vegan Creamy Garlic Potato Soup, use fresh ingredients. Fresh garlic and onion add a lot of taste. Choose medium-sized potatoes, as they cook evenly. For tools, an immersion blender works best for a smooth soup. If you don’t have one, a regular blender will do. Be careful when blending hot soup. Always let it cool a bit before blending to avoid splashes. You can add spices to boost the flavor. Try adding a pinch of cayenne pepper for some heat. Fresh herbs like parsley or dill can also enhance the taste. If you want a creamier soup, blend in extra coconut milk or cashew cream. For a thicker texture, add more potatoes. If the soup is too thick, stir in some vegetable broth until you reach the desired consistency. For the full recipe, check out the complete guide to this dish. {{image_4}} You can change up this soup with different veggies. Try adding carrots for sweetness or celery for crunch. Spinach or kale can boost the nutrients. Just chop them small and add them in during cooking. For non-dairy milk, coconut milk is rich and creamy. Almond milk is a lighter choice. You can also use oat milk for a mild flavor. Each milk gives a unique taste and texture. Garnishing your soup can make it shine. Sprinkle fresh chives on top for color and flavor. A drizzle of olive oil adds richness. You might also try a dollop of vegan sour cream for creaminess. Pair this soup with crusty bread. A simple side salad adds freshness. You could even serve it with roasted veggies for more flavor. These sides complete your meal and make it even better. To keep your Vegan Creamy Garlic Potato Soup fresh, store it in an airtight container. Let the soup cool completely before sealing the container. This prevents moisture buildup and keeps the flavors intact. You can store the soup in the refrigerator for up to five days. If you want to keep it longer, freeze it. The soup can last up to three months in the freezer. Just remember to leave some space in the container for expansion as it freezes. When it’s time to enjoy your soup again, reheating it correctly is key. For a smooth texture, reheat on the stove over low heat. Stir often to prevent sticking. If the soup seems too thick, add a splash of vegetable broth or water. You can also microwave it in a microwave-safe bowl. Heat it in short bursts, stirring in between, to ensure even warming. To refresh the soup, consider adding a bit more coconut milk or a splash of lemon juice. This adds flavor and helps revive the creamy texture. Enjoy the rich, flavorful dish just like the first time! For the full recipe, check out the earlier section. Is Vegan Creamy Garlic Potato Soup gluten-free? Yes, this soup is gluten-free. All the main ingredients, like potatoes and vegetable broth, do not contain gluten. Always check labels for store-bought broth to be sure. Can I make this soup in advance? Absolutely! This soup stores well. Make it ahead of time and keep it in the fridge for up to four days. It also freezes nicely for about three months. Just reheat it gently before serving. Nutritional information for the soup This soup is packed with nutrients. Each serving provides fiber, vitamins, and healthy fats. It is low in calories but high in flavor. Using coconut milk gives it a creamy texture without dairy. What to serve alongside this soup for a complete meal Pair this soup with crusty bread for a filling meal. A fresh salad can also add a nice crunch. For extra protein, serve some roasted chickpeas on the side. You can find the full recipe to prepare this delightful dish! This blog post covered everything you need to make Vegan Creamy Garlic Potato Soup. We explored key ingredients, shared cooking steps, and listed handy tips to enhance flavor. You learned about possible variations to suit your taste and how to store and reheat leftovers. In summary, this soup is easy to make and delicious. Enjoy creating your own version with your favorite vegetables and spices. With these tips, your soup will impress anyone who tries it. Happy cooking!

Vegan Creamy Garlic Potato Soup Rich and Flavorful Dish

For these bakery-style pumpkin muffins, you'll need just a few simple ingredients. Here’s the complete list to get you started: - 1 ½ cups all-purpose flour - 1 teaspoon baking soda - ½ teaspoon baking powder - 1 teaspoon ground cinnamon - ½ teaspoon ground nutmeg - ¼ teaspoon ground ginger - ½ teaspoon salt - 1 cup granulated sugar - ½ cup packed brown sugar - ½ cup vegetable oil - 2 large eggs - 1 cup canned pumpkin puree - 1 teaspoon vanilla extract - 1 cup chocolate chips (optional) - ½ cup chopped pecans or walnuts (optional) Each ingredient plays a key role in making these muffins moist and flavorful. The pumpkin puree adds a rich texture and a hint of sweetness. The spices bring warmth and depth, perfect for fall. You can also add chocolate chips or nuts for extra flavor. Check out the Full Recipe for detailed instructions on how to make these delightful treats. - Preheat your oven to 375°F (190°C). - Prepare a muffin tin by lining it with paper liners or greasing it lightly. - In a bowl, mix together the flour, baking soda, baking powder, cinnamon, nutmeg, ginger, and salt. - In a large bowl, combine granulated sugar, brown sugar, and vegetable oil. - Whisk these together until they blend well. - Add eggs one at a time, mixing well after each. - Stir in pumpkin puree and vanilla extract until smooth. - Gradually add the dry mixture to the wet mixture. - Fold in optional chocolate chips and nuts for extra flavor. - Fill each muffin cup about ¾ full with batter. - Place the muffin tin in the oven and bake for 18-20 minutes. - Check doneness by inserting a toothpick into a muffin; it should come out clean. For more in-depth steps, check the Full Recipe. - Ensuring muffins rise evenly To help your muffins rise well, fill each cup about ¾ full. This gives them room to expand. Use a scoop for even portions. - Maintaining moist texture Adding pumpkin puree keeps muffins soft. Avoid overbaking; check them at 18 minutes. They will continue cooking outside the oven. - Dusting with powdered sugar Once cooled, sprinkle powdered sugar on top. It adds a sweet touch and looks nice. This simple step makes your muffins look extra special. - Serving suggestions for added indulgence Serve warm muffins with whipped cream. You can also add a drizzle of maple syrup for a fun twist. - Overmixing the batter Mix just until combined. Overmixing can make muffins tough. A few lumps in the batter are okay. - Not using room temperature ingredients Always use room temperature eggs and pumpkin. This helps the batter mix well and improves the texture. For best results, take them out of the fridge ahead of time. {{image_4}} To add more flavor to your pumpkin muffins, try mixing in spices like cloves or allspice. These spices give a warm, cozy taste that complements pumpkin well. You can also switch up the chocolate chips. Use dark chocolate, white chocolate, or even butterscotch chips. Each type brings a new twist that can delight your taste buds. If you want to make your muffins a bit healthier, consider substituting applesauce for oil. This change keeps the muffins moist while cutting down on fat. You can also use whole wheat flour instead of all-purpose flour. Whole wheat adds fiber and nutrients, making your muffins more wholesome without losing flavor. Seasonal add-ins can take your muffins to the next level. Try incorporating cranberries or raisins for a sweet and tart burst. Fresh pumpkin is another great option. It can replace canned pumpkin for a fresher taste. Using fresh pumpkin adds a unique flavor and texture that enhances the overall muffin experience. For the full recipe, check out the detailed instructions above. To keep your muffins fresh, store them in an airtight container. Place the container at room temperature. This method keeps the muffins soft and moist for up to three days. If you live in a humid area, consider putting a paper towel in the container. This helps absorb excess moisture. If you want to save muffins for later, freezing is the best way. Wrap each muffin in plastic wrap, then place them in a freezer bag. They can last up to three months in the freezer. When you're ready to enjoy them, simply take out a muffin and let it thaw at room temperature or heat it in the microwave. To warm up your muffins, use the oven or microwave. For the oven, preheat it to 350°F (175°C) and heat the muffins for about 5-10 minutes. For the microwave, place a muffin on a plate and heat it for 15-20 seconds. This helps restore their fresh-baked flavor and soft texture. Follow the Full Recipe for more tips on baking these delightful muffins! You can tell the muffins are done when they rise and turn golden brown. The best way to check is to use a toothpick. Insert it into the center of a muffin. If it comes out clean, the muffins are ready. If not, bake for a few more minutes. Yes, you can prepare these muffins ahead of time. You can mix the dry ingredients and store them in a sealed bag. When you're ready to bake, mix the wet ingredients and combine them with the dry mix. This method saves time and keeps your muffins fresh. You can use applesauce or mashed bananas as a substitute for pumpkin puree. If you use applesauce, use the same amount as the recipe calls for. For mashed bananas, use a little less than the pumpkin amount since they are thicker. To make gluten-free muffins, use a gluten-free flour blend. Look for one that includes xanthan gum. You can also try almond flour or coconut flour in place of all-purpose flour. Just adjust the amount based on the blend's guidelines for best results. For the complete recipe, check out the Full Recipe link. This blog post shared a simple guide for baking flavorful muffins. We covered essential ingredients, step-by-step instructions, handy tips, and creative variations. Remember, baking success hinges on accurate measuring and not overmixing. Make these muffins your own by trying different flavors or healthier swaps. With the right storage, you can enjoy these treats later too. Follow these tips to bake perfect muffins that delight everyone. Happy baking!

Bakery-Style Pumpkin Muffins Delightful Fall Treat

- 4 medium sweet potatoes, peeled and cut into 1-inch cubes - 2 medium apples, cored and cut into bite-sized pieces - 3 tablespoons extra virgin olive oil - 2 teaspoons ground cinnamon - 1 teaspoon pure vanilla extract - 1 tablespoon pure maple syrup (optional) - 1/2 teaspoon ground nutmeg - Sea salt, to taste - 1/2 cup chopped pecans or walnuts (for garnish) To make cinnamon roasted sweet potatoes and apples, start with fresh ingredients. Sweet potatoes provide a creamy base, while apples add a nice crunch. I suggest using Granny Smith or Honeycrisp apples. These varieties offer a great balance of sweet and tart. Next, we need olive oil for roasting. It helps to crisp the edges and enhances the flavors. Ground cinnamon and nutmeg will give your dish that warm, cozy taste. If you want a touch of sweetness, add maple syrup. This is optional but worth it if you like it sweeter. Finally, don't forget about the nuts! Chopped pecans or walnuts add a delightful crunch on top. This mix of flavors makes every bite special. You can find a full recipe for cinnamon roasted sweet potatoes and apples in the corresponding section. 1. Preheating the oven: Start by preheating your oven to 425°F (220°C). This high heat helps the sweet potatoes caramelize nicely. While the oven heats, you can prepare the rest of the dish. 2. Mixing the ingredients: In a large bowl, combine the sweet potato cubes and apple pieces. Pour in 3 tablespoons of extra virgin olive oil. Next, add 2 teaspoons of ground cinnamon, 1 teaspoon of pure vanilla extract, and 1/2 teaspoon of ground nutmeg. If you like it sweet, stir in 1 tablespoon of pure maple syrup. Add a pinch of sea salt to enhance the flavors. 3. Spreading on the baking sheet: Use a wooden spoon or spatula to toss everything together. Make sure all the pieces are coated well. Then, spread the mixture in a single layer on a lined baking sheet. This space allows the sweet potatoes and apples to roast evenly. 1. Timing and tossing: Roast the sweet potatoes and apples in your preheated oven for about 25-30 minutes. Halfway through, around the 15-minute mark, take the baking sheet out and toss the mixture. This helps with even cooking and caramelization. 2. Achieving the perfect texture: You want the sweet potatoes to be tender and slightly golden. Keep an eye on them as they roast. When they look good and smell great, they are ready to come out of the oven. For the full recipe, check the earlier section. Enjoy this easy and tasty dish! To ensure even roasting, cut sweet potatoes and apples into similar sizes. This helps them cook at the same rate. Spread them out on the baking sheet. Do not crowd the pan. Give each piece room to breathe. Toss the mix halfway through cooking to avoid burning. For flavor enhancement, use fresh spices when possible. Fresh cinnamon packs more punch than old spices. You can add a pinch of cayenne pepper for some heat. A squeeze of lemon juice brightens up the flavors, too. For serving suggestions, use a rustic bowl that shows off the colors. A wooden bowl adds a warm touch. You can layer the sweet potatoes and apples for height. This makes the dish look more inviting. For garnishing techniques, sprinkle extra cinnamon on top. Add a handful of chopped pecans or walnuts for crunch. A light drizzle of maple syrup can add a touch of shine. You can also garnish with fresh herbs like mint for a pop of color. Enjoy these tips to make your cinnamon roasted sweet potatoes and apples shine. Check the Full Recipe for more details! {{image_4}} You can easily change some ingredients to fit your taste. Instead of maple syrup, try honey or agave syrup. These sweeteners work well and add a nice flavor. If you're not a fan of nuts, you can skip them. However, if you want a crunch, use almonds or pistachios. They give a different taste and texture. Spices can change the whole dish. Try adding a pinch of ginger or a dash of cayenne for some heat. These spices can give your sweet potatoes and apples a new twist. You can also mix in different fruits. Pears or cranberries can add a fun flavor. Each fruit will give your dish a unique taste, making it exciting every time you cook it. For the Full Recipe, follow the steps above and enjoy the fun of cooking. After enjoying your cinnamon roasted sweet potatoes and apples, you may have some leftovers. Store them in an airtight container. Place them in the fridge. They will stay fresh for about 3 to 5 days. If you want to keep them longer, consider freezing. Use freezer-safe bags or containers. Make sure to remove as much air as possible. They can last up to 3 months in the freezer. When you’re ready to enjoy them again, simply thaw them in the fridge overnight. You have a few great options for reheating your leftovers. The oven is a top choice. Preheat it to 350°F (175°C). Spread the sweet potatoes and apples on a baking sheet. Heat for about 10 to 15 minutes. This method keeps them crispy and tasty. You can also use the microwave for a quick reheat. Place the leftovers in a microwave-safe dish. Cover it with a lid or a damp paper towel. Heat in short bursts of 30 seconds, stirring in between. This way, they warm evenly without getting mushy. For best results, always check if they are heated through before serving. Enjoy your delicious meal again! How to make the dish vegan? To make cinnamon roasted sweet potatoes and apples vegan, simply skip the maple syrup. Use agave nectar instead if you want some sweetness. The dish works well without any sweeteners. Can I prepare this in advance? Yes, you can prepare the dish ahead of time. Chop the sweet potatoes and apples, then store them in an airtight container in the fridge. You can mix the olive oil and spices in another container. Just combine them before roasting. What goes well with cinnamon roasted sweet potatoes and apples? This dish pairs nicely with grilled chicken or pork. You can also serve it with a simple green salad for a fresh touch. Can I use different types of apples? Absolutely! You can use any apples you enjoy. I recommend Granny Smith for a tart taste or Honeycrisp for sweetness. Each type adds its own flavor to the dish. How long do leftovers last? Leftovers of cinnamon roasted sweet potatoes and apples last about 3 to 5 days in the fridge. Store them in a sealed container for best results. You can also freeze them, but they may lose some texture. In this post, we covered a delicious recipe for cinnamon roasted sweet potatoes and apples. We talked about the key ingredients, step-by-step cooking instructions, and helpful presentation ideas. You also learned about tips for storage and variations to suit your taste. Enjoy making this dish! It’s simple, tasty, and perfect for any meal. Remember, you can always adjust flavors to your liking. Happy cooking!

Cinnamon Roasted Sweet Potatoes and Apples Delight

- 4 large sweet potatoes - ½ cup unsweetened coconut milk - 3 tablespoons butter - 2 tablespoons pure maple syrup - 1 teaspoon ground cinnamon - ½ teaspoon ground nutmeg - Salt and freshly ground black pepper - 2 tablespoons fresh chives You can easily swap ingredients based on your needs. For a vegan version, use coconut oil instead of butter. If you want a different milk, try almond or oat milk. Both add a nice creaminess. For sweetness, you can use honey or agave syrup instead of maple syrup. This allows you to tailor the recipe to your taste. When making creamy mashed sweet potatoes, these adjustments help create a dish that fits your dietary needs without losing flavor. You can still enjoy a rich and tasty dish. Remember, the key is to maintain the balance of flavors while being creative with your choices. For the full recipe, check out the complete guide above. Start by placing your sweet potatoes in a large pot filled with cold salted water. This step is key. Cold water helps cook the potatoes evenly. If you start with hot water, they can cook unevenly. Bring the water to a boil over medium-high heat. Once it boils, reduce the heat to medium. Let the sweet potatoes simmer uncovered for about 15-20 minutes. They should be soft enough to pierce easily with a fork. After you cook the sweet potatoes, drain them well. Return them to the pot on low heat for a couple of minutes. This lets any extra moisture steam away. Now, add the coconut milk, butter, maple syrup, cinnamon, nutmeg, salt, and pepper. Use a potato masher or an immersion blender to mash the mixture. You want it to be smooth and creamy. If you like it thinner, add more coconut milk slowly until it's just right. Taste your creamy mashed sweet potatoes. Adjust the seasoning with a bit more salt, pepper, or maple syrup if needed. For a lovely presentation, transfer the mash to a serving bowl. Smooth the top with the back of a spoon. Finally, sprinkle fresh chives over the top for a pop of color. Serve warm as a side dish. This dish pairs well with many main courses. For the full recipe, check the earlier section. Coconut milk plays a big role in making these sweet potatoes creamy. It adds rich flavor and smooth texture. Adjust the amount based on how creamy you like it. You can also use almond or oat milk if you prefer. Spices help balance the sweetness of the potatoes. Ground cinnamon and nutmeg bring warmth and depth. Use them wisely to enhance the flavor without overpowering the dish. To save time, peel and cut the sweet potatoes ahead. You can do this a day before cooking. This way, you reduce prep time on the day you want to serve. A potato masher is great for a rustic texture. But if you want it super smooth, use an immersion blender. This tool ensures a silky finish in no time. Creamy mashed sweet potatoes pair well with roasted meats or grilled fish. They also work great as a base for hearty stews. Think of them as a warm hug on your plate. For gatherings, serve them in a large bowl with a sprinkle of chives on top. You can also add a drizzle of olive oil for a touch of elegance. For a fun twist, try mini servings in small bowls or jars. This makes it easy for guests to enjoy! {{image_4}} You can boost the taste of creamy mashed sweet potatoes by adding garlic or herbs. Garlic brings a rich flavor. Fresh herbs like rosemary or thyme add a nice touch. You might also try adding different sweeteners or spices. Honey or brown sugar can give a unique sweetness. A dash of cayenne pepper can add a fun kick! For those on paleo or keto diets, you can make simple swaps. Use ghee or coconut oil instead of butter. Make sure your sweeteners fit your diet plan. Sweet potatoes are naturally gluten-free, so this dish is great for gluten-sensitive folks. Always check your labels to be safe. Adjust this recipe for fall or holiday meals! You can add festive spices like ginger or cloves. Top with toasted pecans or marshmallows for a fun twist. This can make your dish feel special for holiday gatherings. The creamy texture pairs well with seasonal flavors! To keep your creamy mashed sweet potatoes fresh, place them in an airtight container. You can store them in the fridge for up to 5 days. If you want to keep them longer, freezing is a great option. To freeze, spoon the mashed sweet potatoes into a freezer-safe bag. Flatten the bag to remove air and seal it tightly. They will last up to 3 months in the freezer. When it’s time to enjoy your leftovers, you want them creamy again. The best way is to reheat them slowly on the stove over low heat. Stir in a splash of coconut milk to restore creaminess. You can also use a microwave. Heat in short bursts, stirring in between. This helps avoid dryness, which can happen if you heat them too long. Creamy mashed sweet potatoes can last up to 5 days in the fridge. When frozen, they stay good for about 3 months. Signs of spoilage to look for include a sour smell or a change in color. If you see any mold, throw them away. Always trust your senses to determine if they are still safe to eat. Yes, you can make creamy mashed sweet potatoes ahead of time. Prepare them up to two days before serving. Store them in an airtight container in the fridge. When you are ready to serve, just reheat them gently. You can serve creamy mashed sweet potatoes with many dishes. They pair well with: - Roasted chicken - Grilled steak - Baked salmon - Vegetarian main dishes - Holiday turkey To customize the sweetness level, adjust the maple syrup. Start with two tablespoons. Taste the mixture, and add more if you want it sweeter. You can also experiment with other sweeteners like honey or agave. Yes, you can use regular potatoes. They will give a different flavor and texture. Yukon Gold or Russet potatoes work best. The cooking time may vary, so check for tenderness with a fork. The best way to reheat mashed sweet potatoes is on the stove. Use a pot over low heat. Add a splash of coconut milk to keep them creamy. Stir often until heated through. You can also microwave them but stir every minute to avoid hot spots. For the complete recipe, check out the Full Recipe section. This blog post covered how to make creamy mashed sweet potatoes. I shared key ingredients and how to prepare them perfectly. You learned about substitutions, cooking tips, and creative variations. When you follow these tips, you will enjoy a tasty dish. Remember to adjust flavors to fit your style. With this guide, you can impress family and friends with ease. Enjoy your cooking and the delicious results!

Creamy Mashed Sweet Potatoes Rich and Flavorful Dish

To make a true German goulash, you need these ingredients: - 2 lbs beef chuck, cut into 1-inch cubes - 2 tablespoons olive oil - 1 large onion, finely diced - 3 cloves garlic, minced - 2 tablespoons sweet paprika - 1 tablespoon caraway seeds - 4 medium potatoes, peeled and diced - 3 medium carrots, peeled and sliced - 1 bell pepper, diced (choose red or green for a pop of color) - 4 cups low-sodium beef broth - 1 can (14 oz) diced tomatoes, undrained - 2 tablespoons tomato paste - Salt and black pepper to taste These ingredients create a hearty and rich flavor. The beef chuck gives a tender bite, while the spices add warmth. You can enhance your goulash with these optional ingredients: - 1-2 bay leaves - 1 tablespoon Worcestershire sauce - 1 teaspoon smoked paprika Adding these will deepen the taste. Bay leaves bring a subtle aroma, and Worcestershire sauce adds a savory note. Before serving, consider these garnishes: - Fresh parsley, finely chopped - A dollop of sour cream - Crusty bread for dipping Garnishes not only add color but also elevate the dish. Fresh parsley adds brightness, while sour cream brings creaminess. Enjoy your goulash with warm bread for a complete meal! {{ingredient_image_2}} To start, gather your beef chuck. Cut it into 1-inch cubes. This size helps the beef cook evenly. In a large pot, heat 2 tablespoons of olive oil over medium-high heat. Add the beef cubes in batches. Do not overcrowd the pot. Sear the beef for 4-5 minutes until it turns brown on all sides. Once done, remove the beef from the pot and place it on a plate. Next, use the same pot to keep all the good flavors. Add the finely diced onion first. Sauté it for about 5 minutes until it is soft and translucent. Then add 3 cloves of minced garlic. Stir for another minute to let the garlic smell great, but don’t burn it. Now, it’s time to enhance the flavor! Sprinkle in 2 tablespoons of sweet paprika and 1 tablespoon of caraway seeds. Stir these spices for 1-2 minutes. This toasting brings out their best taste. Now, return your browned beef to the pot. Add 4 diced potatoes, 3 sliced carrots, and your choice of a diced bell pepper. Mix everything well so the veggies and beef blend together. Pour in 4 cups of low-sodium beef broth. Then, add a can of 14 oz diced tomatoes, undrained, and 2 tablespoons of tomato paste. Mix it all together. Season with salt and black pepper to your liking. Bring this mix to a boil, then lower the heat to let it simmer. Cover the pot and let it simmer for 1.5 to 2 hours. Stir occasionally. This slow cooking makes the beef tender and the veggies soft. When ready, check if the beef is fork-tender. If it is, your goulash is done! If the goulash looks too thick, add a little more broth or water until it’s just right. Before serving, taste it and adjust seasoning if needed. To get that true German taste, use sweet paprika. This spice gives a rich depth. Caraway seeds add a unique flavor. Don’t skip browning the beef. It seals in juices and adds color. Sauté your onions until they’re soft and slightly golden. This step builds a solid base for flavor. Always use low-sodium beef broth. It allows you to control the saltiness. One common mistake is overcrowding the pot. When you brown the beef, do it in batches. Overcrowding leads to steaming instead of browning. Another pitfall is not letting the goulash simmer long enough. This helps the flavors meld. If you add too much water, the dish can lose its richness. Taste and adjust seasoning as needed. Serve your German goulash in deep bowls. Accompany it with crusty bread for dipping. A side of pickled cucumbers can add a nice crunch. For drinks, consider a light German beer or a glass of red wine. Garnish with fresh parsley for a pop of color. This adds both taste and visual appeal. Enjoy each spoonful of this hearty meal! Pro Tips Choose the Right Cut: Opt for beef chuck as it becomes tender and flavorful through slow cooking, ensuring a rich goulash. Toast Your Spices: Always toast the paprika and caraway seeds briefly before adding other ingredients to enhance their aromas and flavors. Adjust Seasoning Gradually: Taste and adjust seasoning towards the end of cooking; it's easier to add salt and pepper than to correct an over-seasoned dish. Let It Rest: Allow the goulash to rest for about 10 minutes after cooking before serving; this helps the flavors meld together beautifully. {{image_4}} German goulash has many tasty twists. Each region adds its own flair. In Bavaria, cooks often use dark beer for depth. In Swabia, you might find a mix of pork and beef. The spices can also change. Some people add chili for a kick. Others prefer it mild with just paprika. Each version reflects local tastes and traditions. You can enjoy goulash without meat too! Use hearty mushrooms instead of beef for texture. Sweet potatoes or lentils can add protein and flavor. Replace beef broth with vegetable broth. This keeps the base rich and savory. You can still use all the classic spices. The dish stays warm and comforting for all. Germany has many local ingredients that can enhance goulash. In northern regions, you might find fish goulash. The fresh catch adds a unique taste. In the south, farmers may add local root vegetables. Carrots, parsnips, and turnips can make it heartier. Feel free to mix in what you love. Each ingredient makes the meal more personal and special. To store leftover German goulash, let it cool first. Place it in an airtight container. Make sure to cover it well. Store in the fridge for up to three days. If you want to keep it longer, freezing is a good option. When you’re ready to eat the goulash again, take it out of the fridge. Pour it into a pot and heat on low. Stir often to avoid burning. You can also use a microwave. Heat in a microwave-safe bowl, covered, for about 2-3 minutes. Stir halfway through. Make sure it’s hot all the way through before serving. For long-term storage, freeze the goulash in a freezer-safe container. Leave space at the top because it will expand when frozen. Label the container with the date. It can last up to three months in the freezer. To thaw, move it to the fridge overnight. Reheat as mentioned above. Enjoy your hearty meal whenever you want! German goulash comes from Hungary. It has roots in a dish called pörkölt. Over time, Germany added its own twists. Today, it blends rich flavors with hearty ingredients. You can find it in homes and restaurants alike. Yes, you can use other meats. Pork or turkey works well, too. Just cut them into cubes, like the beef. The cooking time may change slightly, so keep an eye on it. If your goulash is too thin, don't worry. You can add more diced potatoes or carrots. They will cook down and help thicken the sauce. Another option is to mix cornstarch with cold water and stir it in. - What can I serve with German Goulash? German goulash pairs well with crusty bread. You can also serve it over egg noodles or rice. A simple green salad adds a fresh touch. If you want more flavor, try a dollop of sour cream on top! In this article, we explored how to make authentic German goulash. We discussed key ingredients, cooking steps, and tips for great flavor. You learned about variations, storage methods, and common questions. Remember, using fresh ingredients and avoiding common mistakes can greatly improve your dish. Enjoy experimenting with different flavors and techniques. Your goulash will be a hit whether you stick with tradition or try something new. Happy cooking!

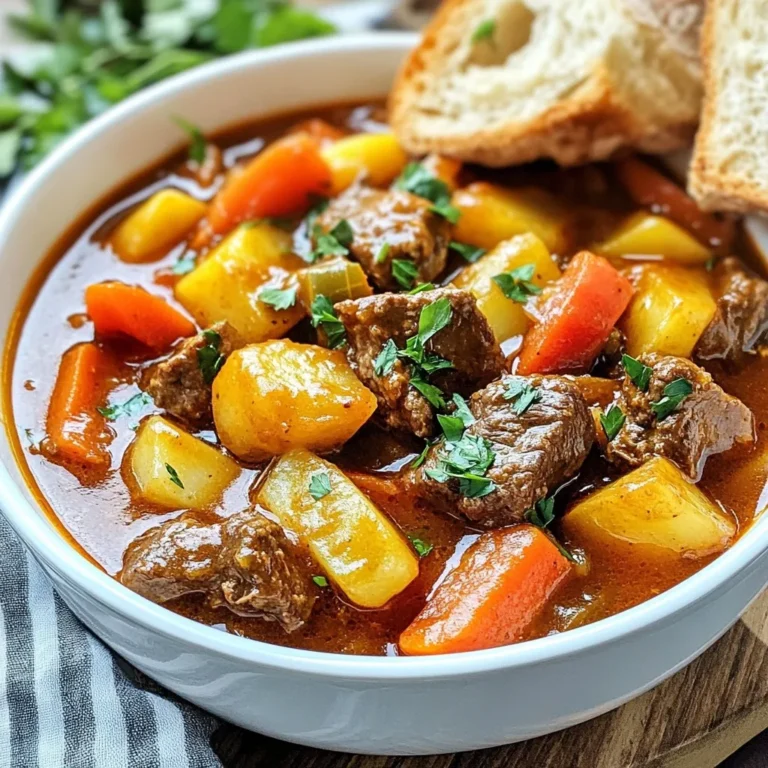
German Goulash Flavorful and Hearty Comfort Meal

For this ratatouille, I love using fresh, seasonal veggies. They burst with flavor and color. Here are the key ingredients: - 2 medium zucchinis, cut into bite-sized cubes - 1 medium eggplant, diced into uniform pieces - 1 bell pepper (your choice of color), chopped - 1 medium onion, finely chopped - 3 cloves of garlic, minced - 4 ripe tomatoes, chopped into chunks - 1 cup of vegetable broth, low-sodium preferred - 2 teaspoons of dried oregano - 2 teaspoons of dried basil - 1 teaspoon of sea salt - 1/2 teaspoon of freshly ground black pepper - 1 tablespoon of extra virgin olive oil Seasonal veggies like zucchini and eggplant shine in this dish. They soak up the flavors well. Tomatoes add moisture and sweetness. The broth keeps everything tender and tasty. For best results, I recommend low-sodium vegetable broth. This lets the veggie flavors really come through. Fresh basil leaves make a great garnish. They add a pop of color and fresh flavor. Basil also offers health benefits, like antioxidants and vitamins. Here are some other garnish ideas you might like: - Grated cheese, like Parmesan - A drizzle of balsamic glaze - Toasted pine nuts for crunch Garnishes can elevate this dish. They give it a nice touch and can change the flavor profile too. Enjoy exploring different options! For the full recipe, check here [Full Recipe]. Start by washing all your veggies well. This helps remove dirt and any chemicals. Then, cut the zucchinis into bite-sized cubes. Make sure they are uniform so they cook evenly. Next, dice the eggplant into similar-sized pieces. Chop your bell pepper into nice chunks. Finely chop the onion, and mince the garlic cloves. Lastly, cut the ripe tomatoes into chunks. Place all these prepared vegetables aside for mixing later. In a large bowl, combine all the veggies you prepped. Add the chopped zucchinis, eggplant, bell pepper, onion, and tomatoes. Don’t forget the minced garlic! Drizzle the olive oil over this mix. Then, sprinkle in the dried oregano, dried basil, sea salt, and black pepper. Toss everything together well. This ensures every piece gets coated in oil and seasoning. The flavors will combine beautifully as it cooks. Pour the vegetable broth into the bottom of your crockpot. This will keep the veggies from sticking. Now, carefully transfer the seasoned vegetable mix into the crockpot. Spread it out evenly. Cover the pot with the lid. Set your crockpot to cook on low for 6-8 hours or on high for 3-4 hours. The dish is done when the veggies are tender and flavors blend perfectly. After cooking, taste the ratatouille. Adjust the seasoning if needed, and stir gently before serving. For the complete recipe, check the [Full Recipe]. To enhance the flavor of your ratatouille, use the freshest veggies. Fresh produce adds brightness. Choose ripe tomatoes for sweetness. You can also roast the vegetables before adding them to the crockpot. This adds depth to their flavor. A splash of balsamic vinegar can give your dish a nice tang. If you enjoy a bit of heat, add a pinch of red pepper flakes. Different crockpot models may cook at different speeds. If your crockpot runs hot, check your ratatouille early. On the other hand, if yours cooks slowly, you may need more time. A good rule is to check for tenderness after three hours on high or six hours on low. Remember, the goal is tender veggies that meld together. Ratatouille pairs well with many sides. Serve it over creamy polenta for a hearty meal. You can also put it next to grilled chicken or fish. For a lighter option, serve it with a side salad. A slice of crusty bread also complements it well. Don't forget to top it with fresh basil for that extra pop of flavor. For the full recipe, check out the details above. {{image_4}} You can change up the veggies based on what's in season. Instead of eggplant, try using mushrooms. Swap zucchini for carrots for a sweeter taste. Bell peppers can be switched with squash for a different texture. The great thing about ratatouille is its flexibility. You can mix and match to suit your taste. Want a heartier dish? Add beans or meats! Chickpeas or black beans work well for a plant-based option. If you want meat, diced chicken or sausage will add great flavor. Just toss them in with the veggies. They will blend well as they cook together. To make your ratatouille stand out, add spices or sauces. A pinch of red pepper flakes gives heat. Try adding a splash of balsamic vinegar for a tangy twist. Fresh herbs like thyme or rosemary can also add depth. These little changes can turn a simple dish into something special. For the full recipe, check out the Summer Veggie Crockpot Ratatouille recipe. After enjoying your Summer Veggie Crockpot Ratatouille, you might have some leftovers. It's best to store them in an airtight container. Make sure to let the ratatouille cool to room temperature first. This prevents steam from building up in the container, which can cause sogginess. Place the container in the fridge. The ratatouille stays fresh for up to four days. If you want to keep your ratatouille for longer, you can freeze it. Start by letting it cool completely. Then, scoop portions into freezer-safe bags or containers. Remove as much air as possible before sealing. Label the bags with the date. When you're ready to eat, thaw it overnight in the fridge. Reheat it in the microwave or on the stove until hot. This method keeps the flavors intact. Ratatouille can stay fresh in the fridge for about four days. If frozen, it lasts for three months. Always check for signs of spoilage before eating. If it smells off or looks strange, it’s best to throw it away. Remember, proper storage helps maintain its taste and nutrients. Yes, you can use frozen vegetables in this dish. However, frozen veggies may change the texture of your ratatouille. They often become softer when cooked. Fresh vegetables maintain their shape and bite better. If you choose frozen, let them thaw before adding them to the crockpot. This helps keep the dish from getting too watery. Ratatouille pairs well with many dishes. Here are a few ideas to try: - Crusty bread: Perfect for soaking up the sauce. - Quinoa or rice: These grains add a hearty base. - Grilled chicken or fish: These proteins make a filling meal. - A fresh salad: A light salad adds crunch and freshness. Feel free to mix and match these options to create a delightful meal. Reheating ratatouille is easy. You can use the stovetop or microwave. - Stovetop method: Place the ratatouille in a pan. Heat over medium-low heat, stirring often. This method helps maintain its texture. - Microwave method: Put the ratatouille in a microwave-safe bowl. Heat it on medium power for 1-2 minutes, stirring halfway through. Both methods keep the flavors intact and make it tasty again. For detailed cooking instructions, refer to the Full Recipe. In this post, we explored how to make a tasty summer veggie crockpot ratatouille. We discussed essential ingredients, optional garnishes, and step-by-step instructions for prepping and cooking. You learned tips to improve flavor, adjust cooking times, and serve this dish with others. Plus, we covered variations and smart storage methods. Now, grab those seasonal veggies and enjoy your homemade ratatouille!

Summer Veggie Crockpot Ratatouille Easy and Flavorful

To make melt-in-your-mouth chicken breasts, you need a few key items. These ingredients work together to create juicy and flavorful chicken. - 4 boneless, skinless chicken breasts - 1 cup buttermilk - 1 tablespoon garlic powder - 1 tablespoon onion powder - 1 teaspoon smoked paprika - 1 teaspoon salt - 1/2 teaspoon black pepper - 1 cup all-purpose flour - 1/4 cup cornstarch - 1 tablespoon fresh parsley, finely chopped (for garnish) - 1/4 cup unsalted butter - 2 tablespoons olive oil If you can’t find some ingredients, no worries! Here are some easy swaps: - Buttermilk: Use regular milk with a splash of vinegar or lemon juice. - Garlic Powder: Fresh minced garlic works well too. - Smoked Paprika: Try regular paprika for a milder taste. - Unsalted Butter: You can use salted butter, but reduce the added salt. - Cornstarch: All-purpose flour can replace cornstarch, but it may change the texture slightly. Want to make your dish shine? Here are some fun garnishes to consider: - Fresh herbs like thyme or basil for an aromatic touch. - Lemon zest for a bright, citrusy flavor. - A drizzle of honey or balsamic glaze for a sweet finish. These ingredients and tips will help you create the best melt-in-your-mouth chicken breasts. If you want the full recipe, check out the details provided above. Enjoy your cooking! To start, you need to marinate the chicken. This step makes the chicken tender and flavorful. In a large bowl, mix one cup of buttermilk, one tablespoon of garlic powder, one tablespoon of onion powder, one teaspoon of smoked paprika, one teaspoon of salt, and half a teaspoon of black pepper. Whisk this together well. Then, add the chicken breasts. Make sure they are fully covered by the marinade. Cover the bowl with plastic wrap. Let it sit in the fridge for at least one hour. For the best results, leave it overnight. Next, you'll need to prepare your oven and skillet. Preheat your oven to 375°F (190°C). While the oven heats up, take a shallow dish or plate. In this dish, mix one cup of all-purpose flour and one-fourth cup of cornstarch. Stir them together well to ensure they blend evenly. This mix will help create a crispy coating on the chicken. Once marinated, take the chicken out of the bowl. Let any extra marinade drip off. Now, dredge each chicken breast in the flour and cornstarch mixture. Press lightly to make sure the coating sticks well. In a large, oven-safe skillet, heat one-fourth cup of unsalted butter and two tablespoons of olive oil over medium-high heat. When the butter melts, add the coated chicken. Sear each breast for about four to five minutes on each side. Look for a golden-brown crust to form. After searing, it’s time to bake! Carefully transfer the skillet to your preheated oven. Bake the chicken for 20 to 25 minutes. Use a meat thermometer to check the internal temperature. It should reach 165°F (75°C). This ensures the chicken is fully cooked and safe to eat. To get juicy chicken breasts, start with marination. The buttermilk in the marinade works wonders. It adds moisture and tenderizes the meat. Marinate for at least one hour, but overnight is best. This gives the flavors time to soak into the chicken. Also, do not rush the cooking. Searing and baking should be done at the right temperatures. Use a meat thermometer to check for doneness. Aim for 165°F (75°C) for safety and juiciness. When marinating, always use a non-metal bowl. Metal can react with the acids in the marinade. Mix your buttermilk and spices well so every piece of chicken gets flavor. Make sure the chicken is fully covered in the marinade. If needed, flip it halfway through. This helps to ensure even flavor and tenderness. For a twist, try adding citrus zest or herbs to the mix. These add depth and freshness to the chicken. If your chicken turns out dry, it may have been overcooked. Always check your chicken’s temperature early. If the crust is too dark but the inside is not done, reduce the heat. If you experience bland chicken, ensure your marinade has enough salt and spices. Taste it before adding the chicken. If you find your chicken lacks crunch, try pressing the coating onto the chicken more firmly. This helps it stick better during cooking. For more detailed guidance, check the Full Recipe. {{image_4}} You can add many flavors to the marinade. Try mixing in some lemon juice or zest for a bright taste. Honey adds a nice sweetness that balances the spices. Fresh herbs like thyme or rosemary can bring a lovely aroma. If you like heat, a pinch of cayenne pepper or chili flakes can spice things up. For a smoky flavor, consider adding more smoked paprika or some liquid smoke. Each addition can change the dish, making it yours. Grilling is a great way to cook these chicken breasts. It gives them a nice char and smoky flavor. Set your grill to medium-high heat. Cook the marinated chicken for about 6-8 minutes on each side. Keep an eye on the temperature. It should reach 165°F (75°C). Air frying is another quick option. Preheat your air fryer to 375°F (190°C). Place the chicken in a single layer and cook for about 15-20 minutes. Check the internal temperature, just like with grilling. Both methods keep the chicken juicy and tender, while adding unique flavors. Pair your chicken with delicious sides to make it a full meal. Roasted vegetables like carrots and broccoli complement the chicken's flavor. Mashed potatoes or creamy polenta also work well. A fresh green salad adds a nice crunch. You can even serve it with rice or quinoa for a hearty option. Each side can enhance your melt-in-your-mouth chicken breasts and create a balanced plate. To keep leftover chicken breasts fresh, let them cool first. Place the chicken in an airtight container. You can also wrap it tightly in plastic wrap or aluminum foil. Store the chicken in the fridge for up to three days. This way, it stays juicy and tasty for your next meal. When reheating your chicken, aim for warmth without drying it out. Preheat your oven to 350°F (175°C). Place the chicken in an oven-safe dish and cover it with foil. Heat it for about 15-20 minutes. This keeps the chicken moist. You can also use a microwave, but be careful. Use a lower power setting, and heat it in short bursts. Check often to ensure it stays tender. If you want to freeze chicken, do it soon after cooking. Let the chicken cool down completely. Wrap each piece tightly in plastic wrap, then place them in a freezer bag. Remove as much air as possible. Label the bag with the date. Frozen chicken lasts up to three months. When ready to eat, thaw it in the fridge overnight for the best results. You can then reheat it according to the earlier instructions. This method helps maintain the chicken's melt-in-your-mouth quality. For the full recipe, refer to the earlier sections. The secret lies in the marinade. Buttermilk works wonders by breaking down proteins. This gives the chicken a tender texture. The garlic and onion powders add depth. Smoked paprika brings a warm, smoky flavor. Together, they create a juicy, flavorful experience. Yes, you can use bone-in chicken. It may take longer to cook, though. Bone-in pieces can add flavor and moisture. Just make sure to check the internal temperature. It should reach 165°F (75°C) for safety. Use a meat thermometer to check the chicken’s temperature. Insert it into the thickest part of the breast. It should read 165°F (75°C). This ensures the chicken is safe to eat. If you don’t have a thermometer, cut into the chicken. The juices should run clear, not pink. You can marinate the chicken for one hour to overnight. Longer marination gives better flavor and tenderness. However, avoid going over 24 hours. The chicken can become too soft and mushy. Several sides complement this chicken perfectly. Roasted vegetables add color and nutrition. Mashed potatoes provide creaminess. A fresh salad offers a crisp contrast. Rice or quinoa can soak up the juices. Explore your favorites to create a balanced meal. For the full recipe, check the detailed instructions above. You now know the key to melt-in-your-mouth chicken breasts. We've covered essential ingredients, marination steps, and cooking methods. You learned how to keep chicken juicy and avoid common mistakes. Exploring variations adds excitement to your meals. Don’t forget to store extra chicken properly for future enjoyment. With these tips, you can create delicious dishes every time. Trust this guide to make your cooking joyful and easy. Enjoy your kitchen adventures!

Melt-In-Your-Mouth Chicken Breasts Tender and Juicy

- 4 large Portobello mushrooms, stems carefully removed - 2 cups cherry tomatoes, halved for vibrant color - 1 cup fresh mozzarella balls, halved for bite-sized pieces - 1/2 cup fresh basil leaves, finely chopped to release their aromatic flavor - 3 tablespoons balsamic glaze for a tangy finish - 2 tablespoons extra virgin olive oil to enhance richness - 1 teaspoon garlic powder for depth of flavor - Salt and black pepper to taste for seasoning - 1/4 cup pine nuts, toasted for extra crunch The main ingredients bring the classic Caprese flavors to life. The juicy cherry tomatoes add sweetness and brightness. Fresh mozzarella gives a creamy texture that melts beautifully. The basil adds a fragrant touch that ties everything together. For extra flavor and richness, I use balsamic glaze and olive oil. The garlic powder adds a nice depth, while salt and pepper balance the dish. If you want a little crunch, pine nuts are a great choice. You can find the full recipe above to see how these ingredients come together to create a delicious dish. 1. Preheat your oven to 375°F (190°C). This ensures even cooking. 2. Prepare a baking sheet by lining it with parchment paper. This helps with easy clean up. 3. In a medium bowl, mix halved cherry tomatoes, mozzarella balls, and chopped basil. 4. Drizzle in 2 tablespoons of olive oil and balsamic glaze. 5. Season with garlic powder, salt, and pepper. Toss gently until everything is mixed well. 1. Take the Portobello mushrooms and place them cap side up on the baking sheet. 2. Drizzle the inside of each mushroom with the last tablespoon of olive oil. 3. Sprinkle with salt and pepper to bring out their natural taste. 4. Fill each mushroom with the Caprese mix. Press gently to pack it in. 5. If you like, add pine nuts on top for added crunch and flavor. 1. Place the stuffed mushrooms in the oven. Bake for 20-25 minutes. 2. Keep an eye on them. Look for tender mushrooms and melted cheese that is slightly golden. 3. Once done, remove them from the oven. Drizzle more balsamic glaze for extra flavor before serving. For the full recipe, refer to the detailed instructions provided above. Enjoy your cooking! To achieve the perfect texture, choose large Portobello mushrooms. They should be firm and not too wet. Bake them until tender, which usually takes about 20-25 minutes. Keep an eye on them to avoid overcooking. For a great flavor balance, use fresh ingredients. The mix of tomatoes, mozzarella, and basil creates a bright taste. Season well with salt and pepper to enhance all the flavors. For an impressive look, serve the stuffed mushrooms on a rustic wooden board. This adds warmth and charm to the dish. You can also garnish with fresh basil leaves and a drizzle of balsamic glaze. Pair them with a light salad or crusty bread. This complements the mushrooms and adds texture to your meal. To make the dish even better, consider adding more seasonings. A pinch of red pepper flakes can add heat. You might also try fresh herbs like oregano or thyme for extra aroma. Optional garnishes like toasted pine nuts add a nice crunch. They bring a nutty flavor that pairs well with the mushrooms and cheese. Enjoy experimenting with these ideas to create your perfect dish! {{image_4}} For a vegan twist on Caprese stuffed Portobello mushrooms, you can swap the cheese. Use cashew cheese or tofu instead of mozzarella. Both options provide creaminess and flavor without dairy. You can also replace the balsamic glaze with a mix of vinegar and maple syrup for sweetness. If you need gluten-free options, this recipe already fits the bill. Portobello mushrooms are naturally gluten-free. Just ensure any additional sauces or toppings you use are also gluten-free. If you want to switch up the cheese, try goat cheese or feta. These cheeses add a unique tang and creaminess. You can also use vegan cheese for a non-dairy option. For fresh herbs, experiment with thyme or oregano. They pair well with the Caprese flavors. You might also add arugula for a peppery touch. Each herb brings its own character to the dish. You can stuff Portobello mushrooms with other ingredients too. Try a mix of spinach and artichokes for a different flavor. Another option is to use roasted red peppers and feta for a Mediterranean twist. Feel free to combine flavors. Add sun-dried tomatoes for sweetness or olives for a salty kick. Each variation can create a new and exciting dish. Check out the Full Recipe for more ideas! To keep your Caprese stuffed Portobello mushrooms fresh, follow these tips: - Refrigerate: Place any leftovers in an airtight container. They stay good for up to 3 days. - Avoid moisture: Make sure the container is dry to prevent sogginess. - Freezing: You can freeze the stuffed mushrooms. Wrap each one in plastic wrap and then place them in a freezer bag. They can last for about 2 months. When it’s time to enjoy your leftovers, here’s how to reheat them: - Oven method: Preheat your oven to 350°F (175°C). Place the mushrooms on a baking tray. Heat them for about 10-15 minutes. This method keeps the mushrooms tender. - Microwave method: For a quick option, place them on a microwave-safe plate. Heat for 1-2 minutes. However, they may lose some texture. Knowing how long your dish lasts is key: - Fridge: Your stuffed mushrooms last about 3 days in the fridge. - Signs of spoilage: Look for discoloration or an off smell. If they seem slimy or have mold, throw them away. For the full recipe, visit the Caprese stuffed Portobello mushrooms section. What can I use instead of mozzarella? You can use burrata, feta, or goat cheese. These cheeses offer unique flavors. Burrata has a creamy texture, while feta adds a salty bite. Goat cheese brings tanginess that contrasts nicely with the mushrooms. Can I use dried basil instead of fresh? Yes, you can use dried basil, but use less. Dried herbs are stronger in flavor. About one teaspoon of dried basil equals one tablespoon of fresh. Add it to your filling and adjust to taste. How do I know when the mushrooms are done? Mushrooms are done when they become tender. The cheese should be melted and slightly golden. You can poke the mushrooms with a fork for a quick check. They should feel soft but not fall apart. Can I make the filling ahead of time? Yes, you can prepare the filling a day ahead. Store it in the fridge in a sealed container. This saves time and makes cooking easier. Just fill the mushrooms right before baking. What goes well with Caprese Stuffed Portobello Mushrooms? These mushrooms pair well with a green salad. A light vinaigrette complements their rich flavors. You can also serve them with crusty bread or a side of pasta for a full meal. Are these mushrooms suitable for a party appetizer? Absolutely! They are colorful and easy to serve. Each mushroom is a perfect bite-sized treat. Guests will love the blend of flavors in every bite. For a party, consider making a larger batch. This blog post covered making Caprese Stuffed Portobello Mushrooms. We explored key ingredients, like fresh basil and cherry tomatoes. You learned step-by-step instructions for prep, stuffing, and baking. I shared tips for perfect texture and flavor and offered variations to fit dietary needs. Remember, these mushrooms are a delicious dish for any occasion. You're ready to impress with your new cooking skills. Enjoy experimenting with flavors and share your results!

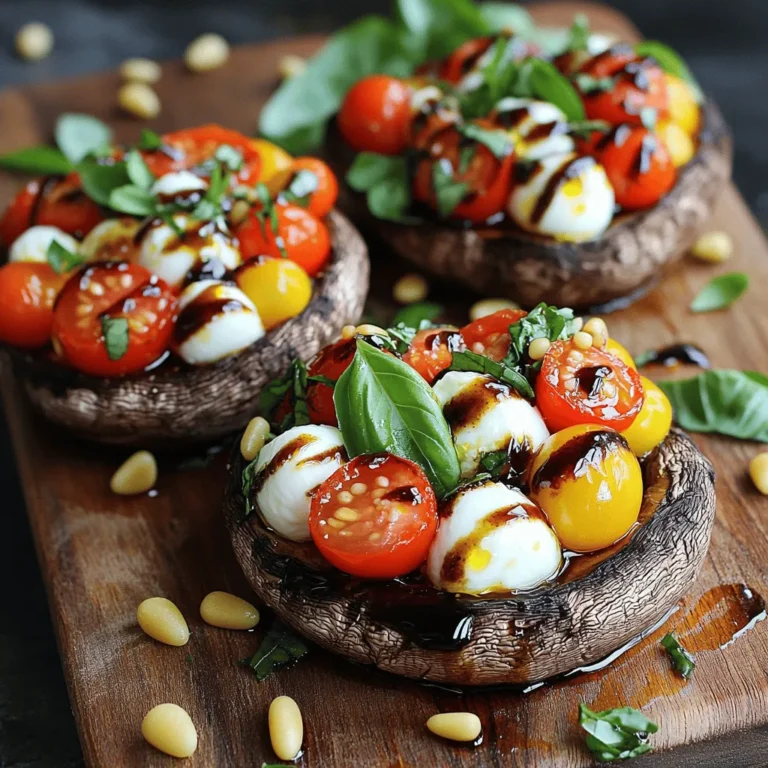
Caprese Stuffed Portobello Mushrooms Flavorful Treat

To make this Avocado Lime Chicken Salad, you need: - 2 cups cooked chicken breast, shredded - 1 ripe avocado, diced into cubes - 1/2 cup cherry tomatoes, halved through the center - 1/4 cup red onion, finely chopped - 1/4 cup fresh cilantro, chopped - Juice of 1 lime (reserve lime zest for finishing) - 1 tablespoon extra-virgin olive oil - Salt and freshly ground black pepper to taste - 1/4 teaspoon garlic powder - 1/4 teaspoon ground cumin When picking ingredients, look for ripe avocados. They should feel slightly soft but not mushy. Choose bright red cherry tomatoes with no blemishes. Fresh cilantro should have vibrant green leaves and no wilting. For chicken, use meat that is cooked and shredded, without any added preservatives. You can add other ingredients to change the flavors. Try adding diced bell peppers for crunch or corn for sweetness. If you want a creamier salad, mix in Greek yogurt or sour cream. For a protein boost, consider beans or chickpeas. Feel free to swap the chicken for grilled shrimp or tofu for a vegetarian option. You can find the Full Recipe for complete details on preparation. To make Avocado Lime Chicken Salad, start by gathering all your ingredients. You’ll need cooked chicken, avocado, cherry tomatoes, red onion, cilantro, lime juice, olive oil, and seasonings. In a large mixing bowl, add 2 cups of shredded chicken. Dice 1 ripe avocado into small cubes and add it to the bowl. Next, slice 1/2 cup of cherry tomatoes in half and toss them in. Then, finely chop 1/4 cup of red onion and add it for a nice crunch. In a small bowl, whisk 1 lime's juice with 1 tablespoon of olive oil. Add 1/4 teaspoon of garlic powder and 1/4 teaspoon of ground cumin. Season with salt and black pepper to taste. Pour this tangy dressing over the chicken and veggies. Gently mix everything together, careful not to mash the avocado. Finally, fold in 1/4 cup of chopped cilantro to finish. When mixing your ingredients, use a gentle touch. You want to keep the avocado cubes intact. If you mash them, the salad will become mushy. It helps to mix the chicken and veggies first, then add the dressing. This way, everything gets coated without damaging the avocado. Look for bright colors in your salad. The green avocado should be vibrant, and the tomatoes should shine. If your salad looks fresh and colorful, you’re on the right track. When you taste it, the flavors should be bright and zesty. If the salad feels creamy but not mushy, you nailed the texture. Serve it right away for the best taste or chill it for a bit to let the flavors blend. For a nice touch, sprinkle some lime zest on top just before serving. You can find the Full Recipe for a more detailed guide. To boost the taste of your avocado lime chicken salad, try adding different spices. You can mix in some smoked paprika for a hint of smokiness. A dash of cayenne pepper adds heat and depth. If you love fresh herbs, consider adding fresh dill or parsley. They can brighten up the salad. You can also switch up the lime juice with lemon or orange juice for a different twist. One mistake is over-mixing the salad. Gently toss the ingredients to keep the avocado cubes intact. If you add too much salt at once, it can overwhelm the dish. Start with a little and taste as you go. Another mistake is not using ripe avocados. A hard avocado won’t blend well and can feel bland. Make sure it yields slightly when you press it gently. For the best avocado texture, cut it just before you mix the salad. This keeps it fresh and vibrant. When dicing, aim for even cubes. This helps them mix well with other ingredients. Use a fork to mash a bit of avocado if you want a creamier texture. Just be careful not to mash it all. You want that creamy richness without losing the delightful chunks. For more details, check the Full Recipe for Avocado Lime Chicken Salad! {{image_4}} If you want to mix things up, try different proteins. You can use shrimp or tofu for a fresh twist. For a leaner option, turkey works well too. Each choice brings new flavors. Just adjust cooking times as needed. Adding toppings makes the salad even better. You could sprinkle on some feta cheese for a salty kick. Sliced olives add a briny flavor that complements the avocado. If you like a crunch, toss in some nuts or seeds. They add texture and depth. Feel free to get creative with seasonal veggies, like bell peppers or cucumbers. To make a vegan version, swap out the chicken for chickpeas. Use firm tofu or tempeh for extra protein. Replace the lime juice with lemon juice if you prefer a different tang. Keep the avocado and mix in your favorite veggies. This way, you still enjoy a creamy and delicious salad. The Full Recipe gives you all the details on how to prepare this meal. To keep your Avocado Lime Chicken Salad fresh, store it in an airtight container. This helps keep moisture in and air out. If you plan to eat it later, avoid mixing in the dressing until you are ready. The dressing makes the salad soggy over time. Use glass or BPA-free plastic containers. Glass containers are great because they do not retain odors. Choose containers with tight-fitting lids to keep your salad fresh. If you have a lot of salad, consider using a larger container. Your salad will stay fresh for about two to three days in the fridge. Look for any changes in color or smell. If the salad starts to brown or smells off, it’s best to toss it. Always trust your senses; they help you avoid spoiled food. Yes, you can make this salad ahead of time. Prepare the chicken, avocado, and other ingredients. Mix them together just before serving. This keeps the avocado fresh and tasty. If you want to store it, keep the dressing separate. When you are ready to eat, combine everything for the best flavor. You can serve this salad with many sides. Here are some tasty options: - Tortilla chips for crunch - Whole grain bread for a sandwich - Quinoa for added protein - Rice for a filling meal These sides balance well with the salad's fresh flavors. To keep your avocado green, you can use lime juice. The acid in lime slows down browning. You can also try covering the salad tightly with plastic wrap. Press the wrap against the salad to limit air exposure. If you use a bowl, cover it well with a lid. These tips help keep your avocado fresh longer. In this post, I covered how to make Avocado Lime Chicken Salad. I shared ingredient choices and tips for selecting fresh items. You learned about preparation steps and how to avoid common mistakes. I also suggested variations for different diets and how to store leftovers. Remember, picking quality ingredients matters. With these tips, your salad will shine. Enjoy creating this flavorful dish and make it your own!

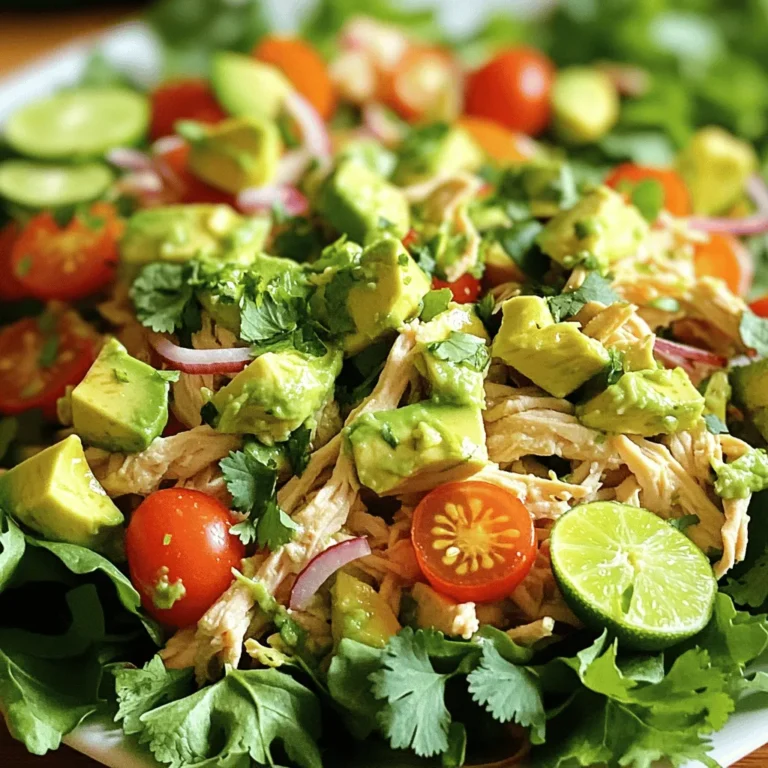
Avocado Lime Chicken Salad Fresh and Flavorful Dish

PREV 1 … 21 22 23 … 45 NEXT
yummybiterecipes

explore

DessertsDinnerAppetizersDrinks

Our Policies

  • Cookie Policy
  • Copyright Policy
  • Disclaimer
  • GDPR Policy
  • Terms Of Use
Back to Top
  • About
  • Contact Us
  • Privacy Policy
© 2025 yummybiterecipes