FREE DINNER EBOOK! Get your copy!
  • Cookie Policy
  • GDPR Policy
  • Disclaimer
  • Terms Of Use
  • Visit my other site: Fun Cookie Recipes
yummybiterecipes
  • Home
  • Dinner
  • Desserts
  • Drinks
  • Appetizers
  • Contact
  • About
  • Privacy Policy
  • Home
  • Dinner
  • Desserts
  • Drinks
  • Appetizers
  • Contact
  • About
  • Privacy Policy
  • Cookie Policy
  • GDPR Policy
  • Disclaimer
  • Terms Of Use
Visit my other site: Fun Cookie Recipes

HOME / CATEGORIES /

Latest

- 1 cup unsalted butter - 1 cup granulated sugar - 1 cup packed brown sugar - 2 large eggs - 2 teaspoons vanilla extract - 3 cups all-purpose flour - 1 teaspoon baking soda - 1/2 teaspoon salt - 1 cup semi-sweet chocolate chips - 8 oz cream cheese - 1/4 cup granulated sugar - 1/2 teaspoon vanilla extract - 1 tablespoon heavy cream - Optional toppings like powdered sugar - Serving suggestions Gathering the right ingredients is key to making Oreo cheesecake stuffed cookies. You need to start with unsalted butter. This gives the cookies a rich flavor. Both granulated and brown sugar help create a sweet and chewy texture. Two large eggs add moisture and help bind the dough. Vanilla extract brings a warm, sweet note. The flour and baking soda work together to give the cookies their structure. Salt enhances the flavors and balances the sweetness. Finally, semi-sweet chocolate chips add a delightful burst of chocolate in every bite. For the cheesecake filling, cream cheese is essential. It gives that creamy, luscious texture. Granulated sugar sweetens the filling, while vanilla extract adds depth. A little heavy cream helps to make it smooth and rich. Lastly, think about optional garnishes. A light dusting of powdered sugar can make your cookies look elegant. You can serve them with a glass of cold milk for dipping. This takes the experience to the next level! - First, cream the cream cheese, sugar, vanilla, and heavy cream in a bowl. - Mix until smooth and creamy, leaving no lumps. - Next, fold in the crushed Oreo cookies gently. - Cover the mixture and chill it for about 30 minutes. This step firms up the filling. - In a large bowl, cream the softened butter with the granulated and brown sugars. - Beat until the mix is light and fluffy, about 2-3 minutes. - Add the eggs one at a time, mixing well after each one. - Then, stir in the vanilla extract until fully combined. - In another bowl, whisk the flour, baking soda, and salt together. - Gradually mix the dry ingredients into the butter and sugar mix. - Be careful not to overmix; this keeps the cookies tender. - Finally, fold in the chocolate chips for a sweet touch. - Preheat your oven to 350°F and line a baking sheet with parchment paper. - Use a cookie scoop or tablespoon to take a portion of dough. - Flatten it in your palm and place about one tablespoon of cheesecake filling in the center. - Wrap the dough around the filling, sealing it well. - Roll the filled dough into a ball and place it on the sheet. - Repeat until you use all the dough and filling, leaving space between cookies. - Bake the cookies in the preheated oven for 12-15 minutes. - The edges should be lightly golden while the centers may look a bit soft. - They will firm up as they cool, so don’t worry. - Let the cookies cool on the baking sheet for 5 minutes. - Carefully transfer them to wire racks to cool completely. - For a lovely presentation, dust the cookies with powdered sugar. - Serve them on a nice plate with cold milk for dipping! To get the best cookies, avoid overmixing the dough. Mix until just combined. This keeps your cookies soft and chewy. When measuring flour, use the spoon and level method. Spoon flour into your measuring cup, then level it off with a knife. This stops you from using too much flour, which makes the cookies tough. You can boost the flavor by adding spices like cinnamon or nutmeg. A touch of espresso powder can also help. If you want a richer taste, try extra vanilla extract. Balance sweet and salty by adding a pinch of sea salt. This small step makes the flavors pop! One common mistake is having dough that is too dry or too sticky. If your dough is too dry, add a tiny bit of milk. If it’s too sticky, add a little flour. Pay close attention to your baking time and temperature. Every oven is different, so keep an eye on your cookies. They should be golden on the edges but soft in the center. {{image_4}} You can change the cheesecake filling for a fun twist. Consider using strawberry or chocolate flavors instead of the classic. Both options give a new taste to the cookies. You can also play with the cookie dough. Try peanut butter or oatmeal dough for a unique flavor. These changes can make your cookies even more exciting and delicious. If you need gluten-free options, use almond flour or a gluten-free blend. These flours work well in cookie recipes. For those who want dairy-free, you can swap cream cheese for cashew cream or a dairy-free brand. These swaps keep your cookies tasty and friendly for different diets. Seasonal ingredients can add a festive flair. In winter, try adding peppermint extract for a holiday vibe. In fall, incorporate pumpkin spice for a cozy flavor. You can also mix in seasonal fruits like raspberries or cherries for fresh bursts of flavor. These twists make your Oreo cheesecake stuffed cookies perfect for any time of the year. To keep your Oreo cheesecake stuffed cookies fresh, store them in an airtight container. This helps keep moisture in and prevents them from drying out. Place a piece of parchment paper between layers if stacking them. This will help avoid sticking. Use a container made of glass or plastic for the best results. You can freeze the stuffed cookies for later. First, let them cool completely. Then, wrap each cookie in plastic wrap. Place them in a freezer-safe bag or container. They can stay fresh in the freezer for up to three months. When you're ready to enjoy them, take the cookies out and let them thaw at room temperature. If you want to warm them up, pop them in the oven for a few minutes. At room temperature, these cookies last for about one week. Keep them in a cool, dry place. You will know they have gone bad if they smell off or feel hard. Also, check for any signs of mold. If you see any, throw them away. Storing them properly ensures you enjoy their delicious taste for longer! To make these cookies, start with the cheesecake filling. Beat the cream cheese until it's smooth. Then mix in sugar, vanilla, and heavy cream. Fold in crushed Oreo cookies and chill for 30 minutes. Next, prepare the cookie dough. Cream butter and sugars until light. Add eggs and vanilla. Then mix in flour, baking soda, and salt. Fold in chocolate chips. Preheat your oven to 350°F. Take some cookie dough, flatten it, and add a spoon of cheesecake filling. Wrap the dough around the filling, roll it into a ball, and place it on a baking sheet. Bake for 12-15 minutes until the edges are golden. Let them cool, and enjoy! Yes, you can make these cookies ahead of time. After baking, let them cool fully. Store them in an airtight container at room temperature. They stay fresh for up to a week. You can also freeze the unbaked stuffed cookies. Just wrap them tightly and store them in the freezer. When you're ready to bake, just take them out and bake straight from the freezer. This way, you can enjoy fresh cookies anytime! Chilling the dough is not required but helps a lot. It makes the cookies thicker and chewier. Chilling also allows the flavors to blend better. If you skip chilling, your cookies may spread more while baking. If you're in a hurry, just chill the dough for 15-30 minutes. This short chill can still improve texture and taste! You can use other cookies instead of Oreos. Try using chocolate sandwich cookies or vanilla wafers for a different twist. For a fruity touch, crushed graham crackers work well, too. If you want a unique flavor, try chocolate chip cookies. Each option gives a fun twist to your cheesecake stuffed cookies! This article explained how to make Oreo cheesecake stuffed cookies. We covered essential ingredients, step-by-step instructions, and tips for perfect results. Remember to measure flour correctly and avoid overmixing for the best texture. You can try different fillings or seasonal twists to keep things exciting. Store and freeze cookies properly to enjoy them longer. With these tips, you'll create delicious treats that impress everyone. Enjoy baking and tasting your creation, and share your fun results!

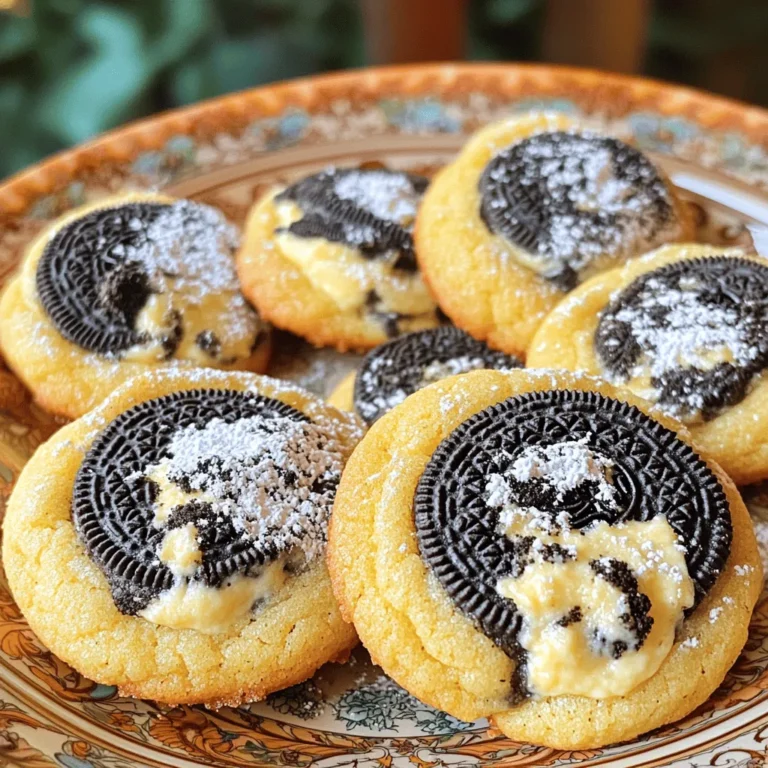
Oreo Cheesecake Stuffed Cookies Irresistible Treat

To create this tasty dish, you need the following key ingredients: - 4 boneless, skinless chicken thighs - 1 cup long-grain rice - 1 medium onion, diced - 2 cloves garlic, minced - 2 cups chicken broth - 1 lemon (for both zest and juice) - 1 teaspoon dried oregano - 1 teaspoon dried thyme - 1 teaspoon paprika - 1/2 cup frozen peas - 2 tablespoons olive oil - Salt and pepper to taste - Fresh parsley, chopped (for garnish) These ingredients work together to give a bright and fresh taste. The chicken thighs keep the dish juicy. The rice soaks up all the flavors, making every bite delicious. The lemon zest and juice add a bright kick, while the herbs bring warmth. You can also add some optional ingredients if you want to boost the dish's taste: - 1 bell pepper, diced - 1 cup chopped spinach - 1/2 teaspoon red pepper flakes - 1 tablespoon capers Adding these items can deepen the flavor and add more texture. For instance, bell peppers add sweetness, while spinach brings in a savory touch. Red pepper flakes give a bit of heat, perfect for spice lovers. To make this dish, having the right tools is key. Here are the tools I recommend: - Large pot or Dutch oven - Wooden spoon or spatula - Measuring cups and spoons - Cutting board and knife - Zester or grater These tools help you cook efficiently. A good pot ensures even cooking, while measuring tools help with accuracy. A zester is handy for getting the perfect lemon zest. Start by getting your large pot or Dutch oven ready. Pour in two tablespoons of olive oil and heat it over medium heat. While the oil warms, season four boneless, skinless chicken thighs with salt, pepper, and paprika. Once the oil is hot, add the chicken in a single layer. Let it brown for about 5-6 minutes on each side until it turns golden. When done, remove the chicken and set it aside on a plate. In the same pot, toss in one medium diced onion and two minced garlic cloves. Sauté this mixture for about 2-3 minutes. Stir it often to keep the onion from burning. You want it soft and a bit clear. Next, add one cup of long-grain rice to the pot. Make sure to stir well so the rice gets coated in the flavorful oil and onion mix. Sauté the rice for another 2 minutes to toast it lightly. Now it’s time to bring it all together. Carefully pour in two cups of chicken broth. Then squeeze in the juice of one lemon and add both the lemon zest and one teaspoon each of dried oregano and dried thyme. Stir everything to blend it well. Next, place the browned chicken thighs back into the pot. Ensure they are submerged in the liquid. Cover the pot with a lid and bring it to a gentle simmer. Lower the heat and let it cook for 20 minutes, until the rice is tender and has soaked up most of the broth. In the last 5 minutes, stir in half a cup of frozen peas. Re-cover the pot to warm the peas through. When the time is up, fluff the rice with a fork and garnish with fresh chopped parsley before serving. To get the best flavor from your One Pot Lemon Herb Chicken and Rice, focus on a few key steps. First, season the chicken well with salt, pepper, and paprika before browning. This helps build a rich base. Use fresh lemon juice and zest; it brightens the dish beautifully. Sauté the onion and garlic until soft, as this releases their flavors into the oil. Finally, let the rice toast briefly before adding the broth. This step enhances the taste. Many people rush the browning stage. Take your time! If you crowd the pot, the chicken won't brown well. Avoid skipping the toasting of the rice; it adds a deeper flavor. Also, don’t forget to cover the pot while simmering. This keeps the steam in and cooks the rice evenly. Lastly, be gentle when fluffing the rice after cooking. This prevents it from becoming mushy. For a gourmet touch, serve the dish directly from the pot. It makes for a warm, inviting presentation. Add lemon slices on the side for a splash of color and freshness. A sprinkle of freshly chopped parsley brightens the plate. Pair your meal with a light salad or steamed veggies for a balanced plate. This keeps your meal simple yet elegant. {{image_4}} You can easily modify the recipe to suit your needs. For a healthier option, use skinless chicken breasts instead of thighs. If you want a vegetarian dish, swap the chicken for chickpeas or tofu. For gluten-free options, choose rice that is certified gluten-free. You can also use vegetable broth instead of chicken broth for a plant-based flavor. Seasonal vegetables can boost both flavor and nutrition. In spring, add asparagus or fresh peas for a pop of color. In summer, consider zucchini or bell peppers for a fresh taste. Autumn brings great options like butternut squash or carrots. Just chop them small and add them when you mix in the rice. Herbs and spices can take this dish to the next level. Fresh herbs like basil or dill can add brightness. For a bolder flavor, try adding red pepper flakes or cumin. A splash of white wine in the broth can also deepen the taste. Just remember to adjust the salt to keep the balance right. After enjoying your One Pot Lemon Herb Chicken and Rice, store leftovers properly. Allow the dish to cool down to room temperature first. Then, transfer it to an airtight container. This way, it keeps the flavors intact and prevents spills. Label the container with the date. Leftovers stay fresh in the fridge for up to three days. If you want to keep it longer, freezing is a good option. To enjoy your leftovers, reheating is key. For the best taste, use a pot on the stove. Add a splash of chicken broth or water to help rehydrate the rice. Heat over low to medium heat while stirring occasionally. This method helps to keep the chicken juicy and the rice fluffy. If you prefer, use a microwave. Cover the dish with a microwave-safe lid or wrap. Heat in short intervals, stirring in between, until warm. If you want to store the dish for a long time, freezing works well. Portion the meal into smaller, airtight containers. This makes it easy to grab a single serving. Make sure to leave some space in the container, as the rice will expand when frozen. Label the containers with the date. You can freeze it for up to three months. When ready to eat, thaw the container in the fridge overnight and follow the reheating steps. Yes, you can use brown rice. However, you need to adjust the cooking time. Brown rice takes longer to cook, about 40-45 minutes. Use 2 1/2 cups of chicken broth for best results. Keep in mind that the dish may have a nuttier flavor and a chewier texture. To add spice, use hot paprika or red pepper flakes. You can also add diced jalapeños or chili powder. Start with a small amount, then taste and adjust. Adding a splash of hot sauce before serving can also give it a nice kick. Several sides go great with this dish. Consider a fresh green salad with lemon vinaigrette. Roasted vegetables like asparagus or Brussels sprouts also make a nice pairing. You could serve garlic bread or crusty rolls to soak up the flavorful juices, too. This blog post covered the key ingredients and steps for making One Pot Lemon Herb Chicken and Rice. You learned about must-have ingredients, optional adds for more flavor, and essential tools. I shared tips to enhance taste and avoid common errors. I also discussed variations for dietary needs and how to store leftovers properly. In closing, this dish is simple yet tasty. With practice, you'll impress everyone at your table. Enjoy cooking!

One Pot Lemon Herb Chicken and Rice Flavorful Dish

To make spicy garlic edamame, you will need: - 2 cups edamame pods (fresh or frozen) - 4 cloves garlic, finely minced - 2 tablespoons extra virgin olive oil - 1 tablespoon low-sodium soy sauce - 1 teaspoon crushed red pepper flakes - 1 tablespoon sesame seeds (toasted, for extra flavor) - Salt, to taste - 1 tablespoon finely chopped green onions (for garnish) I recommend using frozen edamame for this recipe. It is easy to find and cooks quickly. Frozen edamame is picked at peak freshness, so the taste is great. Fresh edamame works too. If you choose fresh, look for bright green pods that feel firm. If you want to change things up, here are some easy swaps: - Use garlic powder instead of fresh garlic in a pinch. - Swap olive oil for sesame oil for a richer flavor. - You can try tamari instead of soy sauce for a gluten-free option. - If you don't have sesame seeds, you can use chopped nuts for crunch. {{ingredient_image_2}} Start by cooking the edamame pods. If you use frozen edamame, fill a pot with water. Bring the water to a boil. Add the edamame pods and cook them for about 5 minutes. They should be tender. After cooking, drain the pods well and set them aside. Next, heat a medium skillet on medium heat. Pour in 2 tablespoons of extra virgin olive oil. Let it warm up. Add 4 finely minced garlic cloves to the skillet. Stir the garlic for 1-2 minutes. You want it to smell nice and fragrant. Be careful not to let it burn. Burnt garlic tastes bad. Now, add the cooked edamame to your skillet. Pour in 1 tablespoon of low-sodium soy sauce and 1 teaspoon of crushed red pepper flakes. Sprinkle in a little salt for taste. Stir everything well to coat the edamame in that garlic goodness. Cook for another 2-3 minutes. Stir often, so everything heats evenly. Once heated, take the skillet off the heat. Sprinkle 1 tablespoon of toasted sesame seeds on top. Add 1 tablespoon of finely chopped green onions for color and crunch. Serve the spicy garlic edamame warm. You can use a rustic bowl for a nice touch. Enjoy this flavor-packed snack! To cook edamame well, start with fresh or quality frozen pods. Boil them until tender, usually around five minutes. Drain the pods well to keep them from being soggy. If you want a bit more flavor, try using vegetable broth instead of water. This adds depth without extra effort. Adjusting spice is easy. Start with a small amount of crushed red pepper flakes. You can always add more later. If you want less heat, reduce the flakes or skip them. For extra heat, add more. Another option is to drizzle a bit of sriracha or chili oil before serving. For a beautiful presentation, use a rustic bowl for the edamame. Sprinkle the toasted sesame seeds and green onions on top for color. You can also serve them in a platter with your favorite dipping sauces. This makes them fun for sharing. Always serve the edamame warm for the best taste experience. Pro Tips Choose Fresh Edamame: Fresh edamame pods will give you a better texture and flavor compared to frozen. Look for bright green pods without blemishes. Control the Heat: Adjust the amount of crushed red pepper flakes to suit your spice preference. Start with less and add more gradually if desired. Perfect Garlic Sauté: Be vigilant while sautéing garlic; it can quickly turn from fragrant to burnt. Remove it from the heat as soon as it becomes golden. Garnish for Flavor: Don’t skip the toasted sesame seeds and green onions; they add a delightful crunch and enhance the overall flavor of the dish. {{image_4}} You can easily make spicy garlic edamame vegan. The recipe is naturally vegan since it uses edamame and garlic. For a gluten-free version, use tamari instead of soy sauce. Tamari has a similar taste but is free of gluten. This way, everyone can enjoy the dish without worry. You can add more flavor to your edamame. Try adding a splash of lime juice for a zesty twist. Another option is mixing in some ginger for a spicy kick. You may also add a dash of sesame oil for a nutty flavor. For an Asian touch, consider adding chopped cilantro. These simple changes can take your snack to the next level. Spicy garlic edamame is great for many events. Serve it as an appetizer at parties and gatherings. It also works well as a side dish for Asian meals. If you have friends over, serve it with drinks for a fun snack. For movie nights, present it in a bowl for easy sharing. The vibrant colors and bold flavors make it a hit every time! To store leftover spicy garlic edamame, place it in an airtight container. Be sure to cool it to room temperature before sealing. This helps keep the flavors fresh. You can store it in the fridge for up to three days. If you have more leftovers, consider freezing them for later use. To reheat the edamame, you can use a skillet or microwave. For the skillet, heat it over medium-low heat. Add the edamame and a splash of water. Stir until warmed through, about 5 minutes. If using a microwave, place the edamame in a microwave-safe bowl. Cover it with a damp paper towel and heat for about 1-2 minutes. When stored properly, spicy garlic edamame lasts up to three days in the fridge. If frozen, it can last for about three months. Just remember to thaw it overnight in the fridge before reheating. Always check for off smells or changes in texture before eating leftovers. Enjoy your flavorful snack! The best way to cook edamame is to boil it. Start with fresh or frozen edamame pods. If using frozen, add them to boiling water. Cook for about 5 minutes until tender. Drain the pods well before using them in your recipe. This method keeps the beans bright green and tasty. Yes, you can make Spicy Garlic Edamame in advance. Prepare it and let it cool completely. Store it in an airtight container in the fridge. It will last for up to three days. When you're ready to eat, reheat it in a skillet over medium heat until warmed through. To make this recipe less spicy, reduce the amount of crushed red pepper flakes. You can start with half a teaspoon. If you want even less heat, skip the red pepper altogether. The garlic and soy sauce will still give you great flavor. Yes, edamame is very healthy! It is high in protein, fiber, and vitamins. Edamame is also low in calories and fat. It can support heart health and aid digestion. Eating edamame can be a great addition to your diet. This blog covered how to make spicy garlic edamame. You learned about key ingredients, step-by-step instructions, and tips for success. I also shared variations and storage ideas to keep your dish fresh. Remember, edamame is not just tasty; it's healthy too. Feel free to tweak flavors and serve it anytime. Cooking can be fun, and this recipe is a great way to start. Enjoy making your own delicious version!

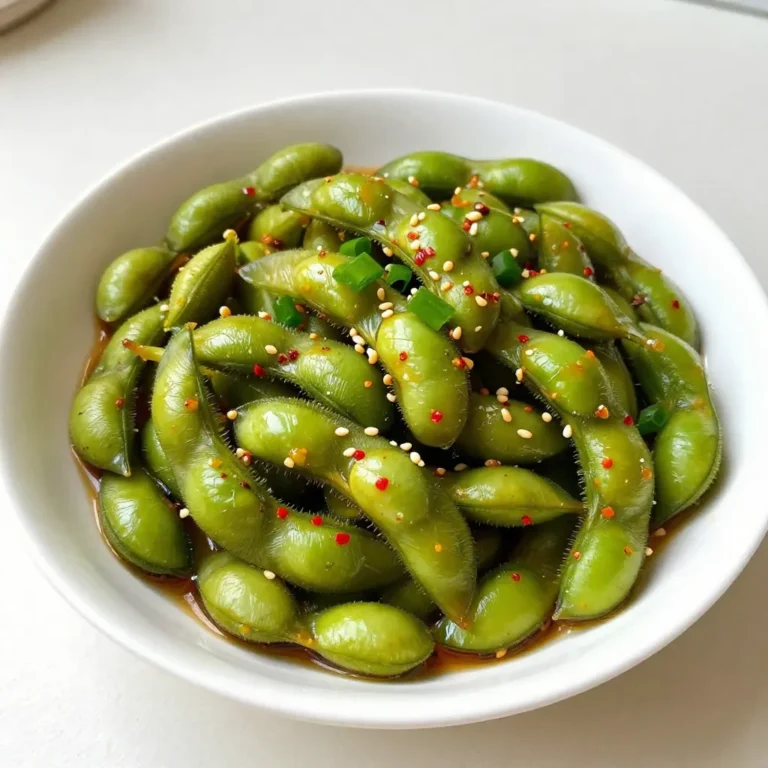
Spicy Garlic Edamame Bold and Flavorful Snack Recipe

- 1 cup all-purpose flour - 1 cup canned pumpkin puree - 2 large eggs - 1/4 cup packed brown sugar - 1/2 cup milk - 1 tablespoon baking powder - 1/2 teaspoon baking soda - 1 teaspoon ground cinnamon - 1/2 teaspoon ground nutmeg - 1/2 teaspoon ground ginger - 1/4 teaspoon salt - 1/2 cup unsalted butter - 1/2 cup pure maple syrup For the best spiced pumpkin waffles, start with the right ingredients. First, grab a cup of all-purpose flour. This will give your waffles a nice base. Next, use a cup of canned pumpkin puree. It adds flavor and moisture. You need two large eggs for binding. A quarter cup of packed brown sugar sweetens the mix. Then, add half a cup of milk to make the batter smooth. Spices bring magic to these waffles. Use one tablespoon of baking powder to help them rise. Add half a teaspoon of baking soda for extra fluffiness. One teaspoon of ground cinnamon creates warmth. Half a teaspoon of ground nutmeg adds depth. Another half teaspoon of ginger gives a slight kick. Finally, use a quarter teaspoon of salt to balance the sweetness. For the brown butter maple syrup, melt half a cup of unsalted butter. This will turn nutty and rich. Stir in half a cup of pure maple syrup. This combo makes your waffles extra special. - Preheat the waffle maker according to the manufacturer's instructions. This step is key for even cooking. - In a large mixing bowl, combine: - 1 cup all-purpose flour - 1 tablespoon baking powder - 1/2 teaspoon baking soda - 1 teaspoon ground cinnamon - 1/2 teaspoon ground nutmeg - 1/2 teaspoon ground ginger - 1/4 teaspoon salt - Whisk these until well blended. This makes sure the spices are evenly spread. - In another bowl, whisk together: - 1 cup canned pumpkin puree - 2 large eggs - 1/4 cup packed brown sugar - 1/2 cup milk - 1/2 teaspoon vanilla extract - 1/4 cup unsalted butter, melted - Mix until smooth. This mixture gives the waffles their rich flavor. - Pour the wet mixture into the dry ingredients. - Stir gently until just combined. It's okay if some lumps remain. Overmixing makes the waffles tough. - Lightly grease your waffle maker. Use cooking spray or a bit of melted butter. - Cook the batter for 4-6 minutes, or until the waffles turn golden brown. Check your machine for specific times. - In a small saucepan over medium heat, melt: - 1/2 cup unsalted butter - Cook the butter until it turns golden brown and smells nutty. This takes about 5-7 minutes. Stay close to avoid burning. - Once ready, remove it from heat and stir in: - 1/2 cup pure maple syrup - Mix well and keep warm. This syrup adds a lovely touch to your waffles. To make your waffles light and fluffy, avoid overmixing the batter. When you combine the wet and dry ingredients, stir just until you see no dry flour. A few lumps are okay. Overmixing can lead to dense waffles, and we want them airy and soft. When making the brown butter for your syrup, keep a close eye on it. Melt the butter over medium heat and stir it often. Once it starts to foam, watch for that nutty aroma. It should turn a rich golden brown in about 5-7 minutes. If it burns, you’ll lose that lovely flavor. To make your waffles even more special, consider adding some toppings. A light dusting of powdered sugar gives a nice touch. A dollop of whipped cream adds creaminess. You can also sprinkle chopped nuts, like pecans or walnuts, for a delightful crunch. {{image_4}} If you need a gluten-free option, use a gluten-free flour blend. Many blends work well. Look for one that has a mix of flours like rice, almond, or coconut. The taste will still be great! For a vegan choice, swap regular eggs for flax eggs. To make a flax egg, mix 1 tablespoon of ground flaxseed with 2.5 tablespoons of water. Let it sit until it thickens. Use plant-based milk instead of dairy milk for the batter. Want to add more flavor? Try mixing in chocolate chips or chopped pecans into the batter. They add a nice crunch and sweetness. You can also sprinkle some on top for a beautiful finish. This makes the waffles even yummier! To keep your waffles fresh, place the cooked waffles in an airtight container. They will stay good in the fridge for up to 3 days. This way, you can enjoy them again without losing any flavor. If you have extra waffles, freezing them is a great option. First, cool the waffles completely. Then, lay them in a single layer on a baking sheet. Once they are frozen solid, transfer them to a freezer bag. They can last up to 2 months in the freezer. When you are ready to enjoy your waffles, reheating is simple. Use a toaster for a crisp finish or a microwave for a quick warm-up. Either way, you will have a tasty breakfast ready in no time! Yes, you can prepare the batter in advance and store it in the refrigerator for a few hours. This makes it easier for busy mornings. Just remember to stir it gently before using it. Ensure your waffle maker is preheated properly. You can also add a little more oil or butter to the batter. This helps create a nice, crunchy texture on the outside while keeping the inside fluffy. Besides brown butter maple syrup, try fresh fruits, nuts, or yogurt as delicious toppings. Sliced bananas or berries add a nice touch. A sprinkle of nuts gives extra crunch too. You can even add a dollop of whipped cream for a treat! These pumpkin waffles are easy to make and tasty. You mix simple ingredients like flour, pumpkin, and eggs. We covered tips for the perfect waffle texture and how to make brown butter maple syrup. You can even try gluten-free or vegan options. Store any extras for a quick meal later. With these ideas, enjoy a fun breakfast or snack. Now, grab your ingredients and start cooking!

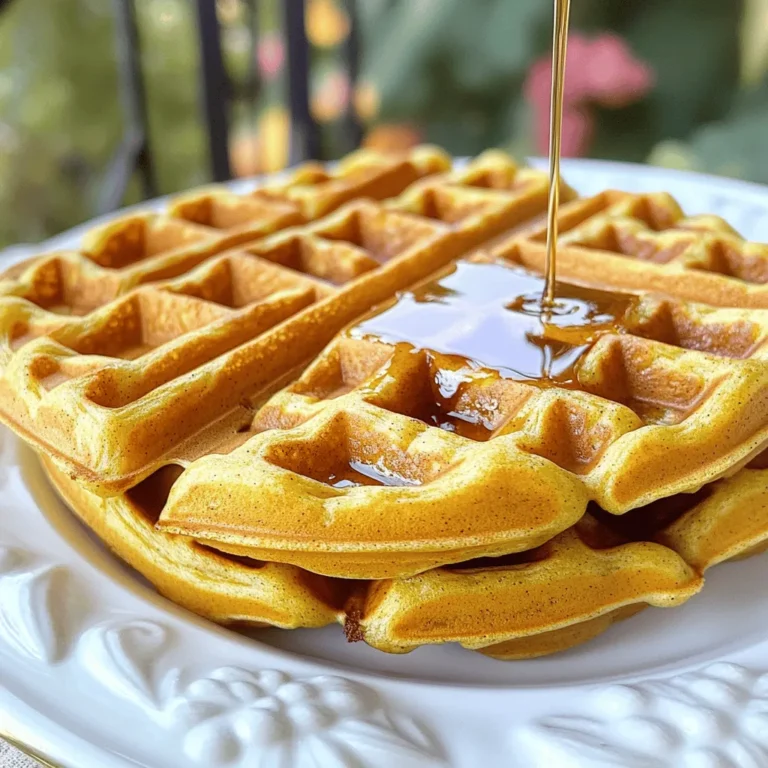
Spiced Pumpkin Waffles with Brown Butter Maple Syrup

- 1 medium green cabbage, finely shredded - 1 pound lean turkey or chicken sausage, cut into half-moon slices - 1 large onion, diced - 2 cloves garlic, minced - 2 medium carrots, peeled and julienned - 1 tablespoon extra virgin olive oil - 1 teaspoon smoked paprika - 1/2 teaspoon freshly ground black pepper - Sea salt to taste - 1/2 cup low-sodium vegetable broth - Fresh parsley, finely chopped, for garnish - Cabbage: This veggie is low in calories and rich in vitamins. It helps with digestion and boosts your immune system. - Turkey or Chicken Sausage: Lean meats provide protein without too much fat. They help build muscles and keep you full. - Onion: Onions are great for heart health. They also add flavor and nutrition to your meal. - Garlic: Garlic can help lower blood pressure and improve cholesterol levels. It adds a wonderful aroma, too. - Carrots: Carrots are high in beta-carotene, which is good for your eyes. They add sweetness and crunch. - Extra Virgin Olive Oil: This oil is rich in healthy fats. It helps with heart health and adds flavor. - Smoked Paprika: This spice gives a smoky flavor and is high in antioxidants. - Black Pepper: This spice can aid digestion and enhance the taste of your dish. - Sea Salt: Salt helps bring out the flavors of your ingredients. Use it in moderation for health. - Low-Sodium Vegetable Broth: This adds moisture without too much salt, making your dish flavorful. - Fresh Parsley: Parsley is rich in vitamins and adds a fresh touch to your meal. - Cabbage: Look for heads that feel heavy for their size. The leaves should be crisp and tightly packed. - Sausage: Choose lean options with minimal additives. Check the packaging for freshness dates. - Onion: Select firm onions with dry, papery skins. Avoid any with soft spots or sprouting. - Garlic: Pick garlic bulbs that are firm and plump. The skins should be dry and intact. - Carrots: Choose bright orange carrots that are firm and smooth. Avoid any that are limp or have cracks. - Olive Oil: Get high-quality extra virgin olive oil. Look for dark bottles to protect it from light. - Spices: Check the expiration dates. Fresh spices have more flavor and health benefits. - Parsley: Select vibrant green parsley. Leaves should be fresh and not wilted or yellowed. 1. Start by heating one tablespoon of extra virgin olive oil in a large skillet over medium heat. This oil gives great flavor to the dish. 2. Add one large diced onion to the skillet. Sauté for about 3-4 minutes until the onion is soft and clear. 3. Then, add two minced cloves of garlic. Cook for one more minute. This step adds a wonderful aroma to the mix. 4. Next, toss in one pound of sliced turkey or chicken sausage. Cook it for about 5-7 minutes, stirring often. You want it browned on the edges. 5. Now, add the two julienned carrots and the finely shredded cabbage. Mix everything well to spread the heat evenly. 6. Sprinkle in one teaspoon of smoked paprika, half a teaspoon of freshly ground black pepper, and sea salt to taste. Toss again to coat all the ingredients. 7. Pour in half a cup of low-sodium vegetable broth. Cover the skillet with a lid. Lower the heat and let it simmer for 10-15 minutes. This softens the cabbage. 8. After simmering, lift the lid and stir the mixture well. Cook for an extra 2-3 minutes to let any extra liquid cook off. 9. Taste your dish and adjust the salt or pepper as needed. This step is key for great flavor. 10. Finally, turn off the heat. Sprinkle finely chopped fresh parsley on top. This adds color and freshness. Serve warm. - Sautéing: This method cooks the onion and garlic quickly, releasing their flavors. It’s important to keep an eye on them to avoid burning. - Simmering: Covering the skillet helps trap steam. This softens the cabbage and melds the flavors together. - Tossing: Mixing the ingredients ensures even cooking and flavor distribution. It also prevents sticking. - Heat the olive oil over medium heat. This helps to sauté the onion and garlic without burning them. - Sauté the onion for 3-4 minutes, then add garlic for one additional minute. - Brown the sausage for 5-7 minutes. This gives it a nice texture. - When you simmer, keep the heat low. This allows the cabbage to soften without overcooking. - Simmer for 10-15 minutes. Adjust the time based on how soft you like your cabbage. To make the best cabbage sausage skillet, focus on your timing. Start with the onion. Cook it until it is soft and clear. This brings out its sweet taste. When you add garlic, stir it quickly. You want it to smell great but not burn. Add your sausage next. Let it brown well. This adds a rich flavor. When you mix in the cabbage, stir gently. You want it to mix but not turn mushy. Cover and simmer it just right. Check the cabbage often until it's tender but still crisp. Don't rush your cooking. If you cook too fast, the flavors won’t blend well. Avoid using too much salt early on. You can always add more later. If you skip the broth, your dish might dry out. The broth helps keep everything moist and tasty. Lastly, don’t forget to taste your dish before serving. Adjust the seasoning for the best flavor. Use a large skillet or sauté pan for this dish. A good non-stick surface helps with easy cooking and cleanup. You will also need a sharp knife for cutting vegetables. A sturdy cutting board will keep your workspace safe. Use a wooden spoon or spatula to stir your dish. This prevents scratching your pan. Finally, have measuring spoons handy for spices and broth. These tools will make your cooking smoother and more enjoyable. {{image_4}} You can make this dish even healthier. Consider using leaner sausage options. Try chicken or turkey. You can also swap the olive oil for a light spray of cooking oil. This cuts extra calories. For a boost of fiber, add quinoa or brown rice instead of just cabbage. You could even mix in zucchini or bell peppers for extra nutrients. Sausage adds great flavor. You can use many kinds. Chicken or turkey sausage is lean and tasty. If you enjoy spice, try andouille sausage for a kick. For a different twist, Italian sausage brings herbs and spices. Always choose sausages that are low in fat and sodium for the best health. To make a vegetarian or vegan version, simply skip the sausage. Use chickpeas or lentils as a protein source. They are healthy and hearty. Replace the vegetable broth with homemade vegetable stock for a richer taste. You can also add tofu or tempeh for more protein. Season them well to enhance the flavor in your skillet. To keep your Healthy Cabbage Sausage Skillet fresh, let it cool first. Use an airtight container for storage. This will keep the flavors intact. Store it in the fridge for up to three days. If you want to keep it longer, consider freezing. When it's time to enjoy leftovers, reheat your skillet dish. Use a pan over medium heat. Add a splash of water or broth to help it warm evenly. Stir it often, and heat until it’s hot throughout. You can also use a microwave. Just cover it to keep moisture in. To freeze your Cabbage Sausage Skillet, pack it in freezer-safe containers. Leave some space for expansion. It can last for about three months in the freezer. When you’re ready to eat, thaw it in the fridge overnight. Reheat as mentioned above to enjoy it fresh again. You can use several options. Ground turkey or chicken works well. You can also try plant-based sausage for a vegetarian choice. For a spicy kick, chorizo adds great flavor. Tofu or tempeh can substitute if you want a meatless dish. Yes, this dish is gluten-free. The main ingredients, like cabbage and meat, do not contain gluten. Just ensure your sausage is gluten-free. Check labels for any added ingredients that may contain gluten. To spice it up, add crushed red pepper flakes. You can also use hot sausage instead of mild. Another option is to add diced jalapeños or a dash of hot sauce. These will give your dish a nice heat boost. Absolutely! You can add bell peppers, zucchini, or mushrooms. Broccoli and green beans also work well. Feel free to mix in any veggies you enjoy. Just chop them to a similar size for even cooking. Cabbage is low in calories and high in fiber. It helps with digestion and keeps you full. Cabbage is rich in vitamins C and K, which support your immune system. It also has antioxidants that fight inflammation and support heart health. This blog post covers the key steps for making a delicious skillet dish. We reviewed the best ingredients, their benefits, and how to choose fresh ones. You learned essential cooking techniques and tips for perfecting your dish. We also discussed variations, storage options, and answered common questions. In summary, cooking should be fun and easy. Try these tips to make your meal special and enjoy the process. Happy cooking!

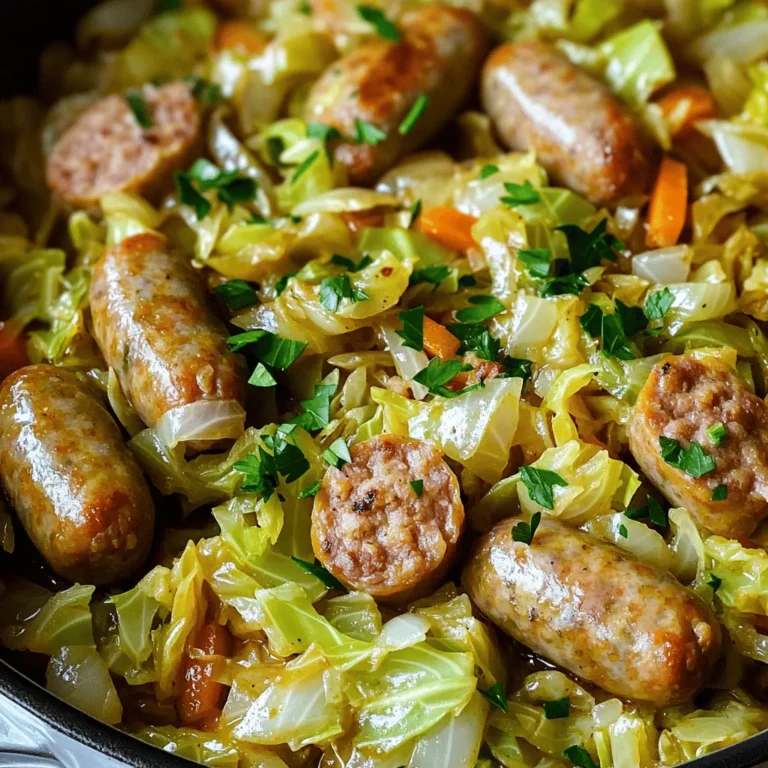
Healthy Cabbage Sausage Skillet Simple and Flavorful Meal

- 1 pound ground beef - 1/2 pound beef steak (such as flank or ribeye), thinly sliced against the grain - 1 medium onion, finely diced - 1 green bell pepper, finely diced - 2 cloves garlic, minced - 1 tablespoon Worcestershire sauce - 1 cup beef broth (low sodium recommended) - 1 tablespoon soy sauce - 4 hearty hamburger buns - 1 cup provolone cheese, freshly shredded - Salt and freshly ground black pepper to taste - 2 tablespoons olive oil - Fresh parsley, chopped, for garnish (optional) The ingredients for Philly Cheesesteak Sloppy Joes bring bold flavors and comfort to your plate. Start with ground beef and beef steak for a rich meat base. The steak adds a nice texture and depth. Next, the diced onion and green bell pepper add sweetness and crunch. Minced garlic gives a punch of flavor that ties everything together. Worcestershire sauce and soy sauce deepen the taste. They add umami, making each bite delightful. Low sodium beef broth helps to keep the mixture juicy without being too salty. Don't forget the provolone cheese! It melts beautifully over the meat, making it creamy and dreamy. Finally, you need hearty hamburger buns to hold all this goodness. They soak up the flavors without falling apart. Optionally, sprinkle fresh parsley on top for a pop of color and freshness. With these ingredients, you are all set to create a meal that is both tasty and easy to make. Enjoy the process and the delicious result! {{ingredient_image_2}} Start by sautéing the onions and bell pepper. In a large skillet, heat 2 tablespoons of olive oil over medium heat. Add 1 medium onion and 1 green bell pepper, both finely diced. Cook them for about 5 minutes. You want them to soften and smell good. Next, cook the garlic to aromatic perfection. Stir in 2 cloves of minced garlic. Cook for 1 more minute. Watch carefully, so the garlic doesn’t burn. Now, it’s time to brown the ground beef. Increase the heat slightly and add 1 pound of ground beef to the skillet. Use a spatula to break it apart. Cook for 7 to 10 minutes until it’s no longer pink. Season with salt and freshly ground black pepper to taste. After that, add the steak. Thinly slice 1/2 pound of beef steak against the grain. Introduce these steak strips into the skillet. Stir well and let it cook for 3 to 4 minutes. The steak should be just cooked through. Next, you’ll simmer the sauce. Pour in 1 tablespoon of Worcestershire sauce, 1 tablespoon of soy sauce, and 1 cup of beef broth. Mix everything together well. Let the mixture come to a gentle simmer. Allow it to simmer for about 5 to 7 minutes. The sauce should thicken slightly. Now, let’s assemble the sloppy joes. Split 4 hearty hamburger buns in half. Load the bottom halves with the beef mixture. Make sure to get plenty of that juicy filling. Add the cheese on top. Generously sprinkle 1 cup of freshly shredded provolone cheese over the meat. It’s time to broil for cheesy perfection. Place the buns under the broiler for 2 to 3 minutes. Keep an eye on them to prevent burning. You want the cheese to be bubbly and golden. Finally, garnish and serve. Place the tops of the buns on each sloppy joe. If you like, sprinkle some chopped fresh parsley on top for color. Enjoy your tasty Philly cheesesteak sloppy joes! How to perfectly sauté vegetables To get the best flavor, heat olive oil in a large skillet over medium heat. Add diced onions and green bell peppers. Stir them often and cook for about 5 minutes. They should soften and smell great. Add garlic last to keep it from burning. Cook for just one more minute. Best practices for browning ground beef When you add ground beef, increase the heat slightly. Break it apart with a spatula as it cooks. This helps it brown evenly. Cook it for about 7-10 minutes. Season it well with salt and black pepper. This step makes a big difference in taste. Ideal sides to accompany the dish Serve these sloppy joes with crispy fries or a fresh green salad. Pickles or sliced jalapeños add a great touch. They bring extra crunch and flavor to the meal. You can also pair them with coleslaw for some coolness. Enhancing presentation for serving For a fun look, use a rustic wooden board to serve the sloppy joes. Lay the buns on the board and place the sides around them. This makes your meal feel special and inviting. A garnish of fresh parsley adds color and a hint of freshness. How to store leftovers correctly Let the sloppy joe mixture cool before storing. Place it in an airtight container. You can keep it in the fridge for up to 3 days. If you want to store it longer, freeze it in a freezer-safe bag for up to 3 months. Best methods for reheating To reheat, use a skillet over low heat. Stir it often until it’s warm. You can also use the microwave. Heat it in short bursts, stirring in between. If you reheat in the oven, cover it with foil to keep it moist. Pro Tips Quality Meat Matters: Use high-quality beef steak for the best flavor. Ribeye or flank steak works great for a tender and juicy texture. Cheese Choice: While provolone is traditional, feel free to mix in some mozzarella or even cheddar for a different flavor profile. Don’t Skip the Broiler: Broiling the assembled sandwiches melts the cheese perfectly and adds a nice golden finish. Keep an eye on them to avoid burning! Serving Suggestions: Serve with crispy fries or a side salad for a complete meal. Pickles or jalapeños on the side can add a nice tangy kick! {{image_4}} You can switch out the proteins in this dish. Ground turkey or chicken works well. Both options keep the meal light but still tasty. If you want a plant-based twist, try using lentils or mushrooms. They add great texture and flavor, making a perfect vegan or vegetarian choice. For a spicy kick, consider adding hot sauce or red pepper flakes. Both options can enhance the dish's flavor profile. If you love cheese, experiment with different types. Try cheddar, pepper jack, or even gouda for a unique taste. These tweaks keep the meal exciting and cater to your preferences. Want to change things up? Turn these sloppy joes into a Philly cheesesteak burger. Just stack the ingredients on a grilled burger patty. For a cozy twist, make a baked casserole. Layer the beef mix with cheese and buns in a dish, then bake until bubbly. These options let you enjoy this dish in new ways. To keep your Philly Cheesesteak Sloppy Joes fresh, you need to cool them first. Let the sloppy joes sit at room temperature for no more than two hours. Then, transfer them to an airtight container. This helps keep them tasty and safe to eat. For longer storage, you can freeze the sloppy joe mixture. Divide it into portions and put it in freezer-safe bags. Make sure to remove as much air as possible before sealing. Label the bags with the date. This way, you know how long they have been in the freezer. You can keep Philly Cheesesteak Sloppy Joes in the fridge for about three to four days. Just make sure your fridge is set to 40°F or lower. Watch for signs of spoilage. If you see mold or a change in color, it's best to toss them. If they smell sour or off, don’t eat them. Always trust your senses when it comes to food safety. Sloppy Joes have a rich history. Some say they started in the 1930s in a diner. The name may come from a cook named Joe. He made a meat dish with sauce and served it on bread. Others think it came from a Cuban dish called "ropa vieja." Over time, it became popular in the U.S. It is now a classic comfort food, loved by many. Yes, you can prepare this dish ahead. Cook the beef and veggies, then store them in the fridge. It stays good for about three days. When you're ready to eat, just heat it up. You can also freeze it for up to three months. Thaw it overnight before reheating. This saves time on busy nights. To kick up the heat, add hot sauce while cooking. You can also mix in diced jalapeños. If you like peppers, try using spicy varieties like serrano. Another option is to top with pepper jack cheese instead of provolone. Adjust the spice to fit your taste. Enjoy the extra flavor! Many sides work great with these Sloppy Joes. Here are some popular choices: - Crispy fries - Onion rings - Coleslaw - Potato salad - Green salad Pair these dishes for a fun and tasty meal. They balance the flavors of the Sloppy Joes perfectly. Philly Cheesesteak Sloppy Joes combine flavors and textures for a tasty meal. We reviewed ingredients, cooking steps, tips, and variations to make them perfect. You can experiment with proteins and sauces, creating a dish that fits your taste. Remember, leftovers can be stored and reheated easily, ensuring your hard work pays off. Enjoy your cooking adventure with these easy tips, and elevate your meals to the next level. Dive in, get creative, and savor every bite!

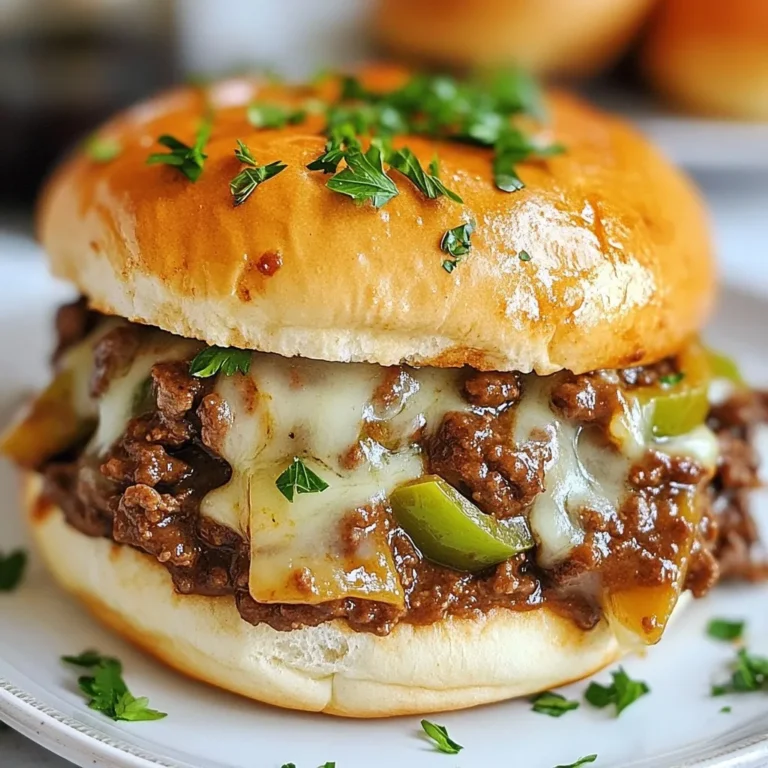
Philly Cheesesteak Sloppy Joes Flavorful Comfort Meal

- 2 cups semi-sweet chocolate chips - 1 cup milk chocolate chips - 1 cup white chocolate chips - 1 cup roasted unsalted peanuts - 1 cup chopped pecans - 1 cup mini marshmallows - 1/2 cup dried cranberries - 1 teaspoon pure vanilla extract - Other nuts or dried fruits - Swaps for chocolate types (dark chocolate, etc.) When making Crockpot Candy Clusters, the right ingredients make all the difference. I love using a mix of chocolate chips. The semi-sweet, milk, and white chocolate create a lovely balance of flavors. Each bite is a treat. You can use nuts like roasted unsalted peanuts and chopped pecans. They add crunch and depth. I also add mini marshmallows for a soft texture and dried cranberries for a chewy bite. The vanilla extract enhances the flavors and ties it all together. Feel free to get creative! You can swap in dark chocolate for a richer taste. You can also try other nuts or dried fruits. Add what you love for a personal touch. This is your chance to make these treats truly yours. {{ingredient_image_2}} Start by pouring the semi-sweet, milk, and white chocolate chips into your crockpot. Set the temperature to low. This helps the chocolate melt slowly and evenly. Stir the chocolate every 10 minutes. This keeps it from burning and promotes smooth melting. After about 30 minutes, the chocolate should be mostly melted. Once the chocolate is smooth, add the roasted peanuts, chopped pecans, mini marshmallows, and dried cranberries. Don’t forget the vanilla extract! Stir well to coat all the ingredients. This step is key to blending the flavors. Cover the crockpot and cook on low for another 1 to 1.5 hours. Stir every 30 minutes to mix everything together. After cooking, prepare a baking sheet by lining it with parchment paper. This prevents sticking and makes cleanup easy. Use a spoon or cookie scoop to drop the chocolate mixture onto the sheet. You can make clusters of different sizes for a fun look. Let the clusters cool at room temperature for at least 1 hour. They need to harden completely before you enjoy them. For the best results, use semi-sweet, milk, and white chocolate chips. These chocolate types melt well and blend nicely. To avoid scorching chocolate, set your crockpot to low heat. Stir the chocolate every ten minutes. This step helps it melt evenly and prevents burning. Store your candy clusters in an airtight container. This keeps them fresh and tasty. They can stay good for up to two weeks. If you want them to last longer, place them in the fridge. Just make sure they are fully cooled first. To serve your candy clusters, arrange them in pretty cupcake liners. This makes them look fancy and fun. If you want to give them as gifts, wrap them in cellophane and tie them with a ribbon. It's a great way to share your tasty treats! Pro Tips Tip Title 1: Ensure all chocolate chips are of good quality for the best flavor and texture in your candy clusters. Tip Title 2: For a fun twist, try adding different nuts or dried fruits based on your preferences or what you have on hand. Tip Title 3: To speed up the cooling process, you can place the lined baking sheet in the refrigerator after shaping the clusters. Tip Title 4: Experiment with flavor extracts such as almond or peppermint to give your candy clusters a unique twist! {{image_4}} You can make your Crockpot Candy Clusters even more fun with flavor tweaks. Adding seasonal spices can bring warmth to your treats. Just a pinch of cinnamon or nutmeg can elevate the taste. If you love mint, try using peppermint-flavored chocolate. It adds a nice twist. You can also mix in other flavors, like orange zest, for a fresh touch. If you need dietary alternatives, you have options. For a vegan version, swap regular chocolate with dairy-free chocolate chips. You can replace the marshmallows with vegan ones, too. If you want gluten-free clusters, ensure your chocolate and nuts are certified gluten-free. For a sugar-free option, use sugar-free chocolate chips and a sugar substitute. These tweaks keep your candy clusters tasty and special for everyone! To keep your candy clusters fresh, use airtight containers. This helps keep moisture out. You can also freeze them for longer storage. Just place clusters in a freezer-safe bag. Make sure to seal it tightly. Store the containers in a cool, dry place. Avoid direct sunlight, as this can cause melting. These candy clusters have a shelf life of about two weeks. After that, they may lose their flavor or texture. Signs of spoilage include a dull appearance or an off smell. If you see any white spots, that’s a sign of fat bloom. It doesn’t mean they are bad, but their taste may not be great. Always check before enjoying! If you don’t have a crockpot, you can use a double boiler. Place a heat-safe bowl over a pot of simmering water. This method gently melts the chocolate without burning it. Stir the chocolate chips often. You can also use a microwave. Heat the chocolate in short bursts, stirring in between. This will help it melt evenly. The clusters are done when they look shiny and smooth. You want the chocolate to fully coat the nuts and marshmallows. After cooking, spoon a small amount onto parchment paper. Let it sit for a minute. If it hardens and holds its shape, it’s ready! Yes, you can make these candy clusters in advance. They store well for up to two weeks. Just place them in an airtight container. Keep them in a cool, dry place. If you want to store them longer, you can freeze them. Just make sure to separate layers with parchment paper. This will prevent sticking. These candy clusters combine rich chocolate and crunchy nuts for a tasty treat. You learned the best ingredients, simple steps, and helpful tips to make them shine. You can even customize flavors and options to fit your taste. Remember to store them right for long-lasting freshness. Enjoy making these fun snacks for yourself or as gifts!

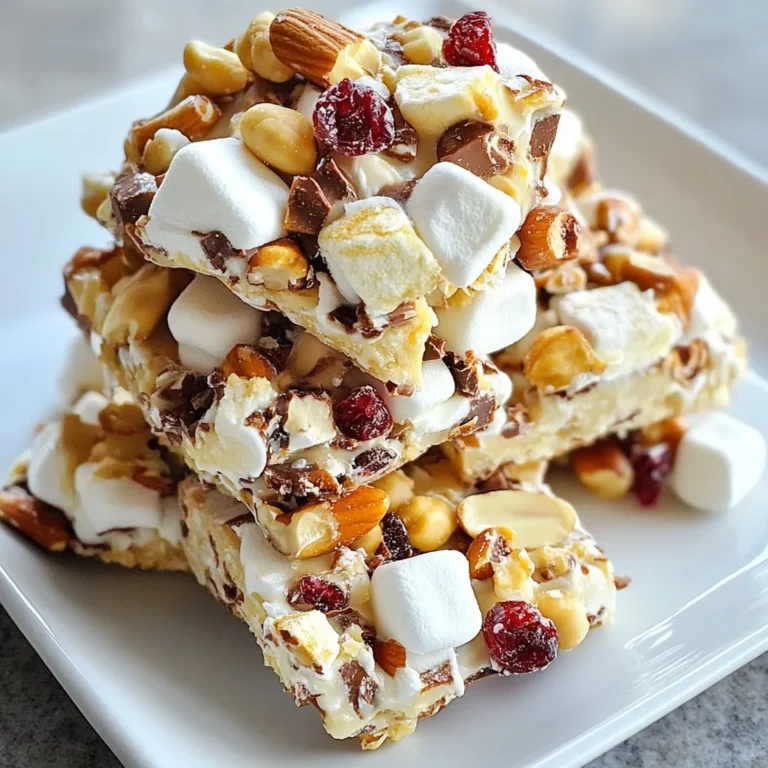
Crockpot Candy Clusters Easy and Tasty Treats

- 1 cup orzo pasta - 1 pound shrimp, peeled and deveined - 2 tablespoons olive oil - 2 garlic cloves, finely minced - 1 teaspoon red pepper flakes (optional) - 4 cups vegetable or seafood broth - 1 cup cherry tomatoes, halved - 1 cup fresh spinach - 1/2 cup grated Parmesan cheese - Salt and freshly cracked pepper, to taste - Fresh parsley, chopped (for garnish) Gather these ingredients before you start. You will want everything ready to go. The orzo pasta is the star of this dish. It absorbs flavors well and gives a nice texture. The shrimp adds protein and a sweet taste. Olive oil helps to sauté the garlic, making it fragrant. Garlic is key here, giving depth to the dish. If you want a bit of heat, add red pepper flakes. The broth is a base for cooking the orzo. You can use vegetable or seafood broth, depending on what you have. Cherry tomatoes bring sweetness and color. Fresh spinach adds a pop of green and nutrients. Parmesan cheese gives a creamy finish. Finally, don’t forget salt and pepper to enhance all the flavors. Fresh parsley on top adds a nice touch for presentation. To start, grab a large skillet. Heat the olive oil over medium heat until it shimmers. Add the minced garlic and red pepper flakes if you want some spice. Sauté for about one minute. You want the garlic fragrant but not browned. This step builds a great flavor base. Next, add the orzo pasta to the skillet. Stir continuously for about two minutes. This toasts the orzo, bringing out a nutty flavor. After that, carefully pour in the broth. Stir to mix it well. Raise the heat to bring it to a gentle boil. Once boiling, reduce the heat to low and cover the skillet. Let it simmer for about ten minutes. You want most of the liquid absorbed and the orzo al dente. When the orzo is cooked, it’s time for the shrimp and tomatoes. Add the shrimp and halved cherry tomatoes to the skillet. Cover it again and cook for three to four more minutes. The shrimp should turn bright pink and be fully cooked by now. Now, take the skillet off the heat. Gently fold in the fresh spinach. It will wilt with the residual heat. Then, sprinkle in the grated Parmesan cheese. Mix well until everything combines. Taste it and adjust the seasoning with salt and cracked pepper as needed. Ensuring Orzo is Al Dente To cook orzo perfectly, watch the time closely. Aim for about ten minutes of simmering. Taste a piece to check if it has a slight bite. This al dente texture gives the dish a nice mouthfeel and keeps it from getting mushy. Avoiding Overcooked Shrimp Shrimp cooks quickly. You only need three to four minutes in the pan. When they turn bright pink, they're done. Remove them from heat right away to keep them tender. Overcooked shrimp become rubbery and tough, ruining your dish. Serving Suggestions for an Elegant Dish Serve the orzo in shallow bowls. This makes it look fancy and allows for easy eating. Drizzle some extra olive oil on top for a glossy finish. A wedge of lemon adds a bright touch and enhances the flavors. Using Fresh Herbs for Garnish Fresh parsley is a perfect garnish. It adds color and freshness. Just chop a bit and sprinkle it on top before serving. You can also use basil or chives for a different flavor. Fresh herbs make any dish look more appealing and taste better. {{image_4}} You can change the protein in this dish. Chicken works well if you prefer it. Just cut it into small pieces and cook it until it’s no longer pink. If you want a veggie option, use tofu. Cut the tofu into cubes and sauté it like the shrimp. You can also switch up the vegetables. Seasonal veggies add color and taste. Try zucchini, bell peppers, or asparagus. Just chop them and add them when you cook the garlic. They will blend nicely with the orzo. To brighten the dish, add some citrus zest. A little lemon or lime zest will lift the flavors. Just grate the outer peel and mix it in at the end. If you want some heat, add more spices. Extra red pepper flakes will spice things up. You can also try herbs like thyme or basil. These will add a nice layer of flavor to the orzo. Store leftover One-Pan Parmesan Orzo with Shrimp in an airtight container. Make sure to let it cool down first. This helps keep the taste fresh. Place it in the fridge within two hours of cooking. Keep the dish away from any strong-smelling foods. This will prevent unwanted flavors from mixing. You can reheat this dish in two ways: stovetop or microwave. For stovetop, heat a skillet over medium heat. Add a splash of broth or water to help steam the orzo. Stir often until heated through. For the microwave, use a microwave-safe bowl. Cover it with a damp paper towel and heat in short bursts. Stir in between until hot. This dish lasts about three to four days in the fridge. After that, it may lose its flavor and texture. If you want to keep it longer, consider freezing it. In the freezer, it can last up to three months. Just remember to thaw it in the fridge before reheating. Can I make this dish ahead of time? Yes, you can make One-Pan Parmesan Orzo with Shrimp ahead of time. Cook it fully and cool it down. Store it in the fridge for up to three days. When you are ready to eat, heat it gently on the stove. Add a splash of broth to keep it moist. Is it possible to use frozen shrimp? Absolutely! Frozen shrimp work well in this dish. Just thaw them first. You can run them under cold water for a few minutes. Remove the shells and devein them if needed. Is One-Pan Parmesan Orzo with Shrimp healthy? Yes, this dish can be a healthy option. It has protein from shrimp and fiber from spinach and tomatoes. The orzo adds carbs for energy. Use low-sodium broth to make it even healthier. How many calories does this dish contain per serving? One serving of this dish has about 400-450 calories. This can vary based on the exact ingredients you use. Always check your specific brands for more accurate numbers. What can I substitute for orzo? If you need a substitute for orzo, you can use other small pasta types. Try ditalini, couscous, or even quinoa. Each option brings its own flavor and texture. Can I use pre-cooked shrimp for this recipe? Yes, you can use pre-cooked shrimp. Just add them in during the last few minutes of cooking. This way, they can heat up without becoming tough. This blog post detailed a simple, tasty recipe for One-Pan Parmesan Orzo with Shrimp. We covered key ingredients, step-by-step instructions, and even useful tips. Remember, using fresh herbs and the right cooking methods can elevate your dish. Feel free to experiment with swaps and variations to suit your taste. This recipe is not just quick but also healthy, making it a great choice for any meal. Enjoy your cooking and the delicious results!

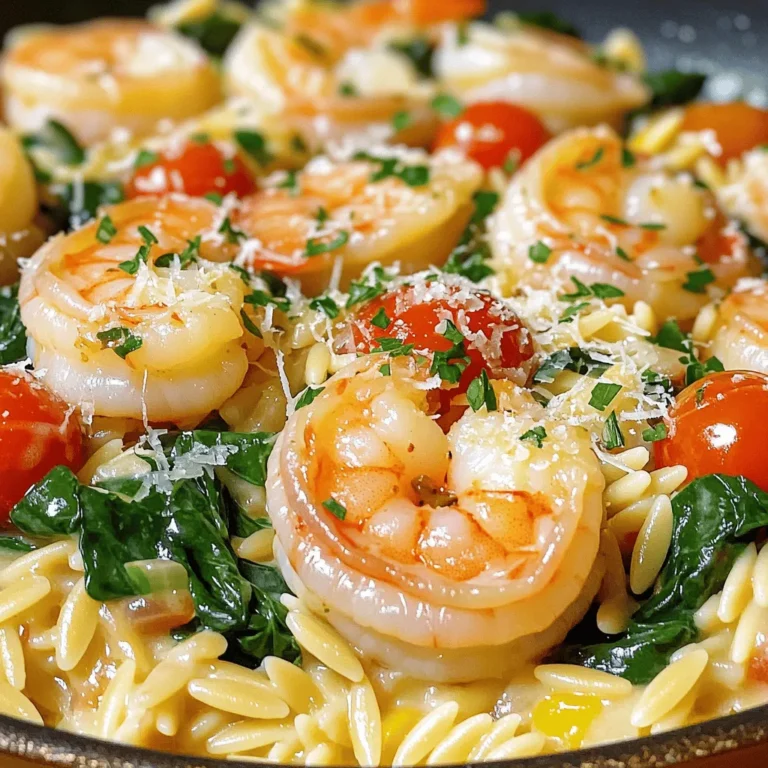
Satisfying One-Pan Parmesan Orzo with Shrimp Dish

- 2 cups elbow macaroni - 1 cup corn kernels (fresh or frozen) - 1 red bell pepper, finely diced - 1 jalapeño, finely chopped (seeds removed for a milder flavor) - 1/2 cup red onion, finely chopped - 1/2 cup fresh cilantro, chopped - 1/2 cup crumbled queso fresco or feta cheese - 1/4 cup mayonnaise - 1/4 cup sour cream - 2 tablespoons fresh lime juice - 1 teaspoon chili powder - Salt and freshly cracked black pepper, to taste You can switch out the elbow macaroni for any pasta shape you have. Penne or rotini work well too. For corn, use canned corn if fresh isn't available. The red bell pepper can be swapped for yellow or green. If you want less heat, leave out the jalapeño. For cheese, goat cheese or even shredded cheddar can work nicely. You can replace mayonnaise with plain Greek yogurt for a lighter option. For macaroni, I suggest Barilla or Ronzoni; they cook well and taste great. Use Sweet Corn from Green Giant for corn. Look for Feta from Athenos or President for the best flavor. For mayo, Hellmann's or Duke's gives a creamy texture. For sour cream, Daisy is a trusted brand that blends smoothly. Always choose fresh limes for the best juice! First, grab a large pot. Fill it with water and add a pinch of salt. Bring the water to a boil. Once boiling, add 2 cups of elbow macaroni. Cook the macaroni until it is al dente, which usually takes about 8 minutes. After cooking, drain the pasta in a colander. Rinse it under cold water to stop the cooking. Set the macaroni aside to cool completely before mixing it with other ingredients. Next, take a large skillet and heat it over medium heat. Add 1 cup of corn kernels to the skillet. You can use fresh or frozen corn. Sauté the corn for about 5 to 7 minutes. Stir it occasionally until the kernels turn golden brown. This step adds a great smoky flavor. Once done, remove the skillet from heat and let the corn cool slightly. Now, it’s time to mix everything! In a large mixing bowl, combine the cooled macaroni and charred corn. Add in the finely diced red bell pepper, chopped jalapeño, and finely chopped red onion. Stir everything together to blend the fresh ingredients. In a separate small bowl, whisk together 1/4 cup of mayonnaise, 1/4 cup of sour cream, 2 tablespoons of fresh lime juice, and 1 teaspoon of chili powder. Season this mixture with salt and freshly cracked black pepper to taste. Drizzle the dressing over the pasta mixture. Toss everything gently until each piece is coated. Finally, fold in 1/2 cup of chopped cilantro and 1/2 cup of crumbled queso fresco. Make sure to mix it well without breaking the pasta. Cover the bowl and chill the salad for at least 30 minutes. This allows all the flavors to meld beautifully together. To make a great dressing, start with fresh ingredients. I use mayonnaise and sour cream for creaminess. Add fresh lime juice for a zesty kick. Whisk in chili powder for flavor. Taste it! You may need salt and pepper. This mix should be creamy, tangy, and a bit spicy. Seasonings make your pasta salad pop. I like to use chili powder for heat. You can add cumin for a smoky touch. Fresh herbs, like cilantro, bring brightness. Don't forget to taste as you go. Adjust the spices based on your preference. This way, every bite will burst with flavor! Mixing is key for a tasty salad. Start with the cooled pasta and charred corn. Add in the diced veggies. Gently toss to combine. When you add the dressing, pour it evenly over the mix. Fold in the cilantro and cheese last. This keeps everything intact and beautiful. Enjoy the vibrant colors and flavors! {{image_4}} You can easily boost your Mexican Street Corn Pasta Salad with protein. Here are some ideas: - Grilled Chicken: Dice up grilled chicken for extra flavor. - Shrimp: Sauté shrimp with lime and chili powder for a tasty twist. - Black Beans: Add canned black beans for a hearty touch. - Tofu: For a vegan option, try sautéed tofu. It absorbs flavors well. Adding protein makes the salad more filling and satisfying. This dish is easy to adapt for everyone. For a vegetarian version, keep the cheese and sour cream. If you want it vegan, swap these out: - Use vegan mayo instead of regular mayo. - Replace sour cream with dairy-free yogurt. - Omit the cheese or use vegan cheese. These swaps keep the creamy texture while meeting dietary needs. Get creative with your pasta salad! Here are some fun add-ins: - Avocado: Creamy avocado adds richness. - Cherry Tomatoes: Halved cherry tomatoes bring a burst of color. - Radishes: Sliced radishes add a crunchy bite. - Chopped Olives: For a briny flavor, mix in sliced olives. You can also top the salad with extra cilantro or a sprinkle of chili powder. These choices let you customize flavors and textures. Enjoy making it your own! To store leftovers of your Mexican Street Corn Pasta Salad, let it cool first. Then, transfer it to an airtight container. This keeps the flavors fresh and prevents drying out. You can freeze this salad, but it may change texture. I recommend freezing only the pasta and corn mix. Avoid freezing the dressing and fresh veggies, as they do not freeze well. When ready to eat, thaw in the fridge and mix in fresh ingredients. Use glass or BPA-free plastic containers for the best results. These containers seal tightly. They help keep your salad fresh longer. If using glass, ensure it is freezer-safe for freezing options. You can use feta cheese as a substitute for queso fresco. Feta has a similar crumbly texture and salty taste. If you want a creamier option, try goat cheese. Both choices work well in this salad. They add a rich flavor that complements the corn and spices. Yes, you can make this salad ahead of time. It tastes even better after chilling in the fridge. Prepare the salad up to a day in advance. Just cover it tightly and store it. The flavors will blend nicely, making it a great option for meal prep or gatherings. Mexican Street Corn Pasta Salad lasts about 3 to 5 days in the fridge. Make sure to store it in an airtight container. If you notice any signs of spoilage, like an off smell or change in texture, it’s best to throw it away. Enjoy it fresh for the best taste! This blog post covered all you need for Mexican Street Corn Pasta Salad. We discussed ingredients, substitutions, and recommended brands. You learned the steps to cook and combine ingredients for the best taste. Tips on perfecting the dressing and mixing well were shared. Variations for protein and unique toppings added more options for your meal. Lastly, proper storage methods ensure freshness. Enjoy experimenting with this dish and make it your own!

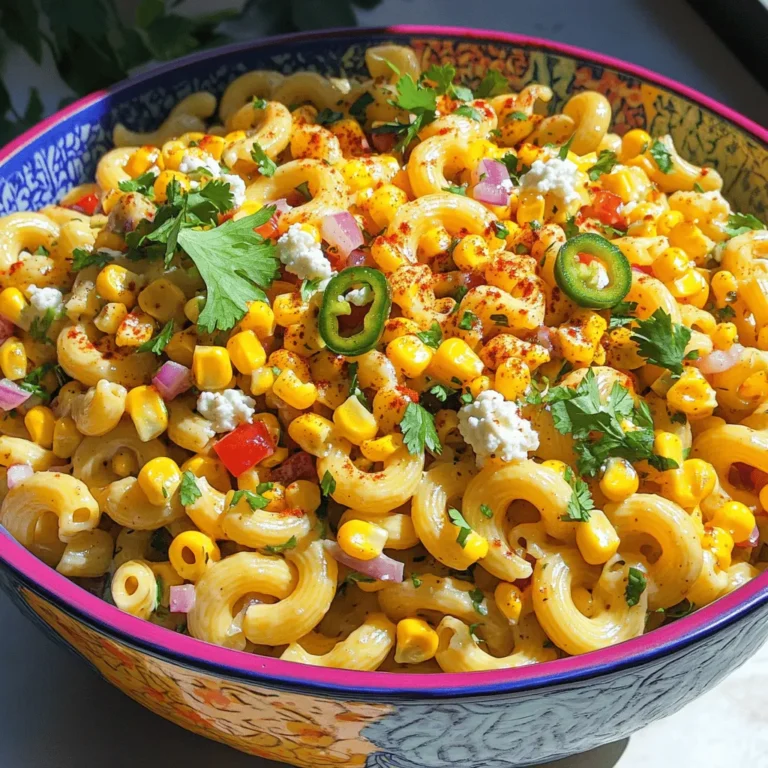
Mexican Street Corn Pasta Salad Fresh and Tasty Dish

- 2 cups mini pretzels - 1 cup semi-sweet chocolate chips - 1 tablespoon coconut oil (optional) - ½ cup crushed peppermint candies or candy canes - Sea salt (optional) You can swap mini pretzels for regular-sized ones if you prefer. If you want a different flavor, use milk chocolate or dark chocolate instead of semi-sweet. For a dairy-free option, look for dairy-free chocolate chips. If you can't find crushed peppermint, you can use crushed nuts or sprinkles for a different crunch. I recommend using Ghirardelli or Nestlé for chocolate chips. These brands melt well and taste great. For peppermint, look for high-quality candy canes. Check the ingredient list to avoid artificial colors or flavors. If you want to make the chocolate smoother, using coconut oil is a good idea. Just remember, a little goes a long way! {{ingredient_image_2}} First, get your space ready. Line a baking sheet with parchment paper. This step helps keep the pretzels from sticking. You want a clean area to work. Gather all your ingredients and tools. It makes the process smoother. Next, melt the chocolate. In a microwave-safe bowl, add the semi-sweet chocolate chips. If you want, add the coconut oil for a smoother texture. Heat the mixture in the microwave. Do it in 30-second bursts. Stir after each burst. Keep heating until the chocolate is melted and smooth. Now, dip the pretzels! Take each mini pretzel and dip it halfway into the melted chocolate. Let any extra chocolate drip off. Place the pretzel back on the baking sheet. While the chocolate is still wet, sprinkle the crushed peppermint over the chocolate. This adds a nice crunch and festive taste. You can also sprinkle a bit of sea salt for a sweet-salty mix. Repeat this for all the pretzels. After you finish dipping, put the baking sheet in the fridge. Chill for about 30 minutes, until the chocolate hardens. Enjoy your tasty treats! To get a nice chocolate coating, you need to melt the chocolate well. Use semi-sweet chocolate chips for a rich taste. Adding coconut oil makes it smoother and easier to dip. Heat in 30-second bursts, stirring between each. This keeps the chocolate from burning. Dip each pretzel halfway, letting excess chocolate drip off. This helps you avoid thick blobs on the sides. Chocolate can seize if it gets water in it. Keep bowls and utensils dry. If you see clumps forming, add a little coconut oil or shortening. Stir it in until the chocolate is smooth again. This trick helps save your melted chocolate from turning into a hard lump. A sprinkle of sea salt adds a great flavor contrast. The salt balances the sweet chocolate and mint. Use just a pinch for each pretzel while the chocolate is still wet. This small step makes a big difference in taste. If you want, try adding different types of salt for more fun! Pro Tips Use Quality Chocolate: Opt for high-quality chocolate chips for the best flavor and smooth melting. This will enhance the overall taste of your pretzels. Chill the Chocolate: If your chocolate starts to thicken while dipping, return it to the microwave for a few seconds. Ensure it remains smooth for easier dipping. Crush Peppermints Easily: Place peppermint candies in a zip-top bag and crush them with a rolling pin. This will keep the mess contained and give you even pieces for topping. Store Properly: Keep your chocolate-dipped pretzels in an airtight container at room temperature for up to a week, or refrigerate for longer freshness. {{image_4}} You can make chocolate dipped peppermint pretzels even more fun by adding different toppings. Try using crushed nuts like almonds or walnuts for a crunchy twist. You can also sprinkle colorful sprinkles or mini chocolate chips on top. Each topping adds a new flavor and makes your pretzels unique. Get creative and mix and match toppings to find your favorite combination! If you love a sweeter taste, try using white chocolate instead of semi-sweet chocolate. White chocolate gives a creamy flavor that pairs well with peppermint. Simply melt the white chocolate just like you did with the semi-sweet chocolate. Dip the pretzels and follow the same steps. You can even add a little food coloring to the white chocolate for a festive look! You can also change the flavor of your pretzels by adding other flavorings. Try mixing in a few drops of peppermint extract into your melted chocolate for a stronger mint flavor. For a twist, use orange or almond extract instead. These flavors can bring a new taste to your pretzels and surprise your friends! Don't be afraid to experiment and find the perfect mix for your taste buds. To keep your chocolate dipped peppermint pretzels fresh, store them in an airtight container. You can layer them with parchment paper to prevent sticking. Keep the container in a cool, dry place away from heat and sunlight. This helps maintain their crunch and flavor. These treats can last up to two weeks when stored properly. However, for the best flavor and texture, enjoy them within the first week. The chocolate coating may start to lose its crispness after a while. If you notice any changes in taste or texture, it’s best to toss them. If you want to save some for later, you can freeze them! Place the pretzels in a single layer on a baking sheet. Freeze them for about an hour until solid. Then, transfer them to an airtight container or freezer bag. They can last for up to three months in the freezer. When you’re ready to enjoy them, let them thaw at room temperature. Yes, you can use different types of chocolate. Dark chocolate adds a rich taste. White chocolate gives a sweet, creamy flavor. Milk chocolate brings a nice balance of sweetness. Each type will change the flavor of your pretzels. Feel free to try any of these options for a fun twist! You can make these pretzels ahead of time. Just follow the recipe steps and let them cool. Once the chocolate is hard, store them in a sealed container. They will stay fresh for about a week at room temperature. For longer storage, place them in the fridge. This way, you can enjoy them later without losing flavor. You can find the ingredients at your local grocery store. Look for mini pretzels, chocolate chips, and peppermint candies in the baking aisle. If you want ready-made treats, check candy shops or online retailers. Many stores offer unique flavors during the holiday season, so keep an eye out for fun options! You now know how to make delicious chocolate-dipped pretzels. We covered each step, from ingredients to tips and storage. Use high-quality chocolate and explore toppings for unique flavors. Proper storage will keep them fresh longer. Feel free to experiment with different chocolates and flavors for fun variations. Making these treats can be a joy. Share them with friends or family for extra smiles. Enjoy your tasty creations!

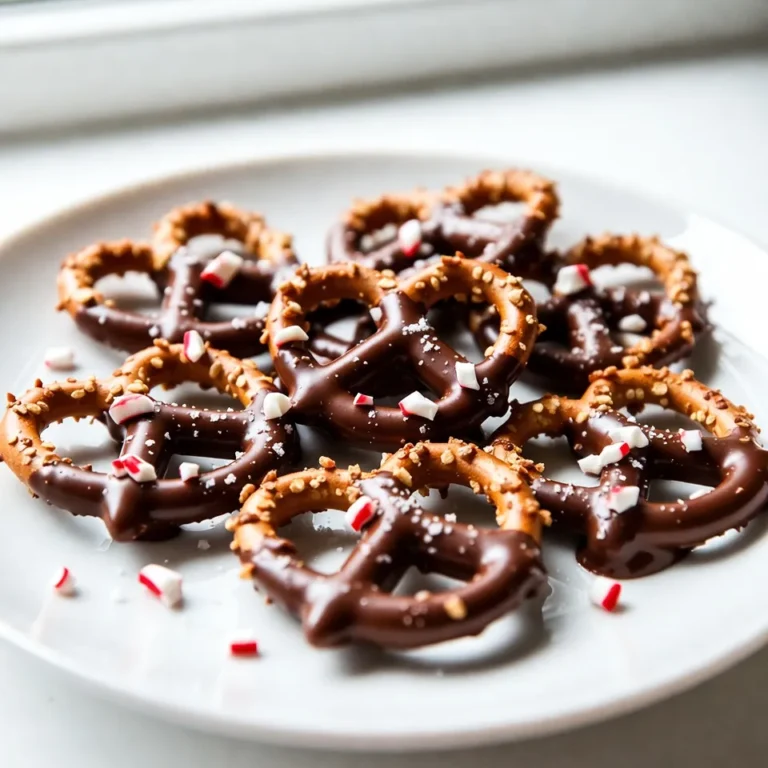
Chocolate Dipped Peppermint Pretzels Crunchy Treat

PREV 1 … 19 20 21 … 44 NEXT
yummybiterecipes

explore

DessertsDinnerAppetizersDrinks

Our Policies

  • Cookie Policy
  • Copyright Policy
  • Disclaimer
  • GDPR Policy
  • Terms Of Use
Back to Top
  • About
  • Contact Us
  • Privacy Policy
© 2025 yummybiterecipes