FREE DINNER EBOOK! Get your copy!
  • Cookie Policy
  • GDPR Policy
  • Disclaimer
  • Terms Of Use
  • Visit my other site: Fun Cookie Recipes
yummybiterecipes
  • Home
  • Dinner
  • Desserts
  • Drinks
  • Appetizers
  • Contact
  • About
  • Privacy Policy
  • Home
  • Dinner
  • Desserts
  • Drinks
  • Appetizers
  • Contact
  • About
  • Privacy Policy
  • Cookie Policy
  • GDPR Policy
  • Disclaimer
  • Terms Of Use
Visit my other site: Fun Cookie Recipes

HOME / CATEGORIES /

Latest

To make Cranberry Pistachio Shortbread Cookies, gather these simple ingredients: - 1 cup unsalted butter, softened - 1/2 cup powdered sugar - 2 cups all-purpose flour - 1/2 teaspoon fine sea salt - 1/4 teaspoon baking powder - 1/2 cup dried cranberries, coarsely chopped - 1/2 cup shelled pistachios, roughly chopped - 1 teaspoon pure vanilla extract - Additional powdered sugar for dusting (optional) Each ingredient plays a role in creating the perfect cookie. The unsalted butter gives it a rich flavor. Powdered sugar adds sweetness and helps create a tender texture. Flour forms the base, while salt and baking powder enhance the taste and structure. Dried cranberries and pistachios add color and crunch, making each bite delightful. Finally, vanilla extract provides a warm aroma. These ingredients are easy to find at your local store. They also allow you to create cookies that are both tasty and beautiful. Enjoy the process of mixing these items to make a treat everyone will love! {{ingredient_image_2}} - Preheat the oven to 350°F (175°C). - In a large bowl, cream together 1 cup of unsalted butter and 1/2 cup of powdered sugar. Mix until light and fluffy, about 3-4 minutes. - Pour in 1 teaspoon of pure vanilla extract and blend until mixed. - In another bowl, whisk together 2 cups of all-purpose flour, 1/2 teaspoon of fine sea salt, and 1/4 teaspoon of baking powder. - Gradually add these dry ingredients to the butter-sugar mixture. Stir gently until just combined. Be careful not to overmix the dough. - Fold in 1/2 cup of coarsely chopped dried cranberries and 1/2 cup of roughly chopped shelled pistachios. Make sure they are well mixed into the dough. - Divide the dough into two equal halves. Shape each half into a log, about 2 inches in diameter. Wrap each log in plastic wrap and chill in the refrigerator for at least 30 minutes. This helps the cookies keep their shape while baking. - After chilling, remove the logs from the refrigerator. Use a sharp knife to slice the logs into rounds, about 1/4 inch thick. - Place the sliced cookies on a baking sheet lined with parchment paper. Make sure to space them about an inch apart to allow for spreading. - Bake the cookies in the preheated oven for 12-15 minutes. You know they are done when the edges are lightly golden. Let them cool for a few minutes before moving them to a wire rack. To make your cookies just right, avoid overmixing the dough. When you add the flour, mix until it's just combined. This helps keep your cookies soft and tender. Next, chill the dough properly before slicing. Wrap your logs in plastic wrap and refrigerate for at least 30 minutes. This keeps your cookies from spreading too much while they bake. For a lovely display, arrange your cookies on a festive platter. This makes them look extra special. You can also garnish with extra cranberries and pistachios. This adds color and makes the platter pop. It's a great way to impress your friends and family. Feel free to experiment with different nuts! You can swap pistachios for walnuts or almonds for a new flavor. Another fun twist is to add orange zest to the dough. This gives your cookies a fresh, bright taste that pairs well with cranberries. Pro Tips Chill the Dough: Ensure you chill the dough for at least 30 minutes. This step is crucial for maintaining the cookie shape during baking. Uniform Slices: Use a sharp knife to cut the logs into even slices, ensuring consistent baking and texture across all cookies. Bake in Batches: If baking multiple trays, rotate them halfway through baking to ensure even cooking and browning. Flavor Variations: Feel free to experiment with different nuts or dried fruits to customize the flavor of your shortbread cookies. {{image_4}} You can change up the flavors in your cookies easily. Substitute dried cranberries with dried cherries or blueberries. This swap gives you a new taste while keeping the texture. You can also use different nuts. Try walnuts or almonds instead of pistachios. This update adds a unique crunch and flavor. If you need to make the cookies gluten-free, use almond flour or coconut flour. Both options work well and keep the cookies delicious. For a vegan version, swap regular butter with plant-based butter. You can also use sugar alternatives to maintain sweetness without animal products. Add some spices to your cookies for a holiday twist. Try cinnamon or nutmeg to warm up the flavors. For a special treat, top your cookies with a chocolate drizzle. This extra touch makes them feel more indulgent and festive. To keep your cranberry pistachio shortbread cookies fresh, store them at room temperature. Place them in an airtight container. This helps to keep them soft and tasty. You can also add a slice of bread inside the container. The bread will help absorb moisture and keep cookies from drying out. If you want to store them longer, consider refrigeration. Wrap the cookies in plastic wrap first. This helps prevent them from absorbing other flavors in the fridge. You can freeze both unbaked dough and baked cookies. For unbaked dough, shape it into logs and wrap them tightly in plastic wrap. Then, place them in a freezer bag. This keeps them fresh for up to three months. When you are ready to bake, slice the chilled dough straight from the freezer. Baked cookies can also be frozen. Place them in a single layer on a baking sheet until frozen. Transfer to an airtight container or freezer bag. To thaw, simply leave them at room temperature for about an hour. If stored correctly, your cookies will last about one week at room temperature. In the fridge, they can last up to two weeks. Always check for signs of spoilage. Look for any off smells or mold. If they feel hard or dry, it's time to toss them. Keep an eye on your cookies, and enjoy them fresh! To make these cookies, start by creaming 1 cup of softened butter with 1/2 cup of powdered sugar. Mix until fluffy. Add 1 teaspoon of pure vanilla extract. In a separate bowl, whisk 2 cups of all-purpose flour, 1/2 teaspoon of fine sea salt, and 1/4 teaspoon of baking powder. Gradually mix this into the butter-sugar mix. Finally, fold in 1/2 cup of coarsely chopped dried cranberries and 1/2 cup of roughly chopped pistachios. Shape the dough into logs, chill, slice, and bake at 350°F for 12-15 minutes. To stop cookies from spreading, chill the dough for at least 30 minutes. This helps the butter firm up. Also, ensure you space the cookies at least one inch apart on the baking sheet. Using parchment paper can also help with easy removal and prevent sticking. Yes, you can make the dough ahead of time. After shaping it into logs, wrap them in plastic wrap and store in the fridge for up to three days. You can also freeze the logs for up to three months. Just thaw in the fridge before slicing and baking. You can use plant-based butter or margarine as a substitute for the butter. This can make the cookies dairy-free. However, the texture may vary slightly. Some people also use coconut oil, but this will change the flavor. To get a great crunch, make sure to cream the butter and sugar well. Also, avoid overmixing once you add the flour. Chilling the dough helps too. Bake until the edges are lightly golden. This creates a nice crunch without making them hard. In this post, we covered how to make delicious Cranberry Pistachio Shortbread Cookies. We listed key ingredients, step-by-step instructions, and shared helpful tips for perfect cookies. You learned about flavor swaps and dietary options to fit your needs. Remember, proper chilling and careful mixing can give you that perfect texture. Don’t be afraid to get creative with flavors and presentations. Enjoy baking these treats today!

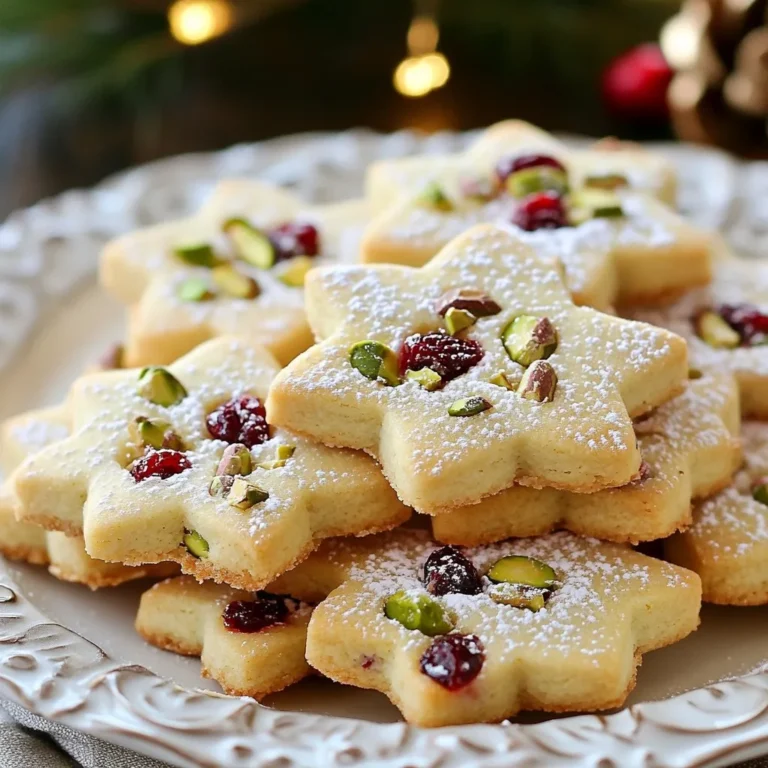
Cranberry Pistachio Shortbread Cookies Easy Delight

- 2 cups all-purpose flour - 1/4 cup granulated sugar - 1 packet (2 1/4 teaspoons) active dry yeast - 1/2 teaspoon salt - 1/2 cup whole milk, warmed - 2 large eggs, at room temperature - 1/4 cup unsalted butter, melted - 1 cup heavy cream - 1/4 teaspoon vanilla extract - Powdered sugar for dusting - Mixing bowls - Piping bag - Round cutter - Frying pot When making cream filled bomboloni, you need a few key items. First, gather the ingredients. You will want flour, sugar, yeast, salt, milk, eggs, and butter. These are the base for your dough. Next, you need the filling. For the cream, grab heavy cream, vanilla extract, and powdered sugar. The right balance of these flavors makes the filling delightful. Finally, collect your tools. A mixing bowl helps you mix well. A piping bag is great for filling. A round cutter sizes the dough perfectly. A frying pot is essential for cooking the bomboloni evenly. Having these ingredients and tools ready makes the process smooth and fun. Trust me; you will love making these treats! {{ingredient_image_2}} In a mixing bowl, combine warm milk and yeast. Make sure the milk is warm, not hot. Let this mixture sit for about 5 minutes. You want it to become frothy and bubbly. This shows the yeast is active and ready to work. In a separate bowl, whisk together the flour, sugar, and salt. This step makes sure all the dry parts mix well. Next, add the eggs and melted butter to the yeast mixture. Stir until everything is mixed. Gradually add the dry mix to the wet mix. Keep stirring until a soft dough starts to form. Now, transfer the dough to a lightly floured surface. Knead the dough for about 8-10 minutes. You want it to become smooth and elastic. This is key for a good texture. After kneading, place the dough in a greased bowl. Cover it with a clean kitchen towel. Let it rise in a warm spot until it doubles in size. This should take about 1 to 1.5 hours. To get the best dough, knead it for 8-10 minutes. The dough should feel smooth and elastic. You know it's ready when it springs back after a gentle poke. If it sticks to your fingers, add a little more flour. Frying bomboloni needs the right oil temperature. Heat vegetable oil to 350°F (175°C). Use a thermometer for accuracy. If the oil is too cold, the dough will soak up oil. If too hot, the outside will burn before the inside cooks. Filling bomboloni can be tricky. Use a piping bag with a filling tip for best results. Insert the tip into the side of the doughnut. Squeeze gently until you feel resistance. This ensures even filling without tearing the doughnut. If you don’t have a piping bag, a skewer works, too! Pro Tips Use Fresh Yeast: Ensure your yeast is fresh and active for the best rise. If your yeast doesn’t bubble in the milk, it’s time to get a new packet. Perfect Oil Temperature: Use a kitchen thermometer to maintain the oil temperature at 350°F (175°C). If the oil is too hot, the bomboloni will burn on the outside while remaining raw inside. Chill the Cream: Keep your mixing bowl and beaters chilled when whipping the cream. This helps achieve better volume and stability in your filling. Filling Technique: When filling the bomboloni, insert the piping tip into the side and fill until you feel resistance. This ensures each doughnut is adequately filled without bursting. {{image_4}} You can fill bomboloni with many tasty creams. Chocolate cream adds a rich flavor. Use smooth custard for a classic touch. Fruit-flavored creams bring a burst of freshness. Think strawberry or lemon! Each option gives a new twist to your dessert. Toppings can change the whole look. A simple glaze adds shine and sweetness. Try a chocolate glaze for extra indulgence. You can also use colorful sprinkles for fun. They make your bomboloni pop and look festive! Serving bomboloni can be a joy. Arrange them on a pretty platter. Dust with powdered sugar for a touch of elegance. Serve them with fresh fruit to balance sweetness. A side of warm chocolate sauce is a great dip. Get creative and make each serving special! To keep bomboloni fresh and tasty, store them in an airtight container. Place parchment paper between layers to avoid sticking. They stay best at room temperature for one to two days. If you want to keep them longer, refrigerate them for up to a week. However, refrigeration may change their texture slightly. To enjoy bomboloni warm, use the oven. Preheat your oven to 350°F (175°C). Place them on a baking sheet and warm for about 5-10 minutes. This method keeps them soft and tasty. You can also use a microwave, but only for a few seconds. Overheating may make them tough. You can freeze bomboloni for later. If they are filled, wrap each one tightly in plastic wrap. Place them in a freezer bag. They will last for up to three months. For unfilled bomboloni, freeze them the same way. When ready to eat, let them thaw in the fridge overnight. Then, reheat as described above. Bomboloni come from Italy. They are a type of doughnut filled with cream or jam. This treat has roots in Tuscany, where they were made for special occasions. They are part of Italian culture, enjoyed at festivals and family gatherings. Many people love their sweet, fluffy texture and rich filling. Yes, you can prepare some parts ahead of time. Make the dough and let it rise. After the first rise, you can shape the dough and freeze it. When you're ready to fry, just let the dough thaw and rise again. You can also make the cream filling earlier and store it in the fridge. This way, you save time on the day you plan to serve them. The best oil for frying bomboloni is vegetable oil. It has a high smoke point, which means it can get very hot without burning. This helps the bomboloni fry evenly, getting that perfect golden color. You can also use canola oil for a similar effect. Avoid oils with strong flavors, like olive oil, as they can change the taste of your bomboloni. In this article, we explored how to make delicious bomboloni from scratch. We covered ingredients, step-by-step instructions, and helpful tips. You now know the best filling options, storage methods, and frying techniques. Remember, practice makes perfect. Don't be afraid to experiment with flavors and toppings. Enjoy the process and share your tasty creations with friends and family. Happy frying!

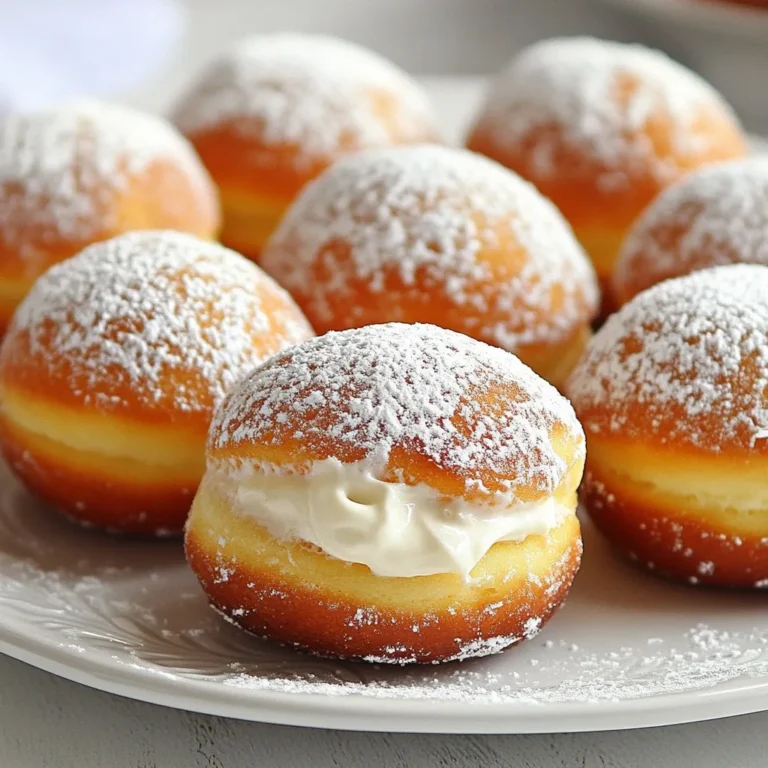
Cream Filled Bomboloni Irresistible Dessert Delight

To make these tasty crumble bars, gather these key ingredients: - 1 cup all-purpose flour - 1 cup rolled oats - 1/2 cup packed brown sugar - 1/2 cup granulated sugar - 1/2 cup unsalted butter, melted and slightly cooled - 1/2 teaspoon baking powder - 1/4 teaspoon sea salt For the berry filling, I love using a mix of berries. You can pick: - Blueberries - Strawberries - Raspberries Fresh berries taste great, but frozen berries work too. When using frozen berries, they may release more juice. This can make the bars a bit softer but still delicious. To boost flavor, consider adding: - 1 tablespoon fresh lemon juice - 1 teaspoon pure vanilla extract These add a bright taste. The lemon juice balances the sweetness of the berries. The vanilla enhances the overall flavor. First, preheat your oven to 350°F (175°C). This helps the bars bake evenly. While the oven heats, grease a 9x9-inch baking pan. You can also line it with parchment paper. Make sure some paper hangs over the edges. This will help you lift the bars out later. In a large bowl, mix the dry ingredients. Combine 1 cup of all-purpose flour, 1 cup of rolled oats, ½ cup of packed brown sugar, ½ cup of granulated sugar, ½ teaspoon of baking powder, and ¼ teaspoon of sea salt. Pour in ½ cup of melted butter. Stir this mixture with a spatula until it looks like coarse crumbs. Some pieces can be larger for texture. In a separate bowl, take 1 cup of mixed berries. You can use blueberries, strawberries, and raspberries. Add 1 tablespoon of cornstarch, 1 tablespoon of fresh lemon juice, and 1 teaspoon of pure vanilla extract. Gently toss the berries with these ingredients. Make sure each berry gets coated well. This step helps thicken the berry juices while baking. Now it’s time to put everything together! Press about 2 cups of the crumb mixture into the bottom of your prepared pan. Spread it evenly across the base. Next, pour the berry mixture over the crust. Use a spatula to spread it out evenly. Finally, sprinkle the reserved crumb mixture on top of the berries. This will create a lovely crumble topping. Place the pan in your preheated oven. Bake for 30-35 minutes. Look for a golden brown topping and bubbling edges. These are signs that your bars are done. Once baked, take the pan out of the oven. Let it cool for at least 15 minutes. This cooling time is key before slicing the bars. After cooling, lift the bars out using the parchment paper. Place them on a wire rack to cool completely. For a beautiful presentation, serve the bars on a rustic wooden board. Dust with powdered sugar and arrange fresh berries around them for a pop of color. To make the best crumble, butter temperature is key. Use unsalted butter that is melted and slightly cooled. This ensures your crumble is tender and not too greasy. When mixing your crumble ingredients, work quickly. Combine the flour, oats, sugars, baking powder, and salt in a bowl. Pour in the melted butter and stir gently. Stop when the mixture looks like coarse crumbs. You want some larger clumps for texture. To prevent soggy bars, use cornstarch. It thickens the berry juices. Mix the berries with lemon juice and cornstarch before adding them to the base. This will keep your crust nice and firm. Adjust sweetness based on the berries you choose. If your berries are tart, add a little more sugar. Taste the mix before you pour it over the crust. This way, you control the flavor. Pair these crumble bars with drinks like tea, coffee, or lemonade. They make a great afternoon snack. These bars are perfect for gatherings or picnics. They fit well at birthday parties or holiday events. You can easily serve them on a rustic wooden board. Dust with powdered sugar and add fresh berries for a lovely display. {{image_4}} You can change the fruit in your crumble bars based on the season. Fresh peaches, apples, or even cherries work great. You can use only one type of fruit, like just blueberries or just strawberries. This makes it simple and fun to try new flavors every time. If you want a healthier version, try gluten-free flour. Almond flour or oat flour are great options. You can also reduce the sugar. Use a sugar substitute like honey or maple syrup. This way, you keep the yummy taste while making it a bit better for you. Spices can really elevate your bars. Add a sprinkle of cinnamon or nutmeg to the crumble. It gives a warm, cozy taste. You can also throw in some nuts for crunch, or mix in chocolate chips for a sweet twist. This lets you customize your bars to fit your mood! To keep your crumble bars fresh, store them in an airtight container. This method prevents them from drying out. Place parchment paper between layers if stacking. Keep the container in a cool, dry place. The ideal storage temperature is room temperature, around 70°F (21°C). To freeze your crumble bars, first let them cool completely. Cut them into squares. Wrap each square tightly in plastic wrap. Then, place the wrapped bars in a freezer-safe bag. Make sure to remove excess air. For thawing, leave them in the fridge overnight or at room temperature for a few hours. To reheat, warm them in the oven at 350°F (175°C) for about 10 minutes. In the refrigerator, these bars last about five days. You’ll know they have gone bad if you see mold or they smell off. If the texture becomes very dry, it’s time to toss them. Always trust your senses when checking for freshness. Yes, you can use frozen berries. They can still taste great! Pros of using frozen berries: - Frozen berries are often picked at peak ripeness, so they can be very sweet. - They are available year-round and save you a trip to the store. Cons of using frozen berries: - Frozen berries can release more juice. This may make the bars a bit soggy. - They may not hold their shape as well during baking. To minimize sogginess, try to thaw and drain the berries before using them. This helps keep the texture nice. You can easily adjust the sweetness in this recipe. To make the bars sweeter: - Add more granulated or brown sugar to the mixture. - Consider using sweeteners like honey or maple syrup. To reduce sweetness: - Cut back on the sugars. Start by lowering each type by a couple of tablespoons. - You can also use unsweetened applesauce as a natural sweetener. Always taste the berry mixture before adding it to the crust. This helps ensure the right level of sweetness. Cutting the bars neatly can be tricky. Here are some tips: - Let the bars cool completely before cutting. This helps firm them up. - Use a sharp knife for clean cuts. A dull knife will just squish the bars. - Wipe the knife with a damp cloth after each cut. This keeps the edges clean. If they crumble a bit, don't worry! They will still taste amazing. Enjoy every bite! In this post, we explored how to make delicious crumble bars with berries. We covered essential ingredients, step-by-step instructions, and helpful tips for perfecting your bars. You learned about berry selection and optional flavor enhancers. With variations and storage tips, you're set for success. Now it’s your turn to create these tasty treats. Enjoy the process and share them with friends! Happy baking!

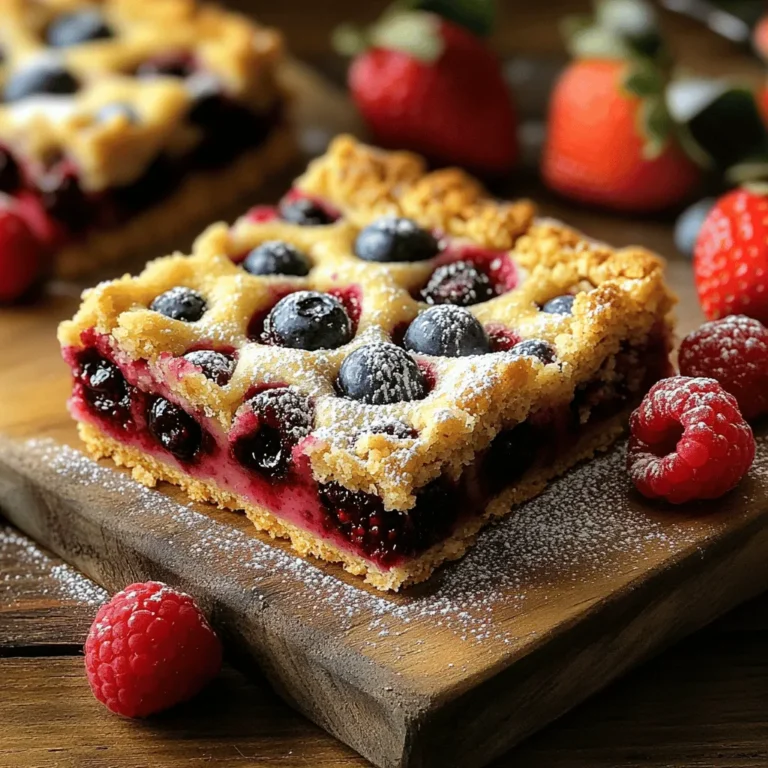
Bakery-Style Triple Berry Crumble Bars Delightful Treat

To make Air Fryer Crispy Jalapeño Poppers, you need fresh, simple ingredients. Each one plays a key role in flavor and texture. - Fresh jalapeño peppers - Cream cheese - Sharp cheddar cheese - Parmesan cheese - Spices and seasoning - Panko breadcrumbs - Cooking spray for crispiness Fresh jalapeño peppers are the star of this dish. Their spicy kick adds excitement. Cream cheese gives a creamy, rich base that balances the heat. Sharp cheddar cheese brings a bold flavor that pairs well with the cream cheese. Parmesan cheese adds a nutty taste. The spices and seasoning enhance the overall flavor. I use garlic powder, onion powder, and smoked paprika. These ingredients add depth and warmth to the poppers. Panko breadcrumbs give a crispy finish. They create a crunchy outer layer that contrasts with the soft filling. Finally, a light spray of cooking spray helps achieve that perfect golden-brown color. These ingredients come together to create a delicious snack. With the right mix, your jalapeño poppers will be a hit! First, set your air fryer to 375°F (190°C). Preheating is key. It ensures your poppers cook evenly and get that nice crisp. In a medium bowl, mix 1 cup of softened cream cheese, 1/2 cup of sharp cheddar, and 1/4 cup of Parmesan. Stir them well with a spatula. Then, add 1/4 teaspoon each of garlic powder, onion powder, and smoked paprika. Don’t forget to season with salt and pepper. Mix until smooth and creamy. Take your cleaned jalapeños. Scoop a good amount of the cheesy filling into each half. Make sure they are filled well. Next, grab 1 cup of panko breadcrumbs. Press each stuffed jalapeño into the breadcrumbs. This step gives them that crunchy texture. Place the coated poppers in the air fryer basket, keeping them in a single layer. Lightly spray the tops with cooking spray for extra crispiness. Now, air fry the poppers for about 10-12 minutes. Check them halfway through. You want the jalapeños tender and the tops golden brown. If needed, adjust the time based on your air fryer. Once they look perfect, carefully take them out and let them cool for a few minutes before enjoying. To get the best crunch from your jalapeño poppers, use cooking spray. Spray the tops lightly before cooking. This helps the panko breadcrumbs crisp up nicely. Make sure to coat all sides for even crispiness. Every air fryer cooks differently. Some run hotter than others. If yours cooks fast, check the poppers early. You may need less time. For slower models, you might need a bit more. Always look for that golden-brown color and tender jalapeño. Spices can take your poppers to the next level. Try adding a pinch of cayenne for heat or some cumin for warmth. You can also add some fresh herbs like cilantro or chives for extra flavor. Cheese options can change the taste too. Instead of just cheddar, try pepper jack for a spicy kick. You could also mix in some mozzarella for a stretchier texture. If you want a dairy-free option, use vegan cream cheese and dairy-free cheese. {{image_4}} You can mix up the cheese in your jalapeño poppers. Try using mozzarella for a stretchy bite. Gouda brings a creamy taste. For a sharp kick, use pepper jack cheese or blue cheese. If you want a dairy-free option, use almond cream cheese. It works well and keeps the poppers tasty. Want more heat? Add more jalapeños or a splash of hot sauce to the cheese mixture. For those who prefer less spice, try using bell peppers instead. You can also remove all the seeds from the jalapeños. This helps lower the heat while keeping great flavor. Make your poppers fancy by adding cooked bacon bits or fresh herbs like cilantro or chives. This adds depth to each bite. If you want a vegetarian twist, mix in some spinach or artichokes. These options keep the dish fun and tasty while being friendly to all diets. After enjoying your jalapeño poppers, you may have some left. To store them, follow these simple steps: - Refrigeration: Place the cooked poppers in an airtight container. They will stay fresh in the fridge for about 3 days. Make sure to let them cool before sealing the container. - Freezing: For longer storage, you can freeze the poppers. Lay them on a baking sheet in a single layer. Freeze for about 1 hour until firm. Then, transfer them to a freezer bag. They will keep well for up to 3 months. When you're ready to enjoy your leftover poppers, it’s key to keep them crispy. Here’s how: - Best methods: The air fryer is the best way to reheat poppers. It brings back that nice crunch. You can also use an oven if you don’t have an air fryer. - Recommended time and temperature: Preheat your air fryer to 350°F (175°C). Heat the poppers for about 5-7 minutes. If using the oven, set it to 375°F (190°C) and bake for around 10-12 minutes. Check that they are hot all the way through before serving. Yes, you can prepare jalapeño poppers ahead of time. To do this, follow these steps: - Prepare the filling and stuff the jalapeños. - Place the stuffed jalapeños on a tray. - Cover and store in the fridge for up to 24 hours. - Before cooking, let them sit at room temperature for about 15 minutes. - Cook as instructed when you are ready to serve. This method makes it easy to enjoy fresh, crispy poppers without much fuss. Dipping sauces can elevate your jalapeño poppers. Here are some popular choices: - Ranch dressing: Creamy and cool, it pairs well with spice. - Guacamole: Fresh and zesty, it adds a great flavor boost. - Salsa: Choose mild or spicy, depending on your taste. - Cheese sauce: Warm and cheesy, it’s a classic comfort choice. You can also make your own sauce by mixing sour cream with lime juice and herbs. If you prefer milder jalapeño poppers, here are some tips: - Choose larger jalapeños: They often have less heat. - Remove all seeds and membranes: This part contains most of the heat. - Soak jalapeños in milk: This can help reduce spice levels. - Use less spicy cheese: Cream cheese or mozzarella can be milder options. These tips let you enjoy the flavor without too much heat. You learned how to make delicious air fryer jalapeño poppers. We covered the key ingredients, prep steps, and helpful tips for the best results. You can customize with different cheeses and spices to suit your taste. Remember to store extras properly and reheat for crispiness. Enjoy sharing these tasty treats at your next gathering. With practice, you will become a pro at making poppers. Happy cooking!

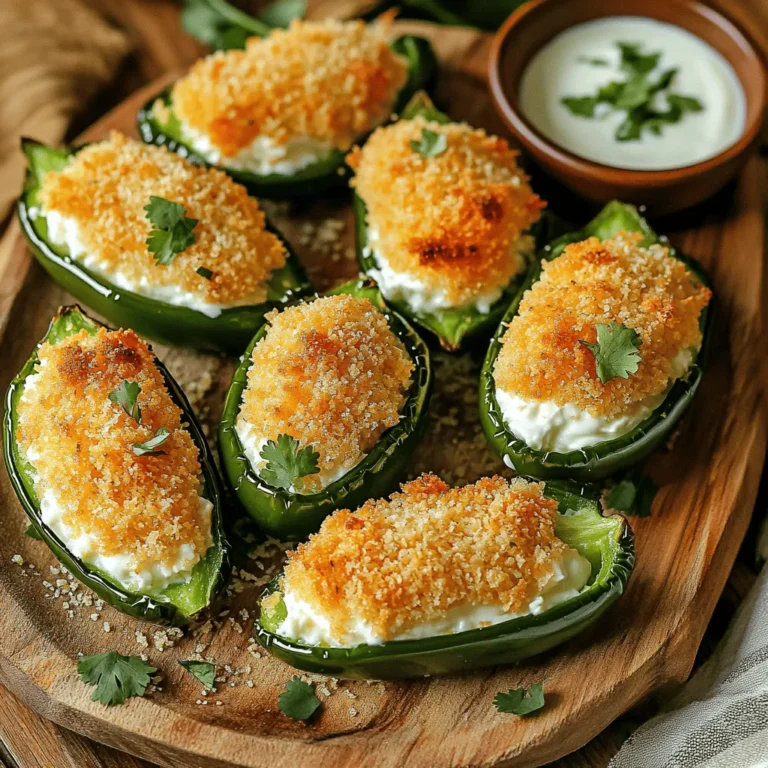
Air Fryer Crispy Jalapeño Poppers Flavorful Snack

- 1 cup all-purpose flour - 1 cup whole wheat flour - 1 teaspoon baking soda - 1 teaspoon baking powder - 1 teaspoon ground cinnamon - 1/2 teaspoon ground nutmeg - 1/4 teaspoon ground ginger - 1/4 teaspoon salt - 1 cup canned pumpkin puree - 1 cup granulated sugar - 1/2 cup packed brown sugar - 1/2 cup vegetable oil - 4 large eggs - 1 teaspoon vanilla extract - 8 oz cream cheese, softened - 1/4 cup powdered sugar - 1 teaspoon lemon juice Canned pumpkin puree is the star of these muffins. It adds moisture and flavor. It also gives a rich, warm color. Ground spices like cinnamon, nutmeg, and ginger add depth. They make the muffins taste like fall. The cream cheese filling brings creaminess. It contrasts with the soft muffin texture. Whole wheat flour adds health benefits. It gives a hearty feel to the muffins. Using both granulated and brown sugar helps balance sweetness and flavor. - Choose pure pumpkin puree, not pumpkin pie filling. The latter has added sugars and spices. - When selecting spices, check the date on the label. Fresh spices give better flavor. - Look for cream cheese that is full-fat for the best creaminess. - Use fresh eggs. They should feel heavy and have a clean shell. - For flour, choose unbleached all-purpose flour for a more natural taste. First, set your oven to 350°F (175°C). It needs to be hot for baking. Next, grab a muffin tin. Line it with paper liners or grease it lightly with cooking spray. This step helps the muffins come out easily. In a medium bowl, mix the dry ingredients. Combine 1 cup of all-purpose flour, 1 cup of whole wheat flour, 1 teaspoon of baking soda, 1 teaspoon of baking powder, 1 teaspoon of ground cinnamon, 1/2 teaspoon of ground nutmeg, 1/4 teaspoon of ground ginger, and 1/4 teaspoon of salt. Whisk them together until they blend well. Set this mixture aside for now. In a large bowl, it’s time for the wet ingredients. Add 1 cup of canned pumpkin puree, 1 cup of granulated sugar, 1/2 cup of packed brown sugar, 1/2 cup of vegetable oil, 4 large eggs, and 1 teaspoon of vanilla extract. Use an electric mixer or a whisk to blend everything. Mix until it is smooth and well combined. In a small bowl, prepare the cream cheese filling. Beat together 8 oz of softened cream cheese, 1/4 cup of powdered sugar, and 1 teaspoon of freshly squeezed lemon juice. Mix until it becomes smooth and creamy. This filling adds a nice surprise to your muffins. Now, let’s assemble the muffins. Fill each muffin cup with about 1 tablespoon of the pumpkin batter. Then, add a dollop of the cream cheese filling on top. Follow this by adding another tablespoon of the pumpkin batter to cover the cream cheese. For a lovely swirl, gently use a toothpick or skewer to swirl the cream cheese into the batter. Be careful not to mix it completely. Place the muffin tin in the oven. Bake for 18-22 minutes. Check doneness by inserting a toothpick into a muffin. If it comes out clean, they are ready. After baking, let the muffins cool in the tin for about 5 minutes. Then, move them to a wire rack to cool completely. Enjoy your delicious pumpkin cream cheese muffins! To bake perfect muffins, avoid overmixing your batter. When you mix too much, your muffins can turn dense. Stir gently until the dry and wet ingredients just blend. Also, check your oven temperature. An oven that is too hot or too cool can ruin your muffins. Use an oven thermometer to ensure it is accurate. To keep your muffins moist, use canned pumpkin puree. It has a lot of water, which helps. You can also add a bit of vegetable oil. This will add moisture and keep your muffins soft. Another tip is to bake them just until a toothpick comes out clean. Overbaking can lead to dry muffins. To make a beautiful swirl, don’t mix the cream cheese filling too much. After adding the cream cheese, use a toothpick to swirl it in. Be gentle and avoid mixing it fully into the batter. This will give your muffins a lovely marbled look, making them as pretty as they are tasty. {{image_4}} You can add nuts or chocolate chips to your muffins for extra flavor. Walnuts or pecans work well. They add a nice crunch and a nutty taste. If you prefer chocolate, use semi-sweet chocolate chips. This will make your muffins more indulgent. Just fold in about 1/2 cup of your choice into the batter before filling the muffin cups. For gluten-free muffins, you can swap all-purpose flour with a gluten-free blend. Many blends work well and keep the muffins soft. Look for a blend that contains xanthan gum. This helps the muffins rise and stay together. You could also use almond flour or coconut flour, but you may need to adjust the liquid amounts. If you want to change the cream cheese filling, there are many options. You can mix in some chocolate or peanut butter for a twist. For a fruity flavor, try adding crushed pineapple or mashed berries. Just make sure to adjust the sugar if you add fruits. This keeps the balance of flavors right in your muffins. To keep your pumpkin cream cheese muffins fresh, follow these simple tips: - Cool Completely: Let the muffins cool down before storing. This keeps them moist. - Use an Airtight Container: Store them in an airtight container. This prevents drying out. - Layer with Paper Towels: Place a paper towel at the bottom and top of the muffins. This absorbs excess moisture. If you want to save some muffins for later, freezing works well. Here’s how: - Wrap Individually: Wrap each muffin in plastic wrap. This helps keep them fresh. - Use a Freezer Bag: Place the wrapped muffins in a freezer-safe bag. Remove as much air as possible. - Reheat in the Oven: To reheat, preheat your oven to 350°F (175°C). Bake for about 10-15 minutes until warm. This keeps the muffins soft and tasty. These muffins stay fresh for a while. Here’s a quick guide: - At Room Temperature: They last for 2-3 days in an airtight container. - In the Fridge: Store them in the fridge for up to a week. - In the Freezer: If frozen, they can last for 2-3 months. Just remember to label them with the date. Yes, you can use fresh pumpkin. First, you need to cook it. Cut the pumpkin, remove the seeds, and roast or boil it until soft. Then, mash it well. Fresh pumpkin gives a sweeter taste, but it needs more time to prepare. Check the muffins with a toothpick. Insert it into the center of one muffin. If it comes out clean, your muffins are ready. They should also be golden and spring back when touched lightly. Yes! You can make these muffins a day ahead. Store them in an airtight container at room temperature. For longer storage, freeze them. Just remember to thaw them before serving. These muffins pair well with coffee or chai tea. You can also enjoy them with a dollop of whipped cream or a spread of butter. Adding a sprinkle of cinnamon on top enhances the flavors. In this post, I covered everything you need for perfect pumpkin cream cheese muffins. We discussed ingredient choices, detailed instructions, and handy tips to avoid mistakes. Remember, selecting high-quality ingredients is key to great flavor. Explore variations to make these muffins your own, and follow storage tips for freshness. Baking can be fun and rewarding. With these insights, you can create delicious treats that everyone will enjoy. Get baking and share your tasty results!

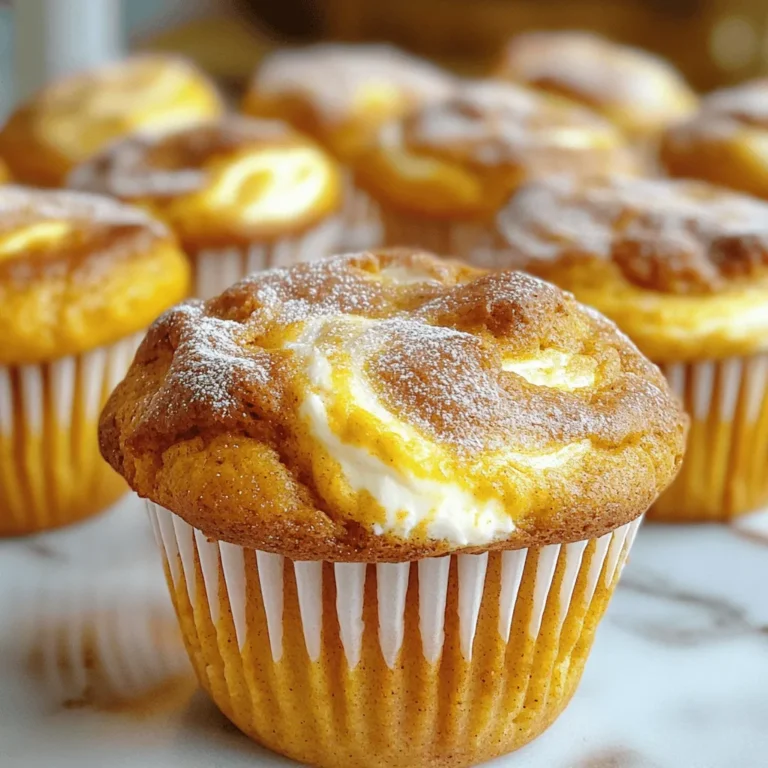
Pumpkin Cream Cheese Muffins Delightful and Easy Recipe

- 200g instant noodles - 3 tablespoons vegetable oil - 4 cloves garlic, minced - 1-2 red chilies, finely sliced The heart of Minute Spicy Garlic Chili Noodles lies in these main ingredients. Instant noodles are quick and easy to cook, making them the perfect base. Vegetable oil gives a rich flavor and helps the garlic and chilies sauté well. Garlic adds a fragrant touch, while red chilies bring the heat. Adjust the amount of chilies to match your spice level. - 2 tablespoons soy sauce - 1 tablespoon chili paste (like sambal oelek) - 1 tablespoon honey or maple syrup These sauces and sweeteners create a deliciously balanced sauce. Soy sauce adds a savory depth. Chili paste enhances the heat and flavor, while honey or maple syrup adds a hint of sweetness to balance the spice. This mix makes every bite exciting. - 1 green onion, chopped (for garnish) - Sesame seeds (for garnish) - Fresh cilantro (optional, for garnish) Garnishes elevate your dish. Chopped green onion adds a fresh crunch. Sesame seeds give a nutty flavor and nice texture. Fresh cilantro can bring brightness, but it’s optional. Garnishing not only looks good but also adds extra flavor to your meal. To start, fill a medium pot with water and bring it to a boil. This is key for cooking your noodles just right. Once the water bubbles, add 200g of instant noodles. Follow the package instructions for cooking time, which is usually about 3-5 minutes. After they are cooked, drain the noodles but save about 1/4 cup of that water. This saved water helps to make your sauce perfect later. Next, grab a large skillet or frying pan. Set it on medium heat and add 3 tablespoons of vegetable oil. Let the oil heat up a bit. Once hot, toss in 4 minced garlic cloves and 1-2 finely sliced red chilies. Sauté them for 1-2 minutes. Stir often until the garlic smells great and turns slightly golden. Be careful; you don’t want to burn it, as that can make your dish taste bitter. Now it’s time to mix everything. Add the drained noodles to the skillet with the garlic and chili oil. Pour in 2 tablespoons of soy sauce, 1 tablespoon of chili paste, and 1 tablespoon of honey or maple syrup. Use tongs or chopsticks to toss the noodles well. If it looks too dry, add a splash of the reserved noodle water. Stir-fry for another 2-3 minutes to heat everything through. Once it’s well combined, take the skillet off the heat. Plate the noodles on serving dishes. For the final touches, sprinkle chopped green onion, sesame seeds, and fresh cilantro if you like. Now, your Minute Spicy Garlic Chili Noodles are ready to enjoy! - Perfecting the garlic sauté: Heat your oil over medium heat. Once hot, add the minced garlic and red chilies. Stir often for 1-2 minutes. The goal is a fragrant and golden garlic. Watch closely! Burnt garlic can ruin your dish. - Avoiding overcooked noodles: Follow the package directions for cooking time. Instant noodles usually take 3-5 minutes. Drain them right away to stop the cooking. Remember to save some of that noodle water! - Balancing spice levels: Taste your dish as you cook. If it’s too spicy, add more honey or maple syrup. This will help balance the heat. If you like it spicy, add more chilies or chili paste. - Alternative sweeteners: You can swap honey with maple syrup or agave nectar. Both options add sweetness. Choose what you have on hand. - Best skillet/pan types: A non-stick skillet works great for this recipe. It helps prevent sticking and burning. A cast iron skillet can also add nice flavor. - Recommended utensils for tossing: Use tongs or chopsticks when mixing the noodles. They make it easier to coat the noodles in sauce. You’ll get a perfect mix every time! {{image_4}} You can easily make these noodles vegan. Just swap honey for maple syrup. Maple syrup adds sweetness without any animal products. You can also add more veggies to boost nutrition. Try bell peppers, snap peas, or broccoli. These will add color and crunch! Want more protein? You can add cooked chicken or shrimp. Simply sauté them before adding the garlic and chili mixture. If you prefer plant-based options, use tofu or tempeh. Cook them until golden, then mix them in with the noodles. This will give your dish a hearty feel. If you like less heat, use fewer red chilies. You can also try different chili types, like jalapeños or poblano peppers. These can give flavor without too much spice. Adjust the chili paste as needed, too. This way, everyone can enjoy their bowl of noodles just the way they like it! To store leftovers, let the noodles cool first. Place them in an airtight container. This helps keep them fresh. Use a container made of glass or BPA-free plastic. These options work well for storing food. The best way to reheat these noodles is on the stove. Add a splash of water to the skillet. This keeps the noodles moist. Heat them on low, stirring gently. You can also use a microwave. Just cover the bowl with a damp paper towel. This will help steam the noodles and keep them from drying out. You can freeze these noodles, but some care is needed. It's best to freeze the noodles without sauce. This keeps the texture better. To freeze, place the cooled noodles in a freezer-safe bag. Remove as much air as possible before sealing. For best taste, use them within a month. When ready to eat, thaw them overnight in the fridge. Reheat as mentioned above for a quick meal. To make chili paste, combine red chilies, garlic, and oil. You can add salt for flavor too. Blend these ingredients until smooth. You can adjust the heat by adding more or fewer chilies. This paste works great in many dishes! Yes, you can use any noodles you like! Rice noodles, udon, or even whole wheat noodles all work well. Just cook them as per the package directions. Each type brings a different texture and taste. These noodles pair well with many dishes. You could serve them with grilled chicken, shrimp, or tofu for protein. A fresh salad on the side adds crunch. You might also enjoy them with steamed veggies for a colorful plate. These noodles can be quite spicy depending on the chilies you use. You can adjust the spice by using fewer chilies or adding more honey. If you want less heat, remove the seeds from the chilies before slicing. Yes, these noodles are great for meal prep! You can cook a large batch and store them in the fridge. Just keep the noodles and sauce separate to prevent sogginess. Reheat them with a little water for the best texture. You now know how to make spicy garlic chili noodles. We covered the main ingredients, sauces, and garnishes. You learned step-by-step cooking, along with tips to avoid mistakes. We discussed tasty variations and storage tips too. These noodles are easy to make and full of flavor. Don't hesitate to experiment with spices or proteins. Enjoy your meal, and share this recipe with friends. Happy cooking!

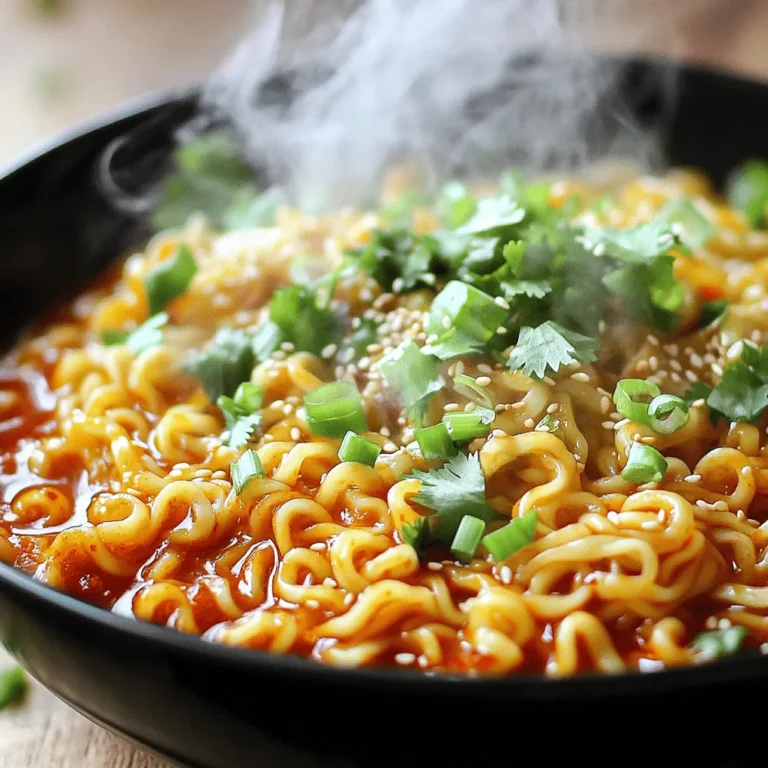
Minute Spicy Garlic Chili Noodles Quick and Flavorful

To make these salted caramel brownie bites, gather the following main ingredients: - 1 cup unsalted butter - 1 cup dark chocolate chips - 2 cups granulated sugar - 4 large eggs - 1 teaspoon vanilla extract - 1 cup all-purpose flour - 1/2 cup cocoa powder - 1 teaspoon baking powder - 1/2 teaspoon salt - 1 cup salted caramel sauce - Sea salt flakes for topping These ingredients come together to create a rich, fudgy base. The chocolate chips and cocoa powder give a deep flavor. The salted caramel adds sweetness and a nice contrast to the brownies. You will need some tools to make this recipe easy: - Medium saucepan - Large mixing bowl - Whisk - Spatula - 9x13 inch baking pan - Parchment paper - Knife or skewer - Wire rack for cooling These tools help mix, bake, and serve your brownie bites perfectly. Using parchment paper makes it easier to lift the brownies out later. You can add some fun toppings to make these bites even better: - Extra salted caramel sauce for drizzling - Chopped nuts like pecans or walnuts - Mini chocolate chips - Fresh fruit like raspberries or strawberries These garnishes add texture and flavor. Feel free to get creative! They can make your brownie bites look even more tempting. {{ingredient_image_2}} First, you need to preheat your oven to 350°F (175°C). This step is key for even baking. Next, prepare a 9x13 inch baking pan by lining it with parchment paper. Let the edges hang over the sides to help with easy removal later. In a medium saucepan, combine 1 cup of unsalted butter and 1 cup of dark chocolate chips. Place this over low heat. Stir continuously until it all melts smoothly. Once melted, take it off the heat and let it cool for a few minutes. Grab a large mixing bowl. Whisk together 2 cups of granulated sugar, 4 large eggs, and 1 teaspoon of vanilla extract. Keep whisking until the mixture is well combined and slightly frothy. In a separate bowl, sift 1 cup of all-purpose flour, 1/2 cup of cocoa powder, 1 teaspoon of baking powder, and 1/2 teaspoon of salt. This helps to mix everything evenly and keeps the brownies light. Pour half of the brownie batter into the lined baking pan. Spread it evenly. Drizzle half of the salted caramel sauce over this layer. Then, carefully spread the remaining brownie batter on top. Take a knife or skewer and gently swirl the remaining salted caramel sauce into the brownie batter. This creates a marbled effect that looks beautiful and tastes amazing. Place your pan in the preheated oven and bake for 25-30 minutes. To check if they’re done, insert a toothpick into the center. It should come out with a few moist crumbs. After baking, remove the brownies from the oven and cool them in the pan on a wire rack. Once cool, lift them out using the parchment paper and cut into bite-sized squares. Enjoy! To make the best brownies, follow these tips: - Use high-quality dark chocolate chips. They give rich flavor. - Melt the butter and chocolate slowly. This keeps the mix smooth. - Whisk the eggs well with sugar until frothy. This adds air. - Do not overmix the batter. Mix just until blended. - Let the brownies cool fully before cutting. This helps them hold shape. Many people make a few common mistakes. Here’s how to avoid them: - Don’t skip the parchment paper. It helps with easy removal. - Avoid opening the oven too soon. This can cause brownies to sink. - Don’t bake too long. Check for moist crumbs with a toothpick. - Avoid using cold ingredients. Bring eggs and butter to room temp. - Don’t neglect the cooling time. Cutting warm brownies can make a mess. Creating beautiful caramel swirls involves some tricks: - Use a thin caramel sauce for easy drizzling. It spreads well. - Don’t swirl too much. You want defined layers, not mixed colors. - Use a knife or skewer for swirling. A gentle hand works best. - Add a pinch of sea salt on top after baking. It enhances flavor. - Drizzle more caramel right before serving. This adds a nice touch. Pro Tips Use High-Quality Chocolate: The flavor of your brownies will greatly depend on the quality of the chocolate you use. Opt for a good quality dark chocolate for the best taste. Don't Overmix: When combining the dry ingredients with the wet mixture, mix just until incorporated. Overmixing can lead to dense brownies. Check for Doneness: To ensure perfectly fudgy brownies, check them a few minutes before the end of the baking time. They should have a few moist crumbs on the toothpick. Cool Completely: Let the brownies cool completely in the pan before cutting. This helps them set and makes cutting easier without crumbling. {{image_4}} You can add nuts for extra crunch. I love walnuts or pecans. Chopping them into small pieces works best. Mix about 1 cup of nuts into the batter. This way, every bite has a delightful nutty flavor. You can also sprinkle some chopped nuts on top before baking. This adds a nice touch and makes them look great. Want a gluten-free treat? Swap the all-purpose flour with a gluten-free blend. Many brands are available, and they work well in this recipe. Just ensure the blend has a good mix of flour types. This change still gives you that rich brownie taste without gluten. Everyone can enjoy these bites! You can easily change the flavor of your brownie bites. For a coffee kick, add 1 tablespoon of espresso powder to the wet mix. This gives a rich depth to the chocolate. If you prefer a minty twist, add a few drops of peppermint extract. This makes the brownies fresh and fun! You can also use orange zest for a citrusy vibe. The possibilities are endless, so feel free to experiment! To keep your brownie bites fresh, store them in an airtight container. Place parchment paper between layers to prevent sticking. They will stay good for up to four days at room temperature. If you want them to last longer, refrigerate them. Keep in mind that chilling may change the texture slightly. You can freeze brownie bites for up to three months. First, let them cool completely. Then, wrap each bite in plastic wrap. Place them in a freezer bag or container. Remember to label the bag with the date. This makes it easy to grab a treat later! To reheat, take the brownie bites out of the fridge or freezer. For frozen bites, let them thaw in the fridge overnight. For a warm treat, place them in the microwave for about 10-15 seconds. This will make them soft and gooey again. Enjoy your salted caramel brownie bites warm! Yes, you can use boxed brownies. They save time and still taste great. Just follow the box instructions. Once baked, add the salted caramel sauce and sea salt on top. This makes for a quick and easy treat without much fuss. To make homemade salted caramel sauce, gather these simple ingredients: - 1 cup granulated sugar - 6 tablespoons unsalted butter - 1/2 cup heavy cream - 1 teaspoon sea salt 1. In a medium saucepan, heat the sugar over medium heat. Stir until it melts and turns a golden brown. 2. Add in the butter and mix well until melted. 3. Slowly pour in the cream, mixing until smooth. 4. Remove from heat and stir in the sea salt. This sauce is rich and perfect for your brownie bites. The best toppings for brownie bites include: - Extra salted caramel sauce - Chopped nuts like walnuts or pecans - Mini chocolate chips - Sea salt flakes These toppings add texture and flavor. You can mix and match to find your favorite combination. Salted caramel brownie bites last for about 3 to 5 days when stored properly. Keep them in an airtight container at room temperature. If you want them to last longer, you can freeze them. Just make sure to wrap them well to avoid freezer burn. You learned how to make salted caramel brownie bites. We covered key ingredients and tools you need. Step-by-step instructions guide you through each part of the process. Helpful tips help you avoid common mistakes. We also explored fun variations and storage tips for your bites. Remember, baking is about joy and creativity. Use this guide to create tasty treats that impress everyone. Happy baking!

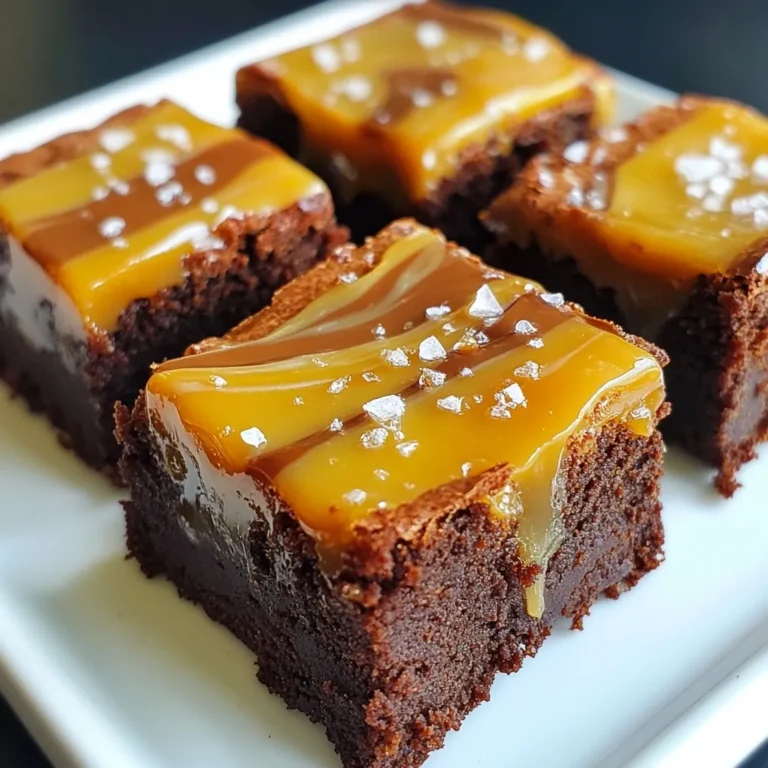
Salted Caramel Brownie Bites Delightful Sweet Treat

- 1 cup green or brown lentils, thoroughly rinsed and drained - 1 tablespoon extra virgin olive oil - 1 medium onion, finely chopped - 2 cloves garlic, minced - 1 large carrot, peeled and diced - 1 celery stalk, diced - 1 bell pepper (any color you prefer), diced - 1 can (14 oz) diced tomatoes, with juices - 2 cups vegetable broth (low-sodium if preferred) - 2 tablespoons tomato paste - 1 teaspoon dried oregano - 1 teaspoon dried basil - Salt and pepper to taste - 1 tablespoon balsamic vinegar - Fresh basil leaves, for garnish The main ingredients make this dish hearty and healthy. Lentils are packed with protein and fiber. The olive oil adds richness. Onions, garlic, and bell peppers give great flavor. Carrots and celery add sweetness and crunch. The tomato components bring moisture and tang. Diced tomatoes add texture, and vegetable broth makes it savory. Tomato paste thickens the sauce and intensifies the flavor. For seasoning, dried herbs like oregano and basil add aroma. Balsamic vinegar enhances the sauce's depth. Salt and pepper balance all the flavors. Fresh basil leaves on top make it look pretty and taste fresh. This one-pot meal is simple, quick, and full of flavor. You can easily find these ingredients at your local store. Enjoy cooking this dish with fresh, colorful veggies! - Heating the olive oil: Start by warming 1 tablespoon of extra virgin olive oil in a large pot over medium heat. You want it to shimmer, which means it's ready for the next step. - Sautéing onions and garlic: Next, add 1 finely chopped onion and 2 minced garlic cloves. Sauté them for about 2-3 minutes. The onions should turn translucent and smell great. - Adding carrots, celery, and bell pepper: After the onions and garlic, stir in 1 diced carrot, 1 diced celery stalk, and 1 diced bell pepper of your choice. Keep stirring for 5 minutes until they soften and their flavors mix well. - Achieving the right texture before adding lentils: You want these veggies to be tender but not mushy. This texture helps the lentils cook evenly later on. - Combining lentils with tomato ingredients: Now, stir in 1 cup of rinsed green or brown lentils. Then, pour in 1 can of diced tomatoes with juices, 2 cups of vegetable broth, and 2 tablespoons of tomato paste. Add 1 teaspoon each of dried oregano and dried basil, and mix everything together well. - Perfecting seasoning and letting it simmer: Bring this mixture to a gentle boil. Then, lower the heat, cover the pot, and let it simmer for 25-30 minutes. Stir occasionally to prevent sticking. Check when the lentils are soft, then add salt, pepper, and 1 tablespoon of balsamic vinegar for extra flavor. - Choosing the best lentils: I prefer green or brown lentils for this dish. They hold their shape well and add a nice texture. Avoid red lentils, as they cook too fast and become mushy. - Cooking tips for the perfect texture: Rinse lentils well before cooking. This removes any dust or debris. When adding them to the pot, stir often. This helps prevent sticking. Simmer until they are tender but not mushy. This usually takes about 25-30 minutes. - Best pasta pairing: I recommend serving this lentil bolognese over spaghetti. The long strands catch the sauce well. You can also use any pasta you enjoy, like penne or fettuccine. - Adding a protein or additional vegetables: To boost nutrition, I sometimes add cooked chickpeas or spinach to the sauce. This adds more protein and fiber. You can also mix in zucchini or mushrooms for added flavor and texture. - Health benefits of lentils: Lentils are rich in protein, fiber, and iron. They help keep you full and satisfied. They also support heart health and digestion. - Vegan nutritional considerations: This dish is great for a vegan diet. It offers protein and essential nutrients without any animal products. To ensure you get enough vitamins, pair it with a side salad or whole grain bread. {{image_4}} You can swap out veggies in this recipe for a fresh twist. Try adding: - Zucchini, chopped - Mushrooms, sliced - Spinach, fresh or frozen - Kale, chopped You can also choose different lentil types. Green or brown lentils work best. If you want a unique texture, use red lentils. They cook faster and become soft. Want to kick up the flavor? Here are some ideas: - Add a pinch of red pepper flakes for heat. - Sprinkle in some smoked paprika for a rich taste. - Stir in a tablespoon of soy sauce for umami. Try incorporating vegan cheese or nutritional yeast. They add creaminess and a cheesy flavor without dairy. You can serve this dish in many ways. Try these ideas: - Pour the bolognese over cooked quinoa or brown rice. - Serve it on baked potatoes for a hearty meal. Get creative by making a lasagna. Layer the bolognese with sheets of pasta and vegan cheese. Or, use it to stuff bell peppers for a fun twist on your meal. After making your Vegan Lentil Bolognese, store leftovers in an airtight container. This keeps it fresh and tasty. You can refrigerate it for up to 5 days. Make sure it cools down before sealing it. If you plan to eat it later, label your container with the date. This way, you won’t forget how old it is. To freeze your Vegan Lentil Bolognese, let it cool completely. Then, place it in a freezer-safe container or bag. Be sure to leave some space for it to expand. This dish can last for up to 3 months in the freezer. When you’re ready to eat, thaw it in the fridge overnight. You can also use the microwave for quick thawing. Reheat it on the stove over low heat, adding a splash of vegetable broth if needed. This keeps it creamy and delicious! Yes, you can make this recipe gluten-free. Just choose gluten-free pasta. Many brands offer options made from rice or chickpeas. You can also try spiralized veggies as a base. Zucchini noodles or spaghetti squash work well. This dish lasts about 4 to 5 days in the fridge. Store it in an airtight container. To keep it fresh, let it cool before sealing. Reheat it on the stove or in the microwave. Always check for any off smells before eating. Absolutely! You can add vegetables like mushrooms, spinach, or zucchini. Try adding kale for extra nutrition. Bell peppers can be switched for your favorite veggie. Mixing in some peas can also add a sweet touch. Be creative and use what you like! Vegan lentil Bolognese is simple and packed with flavor. You have learned the key ingredients and why they work well together. The step-by-step instructions make cooking easy, while tips and tricks enhance your dish. Remember to explore variations and storage options for lasting enjoyment. This meal is healthy, filling, and perfect for many occasions. Now, you’re ready to create a satisfying vegan dish that everyone will love. Enjoy making your Bolognese and share it with friends and family!

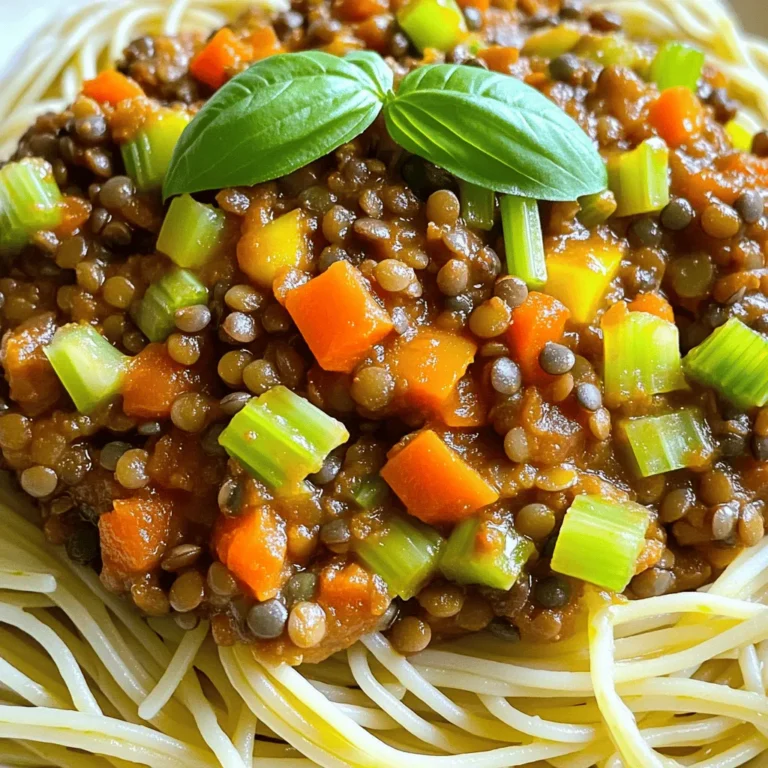
Vegan Lentil Bolognese One Pot Flavorful Comfort Meal

- 4 salmon fillets (about 6 oz each) - 1 cup fresh spinach, roughly chopped - 1 can (14 oz) artichoke hearts, well-drained and chopped - 1 cup cream cheese, softened to room temperature - 1/2 cup grated mozzarella cheese - 1/4 cup grated Parmesan cheese - 2 cloves garlic, finely minced - 1 teaspoon lemon zest - 1 tablespoon fresh lemon juice - Salt and freshly cracked black pepper, to taste - 2 tablespoons olive oil, divided - Fresh parsley, chopped, for garnish Gathering these ingredients is the first step to making this dish shine. Each item adds its own flavor and texture. The salmon fillets serve as a tasty canvas. The fresh spinach and artichokes give a nice pop of green. Cream cheese brings creaminess, while mozzarella and Parmesan add a cheesy kick. Garlic is a must. It adds depth and richness. The lemon zest and juice brighten the dish, giving it a fresh taste. Salt and pepper are key for seasoning. Using good quality ingredients makes a big difference. When you pick your salmon, look for bright color and fresh smell. Fresh spinach should be vibrant green. The artichokes should be tender and flavorful. Don’t skip the olive oil! It helps with cooking and adds richness. Finally, the fresh parsley on top adds color and a hint of freshness. Each ingredient works together to create a dish that is both creamy and delicious. Enjoy gathering your ingredients! 1. Preheat your oven to 375°F (190°C). This helps cook the salmon evenly. 2. In a medium skillet, heat 1 tablespoon of olive oil over medium heat. 3. Add 2 cloves of finely minced garlic. Sauté for about 30 seconds. It should smell fragrant. 4. Next, add 1 cup of roughly chopped spinach and 1 can of chopped artichoke hearts. Cook for 3-4 minutes. The spinach should wilt and become tender. 5. Remove the skillet from heat. Let the mixture cool slightly while you prepare the stuffing. 1. In a mixing bowl, combine 1 cup of softened cream cheese, 1/2 cup of grated mozzarella, and 1/4 cup of grated Parmesan cheese. 2. Add the zest of 1 lemon and 1 tablespoon of fresh lemon juice to the bowl. 3. Once the spinach-artichoke mixture has cooled, add it to the bowl. 4. Season with salt and freshly cracked black pepper. Mix everything well until combined. 1. Take 4 salmon fillets and create pockets in them. Use a sharp knife to make a slit along the side of each fillet. Be careful not to cut all the way through. 2. Generously fill each salmon pocket with the creamy spinach-artichoke mixture. Press it in gently to ensure it fits well. 1. In a large, oven-safe skillet, heat the remaining tablespoon of olive oil over medium-high heat. 2. Place the stuffed salmon fillets in the skillet. Sear for 2-3 minutes on each side. Aim for a light golden brown. 3. Next, transfer the skillet to the preheated oven. Bake for 15-20 minutes. The salmon should be cooked through and flake easily with a fork. How to prevent salmon from drying out: To keep your salmon juicy, do not overcook it. Use a meat thermometer to check. The ideal internal temperature is 145°F. You can also brush the fish with olive oil before cooking. This adds moisture and flavor. Best way to check for doneness: The best way to check if salmon is done is to use a fork. Gently twist the fork at the thickest part. If it flakes easily, it’s ready. If it resists, cook it a bit longer. You can also look for a change in color. The salmon should be opaque and no longer shiny. Pairing options for a complete meal: For a full meal, serve the salmon with sautéed zucchini noodles or a fresh garden salad. You can also add a side of roasted vegetables. These options balance the rich filling and add color. Garnishing ideas for visual appeal: Garnish your salmon with fresh parsley for a pop of color. A sprinkle of lemon zest also brightens the dish. For added taste, drizzle a tiny bit of olive oil or fresh lemon juice before serving. This enhances the flavors and makes your plate look beautiful. {{image_4}} You can switch up the cheese in this dish. If you don’t have cream cheese, use Greek yogurt or ricotta. Both give a similar creamy texture. You can also mix different cheeses for fun. Try using feta for a tangy twist or gouda for a smoky flavor. Combining mozzarella and cheddar can add a nice sharpness. Want to make it even better? Add more veggies! Chopped bell peppers, mushrooms, or even sun-dried tomatoes work well. You can also sneak in some chopped kale or zucchini for extra nutrients. Spices and herbs can enhance the taste too. Try adding a pinch of red pepper flakes for heat. Fresh dill or basil can brighten the dish. A sprinkle of smoked paprika adds depth. Get creative and make it your own! To keep your creamy spinach artichoke stuffed salmon fresh, use airtight containers. Glass or plastic containers work well. Make sure to let the salmon cool before sealing it. Store leftovers in the fridge. You should eat them within 2-3 days for the best taste and safety. When reheating stuffed salmon, you have a few options. The oven is best for even heating. Preheat it to 350°F (175°C). Place the salmon in a baking dish and cover it with foil to keep it moist. Heat for about 15 minutes. You can also use a microwave for quick reheating. Place the salmon on a microwave-safe plate. Cover it with a damp paper towel to retain moisture. Heat in short bursts of 30 seconds until warm. Check often to avoid drying it out. Enjoy your delicious leftovers! Yes, you can use frozen salmon fillets. The best way to thaw them is to place them in the fridge overnight. If you’re short on time, you can also run cold water over the sealed fillets for about 30 minutes. Once thawed, pat them dry with a paper towel. This helps the salmon sear nicely. Cook them as you would fresh salmon. Just make sure they reach a safe internal temperature of 145°F (63°C). Stuffed salmon goes well with many sides. Here are some popular options: - Sautéed zucchini noodles for a light touch - Garlic mashed potatoes for creaminess - Steamed asparagus for a fresh crunch - A vibrant garden salad for brightness These sides balance the rich flavors of the creamy filling and add texture. To make this dish dairy-free, you can swap out the cream cheese and other cheeses. Try using vegan cream cheese instead. You can also use a dairy-free mozzarella cheese. For added creaminess, consider using cashew cream or coconut cream. This way, you keep the rich flavor without dairy. Always check labels to ensure they are dairy-free. This blog post detailed a delicious stuffed salmon recipe. You learned about the ingredients, preparation steps, and helpful tips to ensure perfect results. We also explored variations for different tastes and how to store leftovers. Remember, you can customize flavors and still enjoy a healthy meal. Whether for a family dinner or a special event, stuffed salmon impresses every time. Try it, and savor each bite! Cooking can be fun, and this dish is a perfect way to start.

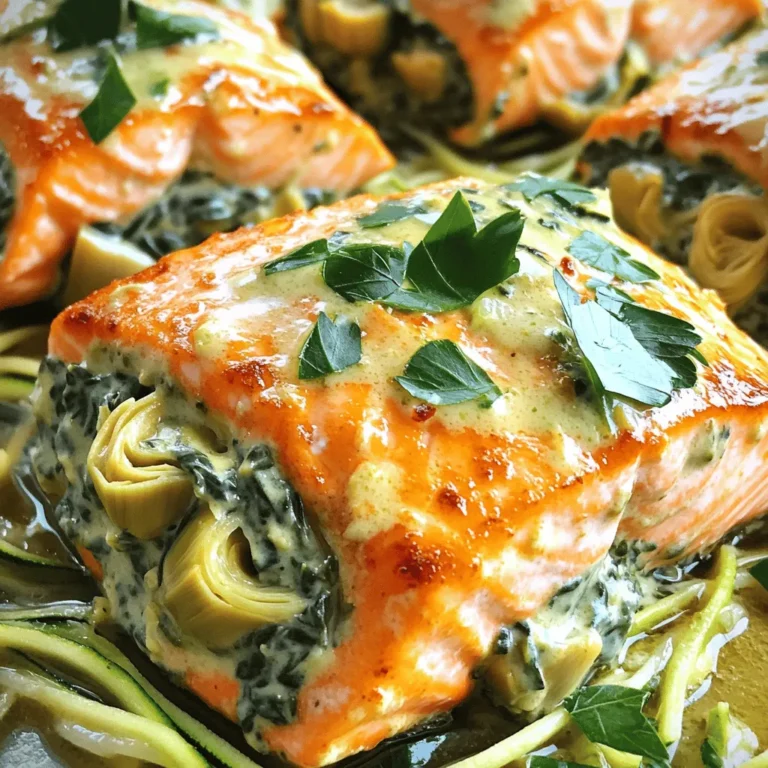
Creamy Spinach Artichoke Stuffed Salmon Delight

- 2 large round sourdough bread loaves - 2 cups cooked chicken, shredded - 1 cup heavy cream - 1 cup grated Parmesan cheese - 1/2 cup unsalted butter - 3 cloves garlic, minced - 1 teaspoon garlic powder - Salt and pepper to taste - 1/4 teaspoon nutmeg (optional) - Fresh parsley, chopped (for garnish) Each ingredient plays a key role in making these Chicken Alfredo Bread Bowls delicious. The sourdough bread holds the creamy filling well. The cooked chicken adds protein. Heavy cream gives a rich texture. Parmesan cheese brings flavor and smoothness. Butter helps sauté the garlic, making it fragrant. Garlic powder adds depth, while nutmeg gives a hint of warmth. Salt and pepper balance all the flavors, and parsley adds a fresh touch. If you don’t have sourdough, try using another hearty bread like Italian or French. For a lighter option, you can substitute heavy cream with half-and-half or whole milk, but the sauce may be thinner. You can also use shredded rotisserie chicken for convenience. If you want a dairy-free version, try using coconut cream and a plant-based cheese. Each serving contains approximately: - Calories: 550 - Protein: 30g - Fat: 35g - Carbohydrates: 40g - Fiber: 2g These bowls offer a filling meal. The protein from the chicken is great for energy. The bread provides carbs to keep you full. Adjusting the ingredients allows you to manage the nutrition to fit your needs. {{ingredient_image_2}} 1. Preheat your oven to 350°F (175°C). This warms it up for baking. 2. Cut the tops off the sourdough loaves. Make a lid for your bowls. 3. Hollow out the insides, leaving about 1 inch of bread on the sides. 4. Save the removed bread for croutons or other recipes. Waste not, want not! 1. Melt unsalted butter in a large skillet over medium heat. Add minced garlic and sauté for 1 minute. This makes your kitchen smell amazing. 2. Pour in heavy cream and gently simmer. Stir often to blend the flavors nicely. 3. Add shredded chicken to the skillet. Include garlic powder and nutmeg if you like. Mix well so every piece is coated. 4. Whisk in grated Parmesan cheese. Keep mixing until it melts into a smooth sauce. Season with salt and pepper to taste. 5. Remove from heat and let the sauce thicken for 3-5 minutes. This step boosts flavor. 6. Spoon the creamy chicken Alfredo into each hollowed-out bread bowl, filling to the top. 1. Place the filled bowls on a baking sheet. Bake for 15-20 minutes until the bread gets crispy. 2. Take them out of the oven and garnish with fresh parsley. It adds color and flavor. 3. Serve hot and enjoy your tasty Chicken Alfredo Bread Bowls! To make the best Alfredo sauce, start with fresh ingredients. Use real Parmesan cheese for a rich flavor. Grate it yourself for the best melt. When cooking, keep the heat low to avoid burning the garlic. Stir the sauce often to keep it smooth. If it gets too thick, add a splash of chicken broth or cream. You may have some chicken left after making the bread bowls. Shred it and store it in the fridge. You can use it in salads or sandwiches. Leftover Alfredo sauce works well too. Store it in an airtight container for up to three days. Reheat it gently on the stove with a little cream or broth. When baking the bread bowls, keep an eye on the time. You want them crispy but not burnt. Line your baking sheet with parchment paper to prevent sticking. If you like a golden top, broil them for a minute after baking. Be careful not to overfill the bowls; too much filling can cause spills. Pro Tips Use Day-Old Bread: Stale sourdough bread holds its shape better and provides a crunchier texture when baked, enhancing your bread bowl experience. Adjust the Cheese: Experiment with different cheeses like mozzarella or a sharp cheddar for a unique flavor twist in your Alfredo sauce. Add Vegetables: Incorporate sautéed spinach, mushrooms, or sun-dried tomatoes into the filling for added flavor and nutrition. Serve with Extra Sauce: Prepare a little extra Alfredo sauce on the side for guests who love a creamier experience with their bread bowls. {{image_4}} You can make a tasty vegetarian version of Chicken Alfredo Bread Bowls. Swap the chicken for cooked mushrooms or diced zucchini. Both add great flavor and texture. You can also use tofu for added protein. Just sauté it until golden before adding it to the sauce. Adding vegetables to your Chicken Alfredo Bread Bowls makes them even better! Try spinach, broccoli, or bell peppers. You can sauté these veggies with the garlic for a rich taste. They add color and nutrition to your meal. Plus, they blend well with the creamy sauce. You don't have to stick with sourdough! Try using Italian bread, baguettes, or even ciabatta. Each type of bread brings a unique flavor. Make sure the bread is sturdy enough to hold the filling. This way, you can enjoy every bite without mess. To store leftover Chicken Alfredo Bread Bowls, wait for them to cool. Place them in an airtight container. You can keep them in the fridge for up to three days. If you want to save the bread bowls longer, consider freezing them. To reheat, preheat your oven to 350°F (175°C). Place the bread bowls on a baking sheet. Cover them with foil to keep them from drying out. Heat for about 15-20 minutes, or until warmed through. This method keeps the bread crispy and the filling hot. If you want to freeze the bread bowls, do so before baking. Wrap each filled bread bowl tightly in plastic wrap, then place them in a freezer bag. They can stay frozen for up to two months. When ready to eat, thaw them overnight in the fridge. Bake as directed for a tasty meal. Yes, you can use other cheeses. Some good choices are mozzarella or cream cheese. These cheeses melt well and add creaminess. You can even mix cheeses for more flavor. Just remember, Parmesan gives a nice salty taste that works great in Alfredo. To keep the bread from getting soggy, hollow out the loaves carefully. Leave about one inch of bread on the sides and bottom. This helps hold in the sauce. Also, bake the filled bowls right after you add the sauce. This keeps the bread crispy. If you have extra bread, make croutons or toast it for later use. These bread bowls pair well with a simple green salad. A fresh Caesar salad adds a nice crunch. You can also serve garlic bread on the side for extra flavor. For drinks, try a light white wine or sparkling water. A fruity dessert can complete the meal nicely, like a sorbet or fruit salad. This blog post covered essential ingredients and tips for making Chicken Alfredo Bread Bowls. You learned about substitutions and nutritional facts. We walked through each step, from prep to cooking, and added helpful tips for perfect results. Variations like vegetarian options and storage tips were included to suit your needs. Remember, experimentation is key. Mix up ingredients, and have fun while cooking. Enjoy your delicious creation!

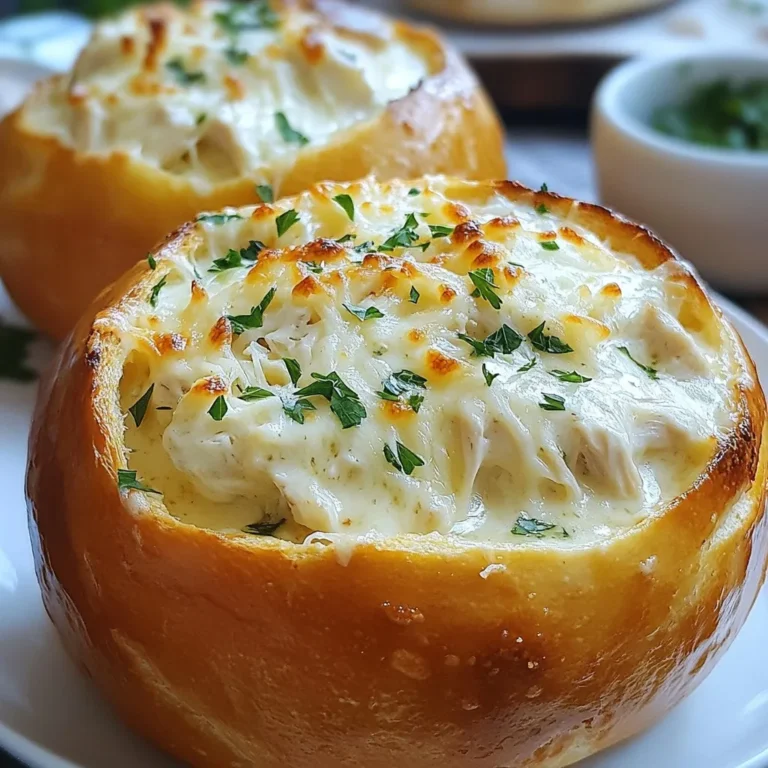
Chicken Alfredo Bread Bowls Flavorful Easy Dinner

PREV 1 … 14 15 16 … 44 NEXT
yummybiterecipes

explore

DessertsDinnerAppetizersDrinks

Our Policies

  • Cookie Policy
  • Copyright Policy
  • Disclaimer
  • GDPR Policy
  • Terms Of Use
Back to Top
  • About
  • Contact Us
  • Privacy Policy
© 2025 yummybiterecipes