FREE DINNER EBOOK! Get your copy!
  • Cookie Policy
  • GDPR Policy
  • Disclaimer
  • Terms Of Use
  • Visit my other site: Fun Cookie Recipes
yummybiterecipes
  • Home
  • Dinner
  • Desserts
  • Drinks
  • Appetizers
  • Contact
  • About
  • Privacy Policy
  • Home
  • Dinner
  • Desserts
  • Drinks
  • Appetizers
  • Contact
  • About
  • Privacy Policy
  • Cookie Policy
  • GDPR Policy
  • Disclaimer
  • Terms Of Use
Visit my other site: Fun Cookie Recipes

HOME / CATEGORIES /

Latest

To make Garlic Chili Butter Shrimp Pasta, gather these items: - 8 oz spaghetti or linguine - 1 lb large shrimp, peeled and deveined - 4 tablespoons unsalted butter, divided - 5 cloves garlic, minced - 1-2 red chilies, finely chopped - 1 teaspoon chili flakes (optional) - 1 lemon, juiced and zested - 1/4 cup fresh parsley, finely chopped - Salt and freshly ground black pepper to taste - Grated Parmesan cheese for serving (optional) If you are missing an ingredient, here are some easy swaps: - Pasta: Use any pasta you like, such as penne or fettuccine. - Shrimp: Substitute with chicken or tofu for a different protein. - Butter: You can use olive oil for a lighter option. - Chilies: If you want less heat, use bell peppers instead. - Parsley: Fresh basil or cilantro can give a nice twist. To make this dish, you will need: - A large pot for boiling pasta - A large skillet for sautéing - A cutting board and knife for chopping - A measuring cup and spoons for accuracy - A serving bowl for tossing pasta These tools will help you create a delicious meal quickly and easily. Enjoy cooking! To start, bring a large pot of salted water to a boil. Use enough salt to make the water taste like the sea. This step is key for flavor. Once boiling, add 8 oz of spaghetti or linguine. Cook it according to the package instructions until it is al dente, which means it should still have a little bite. Remember to reserve 1 cup of pasta water before draining. This water will help later. Drain the pasta and set it aside in a large bowl. Now, let’s get to the shrimp. In a large skillet over medium heat, melt 2 tablespoons of butter. I love using unsalted butter for this. Once it melts, add 5 cloves of minced garlic. Sauté for about 1 minute. You want it to smell amazing, but don’t let it brown. Next, mix in 1-2 finely chopped red chilies and optional chili flakes if you like it spicy. Cook this for another 30 seconds to blend the flavors. Then, add the 1 lb of deveined shrimp to the skillet. Season with salt and freshly ground black pepper. Cook the shrimp for about 3-4 minutes. They should turn pink and opaque. Stir occasionally for even cooking. Now, for the best part! Once your shrimp are cooked, add the reserved pasta to the skillet. Pour in the fresh lemon juice and zest from 1 lemon. This adds a bright flavor. Toss everything together. Add the remaining 2 tablespoons of butter to create a lovely sauce. If it seems dry, splash in some reserved pasta water until you get a glossy look. Lastly, remove from heat and stir in 1/4 cup of finely chopped parsley. Taste and adjust the seasoning with more salt and pepper if needed. Now you’re ready to serve and enjoy this delicious dish! To cook shrimp just right, start with fresh or thawed shrimp. Avoid overcooking them. Cook shrimp until they turn pink and opaque. This usually takes about 3-4 minutes. Use medium heat for even cooking. Stir the shrimp often to ensure they cook evenly. Remember, shrimp will continue to cook after you take them off the heat. To change the spice level, you can add or reduce the amount of red chilies and chili flakes. If you prefer less spice, use one chili instead of two. You can also remove the seeds from the chilies for less heat. For more spice, add extra chili flakes or a dash of hot sauce. Always taste as you go to find your perfect balance. For a great presentation, use shallow bowls. Plate the pasta with a generous amount of shrimp on top. Garnish with chopped parsley and a lemon wedge for color. You can also sprinkle some grated Parmesan cheese on top if you like. This adds flavor and makes the dish look fancy. A beautiful presentation makes every meal feel special. {{image_4}} You can boost nutrition by adding veggies. I love using spinach or broccoli. Spinach wilts quickly, so add it near the end of cooking. For broccoli, steam or sauté it before mixing. You can also use bell peppers or zucchini for color and crunch. These veggies not only taste great but also give you extra vitamins. If you want a twist, try different pasta shapes. Penne or farfalle work well with this dish. You can even use whole wheat or gluten-free pasta. Just follow the cooking time on the package. Each type adds its own flavor and texture. Experiment to find your favorite! Herbs can change the taste of your dish. Instead of parsley, try basil for a fresh kick. Oregano or thyme also add depth. You can even mix herbs for a unique flavor. Just chop them finely and stir them in at the end. This small change can make a big difference in taste! To keep your Garlic Chili Butter Shrimp Pasta fresh, place it in an airtight container. Make sure the pasta cools down first. This helps it stay tasty and safe to eat. Store it in the fridge for up to three days. If you want to keep it longer, consider freezing it. When you’re ready to eat your leftovers, you can reheat them easily. The best way is to use a skillet. Add a splash of water or broth to keep it moist. Heat over medium heat, stirring often, until warm. You can also use the microwave. Place in a bowl, cover with a damp paper towel, and heat for one minute. Stir, then heat again if needed. If you want to save your pasta for later, freezing works great! Place the cooled pasta in a freezer-safe bag. Remove as much air as possible before sealing. It can last up to three months in the freezer. To eat, thaw it overnight in the fridge. Then, reheat it as shown above for a quick meal. If you want a substitute for shrimp, try chicken or tofu. Both options work well in this dish. Chicken should be cut into small pieces and cooked thoroughly. Tofu can be cubed and sautéed until golden. You can also use scallops or even fish like salmon for a new twist. Garlic Chili Butter Shrimp Pasta lasts about 3 days in the fridge. Store it in an airtight container to keep it fresh. When ready to eat, just reheat in a pan or microwave until warm. Yes, you can add heat without chilies. Use hot sauce or cayenne pepper instead. Start with a small amount and taste as you go. This lets you control the spice level and keeps the dish tasty. In this article, we covered the key points for making Garlic Chili Butter Shrimp Pasta. You learned about the ingredients, cooking steps, and tips for perfect shrimp. We also discussed ways to add veggies and alternative pasta options. Remember, storing leftovers properly keeps your meal fresh. Cooking can be both fun and simple. Explore these ideas to make your dish exciting. Enjoy your cooking journey!

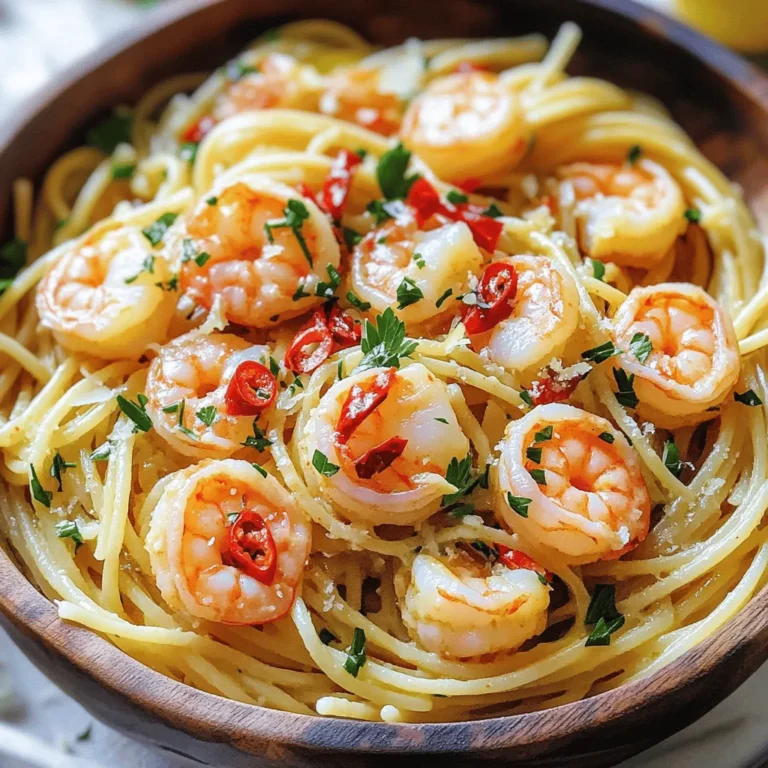
Garlic Chili Butter Shrimp Pasta Quick and Tasty Meal

- 4 salmon fillets (approximately 6 oz each) - 2 cups fresh broccoli florets - 1 bell pepper (choose red or yellow for color), sliced - 1 medium zucchini, sliced into half-moons - 1 cup cherry tomatoes, halved - 4 tablespoons extra virgin olive oil - 2 tablespoons Cajun seasoning - 1 teaspoon garlic powder - Sea salt and freshly cracked black pepper, to taste - Fresh lemon wedges for a zesty finish - Fresh parsley, chopped for garnish Gathering the right ingredients is key for a great dish. The salmon fillets are the star here. They are rich in flavor and healthy omega-3 fats. Fresh vegetables add color and nutrition. Broccoli brings crunch, while bell pepper adds sweetness. Zucchini offers a nice texture, and cherry tomatoes give a burst of juice. You will need olive oil for roasting. It helps the veggies and salmon cook evenly. Cajun seasoning gives that bold, smoky flavor. Garlic powder adds depth without overpowering the other tastes. A sprinkle of sea salt and black pepper brightens everything. Finally, lemon wedges and parsley add a fresh touch when serving. Make sure to use fresh ingredients for the best taste. This meal is simple yet full of flavor. Prepare everything in advance, so cooking becomes easy and fun. Enjoy the process! 1. Preheat your oven to 425°F (220°C). This high heat helps create a nice char on the salmon and veggies. 2. Line a large baking sheet with parchment paper. This makes cleanup easy and keeps food from sticking. 3. In a bowl, combine 2 cups of fresh broccoli florets, sliced bell pepper, sliced zucchini, and halved cherry tomatoes. 4. Drizzle 2 tablespoons of extra virgin olive oil over the veggies. Add a pinch of sea salt and some black pepper. Toss everything well to coat. 5. Spread the veggies in a single layer on one side of the baking sheet. Leave space for the salmon. 1. In a small bowl, mix 2 tablespoons of Cajun seasoning with 1 teaspoon of garlic powder. 2. Pat the 4 salmon fillets dry with paper towels. This helps the seasoning stick better. 3. Rub the spice mix on both sides of the salmon fillets. Make sure to cover them well. 4. Place the seasoned salmon fillets on the empty side of the baking sheet, skin side down if they have skin. 5. Drizzle the remaining 2 tablespoons of olive oil over the salmon. Add a pinch of salt and black pepper for extra flavor. 6. Put the baking sheet in the preheated oven. Bake for 15 to 20 minutes. 7. Check the salmon and veggies when time is up. The salmon should flake easily with a fork, and the veggies should be tender with some charred edges. 1. Carefully take the baking sheet out of the oven. Let it cool for a few minutes. 2. To serve, place each salmon fillet on a plate next to the roasted veggies. 3. Garnish with chopped parsley for a fresh look. 4. Serve with lemon wedges on the side for a zesty touch. Drizzle a little olive oil over the veggies before serving for added shine. Enjoy the colorful plate! To make the best blackened salmon, you need the right seasoning. I use Cajun seasoning mixed with garlic powder. This blend gives the salmon a zesty kick. Make sure to coat both sides of the salmon fillets. This helps lock in the flavor. For doneness, cook the salmon until it flakes easily with a fork. This usually takes about 15-20 minutes at 425°F. Keep an eye on it. Overcooking can dry it out. Cut your veggies into similar sizes for even cooking. I like to slice zucchini into half-moons and bell peppers into strips. This ensures they roast at the same rate. For more flavor, try different seasonings. You can add dried herbs like thyme or rosemary. A splash of balsamic vinegar also works well. Using parchment paper makes cleanup simple. It prevents sticking and saves time. Just toss it when you're done! Keep your workstation organized. Place all your ingredients within reach. This helps you focus on cooking and not searching for tools. A clean space makes cooking more fun! {{image_4}} You can change up the veggies in this dish. Try using seasonal favorites like asparagus, carrots, or green beans. Use what you love! For a sweet twist, add butternut squash. To get more flavor, season your vegetables with herbs like thyme or rosemary. You can even add a splash of balsamic vinegar for extra zing. If you want to try a different flavor, use other spice mixes. Lemon pepper or taco seasoning can work great too. For a milder dish, skip the Cajun seasoning. Instead, use just garlic powder and a bit of paprika. If you like it spicy, add cayenne pepper or crushed red pepper flakes to your mix. You can pair this dish with many sides. Try serving it with rice, quinoa, or a fresh salad. For a tasty sauce, drizzle with tahini or a creamy dressing. You can also turn this dish into a salad or grain bowl. Just chop the salmon and veggies, then mix them with greens and your favorite toppings. Enjoy the fun of mixing flavors! To keep your blackened salmon and veggies fresh, refrigerate them. Place leftovers in an airtight container. This helps prevent moisture loss, keeping your food tasty. Use glass or plastic containers that seal well. If you have multiple portions, separate them to maintain freshness. When reheating, you want to avoid drying out your salmon. The best way is using an oven. Preheat it to 350°F (175°C). Place the salmon and veggies on a baking sheet and cover them with foil. Heat for about 10-15 minutes or until warmed through. If using a microwave, place the food in a microwave-safe dish. Cover it with a damp paper towel. Heat in short bursts of 30 seconds, checking often. This keeps the salmon moist. You can freeze both salmon and veggies. Make sure they are cool first. Wrap them tightly in plastic wrap, then place them in a freezer bag. This helps prevent freezer burn. For best quality, eat them within three months. To thaw, place the wrapped food in the fridge overnight. You can cook directly from frozen, but add extra cooking time. This gives you a quick meal option later. You should cook salmon at 425°F for about 15 to 20 minutes. The salmon will flake easily when it is done. Keep an eye on it to avoid overcooking. The cooking time may vary based on the thickness of the fillets. Yes, you can prepare this dish ahead of time. You can season the salmon and chop the veggies a few hours before cooking. Store them in the fridge until you are ready to bake. This will save you time on busy days. You can serve blackened salmon with many sides. Try rice, quinoa, or a fresh salad. A creamy sauce or a tangy dressing works well too. These options will enhance the meal's flavor and add variety. Yes, you can use frozen vegetables. Just make sure to thaw and drain them first. This will help them roast properly and avoid excess moisture. Keep in mind that frozen veggies may cook faster than fresh ones. To get crispier vegetables, follow these tips: - Cut the veggies into smaller pieces to increase surface area. - Make sure they are spread out in a single layer on the baking sheet. - Avoid overcrowding to allow steam to escape. - Consider roasting them for an extra 5 minutes if needed. In this blog post, we covered how to make blackened salmon with fresh veggies. You learned about the ingredients you'll need, like salmon fillets and colorful vegetables. We discussed step-by-step instructions from prep to serving. Tips helped you perfect your dish, while variations offered new ideas. Finally, you picked up storage tips for leftovers. Cooking should be fun and tasty. Enjoy experimenting with this healthy recipe!

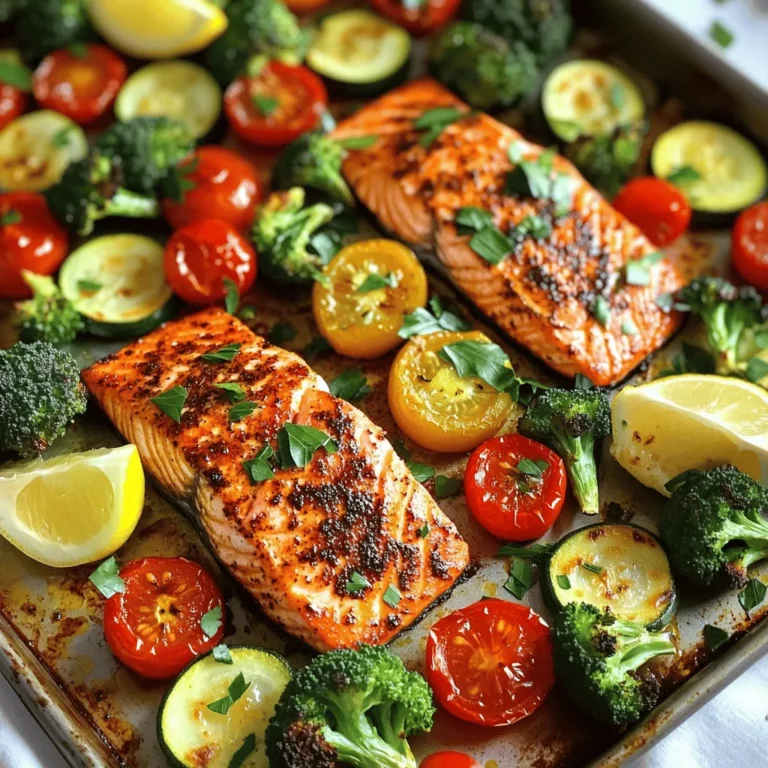
Blackened Salmon Veggie Sheet Pan Flavorful Feast

- 8 oz radiatore pasta - 1 cup heavy cream - 1/2 cup grated Parmesan cheese - 1 cup cherry tomatoes, halved - 2 cloves garlic, minced - 1 tablespoon olive oil - 1 teaspoon dried basil - Salt and pepper to taste These main ingredients create a rich and creamy dish. The radiatore pasta holds sauce well, making each bite tasty. Heavy cream adds a smooth texture. Parmesan cheese brings a salty flavor. Cherry tomatoes add freshness and color. Garlic gives an aromatic touch. Olive oil helps cook the garlic. Dried basil adds an herbal note. - Fresh basil leaves - Additional grated Parmesan cheese - Cracked black pepper Garnishing with fresh basil makes the dish look vibrant. Extra Parmesan cheese enhances the flavor. Cracked black pepper adds a little heat and texture. - Radiatore pasta can be swapped with penne or fusilli. - Heavy cream can be replaced with half-and-half for a lighter sauce. - Cherry tomatoes may be substituted with sun-dried tomatoes. - Garlic powder can stand in for minced garlic if needed. These substitutions can help if you have different ingredients at home. Each swap keeps the dish delicious and enjoyable. {{ingredient_image_2}} First, fill a large pot with water. Add a good amount of salt. This will help flavor the pasta. Heat the pot on high until the water boils. Once boiling, add 8 oz of radiatore pasta. Cook it for about 10 to 12 minutes. You want it to be al dente, which means it should still have a slight bite. After cooking, drain the pasta in a colander. Set it aside for later. While the pasta cooks, grab a large skillet. Heat 1 tablespoon of olive oil over medium heat until it shimmers. Add 2 cloves of minced garlic and stir for about 30 seconds. You want the garlic to smell great but not brown. Next, toss in 1 cup of halved cherry tomatoes. Cook them for 3 to 4 minutes. Stir occasionally until they soften. Then, pour in 1 cup of heavy cream. Mix well and let it gently simmer. Now, slowly add 1/2 cup of grated Parmesan cheese and 1 teaspoon of dried basil. Stir until the cheese melts and the sauce becomes creamy. Taste your sauce. Add salt and pepper to make the flavors pop. Now for the fun part! Take the drained radiatore pasta and add it to your skillet. Gently toss the pasta in the creamy sauce. Make sure each piece gets coated evenly. This step makes the dish come together beautifully. Serve the pasta right away in warm bowls. For a nice touch, add fresh basil leaves on top. Enjoy your meal! To cook pasta well, start with plenty of water. Use a big pot. Salt the water well; it should taste like the sea. Bring it to a rolling boil. Add the radiatore pasta and stir it. Cook until al dente, which means firm to the bite. This usually takes about 10 to 12 minutes. Drain the pasta right away, but don’t rinse it. Rinsing removes the starch that helps sauce stick. For a rich, creamy sauce, heat the olive oil first. Add minced garlic and sauté it until fragrant. Then, add the cherry tomatoes and let them soften. Pour in the heavy cream next. Keep stirring as you add the grated Parmesan cheese. This helps the cheese melt smoothly into the sauce. Season with salt and pepper to balance the flavors. The sauce should be thick and coat the pasta well. Serve the pasta in warm bowls for a cozy feel. Top with fresh basil leaves for a bright touch. You can also drizzle some extra olive oil on top for added flavor. For a bit of flair, sprinkle more grated Parmesan and cracked black pepper. This not only tastes great but also makes the dish look beautiful. Enjoy your meal right away to savor the creamy goodness! Pro Tips Use Fresh Ingredients: Fresh cherry tomatoes and basil can elevate the flavor of your dish significantly, so opt for them whenever possible. Perfectly Cooked Pasta: To avoid mushy pasta, cook it until it's al dente, as it will continue to cook slightly when mixed with the sauce. Adjusting Creaminess: If you prefer a lighter sauce, consider using half-and-half instead of heavy cream, but be aware it may not be as rich. Leftover Pasta Tips: If you have leftover pasta, store it separately from the sauce to prevent it from becoming soggy. Reheat with a splash of cream or broth for best results. {{image_4}} You can make this pasta dish even better by adding proteins. Chicken works great. You can use cooked, diced chicken breast. Shrimp is also a fantastic choice. Just sauté the shrimp until they turn pink before adding them to the sauce. For a hearty meal, try adding cooked sausage. Just slice it and mix it in for extra flavor. If you want a vegetarian twist, you can leave out meat. Try adding more veggies instead! Spinach, zucchini, or bell peppers work well. Just sauté them with the garlic. You can also add beans for protein. Chickpeas or white beans will add texture and nutrition. Don't forget to adjust the seasonings to match your new ingredients. You can boost the flavor with spices and herbs. Red pepper flakes add heat. A pinch can make the dish lively. Fresh herbs like parsley or thyme will brighten the sauce. You can also try adding lemon juice for a zesty kick. Just squeeze a bit in before serving. Experiment with flavors to find what you love! To keep your Quick Creamy Radiatore Pasta fresh, let it cool first. Place it in an airtight container. Store it in the fridge. It will stay good for up to three days. When you're ready to eat, check for any signs of spoilage before reheating. To reheat, use a skillet over low heat. Add a splash of water or cream to help loosen the sauce. Stir gently to warm it through. This keeps the pasta from getting dry. You can also microwave it in a covered bowl. Heat in short bursts, stirring in between. You can freeze this pasta if you want to save some for later. First, let it cool completely. Then, place it in a freezer-safe container. Make sure to leave some space for expansion. It will keep well for up to two months. To thaw, move it to the fridge overnight before reheating. This dish takes about 20 minutes from start to finish. You need 10 minutes to prep and 10 minutes to cook. It's quick and perfect for busy nights. Yes, you can swap radiatore for other pasta shapes. Penne, fusilli, or even spaghetti work well. Just remember to adjust the cooking time based on the type you choose. If you want a lighter option, use half-and-half or whole milk. For a dairy-free choice, try coconut cream or cashew cream. Both will still give you a nice, creamy texture. This blog post covered all the key steps for making Quick Creamy Radiatore Pasta. We looked at the main ingredients, cooking methods, and helpful tips for a delicious dish. You can add proteins or spice things up with flavors. Remember, you can store and reheat leftovers easily. Enjoy your cooking journey! Each bite will remind you of the joy of making tasty meals.

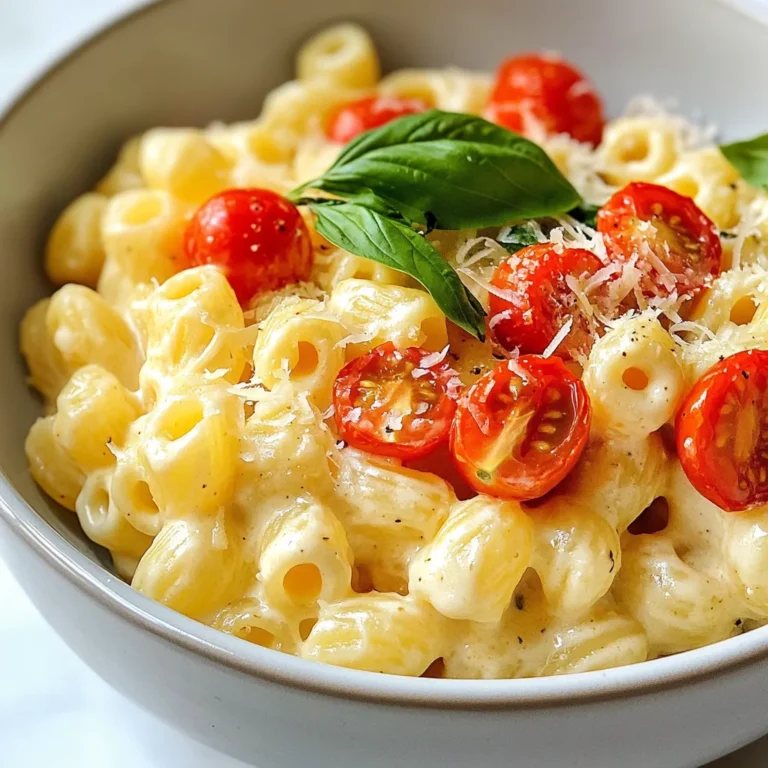
Quick Creamy Radiatore Pasta Simple and Tasty Recipe

To make cheesy cauliflower tater tots, gather these simple ingredients: - 1 medium head of cauliflower, cut into florets - 1 cup shredded sharp cheddar cheese - 1/2 cup almond flour (or regular breadcrumbs if preferred) - 1/4 cup green onions, finely chopped - 1/4 teaspoon garlic powder - 1/4 teaspoon onion powder - 1/4 teaspoon paprika - Salt and freshly ground black pepper, to taste - 1 large egg, beaten - Olive oil spray for baking You can easily swap ingredients to fit your taste: - Use any cheese you like, such as mozzarella or pepper jack. - For a gluten-free option, stick with almond flour or use gluten-free breadcrumbs. - If you don't have green onions, use chives or shallots instead. Each serving offers a healthy option packed with flavor: - Calories: 180 - Protein: 6g - Carbohydrates: 9g - Dietary Fiber: 3g - Sugars: 2g - Fat: 14g These cheesy cauliflower tater tots are a fun snack that can fit into a balanced diet. Enjoy them as a treat or a side! {{ingredient_image_2}} First, preheat your oven to 400°F (200°C). This helps the tots bake evenly. Next, cut your medium head of cauliflower into small florets. Steam these florets until fork-tender, which takes about 5 to 7 minutes. After steaming, drain the cauliflower and let it cool for a few minutes. To remove extra moisture, place the florets in a clean kitchen towel. Twist the towel to wring out as much water as you can. This step is key for crispy tots! In a large mixing bowl, combine the well-drained cauliflower with 1 cup of shredded sharp cheddar cheese, 1/2 cup of almond flour, and 1/4 cup of finely chopped green onions. Add 1/4 teaspoon each of garlic powder, onion powder, and paprika. Season with salt and black pepper to your taste. Use a fork or spatula to mix everything well. Then, pour in 1 large beaten egg and stir until the mixture holds together, looking like dough. Take a handful of the mixture and shape it into small tater tots, about 1 to 1.5 inches long. Place them in a single layer on a lined baking sheet. Lightly spray the tops with olive oil. This helps them get golden and crispy. Bake in the preheated oven for 20 to 25 minutes, flipping them halfway through. Once they are golden brown and crispy, take them out and let them cool for a few minutes before serving. Enjoy your tasty cheesy cauliflower tater tots! To make your tater tots crispy, start with the cauliflower. Steam it just until fork-tender. This step helps keep the tots light. After steaming, drain and cool the cauliflower. Then, wring it out in a kitchen towel. This removes extra moisture. Less moisture means crunchier tots. When mixing, use almond flour or breadcrumbs. Both help hold the tots together and add texture. Finally, spray the tots lightly with olive oil before baking. This adds to the golden crunch. These cheesy cauliflower tater tots shine with great dips. I love pairing them with creamy ranch. It’s cool and complements the cheese well. Another option is zesty sriracha mayo. It adds a spicy kick. You can also try homemade yogurt dip for a fresh twist. Mix yogurt with herbs for a tasty treat. Feel free to get creative with your dips. Avoid using too much moisture in your mixture. It will make the tots soggy. Don't skip the wringing step! Also, ensure you shape the tots evenly. If they are too big, they may not cook through. Don't forget to flip them halfway while baking. This ensures they cook evenly and get crispy all around. Lastly, keep an eye on the time. Overbaking can lead to hard tots. Aim for a golden brown color for the best result. Pro Tips Drain Thoroughly: Ensuring the cauliflower is well-drained after steaming is crucial for achieving crispy tater tots. Excess moisture can lead to soggy results. Experiment with Cheese: While sharp cheddar adds a great flavor, feel free to mix in other cheeses like mozzarella or parmesan for a unique twist on taste. Use a Cookie Scoop: For uniformity, consider using a cookie scoop to shape your tater tots. This ensures they bake evenly and have a professional look. Perfect Your Baking: If you prefer extra crispiness, broil the tater tots for the last 2-3 minutes of baking. Keep a close eye on them to prevent burning. {{image_4}} You can easily switch up the cheese in this recipe. Try using mozzarella for a lighter taste. Gouda adds a smoky flavor, while pepper jack gives a spicy kick. Each cheese will change the taste and texture of the tater tots. It’s fun to mix and match to find your favorite combo! If you need a gluten-free version, almond flour works great. You can also use gluten-free breadcrumbs. This keeps the tots crispy without any gluten. Always check labels to ensure your ingredients are truly gluten-free. Enjoy your snack without worry! Herbs and spices can add a burst of flavor. Try adding fresh parsley or chives for a green lift. You can use dried oregano or basil for an Italian twist. A pinch of cayenne pepper can bring some heat. Experiment with your favorite herbs to make them your own! To keep your leftover tater tots fresh, place them in an airtight container. This helps keep them crispy. Store them in the fridge for up to three days. Avoid stacking them to prevent sogginess. To reheat the tater tots, preheat your oven to 375°F (190°C). Place the tots on a baking sheet. Bake for about 10-15 minutes until they are hot and crispy again. You can also use an air fryer for a quicker option. Heat at 350°F (175°C) for about 5-7 minutes. You can freeze these tater tots for longer storage. After baking, let them cool completely. Place them in a single layer on a baking sheet and freeze until firm. Then, transfer them to a freezer bag. They can stay good for up to three months. When ready to eat, bake them straight from the freezer at 400°F (200°C) for 25-30 minutes. Yes, you can use fresh cauliflower. Fresh cauliflower gives a great taste. Just cut it into florets. Steam it until fork-tender, about 5-7 minutes. Be sure to drain it well. This helps keep your tater tots from being soggy. To lower the calories, try these tips: - Use less cheese or a lighter cheese. - Swap almond flour for whole wheat flour. - Skip the olive oil spray, or use less. - Serve with low-calorie dips like salsa. Some great dipping sauces include: - Creamy ranch dressing - Zesty sriracha mayo - Spicy ketchup - Avocado cream sauce Each adds fun flavors to your tater tots. You can mix and match to find your favorite! In this post, we covered tasty and easy cauliflower tater tots. You learned about key ingredients, substitutions, and their nutritional benefits. I shared steps to prepare, mix, and bake these bites to perfection. Tips for a crispy finish and popular dips were included, along with ways to store and reheat leftovers. Remember, you can add different cheeses and spices for fun flavors. Experiment with these ideas, and enjoy making your tater tots a hit with friends and family!

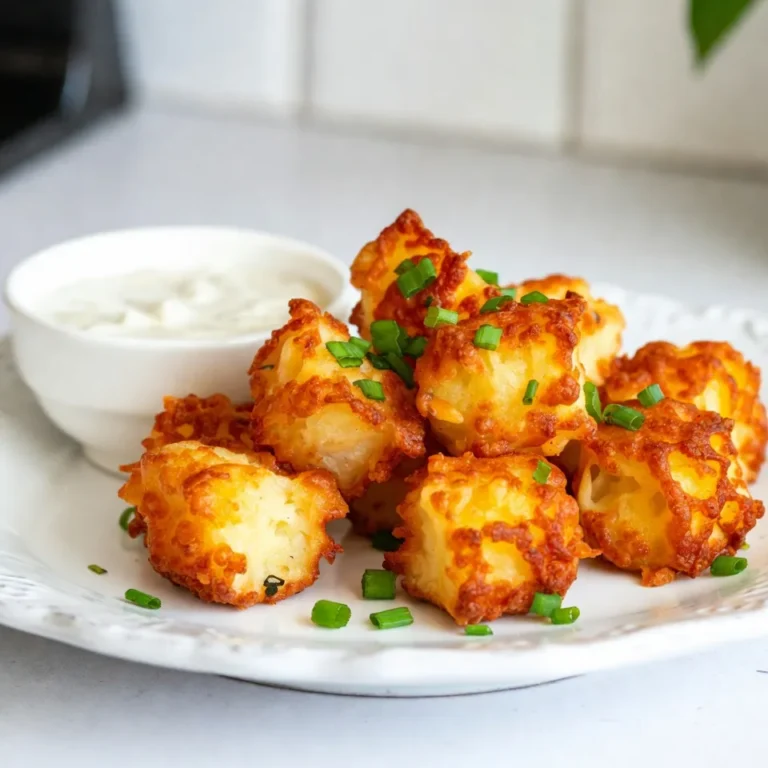
Cheesy Cauliflower Tater Tots Tasty Snack Idea

- 4 bone-in, skin-on chicken thighs - 1 cup heavy cream - 1 cup chicken broth - 3 cloves garlic, finely minced - 1 tablespoon Dijon mustard - 1 teaspoon dried thyme - 1 teaspoon smoked paprika - Salt and freshly ground black pepper to taste The main star here is the chicken thighs. They give you juicy meat with crispy skin. Heavy cream and chicken broth create a rich sauce. Garlic adds a nice kick, while Dijon mustard gives depth. Thyme and smoked paprika bring out great flavors. - 1 cup fresh spinach, roughly chopped - 1/2 cup freshly grated Parmesan cheese - Fresh parsley, chopped, for garnish (optional) Spinach adds color and nutrition. Parmesan cheese gives a wonderful cheesy finish. You can use fresh parsley to make the dish look even better. It adds a pop of green that brightens your plate. - Baking dish - Mixing bowl - Whisk A baking dish is essential for cooking your chicken. A mixing bowl helps you combine all your sauce ingredients. A whisk makes it easy to blend everything smoothly. Having these tools ready makes the cooking process much easier and fun! {{ingredient_image_2}} First, preheat your oven to 400°F (200°C). This step is key for getting that perfect crispy skin on the chicken. While the oven is heating up, grab a large mixing bowl. In this bowl, mix together one cup of heavy cream, one cup of chicken broth, three cloves of finely minced garlic, one tablespoon of Dijon mustard, one teaspoon of dried thyme, and one teaspoon of smoked paprika. Add salt and pepper to taste. Use a whisk to combine everything until it's smooth and creamy. Next, take four bone-in, skin-on chicken thighs and lay them in a baking dish. Make sure they are skin side up to achieve that nice crispiness. Once the chicken is arranged, pour the creamy sauce over each thigh. Use a spatula to ensure each piece is well coated. Now, take one cup of roughly chopped fresh spinach and sprinkle it over the top of the chicken. Press the spinach gently into the sauce so it cooks nicely and adds flavor. Place the baking dish in your preheated oven and bake for 35 to 40 minutes. You know the chicken is done when it reaches an internal temperature of 165°F (74°C) and the skin looks golden brown. After baking, carefully remove the dish from the oven. Let the chicken rest for about five minutes before serving. This resting period is important as it helps the juices stay inside the chicken, making it juicy and flavorful. To get the best flavor in your creamy oven-baked chicken thighs, seasoning is key. Use salt and pepper generously. The smoked paprika adds depth. You can even try adding a splash of lemon juice for brightness. For crispy chicken skin, place the thighs skin-side up in the baking dish. This allows the skin to brown nicely. Bake them at 400°F for the right amount of time. Avoid covering the dish to keep the skin crispy. One common mistake is overcooking the chicken. Keep an eye on the time and use a meat thermometer. The chicken is done when it reaches 165°F. Overcooked chicken can turn dry and tough. Another mistake is skipping the resting period after baking. Let the chicken rest for five minutes before serving. This keeps the juices inside, making every bite juicy. For a great presentation, serve the chicken thighs on individual plates. Drizzle some of the creamy sauce over each piece. Add a sprinkle of fresh parsley for color. For sides, consider steamed veggies or creamy mashed potatoes. These pair well with the richness of the chicken. You can also serve a simple salad for a fresh contrast. Pro Tips Use Bone-In Thighs: Bone-in, skin-on chicken thighs retain moisture and flavor during baking, resulting in a juicier dish. Adjust Seasonings: Feel free to customize the herbs and spices based on your preference; rosemary or oregano can be great alternatives to thyme. Let it Rest: Allowing the chicken to rest for a few minutes after baking helps the juices redistribute, making each bite more succulent. Make it a Meal: Serve with sides like rice, quinoa, or roasted vegetables for a complete, satisfying meal. {{image_4}} You can change up the recipe to fit your needs. For a dairy-free version, swap heavy cream with coconut cream. This adds a nice, rich flavor without dairy. You can also use almond milk, but it may not be as creamy. For herbs and spices, feel free to mix and match. Try oregano or rosemary instead of thyme. Each herb brings its own unique taste. You can also add a pinch of red pepper flakes for some heat. Experiment to find your favorite blend! If you want a different cooking method, try using a slow cooker. Simply combine all ingredients in the slow cooker. Cook on low for 6-8 hours for tender chicken. This method keeps the chicken juicy and full of flavor. Grilling is another fun option. Marinate the chicken in the creamy sauce first. Then, grill the thighs over medium heat until cooked through. This gives a smoky flavor that pairs well with the creaminess of the dish. For side dishes, I recommend serving creamy oven-baked chicken thighs with steamed veggies. Broccoli or green beans work great! Creamy mashed potatoes also make a fantastic pairing. They soak up the sauce well. When it comes to sauces and dips, a tangy yogurt sauce adds a nice contrast. You can mix plain yogurt with lemon juice and herbs. This brightens the dish and enhances the flavors. To keep your creamy oven-baked chicken thighs fresh, store them properly. First, let the chicken cool down to room temperature. Then, transfer the chicken thighs to an airtight container. You can add the sauce to keep it moist. - Refrigeration tips: Place the container in the fridge. Your leftovers will stay good for up to 3 days. - Freezing guidelines: For longer storage, freeze the chicken. Wrap each thigh in plastic wrap, then place them in a freezer bag. They can last for about 3 months in the freezer. When it's time to enjoy your leftovers, reheating is key. - Best practices for reheating in the oven: Preheat your oven to 350°F (175°C). Place the chicken in a baking dish and cover it with foil. Heat for about 20-25 minutes. This helps keep the chicken juicy and warm. - Microwave reheating tips: If you're in a hurry, use the microwave. Place the chicken on a microwave-safe plate. Cover it with a damp paper towel and heat for 1-2 minutes, checking often to avoid drying it out. Knowing how long your food lasts is important. - Duration for refrigerated leftovers: Store in the fridge for up to 3 days for best taste and safety. - Time frame for frozen storage: If you freeze the chicken, it will be safe for about 3 months. For the best flavor, try to eat it sooner. It takes about 35 to 40 minutes to bake chicken thighs at 400°F (200°C). The key is to check the internal temperature. It should reach 165°F (74°C) for safe eating. To ensure juicy meat, let the chicken rest for 5 minutes after baking. This lets the juices settle back into the meat, making it tender and tasty. Yes, you can use boneless chicken thighs. They will cook faster, so check them after 25 to 30 minutes. Keep an eye on the internal temperature to make sure they reach 165°F (74°C). Boneless thighs may not be as crispy, but they will still soak up the creamy sauce well. This option can be great for a quicker meal. There are many tasty sides to pair with creamy chicken thighs. Here are a few great options: - Steamed seasonal vegetables: Broccoli, carrots, or green beans complement well. - Creamy mashed potatoes: Their smooth texture matches the creamy sauce beautifully. - Rice or quinoa: These grains can soak up the sauce, adding flavor to every bite. - Garlic bread: Perfect for dipping into the creamy sauce. - Salad: A fresh salad adds lightness to the meal. Feel free to mix and match these sides for a delightful dinner! This recipe covers everything for tasty creamy chicken thighs. We discussed main ingredients like chicken, cream, and broth. Topping ideas included spinach, Parmesan, and parsley to enhance flavor. I shared step-by-step cooking methods and tips for the best texture. Remember to avoid common mistakes, like overcooking. Lastly, explore variations and storage tips for leftovers. Enjoy making this dish and impressing your family with your skills!

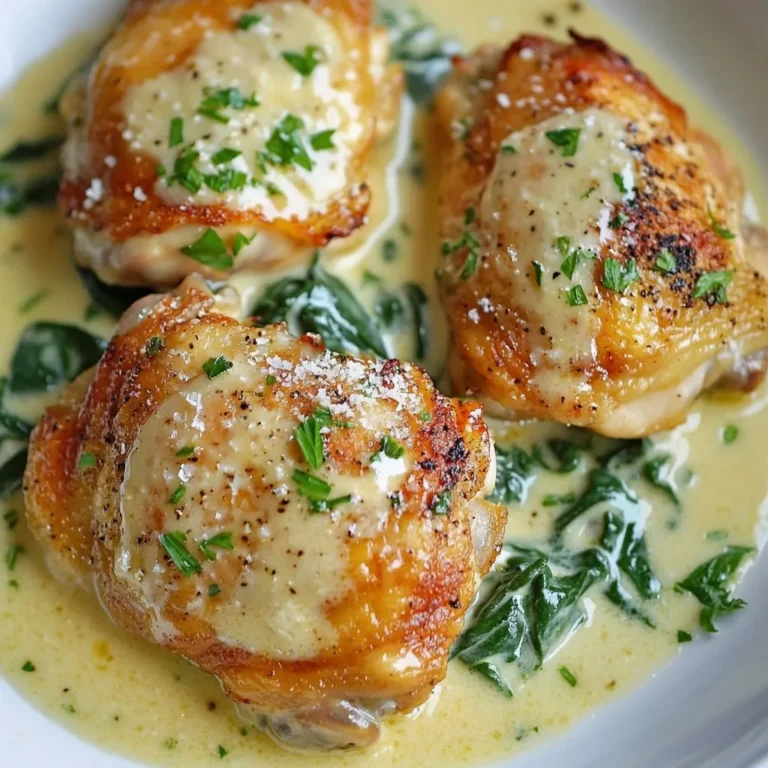
Creamy Oven Baked Chicken Thighs Easy and Flavorful

- 3 cups assorted mushrooms (cremini and shiitake recommended) - 1 medium onion, finely chopped - 2 cloves garlic, minced - 1 cup vegetable broth - 1 cup heavy cream (or coconut cream for dairy-free) - 2 tablespoons soy sauce - 1 tablespoon Dijon mustard - 1 teaspoon smoked paprika - Salt and freshly ground black pepper - 2 cups egg noodles (or any preferred pasta) - 2 tablespoons olive oil When you gather your ingredients, focus on freshness. The mushrooms give deep flavor. I suggest using cremini and shiitake for richness. Chop your onion finely. This helps it cook evenly and blend into the dish. Minced garlic adds a nice kick. For the liquid, vegetable broth adds depth. If you want creaminess, choose heavy cream or coconut cream for a dairy-free option. Flavor enhancers like soy sauce and Dijon mustard elevate the dish. Smoked paprika adds a hint of warmth. Don't forget your pasta! Egg noodles work well, but feel free to pick your favorite. Olive oil helps sauté and brings everything together. Gather these items and get ready for a delicious meal! Each ingredient plays a role in making this dish so special. - Heating the olive oil Start by heating 2 tablespoons of olive oil in a large pot over medium heat. This oil adds flavor and helps cook the onions. - Sautéing the onions Next, add 1 medium onion, finely chopped. Sauté the onion until it becomes soft and clear, which should take about 3-4 minutes. - Adding garlic and mushrooms Now, stir in 2 cloves of minced garlic and 3 cups of assorted sliced mushrooms. Cook until the mushrooms soften and release their juices, around 5-7 minutes. - Incorporating sauces and spices After the mushrooms are ready, add 2 tablespoons of soy sauce, 1 tablespoon of Dijon mustard, and 1 teaspoon of smoked paprika. Mix these ingredients well for a rich flavor. - Adding vegetable broth Gradually pour in 1 cup of vegetable broth. This will help create a nice base for your stroganoff. Bring the mixture to a gentle simmer. - Cooking the pasta Once simmering, carefully add 2 cups of egg noodles. Stir to mix everything together. Cook the noodles according to the package instructions, usually about 8-10 minutes. Stir occasionally to stop them from sticking. - Adding cream and stirring When the noodles are cooked to your liking, lower the heat. Slowly pour in 1 cup of heavy cream (or coconut cream for a dairy-free option). Stir gently until everything is creamy and well combined. - Seasoning to taste Taste your stroganoff and add salt and freshly ground black pepper as needed. If the sauce feels too thick, add a splash more broth or water to achieve your desired texture. - Letting it sit before serving Finally, take the pot off the heat and let it sit for one minute to thicken slightly. This step allows the flavors to blend perfectly before serving. To get the best taste, start by sautéing your onions well. This brings out their natural sweetness. Next, add the minced garlic and cook until fragrant. When you add the mushrooms, let them brown nicely. This creates a rich flavor base. Balancing creaminess with broth is key. Too much cream can make it heavy. Add broth gradually to find your perfect mix. Adjust seasoning based on your taste. A pinch of salt or a dash of pepper can make a big difference. Stirring is important to prevent sticking. Use a wooden spoon to scrape the bottom of the pot. This keeps all the flavors mixed well. Choose a large pot with a non-stick surface. This helps food release easily. Cooking times matter too. Follow the package instructions for noodles and stir often. Garnish with fresh parsley for a pop of color. It adds freshness to each dish. Serve the stroganoff in deep bowls to hold the sauce. Pair it with crusty bread to soak up the creamy sauce. You can also add toppings like extra mushrooms or a sprinkle of paprika for added flavor. {{image_4}} You can make this dish fit your diet. For a dairy-free option, use coconut cream instead of heavy cream. This keeps the dish creamy and rich without dairy. You can also use gluten-free pasta. Look for options made from rice or quinoa. They work well and keep the dish tasty. Want to make it heartier? You can add chicken or tofu. Cook the chicken until golden and add it after sautéing the mushrooms. For tofu, use firm tofu and sauté it until crispy for a nice texture. If you want a vegan protein boost, try lentils or chickpeas. They add protein and fiber. Feel free to get creative with your mushrooms! You can try different types like portobello or oyster mushrooms. Each brings a unique flavor. Adding herbs like thyme or rosemary can also enhance the taste. Just a sprinkle can make the dish shine. Experiment and find what you love! To store your creamy mushroom stroganoff, let it cool first. Use an airtight container. This will keep the dish fresh in the fridge for up to three days. Glass containers work well, as do plastic ones. Make sure to label the containers with the date. When you're ready to eat, reheating the stroganoff is simple. The best method is on the stovetop. Just place it in a pan over low heat. Stir often to warm it evenly. You can also use the microwave for quicker results. Heat in short intervals, stirring in between. This will keep it creamy. You can freeze the stroganoff for later use. Portion it into freezer-safe containers. Make sure to leave space for expansion. It will last up to three months in the freezer. To thaw, move it to the fridge overnight. For reheating, follow the stovetop method for the best texture. Yes, you can use different mushrooms! For this recipe, I suggest cremini and shiitake mushrooms. These types add great flavor and texture. You can also try button mushrooms, portobello, or oyster mushrooms. Mix and match to find your favorite blend. Absolutely! This stroganoff is perfect for meal prep. To make it ahead, cook the dish as directed and let it cool. Store it in airtight containers. It stays fresh for up to four days in the fridge. Reheat portions in the microwave or on the stovetop. If it thickens too much, add a splash of broth. If you want a lighter option, use coconut cream. It will still give you a creamy texture. You can also use cashew cream or a mix of milk and cornstarch. These options keep the dish rich without the heaviness of heavy cream. To check if the pasta is done, taste a noodle. It should be tender but still firm. This is called "al dente." Make sure to stir the pasta while cooking. This prevents sticking and ensures even cooking. Follow the package instructions for precise cooking times. This blog post shared a simple, tasty mushroom stroganoff recipe. You learned about key ingredients like mushrooms and egg noodles. The step-by-step instructions guide you through cooking with ease. Plus, I offered tips for flavor and storage. In the end, you can adapt this dish to suit your needs. Enjoy experimenting with flavors or adding proteins. Remember, cooking should be fun and delicious!

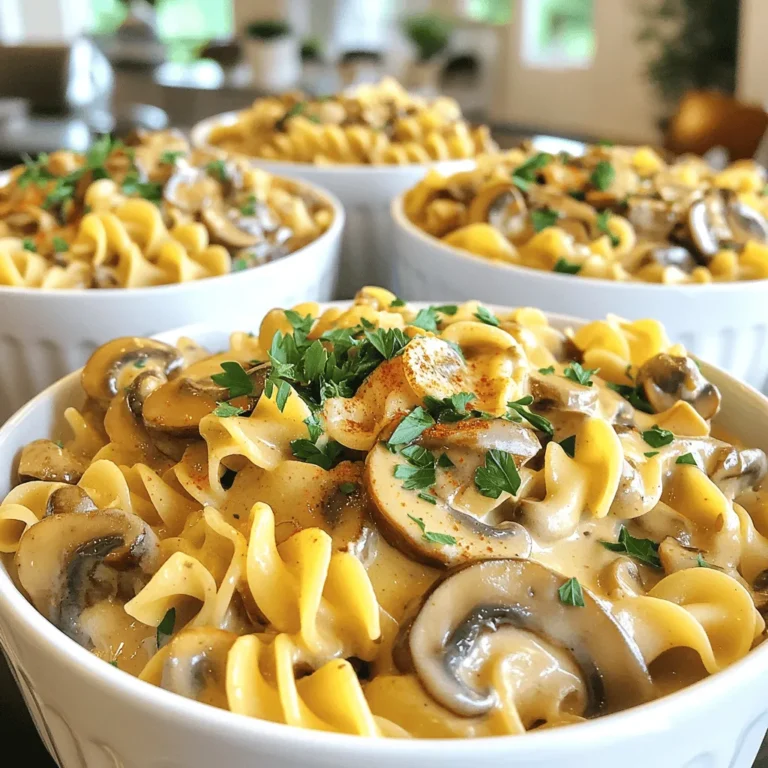
One Pot Creamy Mushroom Stroganoff Delightful Dinner

- 1 cup rolled oats - 2 tablespoons chia seeds - 2 tablespoons natural peanut butter (creamy or crunchy) - 2 tablespoons protein powder (chocolate or vanilla flavor) - 2 cups almond milk (or any milk of your choice) - 1 tablespoon honey or maple syrup (optional for sweetness) - 1/4 cup mini chocolate chips - 1/2 banana, sliced (for garnishing) - A pinch of sea salt These ingredients make up the base of our Protein Peanut Butter Cup Overnight Oats. Each item plays a key role in both taste and texture. Rolled oats provide a hearty foundation. They absorb the milk well and become soft overnight. Chia seeds add a nice crunch and boost the fiber. Natural peanut butter gives a rich flavor and healthy fats. Protein powder increases the protein content, which keeps you full. Almond milk or any milk you like makes everything creamy. Honey or maple syrup adds sweetness, but it is optional. Mini chocolate chips bring little bursts of chocolate joy. Lastly, the banana on top adds freshness and a pop of color. With these ingredients, you can create a delicious, nutritious breakfast that you can enjoy any day of the week. - Mixing dry ingredients Start by taking a large bowl. Add 1 cup of rolled oats, 2 tablespoons of chia seeds, and 2 tablespoons of protein powder. Mix these dry ingredients well. This step ensures they blend evenly. - Combining wet ingredients In another bowl, whisk together 2 cups of almond milk and 2 tablespoons of peanut butter. If you want it sweeter, add 1 tablespoon of honey or maple syrup. Don’t forget a pinch of sea salt! This mixture should be smooth and creamy. - Merging dry and wet ingredients Slowly pour the wet mixture into the bowl with the dry ingredients. Stir until everything is well combined. Make sure no dry bits remain visible. This creates a yummy base for your oats. - Folding in chocolate chips Gently fold in 1/4 cup of mini chocolate chips. Be careful not to break them. This adds a tasty surprise in each bite. - Dividing into jars Divide the oat mixture between two jars. Press down gently to pack the oats inside. This helps them soak up the liquid while chilling. - Refrigerating overnight Seal the jars tightly and place them in the fridge. Leave them overnight or for at least four hours. This allows the oats to soften and thicken. When you wake up, your delicious Protein Peanut Butter Cup Overnight Oats will be ready to enjoy! Just stir, add sliced banana, and top with extra chocolate chips if you like. Choosing the right protein powder Pick a protein powder that you enjoy. Chocolate adds rich flavor. Vanilla is lighter and versatile. Both can enhance your oats. Look for options with clean ingredients. Avoid those with lots of additives. Variations of nut butter Peanut butter is classic, but feel free to experiment. Almond butter brings a nutty twist. Cashew butter creates a creamy texture. Choose your favorite to mix things up. Sweetening options Honey or maple syrup can sweeten your oats. Use them to taste. If you prefer a sugar-free option, try mashed banana. It adds natural sweetness and creaminess. Blending tips for peanut butter To blend peanut butter smoothly, whisk it with milk first. This helps break down lumps. A smooth mixture makes it easier to mix with oats. Importance of mixing thoroughly Mixing well is key to great overnight oats. Ensure all dry ingredients are combined first. Then, blend in the wet mix completely. This prevents dry spots and gives you creamy oats. Presentation ideas with garnishes Serve your oats in jars for a fun look. Top with sliced banana and extra chocolate chips. A sprinkle of chia seeds adds texture. Drizzling honey or maple syrup enhances the visual appeal. Pairing options for a complete breakfast Pair your oats with a side of fruit or yogurt. Fresh berries or sliced apples work well. A hard-boiled egg can add extra protein. Enjoy a balanced meal to kickstart your day. {{image_4}} You can change the taste of your overnight oats in fun ways. Consider adding fruits like berries, apples, or sliced peaches. Berries add freshness and a burst of color. Apples give a nice crunch and sweetness. Try mixing in nuts or seeds too. Chopped almonds or walnuts give a nice crunch. Sunflower seeds or pumpkin seeds add extra nutrition. If you want a vegan version, swap the honey for maple syrup. Use a plant-based protein powder to keep it vegan-friendly. For gluten-free oats, make sure to choose certified gluten-free rolled oats. This way, you can enjoy your protein peanut butter cup overnight oats without worry. To keep your Protein Peanut Butter Cup Overnight Oats fresh, store them in the fridge. Use jars with tight lids to prevent spills and keep them air-tight. This method helps the oats absorb the liquid and flavors well. These oats last up to five days in the fridge. You can enjoy them anytime during that period. Just remember to give them a good stir before you eat. If you want to make a big batch, freezing is a great option. To freeze, pour the oats into freezer-safe containers. Leave some space at the top because the oats may expand. When ready to eat, thaw your oats in the fridge overnight. If you want them to be creamy again, mix in a splash of milk after thawing. This helps revive the texture and flavor. Enjoy your tasty, protein-packed breakfast anytime! You can use any milk you like. Options include cow's milk, oat milk, or soy milk. Each milk adds a unique taste. Choose what you enjoy most. If you prefer a nut-free option, go for oat milk or coconut milk. Yes, you can easily make these overnight oats vegan. Just use plant-based protein powder and substitute honey with maple syrup. This way, you keep it delicious and plant-based. Enjoy the same great taste without any animal products. Overnight oats can last in the fridge for up to five days. Store them in sealed jars to keep them fresh. This makes them a great option for meal prep. Just stir well before eating for the best texture. Absolutely! These oats are perfect for meal prep. Make a batch at the start of the week. They are quick, easy, and ready to grab in the morning. Add different toppings each day for variety. You can adjust sweetness by adding or reducing honey or maple syrup. Taste the mixture before chilling to find your perfect level. If you like it sweeter, add more syrup. For less sweetness, skip the added sweetener. Enjoy your oats just the way you like them! In this article, we explored how to make delicious overnight oats. You learned about essential ingredients and step-by-step preparation. We discussed tips for mixing and enjoying variations to suit your taste. Remember, you can switch out ingredients based on your needs. Overnight oats are easy to store and even easier to make. So, grab your oats and start your tasty breakfast journey today!

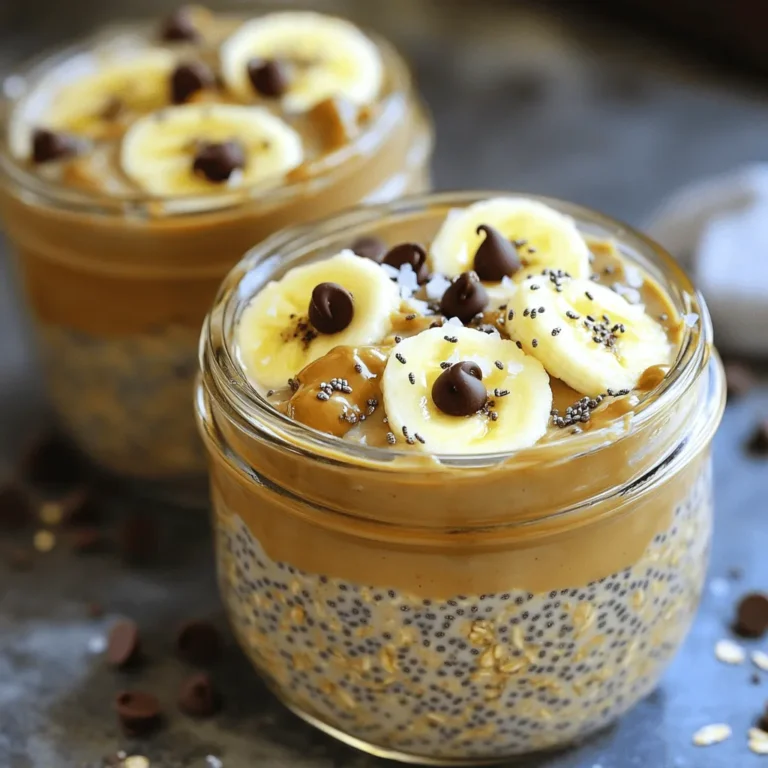
Protein Peanut Butter Cup Overnight Oats Recipe

- 1 lb sirloin steak, cut into 1-inch cubes - 4 medium-sized potatoes, diced into bite-sized pieces - 4 tablespoons unsalted butter - 4 cloves garlic, minced - 1 teaspoon fresh or dried rosemary, finely chopped - 1 teaspoon fresh or dried thyme, finely chopped - Salt and freshly ground black pepper, to taste - 1 cup baby spinach - Fresh parsley, chopped, for garnishing Gathering these ingredients is the first step to making a delicious garlic butter steak and potato skillet. The sirloin steak provides rich flavor and tender texture. The potatoes add heartiness and soak up the garlic butter beautifully. Unsalted butter and fresh garlic create a savory base, while herbs like rosemary and thyme add depth. You can also choose to include baby spinach for a nutritious touch and fresh parsley for a pop of color. Each ingredient plays a vital role in crafting this mouthwatering dish. {{ingredient_image_2}} Heat a large skillet over medium-high heat. You want it hot, so it sizzles when you add food. Once shimmering, add 2 tablespoons of olive oil. Swirl it to coat the skillet evenly. Carefully add the diced potatoes. Season them generously with salt and pepper. Sauté the potatoes for about 10-12 minutes. Stir occasionally until they turn golden brown and are tender. Once cooked, remove the potatoes from the skillet and set them aside. Now, let’s prepare the steak. Cut your sirloin into 1-inch cubes. Season the steak with salt and freshly ground black pepper. In the same skillet, add the cubed steak. Sear it for around 4-5 minutes. Turn the steak occasionally until browned on all sides. Once nicely browned, transfer the steak to a plate and set it aside. Lower the heat to medium. Add 4 tablespoons of unsalted butter to the skillet. Wait until it melts and gets bubbly. Next, add 4 cloves of minced garlic, along with 1 teaspoon of chopped rosemary and thyme. Sauté this mixture for 1-2 minutes. You want it fragrant, with the garlic turning lightly golden. It’s time to bring everything together. Add the seared steak and cooked potatoes back into the skillet. Stir them well to coat with the garlic butter and herbs. If you choose to add baby spinach, do it now. Stir gently until the spinach wilts, which should take about 1 minute. Taste the mixture and adjust the seasoning. You can add more salt and pepper if you like. Lastly, remove the skillet from heat. Sprinkle with chopped fresh parsley for a colorful finish. To cook potatoes evenly, cut them into similar sizes. This helps them cook at the same time. Start with a hot skillet to get that nice golden color. Cook them for about 10-12 minutes, stirring often. You want them crispy on the outside and tender inside. For the perfect sear on steak, let it sit at room temperature for 15 minutes before cooking. This helps it cook evenly. Use high heat and don’t overcrowd the skillet. Cook the steak for about 4-5 minutes until brown. Flip it only once for a nice crust. To boost flavor, try adding fresh herbs like oregano or basil. You can also mix in some red pepper flakes for a spicy kick. Adjust the seasoning based on your taste. If you like it saltier, add a bit more salt. For a tangy twist, a squeeze of lemon juice can brighten the dish. Serving directly from the skillet looks rustic and inviting. Set the skillet on the table and let everyone scoop out their portions. For a more elegant touch, plate individual servings. Garnish with extra parsley for color. Pair it with warm, crusty bread to soak up that delicious garlic butter. Pro Tips Use a Meat Thermometer: For perfectly cooked steak, use a meat thermometer to check for doneness. Aim for 130°F for medium-rare and adjust according to your preference. Let Steak Rest: After searing, let the steak rest for a few minutes before adding it back to the skillet. This helps retain the juices and keeps the meat tender. Customize Herbs: Feel free to experiment with different herbs like oregano, basil, or even a pinch of red pepper flakes for added heat and flavor. Add Extra Veggies: Incorporate other vegetables such as bell peppers or mushrooms for added texture and nutrition. Just sauté them before adding the potatoes. {{image_4}} You can switch out sirloin for other cuts like ribeye, flank, or tenderloin. Each cut has its own flavor and texture. Ribeye adds more fat, giving it a juicy taste. Flank steak is leaner and cooks quickly. Adjust your cooking time based on the cut. Thicker cuts need more time, while thinner pieces cook fast. Feel free to toss in other veggies! Carrots, bell peppers, or zucchini can add color and taste. For seasonal changes, try asparagus in spring or butternut squash in fall. Just chop them into bite-sized pieces and add them with the potatoes. This keeps everything evenly cooked and tasty. If you need a gluten-free meal, you’re in luck! This recipe is naturally gluten-free. For a vegetarian dish, swap steak for hearty mushrooms or tofu. Just make sure to adjust the cooking time. Mushrooms cook fast while tofu may need a bit longer. This way, everyone can enjoy a delicious skillet meal! To keep your garlic butter steak and potato skillet fresh, store leftovers in the fridge. Use a tight-sealing container to keep moisture in. You can store it for up to three days. If you want to keep it longer, consider freezing it instead. When reheating, the skillet method is best. Heat a little oil in your skillet over medium heat. Add the leftover mixture and stir until warmed through. This keeps the flavors intact. If you're short on time, you can use the microwave. Place the food in a microwave-safe dish and cover it. Heat in short bursts, stirring in between, until hot. To freeze your dish, let it cool first. Then, place it in a freezer-safe container, leaving space for expansion. It can last up to three months in the freezer. When you're ready to eat, thaw it in the fridge overnight. For best quality, reheat it in a skillet to keep the texture nice. Cooking garlic butter steak and potato skillet is quick. The prep time is about 10 minutes. Cooking takes around 20 minutes. So, in total, you will need about 30 minutes to serve a tasty dish. Yes, you can make this recipe ahead of time. Cook the steak and potatoes fully, then cool them down. Store them in a sealed container in the fridge for up to three days. When ready to eat, reheat in a skillet over medium heat. This keeps the flavors fresh and delicious. You can serve this dish with various sides. Warm, crusty bread works great to soak up the garlic butter. A crisp salad adds a nice contrast to the richness of the steak. Consider a simple green salad or a Caesar salad for a tasty pairing. In this blog post, we explored a tasty garlic butter steak and potato skillet. You learned about key ingredients, step-by-step cooking, and helpful tips. We also covered variations and storage tips to keep your dish fresh. Cooking this meal is simple and enjoyable. Feel free to play with flavors and enjoy with friends. You're now ready to create a delicious meal that everyone will love. Happy cooking!

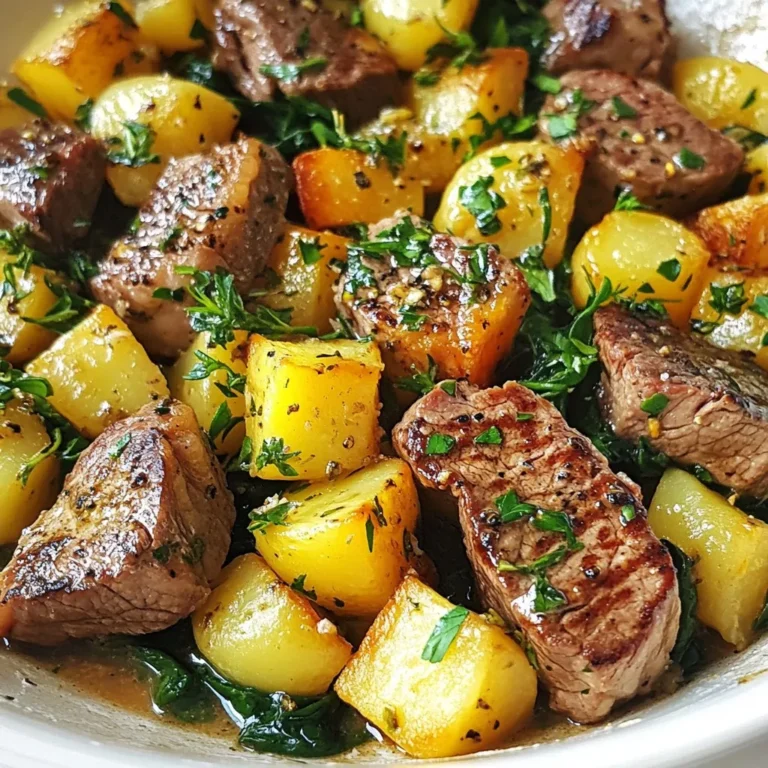
Garlic Butter Steak and Potato Skillet Delight

To make Raspberry Lemonade Cupcakes, you will need: - 1 ½ cups all-purpose flour - 1 teaspoon baking powder - ½ teaspoon baking soda - ¼ teaspoon salt - ½ cup unsalted butter, softened - 1 cup granulated sugar - 2 large eggs, at room temperature - Zest of 1 lemon (about 1 tablespoon) - 1 teaspoon pure vanilla extract - ½ cup buttermilk, at room temperature - ½ cup fresh raspberries, plus extra for garnish - 1 tablespoon freshly squeezed lemon juice If you don’t have some ingredients, here are a few swaps you can use: - Use coconut oil instead of butter for a dairy-free option. - Substitute Greek yogurt for buttermilk to add extra creaminess. - If you lack fresh raspberries, you can try using blueberries or strawberries. - Lemon zest can be replaced with lime zest if you want a twist. Using fresh ingredients is key for flavor. Fresh raspberries taste sweeter and brighter. They add a juicy burst to each bite. Fresh lemons provide a zesty kick, enhancing the cupcake's flavor. Always choose ripe fruits for the best results. This ensures your cupcakes are vibrant and tasty. Fresh ingredients also contribute to better texture. You will notice the difference in every delightful bite. {{ingredient_image_2}} First, you need to preheat your oven to 350°F (175°C). This step is key for even baking. Next, grab a cupcake pan and line it with paper liners. This keeps the cupcakes from sticking and makes for easy serving. In a medium bowl, whisk together the all-purpose flour, baking powder, baking soda, and salt. Make sure they mix well. This mix gives the cupcakes their structure. After mixing, set this bowl aside for later. Take a large mixing bowl. Use an electric mixer on medium speed to cream ½ cup of softened unsalted butter and 1 cup of granulated sugar together. Mix for about 3-4 minutes. You want the mixture to be light and fluffy. This is where the magic begins! Now, add 2 large eggs to the butter-sugar blend. Add one egg at a time. Make sure each is fully mixed in before adding the next. Next, gently mix in the lemon zest and 1 teaspoon of pure vanilla extract. This adds a wonderful flavor. Gradually add the dry mixture into the wet mix. Alternate adding dry ingredients with ½ cup of buttermilk and 1 tablespoon of lemon juice. Start and end with the flour mix. Mix just until combined. Be careful not to overmix or the cupcakes may turn out dense. Now it's time to fold in the star of the show: the raspberries. Use a spatula to gently fold in ½ cup of fresh raspberries. Be careful not to crush them too much. You want them to keep their shape for bursts of flavor in every bite. Spoon the batter into the prepared liners, filling each about two-thirds full. This allows room for the cupcakes to rise. Bake them in the oven for 18-20 minutes. To check if they are done, insert a toothpick into the center of one. If it comes out clean, they are ready. Once baked, let them cool in the pan for about 5 minutes. Then, transfer them to a wire rack to cool completely. Enjoy the sweet smell wafting through your kitchen! To make light and fluffy cupcakes, start with room temperature butter and eggs. Cream the butter and sugar for 3-4 minutes until it's airy. This step adds air to your batter, making it rise nicely. Always mix gently when adding dry ingredients to keep the batter light. Overmixing can ruin your cupcakes. Mix the batter just until combined. If you see dry spots, that’s okay. This helps keep your cupcakes soft. Remember, a few lumps are fine! When you add raspberries, be gentle. Use a spatula to fold them in. This keeps the berries whole and juicy. Avoid smashing them, as this can turn your batter pink. You want to see lovely bits of raspberry in each bite. Let your cupcakes cool completely before frosting. If you frost them too soon, the frosting will melt. Place them on a wire rack for even cooling. This way, your frosting stays fluffy and beautiful. Pro Tips Use Room Temperature Ingredients: Ensure that your butter, eggs, and buttermilk are at room temperature before mixing. This helps create a smoother batter and contributes to a lighter cupcake texture. Be Gentle with the Raspberries: When folding in the raspberries, use a light hand to avoid crushing them. This preserves their shape and adds beautiful bursts of color and flavor to each cupcake. Check for Doneness: To ensure your cupcakes are perfectly baked, insert a toothpick into the center. If it comes out clean or with a few crumbs, they are done; if it comes out wet, give them a few more minutes in the oven. Cool Completely Before Frosting: Let the cupcakes cool completely on a wire rack before frosting them. This prevents the frosting from melting and helps maintain the beautiful presentation. {{image_4}} When it comes to frosting, you have fun options. You can use lemon buttercream for a bright, zesty taste. Cream cheese frosting also works well, adding a rich, tangy flavor. Just mix cream cheese with butter, sugar, and lemon juice. Spread it on top for a creamy finish. You can even add a sprinkle of lemon zest for more zing. Raspberries shine in these cupcakes, but feel free to swap them out. Strawberries bring a sweet touch. Chop them into small pieces and fold them in gently. Blueberries are another great choice. They add a burst of color and flavor. You can even mix fruits for a fun surprise in every bite! Want to make these cupcakes gluten-free? It’s easy! Replace all-purpose flour with a gluten-free blend. Make sure it has xanthan gum to help with texture. Check your baking powder, too; some brands are gluten-free. This way, everyone can enjoy these tasty treats without worry. Store your Raspberry Lemonade Cupcakes in an airtight container. This keeps them fresh. Place the container at room temperature for up to three days. If you want them to last longer, refrigerate them. Just let them come back to room temperature before serving. To freeze your cupcakes, wait until they cool completely. Wrap each cupcake in plastic wrap. Then, place them in a freezer-safe bag or container. They will stay fresh for up to three months. When you’re ready to enjoy them, take out what you need. Let them thaw in the fridge overnight or at room temperature for a few hours. These cupcakes taste best within three days if stored at room temperature. In the fridge, they can last up to a week. If frozen, they remain good for three months. Always check for any signs of spoilage before eating! Yes, you can use frozen raspberries. Just thaw them first. Drain any excess juice to avoid soggy cupcakes. Gently fold them into the batter, treating them carefully. This way, they won't break down too much. To prevent sticking, use high-quality paper liners. Lightly spray them with cooking oil before adding the batter. Allow the cupcakes to cool in the pan for a few minutes before transferring them to a wire rack. This helps them release easily. If you don't have buttermilk, you can make a quick substitute. Mix ½ cup of milk with 1 tablespoon of lemon juice or vinegar. Let it sit for about 5 minutes. This will mimic the acidity of buttermilk and keep your cupcakes moist. To add more tartness, increase the lemon juice to 2 tablespoons. You can also add more lemon zest for an extra kick. Consider using a tart raspberry jam as a filling. This will enhance the tangy flavor in each bite. Yes, you can make a cake. Simply pour the batter into a greased cake pan. Bake at 350°F (175°C) for 25-30 minutes. Check with a toothpick to ensure it’s done. Frost the cake with the same lemon buttercream for a lovely finish. In this post, we covered the key ingredients and steps for making Raspberry Lemonade Cupcakes. You learned about ingredient swaps and the need for fresh items. We outlined easy steps, from mixing to baking. I shared tips for fluffiness and frosting options. You also found storage methods for lasting enjoyment. Remember, great cupcakes start with good ingredients. Enjoy baking and have fun with flavors!

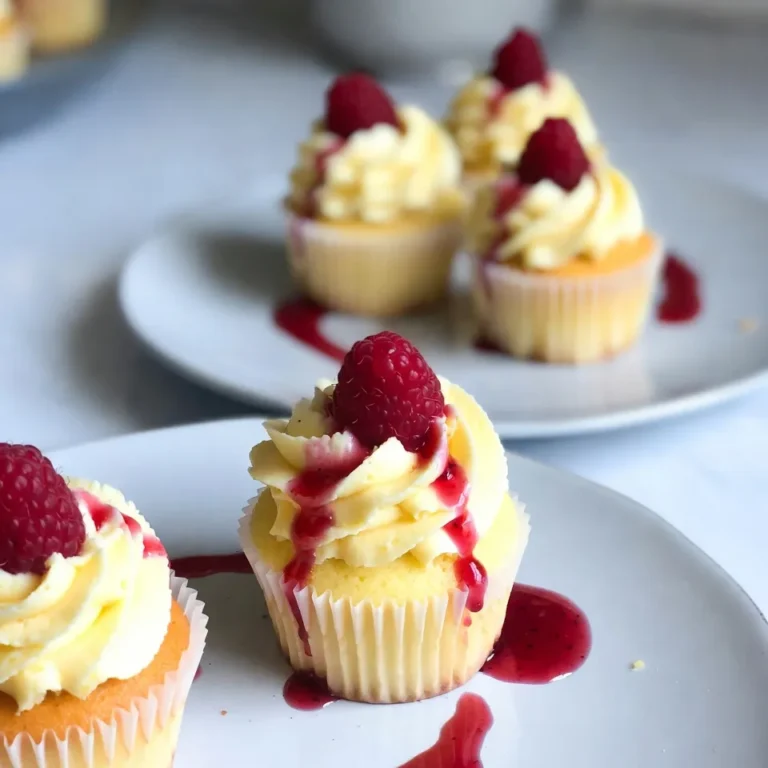
Raspberry Lemonade Cupcakes Delightful Summer Treat

- 1 cup unsalted butter - 1 1/2 cups packed light or dark brown sugar - 2 large eggs, at room temperature - 2 teaspoons pure vanilla extract - 2 cups all-purpose flour - 1/2 teaspoon baking powder - 1/2 teaspoon fine sea salt - 1 cup chocolate chunks (dark or semi-sweet) - 1/2 cup chopped walnuts or pecans (optional) - Chopped walnuts or pecans add a nice crunch. You can leave them out if you want. - You can also try adding a pinch of cinnamon for a warm flavor. - If you don't have unsalted butter, you can use salted butter. Just skip adding extra salt. - Brown sugar can be replaced with white sugar, but the taste will change. - For a gluten-free option, use a gluten-free flour blend. - Eggs can be replaced with flax eggs for a vegan version. Use 1 tablespoon of ground flaxseed mixed with 2.5 tablespoons of water for each egg. Start with a medium saucepan. Place 1 cup of unsalted butter in it. Heat it over medium heat. As the butter melts, stir constantly. Watch for the butter to foam. This shows that it is cooking properly. After a few minutes, the butter will change color. You want a deep golden brown. This process takes about 5-7 minutes. You will smell a nutty aroma, which means you are close. Once done, remove the pan from the heat. Let the butter cool for about 5 minutes. This cooling time is important for the next steps. In a large mixing bowl, pour in the warm brown butter. Add 1 1/2 cups of packed brown sugar to the bowl. Whisk them together until smooth. The mixture should feel creamy and cohesive. Now, crack 2 large eggs into the bowl. Add them one at a time. Whisk vigorously after each egg. This helps to incorporate air into the mixture. Finally, stir in 2 teaspoons of pure vanilla extract. This will add a lovely depth of flavor to your blondies. In a separate bowl, mix your dry ingredients. Whisk together 2 cups of all-purpose flour, 1/2 teaspoon of baking powder, and 1/2 teaspoon of fine sea salt. Make sure they are well blended. Slowly add this dry mixture to your wet ingredients. Use a spatula to fold them together gently. Be careful not to overmix. You want a light, fluffy batter. If you are using nuts, now is the time to add 1/2 cup of chopped walnuts or pecans. Finally, fold in 1 cup of chocolate chunks. This makes for a delightful texture in every bite. To make the best blondies, start with brown butter. It adds a rich flavor. Heat the butter slowly until it turns golden brown. This step is key to depth in taste. Use room temperature eggs to ensure a smooth batter. They mix in better and help your blondies rise nicely. Overmixing is a common issue. When you combine the dry and wet mixes, stop as soon as they blend. This keeps your blondies soft and chewy. Also, don’t skip the cooling step after baking. If you cut them too soon, they will fall apart. Patience is your friend! Every oven is different. Start checking your blondies at 25 minutes. You want golden edges and a few moist crumbs on a toothpick. If they look too wet, give them a few more minutes. Just be careful not to overbake, or they will dry out. {{image_4}} You can change the taste of your blondies easily. Try adding spices like cinnamon or nutmeg. They add warmth and depth. Want a fruity twist? Toss in some dried cranberries or cherries. For a fun crunch, mix in crushed pretzels or potato chips. These add a salty-sweet contrast that is hard to beat. If you love peanut butter, swirl in some creamy peanut butter before baking. Each of these options brings unique flavors that make your blondies one of a kind. If you need a gluten-free option, use a gluten-free flour blend. This swap keeps the blondies soft and chewy. For a dairy-free treat, replace the butter with coconut oil or vegan butter. You can also use flax eggs instead of regular eggs for a vegan version. Just mix 1 tablespoon of ground flaxseed with 2.5 tablespoons of water. Let it sit for a few minutes until it thickens. This simple change makes the recipe friendly for everyone. Serve your blondies warm for the best taste. Dust them with powdered sugar for a pretty touch. Pair them with vanilla ice cream for a classic dessert. A drizzle of caramel or chocolate sauce makes them even more special. For a fun twist, serve them with fresh fruit, like berries or banana slices. This adds a fresh, light contrast. You can also enjoy blondies with a cup of coffee or tea for a cozy snack. To keep your brown butter chocolate chunk blondies fresh, store them in an airtight container. This will help maintain their soft texture and rich flavor. Place a piece of parchment paper between layers if you stack them. Keep the container at room temperature for up to three days. If you want them to last longer, consider refrigerating them for up to a week. Just remember to let them come to room temperature before enjoying. Freezing is a great option if you want to save some blondies for later. First, let them cool completely. Then, slice them into squares. Wrap each piece in plastic wrap tightly. After wrapping, place the pieces in a freezer-safe bag or container. They can last in the freezer for up to three months. When you’re ready to eat them, simply thaw them in the fridge overnight or at room temperature for a few hours. To enjoy warm blondies again, preheat your oven to 350°F (175°C). Place the blondies on a baking sheet. Heat them for about 10 minutes. You can also use a microwave if you're in a hurry. Heat one blondie for about 15-20 seconds. This will make them warm and gooey again, just like fresh out of the oven! Yes, you can use salted butter. Just reduce the added salt in the recipe. Salted butter has flavor, but it may make the blondies taste saltier. Unsalted butter gives you more control over the taste. Blondies and brownies share a base but differ in flavor. Brownies have cocoa powder or melted chocolate for that rich chocolate taste. Blondies use brown sugar, giving them a sweet, caramel-like flavor without cocoa. The texture is similar, but blondies are often denser and chewier. Check for a golden edge and a toothpick test. Insert a toothpick into the center; it should come out with a few moist crumbs. If it comes out clean, they may be overbaked. Keep an eye on the time; baking takes about 25 to 30 minutes. In this post, we explored the key ingredients and steps to make blondies. We discussed brown butter, ingredient options, and substitutions. I shared tips to perfect your blondies and how to avoid common mistakes. We looked at tasty variations and proper storage methods. Baking blondies is fun and rewarding. With the right techniques and ingredients, you can create delicious treats that everyone will enjoy. Keep experimenting with flavors and storage to make your blondies even better!

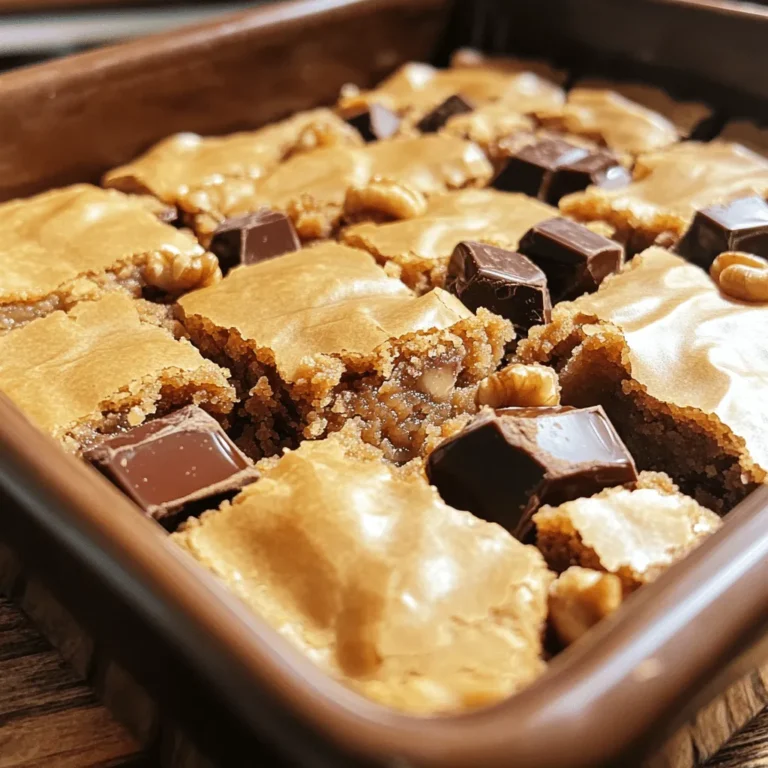
Brown Butter Chocolate Chunk Blondies Delightful Treat

PREV 1 … 11 12 13 … 44 NEXT
yummybiterecipes

explore

DessertsDinnerAppetizersDrinks

Our Policies

  • Cookie Policy
  • Copyright Policy
  • Disclaimer
  • GDPR Policy
  • Terms Of Use
Back to Top
  • About
  • Contact Us
  • Privacy Policy
© 2025 yummybiterecipes