FREE DINNER EBOOK! Get your copy!
  • Cookie Policy
  • GDPR Policy
  • Disclaimer
  • Terms Of Use
  • Visit my other site: Fun Cookie Recipes
yummybiterecipes
  • Home
  • Dinner
  • Desserts
  • Drinks
  • Appetizers
  • Contact
  • About
  • Privacy Policy
  • Home
  • Dinner
  • Desserts
  • Drinks
  • Appetizers
  • Contact
  • About
  • Privacy Policy
  • Cookie Policy
  • GDPR Policy
  • Disclaimer
  • Terms Of Use
Visit my other site: Fun Cookie Recipes

HOME / CATEGORIES /

Latest

- 8 large egg whites - 1 cup fresh spinach, chopped - 1/2 cup cherry tomatoes, halved - 1/4 cup low-fat cottage cheese - 1/4 cup bell pepper, diced - 2 green onions, finely sliced - 1 tablespoon olive oil - 1 teaspoon garlic powder - Salt and black pepper to taste - Fresh herbs for garnish (optional) When I make a protein egg white scramble, I love how simple it is. The first step is gathering the ingredients. You need eight large egg whites. These are low in fat and full of protein. Next, I add one cup of fresh spinach. It gives a nice color and boosts nutrients. I also use half a cup of cherry tomatoes. Their sweetness enhances the flavor. For creaminess, I include a quarter cup of low-fat cottage cheese. It melts beautifully and adds richness. I like to use a quarter cup of bell pepper, diced. Any color works, and they add crunch. Two green onions, finely sliced, bring a fresh taste. To cook everything, I use one tablespoon of olive oil. It helps sauté the veggies nicely. One teaspoon of garlic powder adds flavor without the fuss of fresh garlic. Finally, don't forget salt and black pepper to taste. You can sprinkle fresh herbs on top for a lovely finish. This mix of ingredients makes a fantastic and healthy meal. Each item plays a role in taste and nutrition. You can easily adjust the recipe based on what you have at home. Enjoy cooking! To start, heat the olive oil in a non-stick skillet over medium heat. Let it warm for about one minute. You want it hot but not smoking. Next, add the diced bell peppers to the skillet. Sauté them for about 2-3 minutes. Stir occasionally until they soften and smell great. Now, it's time to add more color and flavor. Toss in the chopped spinach and halved cherry tomatoes. Cook this mix for another 2 minutes. Stir gently until the spinach wilts and the tomatoes get soft. The vibrant colors make it look appetizing! In a medium bowl, grab your egg whites. Add garlic powder, salt, and black pepper. Whisk everything together until it looks frothy and well-mixed. This step adds air, making the eggs light and fluffy. Carefully pour the whisked egg whites over the sautéed vegetables in the skillet. Allow them to cook undisturbed for about 2-3 minutes. This helps the edges set and creates a nice texture. When you see the edges firm up, it’s time for the next step! Using a spatula, gently stir the mixture. This encourages the uncooked egg whites to flow towards the edges. When the eggs are mostly cooked but still soft, add the cottage cheese and sliced green onions. Stir gently to mix everything, cooking for another 1-2 minutes until warmed. Serve in deep bowls. For a great look, sprinkle fresh herbs on top just before serving. Enjoy your colorful, healthy meal! - Using fresh herbs and spices: Fresh herbs like parsley or chives add a bright touch. They make your dish pop with flavor. You can also use spices like paprika or cumin. Just a pinch can change the whole dish! - Pairing suggestions with sides: Serve your scramble with whole-grain toast or a fresh salad. These sides bring in more texture and taste. Try adding avocado on the side for healthy fats. - Achieving the perfect scramble consistency: Stir gently while cooking to keep the eggs fluffy. If you over-stir, the eggs may become dry. You want a soft and creamy texture, not rubbery. - Importance of non-stick skillet: A non-stick skillet helps prevent sticking. This means easy cooking and cleaning. It also allows for even cooking, so your eggs can set just right. - Nutritional advantages of egg whites: Egg whites are low in calories and high in protein. This makes them great for muscle building without extra fat. They also provide essential amino acids your body needs. - How this dish fits into a balanced diet: Protein helps keep you full longer. This dish can be part of a healthy breakfast or lunch. Add veggies for fiber, and you have a well-rounded meal! {{image_4}} You can change the veggies based on the season. In spring, use asparagus or zucchini. In summer, try corn or bell peppers for sweetness. Fall is great for mushrooms or kale. Winter brings hearty greens like collards or Swiss chard. Sneaking in more greens is easy. You can add kale, arugula, or even broccoli. These greens boost nutrition and add color. You get extra vitamins without losing taste. To make your meal even better, add lean meats. Turkey or chicken work well. They mix nicely with egg whites and veggies. You get more protein and flavor in each bite. If you prefer plant-based options, try adding black beans or chickpeas. They add fiber and protein. Tofu is another great choice. It absorbs flavors well and makes the dish filling. For a creamy taste, you can use different cheeses. Feta or goat cheese adds a tangy kick. Cheddar gives a classic flavor that many love. If you want dairy-free options, try nutritional yeast. It adds a cheesy flavor without dairy. You can also use almond or cashew cheese. These options keep the dish light and tasty while fitting into various diets. Store your leftover protein egg white scramble in an airtight container. This keeps it fresh and safe to eat. It can stay good in the fridge for up to three days. Always let it cool down before you seal it up. This prevents moisture buildup, which can spoil your dish faster. To reheat your scramble, use a non-stick skillet over low heat. This helps keep the eggs soft and fluffy. Stir gently while warming to avoid overcooking. You can also use the microwave. Heat it in short bursts of 30 seconds, stirring in between. This keeps the flavor and texture just right. Enjoy your delicious scramble again! Yes, you can use whole eggs. Whole eggs add more fat and flavor. They also provide more nutrients, like vitamin D. However, they are higher in calories. If you aim for lower calories, stick with egg whites. Balancing both can give a rich taste without too many calories. For a complete meal, try these sides: - Whole-grain toast - Avocado slices - Fresh fruit, like berries or bananas - A light salad with mixed greens These options add carbs and healthy fats to your meal, making it more filling. To make it vegan, replace egg whites with tofu. Soft tofu works best. Mash it up, and season well. You can also use chickpea flour, mixed with water to form a batter. This adds protein and keeps it plant-based. Don’t forget your favorite veggies! Yes, this recipe is great for meal prep. You can cook it in advance and store it in the fridge for up to three days. Use airtight containers to keep it fresh. Just reheat it in the microwave before serving. You can freeze the egg white scramble. Allow it to cool completely before freezing. Store it in freezer-safe bags or containers. When you're ready to eat, thaw it overnight in the fridge. Reheat it on the stove or microwave until hot. This recipe for a protein-packed egg white scramble is easy to follow and healthy. You learned how to prepare the ingredients, cook them just right, and enhance the flavor. By adding seasonal veggies or proteins, you can make it your own. You also discovered storage tips to keep leftovers fresh and delicious. Remember, this dish offers flexibility and taste, making it great for any meal. Enjoy experimenting with it! Your mealtime just got more exciting and nutritious.

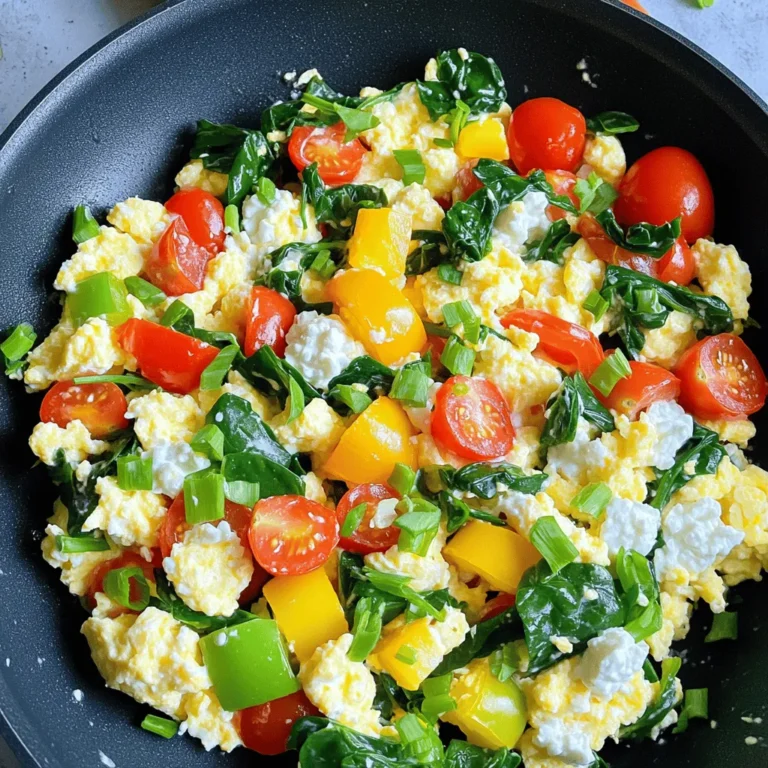
Protein Egg White Scramble Simple and Healthy Meal

- 1 pound boneless, skinless chicken breasts - 1 can (15 oz) black beans, thoroughly drained and rinsed - 1 can (15 oz) sweet corn, adequately drained - 1 can (15 oz) diced tomatoes with green chilies, undrained - 1 medium onion, finely diced - 3 cloves garlic, minced - 1 bell pepper (your choice of color), diced - 4 cups rich chicken broth The main ingredients create a hearty base. The chicken adds protein and richness. Beans provide fiber, while corn gives sweetness. Diced tomatoes bring acidity and color. Onion and garlic add a strong flavor. The bell pepper adds crunch and freshness. Finally, chicken broth ties everything together. - Tortilla chips, for serving - Fresh cilantro, chopped, for garnish - Slices of ripe avocado, for garnish - Shredded cheese (optional), for topping Toppings make your soup special. Tortilla chips add crunch. Fresh cilantro gives a bright taste. Avocado adds creaminess. Cheese brings a savory finish. You can mix and match these toppings for your taste. - 1 tablespoon chili powder - 1 teaspoon ground cumin - 1 teaspoon smoked paprika - Salt and freshly cracked black pepper, to taste - Juice of 1 fresh lime Spices boost the soup's flavor. Chili powder adds warmth. Cumin gives an earthy tone. Smoked paprika adds depth and a hint of smoke. Salt and pepper enhance all the flavors. Finally, lime juice adds a fresh, zesty kick. {{ingredient_image_2}} First, gather your ingredients. You will need: - 1 pound boneless, skinless chicken breasts - 1 can (15 oz) black beans, drained and rinsed - 1 can (15 oz) sweet corn, drained - 1 can (15 oz) diced tomatoes with green chilies, undrained - 1 medium onion, diced - 3 cloves garlic, minced - 1 bell pepper, diced - 4 cups chicken broth - 1 tablespoon chili powder - 1 teaspoon ground cumin - 1 teaspoon smoked paprika - Salt and black pepper, to taste - Juice of 1 lime - Tortilla chips, for serving - Fresh cilantro, for garnish - Avocado slices, for garnish Now, place the chicken breasts at the bottom of your crockpot. This step creates a solid base for the soup. Next, add the diced onion, minced garlic, and bell pepper. These aromatics will add depth to your soup. After adding the aromatics, pour in the black beans and sweet corn. Then, add the diced tomatoes with their juice. This juice adds flavor and moisture. Now, pour in the chicken broth. Then, add chili powder, ground cumin, smoked paprika, salt, and pepper. Stir gently to combine. Be careful not to disturb the chicken too much. Cover the crockpot with the lid. Set it to cook on low for 6-8 hours or on high for 3-4 hours. The chicken should be tender and easy to shred when done. About 30 minutes before serving, remove the chicken from the crockpot. Use two forks to shred the chicken into small pieces. Return the shredded chicken to the soup. Squeeze the fresh lime juice into the soup. Taste and adjust the seasoning if needed. When you serve, ladle the soup into bowls. Top with crunchy tortilla chips, fresh cilantro, and avocado slices. You can also add shredded cheese if you like. Enjoy your hearty and flavorful Crockpot Chicken Tortilla Soup! To boost the taste of your soup, use fresh herbs. Cilantro adds a bright touch. Also, try adding a splash of hot sauce for heat. A teaspoon of lime zest gives a nice zing. For a smoky depth, add a bit more smoked paprika. Lastly, consider using homemade chicken broth for richer flavor. Cooking time can vary based on your crockpot model. If you cook on low, aim for 6 to 8 hours. For a faster option, cook on high for 3 to 4 hours. Always check the chicken. It should shred easily with a fork when done. If your chicken is still tough, give it more time. Serve the soup in colorful bowls for a fun touch. Top each bowl with crispy tortilla chips. This adds great crunch and flavor. Fresh cilantro and avocado slices make wonderful garnishes. Want extra zest? Serve lime wedges on the side. This way, guests can add their preferred amount of lime juice. Pro Tips Use Fresh Ingredients: Opt for fresh lime juice and high-quality chicken broth for a more vibrant flavor in your soup. Customize Your Spice Level: Adjust the amount of chili powder and ground cumin to suit your taste. Add fresh jalapeños for an extra kick! Make Ahead for Convenience: This soup can be made in advance and stored in the fridge for up to 3 days or frozen for up to a month. Garnish Creatively: Experiment with toppings like sour cream, diced red onion, or pickled jalapeños to enhance the presentation and flavor profile. {{image_4}} To make a vegetarian version, swap chicken with hearty vegetables. Use mushrooms, zucchini, or extra beans. Replace chicken broth with vegetable broth for a rich taste. Add more spices like smoked paprika for depth. This soup still tastes great and is full of nutrients. For a faster meal, use an Instant Pot. Start by sautéing the onion, garlic, and bell pepper. Add the chicken and other ingredients. Seal the pot and cook on high for 15 minutes. Release the pressure and shred the chicken. This method saves time and gives you a warm, tasty soup. Feel free to make swaps based on what you like. Instead of black beans, try pinto beans or chickpeas. Use fresh tomatoes if you want a fresher flavor. If you like heat, add jalapeños or hot sauce. Customize your soup to fit your taste and make it your own! Store leftover soup in airtight containers. Let the soup cool to room temp first. Keep it in the fridge for up to three days. If you plan to keep it longer, consider freezing it. To reheat, pour the soup into a pot. Heat it on medium-low. Stir often to avoid sticking. You can also use a microwave. Place in a microwave-safe bowl and heat in short bursts, stirring in between. This keeps the flavor fresh. For freezing, use freezer-safe containers. Leave some space at the top for expansion. Label the containers with the date. The soup can last in the freezer for up to three months. When ready to eat, thaw it in the fridge overnight. Reheat as needed for a warm meal. Yes, you can use frozen chicken breasts. The slow cooking method will thaw and cook them. Just make sure to increase the cooking time by an hour or so. The chicken will still be tender and juicy. If you don't have chicken broth, try vegetable broth or water. You can also use bouillon cubes dissolved in water for a quick fix. This will keep the soup flavorful and rich even without chicken broth. To add more spice, use diced jalapeños or a dash of hot sauce. You can also add extra chili powder or cayenne pepper to the mix. Adjust the spice to your taste for a warming kick. Crockpot chicken tortilla soup is simple and fun to make. We covered the key ingredients, the cooking steps, and tips to boost the flavor. I also shared some tasty variations and storage tips. Remember, you can customize this soup to fit your taste. Experiment with toppings and spices for even more enjoyment. Embrace the process, and you’ll have a flavorful meal ready to share. Enjoy every bowl!

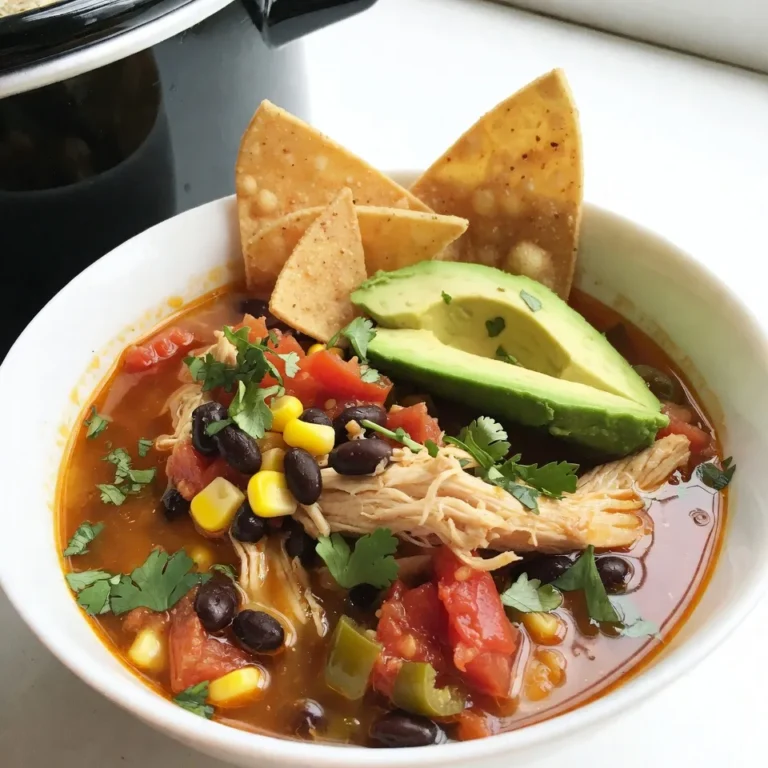
Crockpot Chicken Tortilla Soup Hearty and Flavorful Dish

To make Crispy Sesame Chicken, gather these ingredients: - 1 pound boneless, skinless chicken breasts, cut into bite-sized pieces - 1 cup all-purpose flour - 2 large eggs, beaten - 1 cup panko breadcrumbs - 1 teaspoon garlic powder - 1 teaspoon onion powder - 1 teaspoon salt - ½ teaspoon black pepper - ½ teaspoon cayenne pepper (optional for a hint of heat) - 2 tablespoons sesame seeds - ½ cup honey - 3 tablespoons soy sauce - 1 tablespoon rice vinegar - 2 green onions, sliced (for garnish) - Vegetable oil (for frying) You will need the following tools: - A large skillet for frying - Three shallow bowls for dredging - A medium mixing bowl for the coating - A small saucepan for the glaze - A paper towel-lined plate for draining Serve your Crispy Sesame Chicken on a large white platter. Drizzle some extra honey soy glaze on top and sprinkle with sesame seeds. This adds a nice crunch and makes it look great. Pair it with steamed broccoli or fluffy rice for a full meal. Enjoy your delicious dish! {{ingredient_image_2}} To start, grab a medium bowl. In it, mix 1 cup of all-purpose flour, 1 teaspoon of garlic powder, 1 teaspoon of onion powder, 1 teaspoon of salt, ½ teaspoon of black pepper, and ½ teaspoon of cayenne pepper if you want some heat. Stir these dry ingredients until they blend well. This coating gives the chicken its tasty crunch. Now, set up three bowls. In the first, pour the flour mix. In the second, add 2 large beaten eggs. In the third, place 1 cup of panko breadcrumbs. Take a piece of chicken, dredge it in the flour mix, and shake off any extra. Then, dip it into the eggs, letting the excess drip off. Lastly, coat it in the panko breadcrumbs. Press gently to help the crumbs stick well. Next, heat about ½ inch of vegetable oil in a large skillet over medium-high heat. When the oil shimmers, add the breaded chicken pieces in batches. Don’t overcrowd the pan. Fry each piece for 4-5 minutes on each side. Look for a golden brown color and check that the chicken reaches an internal temperature of 165°F. Once done, move the chicken to a paper towel-lined plate to soak up excess oil. In a small saucepan, mix ½ cup of honey, 3 tablespoons of soy sauce, and 1 tablespoon of rice vinegar over medium heat. Stir until the mixture warms and smooths out. After that, add 2 tablespoons of sesame seeds and let it cook for 1-2 minutes. This glaze adds a sweet and savory touch to your chicken. Finally, take a large mixing bowl and toss the crispy chicken pieces in the honey soy glaze until they are well coated. You can save some glaze for drizzling later. Plate the glazed chicken on a serving platter and garnish it with sliced green onions. This adds a nice, fresh touch. Enjoy your crispy sesame chicken! To get that perfect crunch, follow these tips: - Use Panko Breadcrumbs: They are lighter and crispier than regular breadcrumbs. - Heat the Oil: Ensure the oil is hot before adding chicken. This helps to seal in moisture. - Don’t Overcrowd the Pan: Fry in batches. Crowding can lower the oil's temperature and make the chicken soggy. - Press the Breading: After coating the chicken, gently press the breadcrumbs into the meat. This helps them stick better and stay crispy. You can swap some ingredients for different flavors or dietary needs: - Chicken: Use chicken thighs for more flavor and juiciness. - Flour: Almond flour works well for a gluten-free option. - Honey: Maple syrup can replace honey for a different sweet taste. - Soy Sauce: Tamari is a great gluten-free alternative to soy sauce. - Vegetable Oil: Use canola or peanut oil for frying as well. Here are some pitfalls to watch out for: - Skipping the Drying Step: Pat dry the chicken before breading. This helps the coating stick. - Not Heating Oil Enough: If the oil isn’t hot, the chicken will absorb too much oil and become greasy. - Frying Too Long: Keep an eye on the time. Overcooking will dry out the chicken. - Skipping the Glaze: Don’t skip the glaze! It adds flavor and a shiny finish. Pro Tips Tip Title: Use a Thermometer: To ensure your chicken is perfectly cooked, use a meat thermometer to check that the internal temperature reaches 165°F before serving. Tip Title: Double-Dip for Extra Crispiness: For an even crunchier texture, consider double-dipping the chicken pieces in the flour mixture and breadcrumbs. Tip Title: Let it Rest: After frying, let the chicken rest for a few minutes on a paper towel-lined plate to allow excess oil to drain and maintain its crispiness. Tip Title: Customize Your Glaze: Feel free to adjust the sweetness of the glaze by adding more or less honey, or even incorporating a splash of chili sauce for a spicy kick. {{image_4}} To make a spicy sesame chicken, add heat to your dish. Simply mix in cayenne pepper or red pepper flakes into the flour coating. This gives each bite a nice kick. You can also add some Sriracha or chili oil to the honey glaze for extra flavor. Adjust the spice level to fit your taste. Serve it with a cooling dipping sauce, like yogurt or sour cream, to balance the spice. Want a healthier twist? You can bake the chicken instead of frying it. After coating the chicken with flour, eggs, and panko, place it on a baking sheet lined with parchment paper. Spray a bit of oil over the top to help it crisp up. Bake at 400°F for about 20-25 minutes. This method reduces oil and calories while keeping the chicken crunchy. Pair it with a fresh salad for a light meal. If you prefer a meat-free meal, try using tofu or tempeh instead of chicken. Press the tofu to remove moisture, then cut it into bite-sized pieces. Follow the same coating and cooking steps. For tempeh, steam it first for better texture before coating. You can also use cauliflower florets for a fun veggie option. The glaze will enhance the flavor, making it a tasty dish for everyone. To keep your leftover crispy sesame chicken fresh, allow it to cool first. Place it in an airtight container. Store it in the fridge. It will stay good for up to three days. If you want to enjoy it later, freezing is a great option. When you're ready to eat your leftovers, reheat them in the oven. Preheat your oven to 350°F (175°C). Place the chicken on a baking sheet. Heat for about 10-15 minutes, until it's hot and crispy again. You can also use a microwave, but it may lose some crispiness. If you decide to freeze your chicken, make sure it’s cold first. Wrap individual pieces in plastic wrap, then place them in a freezer bag. This helps save space and keeps them fresh. Use them within three months for the best taste. To cook, thaw in the fridge overnight before reheating. You can serve Crispy Sesame Chicken with many tasty sides. Here are my top picks: - Steamed broccoli - Fluffy white rice - Fried rice - Stir-fried vegetables - A fresh garden salad These sides balance the chicken well and add color to your plate. Yes, you can make this recipe gluten-free. Use gluten-free flour and gluten-free panko breadcrumbs. Check the soy sauce label for gluten-free options. These swaps keep the dish crispy and tasty. To check if the chicken is done, use a meat thermometer. The internal temperature should reach 165°F. The chicken should also look golden brown. If it is still pink inside, cook it a bit longer. Absolutely! Chicken thighs can be a great option. They stay juicy and tender. Just cut them into bite-sized pieces like the breasts. Follow the same cooking steps, and you will enjoy a delicious meal. This blog post covered the key points for making Crispy Sesame Chicken. We discussed the necessary ingredients, tools, and serving ideas. I shared a clear step-by-step method to create a tasty dish. Tips on crispiness and ingredient swaps can help improve your cooking. We also explored various options for different diets. Lastly, proper storage and reheating will keep your meal fresh. Experiment with these ideas, and enjoy making this dish your own!

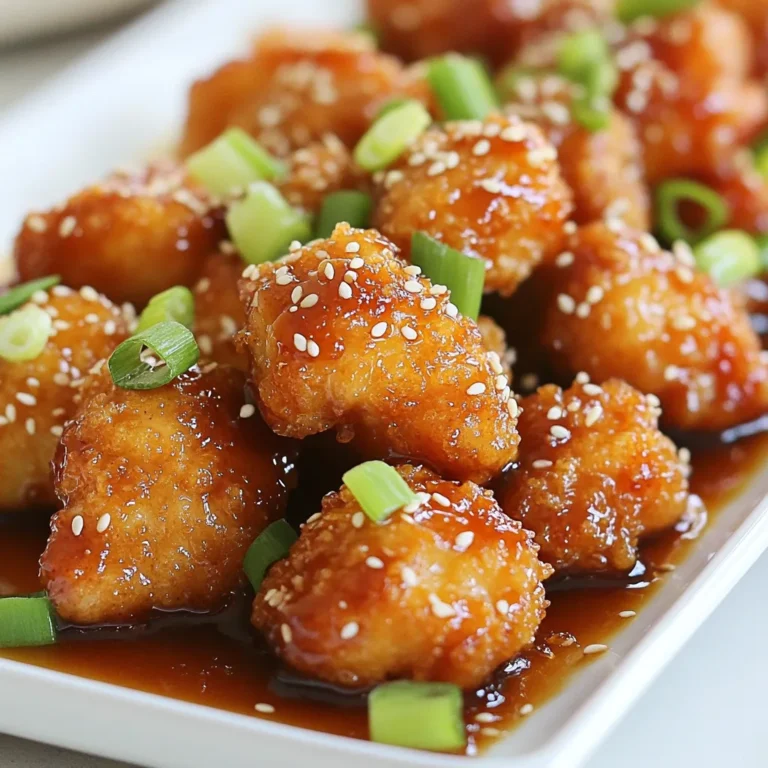
Crispy Sesame Chicken Simple and Tasty Recipe

For Lemon Poppy Seed Muffins, gather these fresh ingredients: - 1 ½ cups all-purpose flour - 1 tablespoon poppy seeds - 1 teaspoon baking powder - ½ teaspoon baking soda - ½ teaspoon salt - ½ cup unsalted butter, softened to room temperature - 1 cup granulated sugar - 2 large eggs, at room temperature - Zest from 2 medium lemons - ¼ cup freshly squeezed lemon juice - ½ cup buttermilk, at room temperature - 1 teaspoon pure vanilla extract If you need alternatives, here are some great options: - Use whole wheat flour for a nutty flavor. - Swap poppy seeds for chia seeds if you prefer. - Greek yogurt can replace buttermilk for creaminess. - Any granulated sugar works, but coconut sugar adds a nice taste. Using fresh ingredients is key to great muffins. Fresh lemons give a bright, zesty flavor. Old flour can make muffins dense and dry. Butter should be at room temperature for easy mixing. Fresh eggs help the muffins rise well, creating a light texture. Always choose the best ingredients for delicious results. Start by preheating your oven to 350°F (175°C). This helps bake the muffins evenly. Next, prepare your muffin tin. You can line it with paper liners or spray it lightly with a non-stick cooking spray. This step keeps the muffins from sticking. Filling the tin with 12 cups is perfect for this recipe. In a medium bowl, sift together 1 ½ cups of flour, 1 tablespoon of poppy seeds, 1 teaspoon of baking powder, ½ teaspoon of baking soda, and ½ teaspoon of salt. This mixing ensures that the dry ingredients blend well. Set this bowl aside. In a large bowl, use an electric mixer to cream together ½ cup of softened butter and 1 cup of granulated sugar. Beat this mixture for about 3-4 minutes until it looks light and fluffy. Add 2 large eggs one at a time, mixing well after each. Then, mix in the zest from 2 lemons and 1 teaspoon of vanilla extract. Gradually add the flour mix and alternate it with ¼ cup of fresh lemon juice and ½ cup of buttermilk. Start and end with the flour mixture. Mix just until combined, avoiding overmixing to keep the muffins soft. Spoon the batter into the prepared muffin cups, filling them about two-thirds full. This gives the muffins room to rise. Bake in the preheated oven for 15-20 minutes. Use a toothpick to check if they are done. Insert it into the center of a muffin; it should come out clean. If it does, the muffins are ready. Let them cool in the tin for about 5 minutes before moving them to a wire rack. Enjoy the lovely aroma as they cool! To get the best texture in your muffins, use room-temperature ingredients. This helps them mix well. Cream the butter and sugar until light and fluffy. This step adds air, making the muffins rise. Be gentle when mixing the dry and wet ingredients. Overmixing can make them tough. One common mistake is not measuring flour correctly. Use a spoon to scoop it into a measuring cup, then level it off. Do not pack it down. Another mistake is skipping the zest. Lemon zest adds bright flavor. Also, avoid opening the oven door too early. This can cause the muffins to sink. You can boost the flavor of your muffins easily. Try adding blueberries for a fruity twist. You can also mix in some chopped nuts for crunch. For a unique taste, consider adding a splash of almond extract. Each of these additions can make your muffins even more delightful. {{image_4}} You can easily make gluten-free lemon poppy seed muffins. Replace all-purpose flour with a gluten-free blend. Look for one that includes xanthan gum. This helps the muffins rise and stay fluffy. Use the same amount of the gluten-free flour as the recipe calls for. This way, you keep the same texture and taste. You can mix it up with other flavors. Add blueberries for a fruity twist. Just fold in about one cup of fresh or frozen blueberries into the batter before baking. Another option is to make a lemon poppy seed loaf instead of muffins. Use a loaf pan and bake for about 50-60 minutes. The taste remains bright and fresh with each bite. Berries are a great way to change things up. Try adding raspberries or strawberries in the spring and summer. In fall, consider incorporating spices like cinnamon or nutmeg. A pinch can really warm the flavors. For winter, add a touch of orange zest for a festive flair. Each season brings new flavors and fun to your muffins! To keep your lemon poppy seed muffins fresh, store them in an airtight container. A good option is to use a zip-top bag or a plastic container with a lid. This method helps keep the muffins soft and moist. Place a paper towel in the container to absorb any excess moisture. This also helps prevent sogginess. If you want to save some muffins for later, freezing is a great choice. First, let the muffins cool completely. Wrap each muffin tightly in plastic wrap. Place the wrapped muffins in a freezer-safe bag or container. Label the bag with the date to keep track. When you are ready to enjoy a muffin, take it out of the freezer. You can thaw it overnight in the fridge. For a warm muffin, heat it in the microwave for about 20-30 seconds. Lemon poppy seed muffins stay fresh at room temperature for about 2-3 days. If you store them in the fridge, they can last up to a week. However, freezing them will give you the longest shelf life—up to three months. Always check for any signs of spoilage before eating. Enjoy these tasty treats while they are still fresh! Yes, you can make these muffins ahead of time. I often bake them the night before. Just cool them completely, then store them in an airtight container. They will stay fresh for a few days. If you want to keep them longer, you can freeze them. Wrap each muffin in plastic wrap and place them in a freezer bag. They will taste great even after a month. When ready to eat, just thaw and warm them up in the oven. The best way to serve lemon poppy seed muffins is warm. I suggest lightly dusting them with powdered sugar. You can also add a thin slice of lemon on top for flair. This makes them look inviting and adds a fresh touch. Pair them with tea or coffee for a delightful snack. You can serve them as a breakfast treat or an afternoon snack. To make these muffins healthier, you can swap some ingredients. Use whole wheat flour instead of all-purpose flour. This adds fiber and nutrients. You can also reduce the sugar by half, or use honey or maple syrup as a sweetener. For a lighter option, try replacing some butter with unsweetened applesauce. This keeps the muffins moist and adds natural sweetness. Lastly, consider adding nuts or seeds for extra crunch and nutrition. You learned how to make tasty muffins using fresh, quality ingredients. Following the steps from mixing to baking, you can achieve the perfect texture. Remember to avoid common mistakes and feel free to try various flavors. Storage is simple, and you can even freeze leftovers. With these tips and tricks, you will impress friends and family. Enjoy your baking journey and share your delicious muffins with loved ones!

Lemon Poppy Seed Muffins Simple and Flavorful Treat

- 2 cans (15 oz each) chickpeas, rinsed and drained - 1 large onion, finely diced - 3 cloves garlic, minced - 2 medium carrots, peeled and sliced - 1 red bell pepper, diced - 1 zucchini, diced - 1 can (14 oz) diced tomatoes with juice - 3 cups vegetable broth - 2 tablespoons extra-virgin olive oil - 1 tablespoon ground cumin - 1 tablespoon ground coriander - 1 teaspoon ground cinnamon - 1 teaspoon smoked paprika - 1/2 teaspoon turmeric - Salt and freshly cracked pepper to taste - Fresh cilantro, roughly chopped, for garnish - Lemon wedges, for serving You can swap chickpeas for lentils or beans. Use vegetable broth or water if needed. If you don’t have zucchini, try yellow squash or eggplant. For spices, feel free to mix in other favorites like chili powder or ginger. If you need a gluten-free option, ensure your broth is gluten-free. Always choose fresh vegetables. Look for firm carrots and bright bell peppers. Canned chickpeas should have no dents or rust. When picking tomatoes, choose those with a rich red color. Good quality spices make a huge difference. Store them in a cool, dark place to keep them fresh. Start by prepping your veggies. In a large slow cooker, add the finely diced onion, minced garlic, sliced carrots, diced red bell pepper, and diced zucchini. Spread them evenly across the bottom. Next, fold in the rinsed and drained chickpeas. This mix adds protein and texture. After that, pour in the diced tomatoes with juice and the vegetable broth. This creates a rich base for your stew. In a separate bowl, whisk together the extra-virgin olive oil and spices: ground cumin, ground coriander, ground cinnamon, smoked paprika, and turmeric. Add a pinch of salt and pepper to this mix. Drizzle it over the stew ingredients. Use a wooden spoon to stir everything together. Make sure all the ingredients are coated in those aromatic spices. Cover the slow cooker with its lid. Set it to cook on low for 6-7 hours or on high for 3-4 hours. Cooking on low gives the flavors more time to meld. Cooking on high is quicker but still tasty. Check for doneness by looking for tender vegetables. The stew should also smell fragrant. If the veggies are soft and the stew has a thick consistency, it is ready. Taste it and adjust the seasoning with more salt and pepper if needed. This will help enhance all the flavors. To get the most flavor from your stew, use fresh spices. Ground spices lose their punch over time. Store them in a cool, dark place to keep them fresh. Toasting the spices briefly in olive oil before adding them can also enhance their flavors. Always taste your stew before serving. Adjust the salt and spices to your liking for the best results. If you like heat, add more smoked paprika or a pinch of cayenne pepper. Start with a small amount and taste as you go. For a milder stew, use less spice or even skip the smoked paprika. You can also reduce the amount of cumin and coriander if you prefer a lighter flavor. Remember, it's easier to add spice than to take it away. For a thicker stew, mash some chickpeas with a fork before adding them. This will help create a creamier base. You can also add diced potatoes or sweet potatoes for added bulk. To make it heartier, toss in some cooked quinoa or couscous just before serving. A crunchy topping like toasted almonds can add a nice contrast to the soft stew. {{image_4}} You can easily adjust this stew for different diets. If you're gluten-free, use gluten-free broth. For a protein boost, add quinoa or lentils. If you're vegan, this recipe is already perfect! Just skip any dairy toppings. You can also swap chickpeas for white beans or black beans for a new twist. If you don’t have a slow cooker, you can make this stew on the stovetop. Start by sautéing the onion and garlic in a pot. Then, add the carrots, bell pepper, and zucchini. After a few minutes, stir in the chickpeas, tomatoes, and broth. Bring it to a boil, then lower the heat. Cover and simmer for about 30 minutes until the veggies are soft. You can change this stew with the seasons! In the spring, add fresh peas or asparagus. In the summer, try zucchini or fresh tomatoes. In the fall, butternut squash or sweet potatoes work great. Winter calls for hearty greens like kale or Swiss chard. Use what you find at the market to keep it fresh and fun! Store leftover stew in an airtight container. Let it cool to room temperature first. This helps keep it fresh. Place it in the fridge if you plan to eat it within a few days. For longer storage, freezing is the best option. When reheating, use a pot over low heat. Stir often to heat evenly. Add a splash of vegetable broth if it seems thick. This keeps the stew creamy and flavorful. You can also microwave it in a bowl. Cover it with a lid or microwave-safe wrap to avoid spills. For freezing, use freezer-safe containers. Leave some space at the top, as liquids expand. Label each container with the date. The stew can last up to three months in the freezer. To use, thaw in the fridge overnight, then reheat as mentioned above. Yes, this stew is already vegan. Chickpeas, veggies, and spices create a rich dish. Use vegetable broth, which is perfect for plant-based meals. This stew is hearty and filling, making it a great option for everyone. If your stew seems watery, there are easy fixes. You can mash some chickpeas with a fork. This helps thicken the broth. Another option is to add a tablespoon of cornstarch mixed with water. Stir this mixture in, and let it cook for a few more minutes. This stew pairs well with several sides. Serve it with warm, crusty bread or fluffy couscous. You can also add a simple salad for a fresh crunch. A dollop of yogurt on top adds creaminess, while lemon wedges bring brightness to each bite. This blog covered everything you need for making Slow Cooker Moroccan Chickpea Stew. We discussed the key ingredients and their substitutes, shared easy steps for cooking, and gave tips to boost flavor. You learned about variations for different diets and how to store leftovers properly. Remember, cooking should be fun and flexible. Feel free to try new things and make this dish your own. Enjoy your cooking adventure!

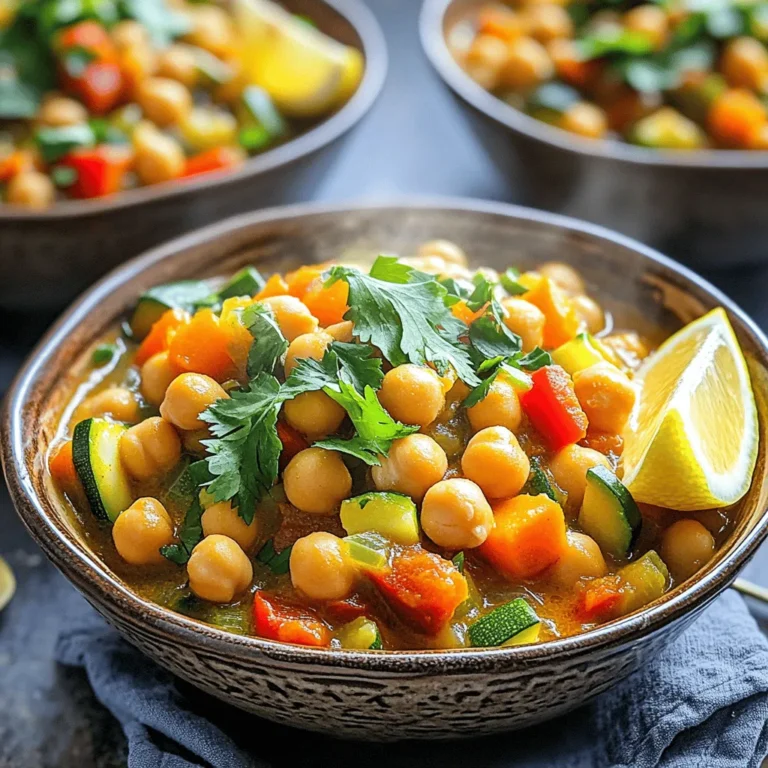
Flavorful Slow Cooker Moroccan Chickpea Stew Recipe

- 1 pound boneless, skinless chicken tenders - 1 cup Panko breadcrumbs - 1/2 cup all-purpose flour - 1 teaspoon garlic powder - 1 teaspoon onion powder - 1 teaspoon smoked paprika - 1 teaspoon salt - 1/2 teaspoon black pepper - 2 large eggs, beaten - 1/2 cup buffalo sauce (e.g., Frank's RedHot) - 1 tablespoon olive oil - Optional: celery sticks and ranch dressing for serving When I make Air Fryer Buffalo Chicken Tenders, I start with fresh chicken. I always choose a pound of boneless, skinless chicken tenders. This cut is tender and cooks evenly. Next, I reach for Panko breadcrumbs. A cup of these gives my tenders that perfect crunch. Regular breadcrumbs can work, but Panko really shines in this recipe. Now, I need some flour. I grab half a cup of all-purpose flour. This will help the spices stick and give a good base for the coating. Seasoning is key. I mix in a teaspoon each of garlic powder, onion powder, and smoked paprika. These add flavor and depth. I also add a teaspoon of salt and a half teaspoon of black pepper. This blend brings out the best in the chicken. For the coating, I beat two large eggs until frothy. This helps bind the breadcrumbs to the chicken. I then grab half a cup of buffalo sauce. I love using Frank's RedHot for its bold taste. Finally, I add a tablespoon of olive oil to help the sauce stick. To serve, I like to include optional celery sticks and ranch dressing. They balance the heat and add a nice crunch. This combination makes for a fun and tasty meal! - Pat chicken tenders dry - Set up dredging stations Start by taking your chicken tenders and pat them dry with paper towels. This step is crucial. Dry chicken helps the coating stick better. Next, create your dredging stations. You need three bowls for this. In the first bowl, mix flour, garlic powder, onion powder, smoked paprika, salt, and black pepper. This mix adds great flavor. In the second bowl, whisk your eggs until they are slightly frothy. This makes a good binding agent. The third bowl will hold your breadcrumbs. I prefer Panko breadcrumbs for extra crunch. - Coat chicken in flour mixture - Dip in beaten eggs - Roll in breadcrumbs Now for the fun part! Take each chicken tender. First, coat it in the flour mixture. Make sure to shake off any extra flour. Next, dip it in the beaten eggs. Let any excess egg drip off. Finally, roll the tender in the breadcrumbs. Press gently to make sure the breadcrumbs stick well. This will give you a nice crispy texture. - Preheat air fryer to 400°F (200°C) - Arrange chicken tenders in the air fryer basket - Cook for 10-12 minutes, flipping halfway Preheat your air fryer to 400°F (200°C) for about five minutes. This step helps the chicken cook evenly and get crispy. Lightly spray the air fryer basket with cooking spray. Place the chicken tenders in a single layer. Make sure not to overcrowd them. Cook the tenders for 10 to 12 minutes. Flip them halfway through to ensure even cooking. They should be golden and fully cooked, reaching an internal temperature of 165°F (75°C). - Use Panko breadcrumbs for extra crispiness. Panko is light and airy, making it perfect for frying. - Ensure the chicken is dry before dredging. Patting it dry helps the coating stick better and gives a nice crunch. - Preheat the air fryer properly. Set it to 400°F (200°C) for about 5 minutes. This helps the chicken cook evenly. - Avoid overcrowding the basket. Leave space around each tender. This allows hot air to circulate, giving you a perfect cook. - Experiment with different buffalo sauce brands. Each brand has its own flavor and heat level. Find your favorite! - Add extra seasoning to the breadcrumb mixture. Garlic powder, onion powder, or even cayenne can boost the taste. {{image_4}} Want to kick up the heat? You can add cayenne pepper or hot sauce to the flour mixture. This small change can give your chicken tenders a fiery twist. Start with 1/4 teaspoon of cayenne for a good kick. Adjust it based on your taste. If you want a crunchier texture, try using crushed cornflakes or tortilla chips instead of breadcrumbs. These options add a fun twist to your tenders. For a gluten-free choice, use gluten-free breadcrumbs. They work just as well and keep your dish tasty. Buffalo sauce is great, but you can mix it up. Serve your tenders with BBQ sauce or honey mustard for a different flavor. These sauces add sweetness and tang, giving you more variety for your meal. Store leftovers in an airtight container. This keeps them fresh and tasty. Consume within 3-4 days for best quality. After that, they may lose flavor and texture. You can freeze cooked chicken tenders for up to 3 months. Just let them cool down first. Once frozen, place them in a freezer bag. To enjoy later, thaw them in the refrigerator before reheating. Reheat in the air fryer for maximum crispiness. This method keeps them crunchy. If you need a quick option, you can use the microwave. However, this may make them lose their crunch. Enjoy your tenders hot and fresh! Yes, you can substitute with a vegan egg replacer or buttermilk. Both work well to help the coating stick to the chicken. Using buttermilk adds a nice tang, too. Check that the internal temperature reaches 165°F (75°C). A meat thermometer is the best tool for this. When the chicken reaches this temperature, it is safe to eat. Yes, but you may need to adjust the cooking time. Frozen chicken tends to need a bit longer to cook. Make sure they are fully cooked through before serving. Pair with celery sticks and ranch dressing. You can also enjoy them in a salad or wrap for a tasty meal. Both options balance the spicy flavor of the tenders nicely. In this post, we explored making Air Fryer Buffalo Chicken Tenders. You learned about the key ingredients, step-by-step instructions, and helpful tips for the best results. Remember to use Panko breadcrumbs for crunch and adjust flavors to your taste. Store leftovers properly or try different sauces for fun. These tenders are easy and delicious. Enjoy your cooking adventure!

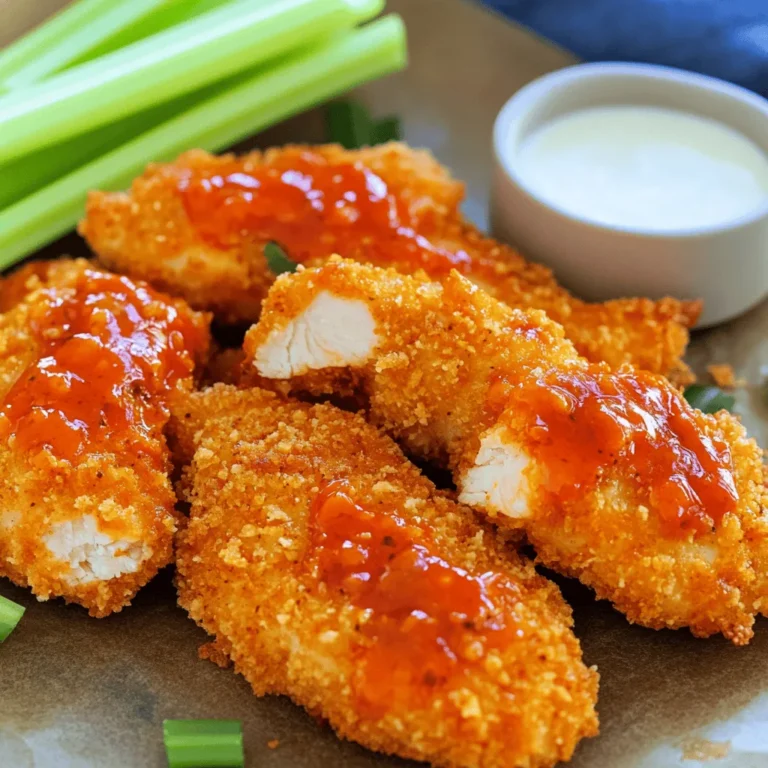
Air Fryer Buffalo Chicken Tenders Crispy and Flavorful

- 1 ½ cups all-purpose flour - ¾ cup unsalted butter, softened - 1 cup granulated sugar - 1 cup fresh blueberries - 1 teaspoon baking powder - ½ teaspoon baking soda - ½ teaspoon salt - 3 large eggs - 1 tablespoon lemon zest - 2 tablespoons fresh lemon juice - 1 teaspoon vanilla extract - ½ cup powdered sugar - 2 tablespoons fresh lemon juice This blueberry lemon pound cake shines with fresh flavors. The main ingredients create a rich and moist base. I use all-purpose flour for the perfect texture. Softened unsalted butter adds creaminess and richness. Granulated sugar gives the cake its sweetness. Fresh blueberries burst with flavor in every bite. The other ingredients are key to balancing the flavors. Baking powder and baking soda help the cake rise. Salt enhances all the flavors without being noticeable. The eggs add moisture and help bind the cake. Lemon zest and juice bring a bright, fresh taste. Vanilla extract rounds out the flavor profile with warmth. For the glaze, I mix powdered sugar with fresh lemon juice. This adds a sweet and tangy finish. Drizzling it on the cooled cake makes it extra special. Each ingredient plays a vital role in making this cake delicious. 1. Preheat your oven to 350°F (175°C). This step is key for even baking. 2. Grease a 9x5 inch loaf pan with butter or non-stick spray. This helps to prevent sticking. 3. In a medium bowl, mix 1 ½ cups all-purpose flour, 1 teaspoon baking powder, ½ teaspoon baking soda, and ½ teaspoon salt. Whisk these dry ingredients until combined. Set this mixture aside for later. 1. In a large bowl, cream together ¾ cup softened unsalted butter and 1 cup granulated sugar. Use an electric mixer on medium speed. Mix for about 3-4 minutes until the mix is light and fluffy. 2. Add 3 large eggs, one at a time, to the butter mix. Make sure to mix well after each egg. Then, add 1 tablespoon of lemon zest, 2 tablespoons of lemon juice, and 1 teaspoon of vanilla extract. Blend until smooth. 1. Slowly mix the reserved dry ingredients into the wet batter. Stir just until it combines. Be careful not to overmix; this keeps the cake soft. 2. Gently fold in 1 cup of fresh blueberries with a spatula. Ensure they are evenly spread but do not crush them. 3. Pour the batter into the greased loaf pan. Use a spatula to smooth the top. 4. Bake for 55-60 minutes. The cake is done when a toothpick comes out clean from the center. If it browns too fast, cover it with aluminum foil for the last 15 minutes. 5. After baking, cool the cake in the pan for 10 minutes. Then, move it to a wire rack to cool completely. To make a soft and moist pound cake, avoid overmixing. Overmixing can make the cake tough. Mix the batter just until you see no dry flour. This helps keep the cake light. When you fold in blueberries, use a spatula or a wooden spoon. Gently fold them into the batter. Be careful not to crush the berries. This keeps the blueberries whole and juicy in your cake. To prevent the top of the cake from browning too fast, use aluminum foil. Place it loosely over the cake during the last 15 minutes of baking. This protects the top while the inside cooks fully. To check if the cake is done, use a clean toothpick. Insert it into the center of the cake. If it comes out clean, your cake is ready. If there is batter on the toothpick, bake a bit longer. Serve slices of your pound cake on a nice plate. Each slice can look even better with a few fresh blueberries on top. Dust with powdered sugar for a sweet touch. This makes your cake look pretty and inviting. {{image_4}} Can I use frozen blueberries instead of fresh? Yes, you can! Frozen blueberries work well when fresh ones are not in season. Just toss them in a bit of flour before adding to the batter. This helps prevent them from sinking. What about other citrus fruits? You can use oranges or limes. They add a fun twist to the cake. Try swapping lemon juice and zest for orange or lime for a new flavor. Can I add herbs? Yes! Adding herbs like thyme brings a unique taste to your cake. Just use a small amount. This adds a fresh and herby note. What about spices? Incorporating spices, such as cinnamon or nutmeg, can enhance the flavor. Just a pinch can make a big difference. It adds warmth and depth to each slice. Are there gluten-free flour alternatives? Yes, you can use almond flour or a gluten-free blend. This allows you to enjoy the cake without gluten. Can I reduce sugar or use natural sweeteners? Definitely! Reducing sugar makes the cake lighter. You can also use honey or maple syrup instead of granulated sugar. Just adjust the amount to match the sweetness you like. To keep your blueberry lemon pound cake fresh, wrap it well. Use plastic wrap or aluminum foil. This keeps moisture in and prevents drying. Place the wrapped cake in an airtight container. Store it at room temperature. Make sure it is cool before wrapping. If you prefer, you can refrigerate it. However, this may change the texture slightly. To freeze the cake, first wrap it tightly in plastic wrap. Then, place it in a freezer-safe bag or container. Label it with the date. You can freeze it for up to three months. When you're ready to eat it, take it out and leave it at room temperature. For the best texture, let it thaw slowly. This helps keep it moist. At room temperature, your pound cake stays fresh for about three days. Look for signs of spoilage. If you see mold or it smells off, do not eat it. If the cake feels dry or hard, it may not taste good. Always check before enjoying a slice. To know if your cake is done, look for a few signs: - The edges pull away from the pan. - The top is golden brown. - The cake springs back when gently pressed. The best way to check is with a toothpick. Insert it into the center of the cake. If it comes out clean, the cake is ready. If not, bake it a bit longer. This test helps ensure your Blueberry Lemon Pound Cake is perfectly baked. Yes! You can use a variety of fruits. Here are some tasty options: - Raspberries - Strawberries - Cherries - Peaches When using different fruits, adjust the baking time. Softer fruits may need less time, while firmer ones may need a bit more. Keep an eye on your cake as it bakes. If your cake sinks, it could be due to several reasons: - Overmixing the batter - Not enough baking time - Opening the oven door too soon To prevent sinking, mix your batter gently. Avoid opening the oven door before 50 minutes of baking. If your cake does sink, you can still enjoy it. Just top it with glaze and fresh fruit for a delicious fix! This blog post covered the key ingredients, steps, and tips for making a delicious blueberry pound cake. I shared how to mix, bake, and store it properly. You learned about tasty variations and how to keep your cake fresh. Baking is fun, and this recipe makes it easy. Remember, great cakes come from good practices. Enjoy making your blueberry pound cake and share it with friends and family. Happy baking!

Blueberry Lemon Pound Cake Delicious and Moist Recipe

- 8 ounces whole grain elbow macaroni - 1 cup low-fat cottage cheese - 1 cup freshly shredded sharp cheddar cheese - 1/2 cup finely grated Parmesan cheese - 2 cups unsweetened almond milk or regular milk - 2 tablespoons unsalted butter - Seasoning options: garlic powder, onion powder - 1/4 cup fresh parsley, finely chopped This dish starts with whole grain elbow macaroni. It gives a hearty base. I love using low-fat cottage cheese for creaminess without too many calories. Sharp cheddar cheese adds that bold flavor we crave. You can't forget about the Parmesan—it's key for that savory kick. If you want a creamier sauce, add almond milk or regular milk. Unsalted butter helps build flavor in the base. Garlic powder and onion powder can really elevate this dish. They add depth and aroma. To finish, chop fresh parsley for a bright touch. It looks nice and adds a fresh taste. Each ingredient plays a role in making this dish special and satisfying. Start by boiling a large pot of salted water. Once the water reaches a rolling boil, add 8 ounces of whole grain elbow macaroni. Cook according to the package directions until the pasta is al dente. This usually takes around 7 to 8 minutes. Drain the macaroni well and set it aside. Make sure it doesn’t stick together. In the same pot, reduce the heat to medium. Add 2 tablespoons of unsalted butter and let it melt completely. Once melted, sprinkle in 2 tablespoons of all-purpose flour. Stir constantly for about 1 minute to create a roux. Be careful not to let it brown. Next, gradually whisk in 2 cups of unsweetened almond milk. Keep stirring until the mixture is smooth and free of lumps. Cook for about 5 to 7 minutes, or until the sauce thickens. Lower the heat even more and add 1 cup of cottage cheese, 1 cup of freshly shredded sharp cheddar cheese, and 1/2 cup of finely grated Parmesan cheese. Stir the mixture until all the cheese melts and the sauce is creamy. Then, season with 1 teaspoon of garlic powder, 1/2 teaspoon of onion powder, salt, and freshly ground black pepper to taste. Mix well until all ingredients are combined. Finally, add the cooked macaroni to the cheese sauce. Stir gently until the pasta is coated in the cheesy goodness. To prevent pasta from sticking, make sure to add enough salt to the boiling water. Salt adds flavor and helps keep the pasta separate. Stir the pasta during the first few minutes of cooking. This keeps it from clumping together. To ensure a smooth cheese sauce, whisk the almond milk in slowly. If you pour it in too fast, you’ll get lumps. Stir constantly as the sauce thickens. This helps blend all the flavors well. For a boost of flavor, try adding herbs like thyme or spices such as paprika. A dash of cayenne pepper can give it a nice kick. These simple additions can lift the dish from good to great. To adjust creaminess, you can mix in more cottage cheese or milk. If you want it thicker, add more cheese. Play around with the amounts until you find your perfect balance. Serving in ramekins makes the dish look fancy and fun. You can add extra cheese on top for a great look. Broil them for a few minutes to create a crispy top. This adds a nice texture contrast to the creamy pasta. {{image_4}} You can switch up the cheeses in this recipe. Try mozzarella for a milder taste. Cream cheese adds a rich texture. You can also use Greek yogurt. It gives a creamy flavor and adds protein. For a gluten-free option, use brown rice pasta or chickpea pasta. These alternatives work well and keep the dish tasty. Always check the package for cooking times. Add fresh veggies to your mac and cheese. Spinach and broccoli work great. They add color and nutrients. Just steam them lightly before mixing in. You can also boost protein. Add shredded chicken or ground turkey. Both options make it more filling. Cook the meat first, then mix it in with the pasta. If you want a different approach, try a slow cooker. Combine all the ingredients and cook on low for about 3 hours. This method makes it easy and hands-off. Another option is oven-baked mac & cheese. Pour the mixture into a baking dish. Top with more cheese and breadcrumbs. Bake at 350°F for 20 minutes. This gives a crunchy top. After making your protein cottage cheese mac & cheese, let it cool. Place it in an airtight container. This helps keep the dish fresh. Store it in the refrigerator. It can last up to four days. To make it last longer, avoid putting hot mac & cheese in the fridge. Let it cool first. This helps prevent moisture buildup and keeps it from getting soggy. You can freeze mac & cheese for longer storage. First, let it cool completely. Then, transfer it to a freezer-safe container. You can also use freezer bags. Remove as much air as possible to prevent freezer burn. When you want to eat it, thaw it in the fridge overnight. Reheat in the oven or microwave. Add a splash of milk to keep it creamy and smooth. How long can you store leftovers? In the fridge, your mac & cheese lasts about four days. If you freeze it, it can last up to three months. Always check for any off smells or changes in texture before eating. Enjoy this delightful dish anytime, knowing it stays fresh for a good while! The best cheese for mac and cheese is sharp cheddar. It gives a bold flavor. You can also use mild cheddar for a softer taste. Gruyère adds a nice nutty twist. A mix of cheeses works well too. Try combining cheddar with mozzarella for extra stretch. Parmesan brings a salty kick when used as a topping. Yes, cottage cheese is a great substitute for traditional cheese. It adds protein and creaminess. Cottage cheese has fewer calories than many other cheeses. It also has calcium and can help with muscle health. Using it makes your mac and cheese lighter and more nutritious. You can use low-fat cottage cheese for a healthier option. To make mac and cheese creamier, use more cheese. A mix of cheeses will enhance creaminess. Adding a splash of cream or extra milk helps too. Stir in some butter for richness. You can also add a little flour to the cheese sauce to thicken it. For an extra creamy texture, blend the cottage cheese before adding it to the sauce. You learned how to make a delicious mac and cheese from scratch. We covered the key ingredients, step-by-step instructions, and tasty variations. Don’t forget the cooking tips for extra creaminess and how to store your dish. Feel free to adjust flavors and add ingredients to match your taste. Enjoy experimenting with different cheeses and toppings. Now you can impress everyone with your creamy dish! Dive in and create your perfect mac and cheese today.

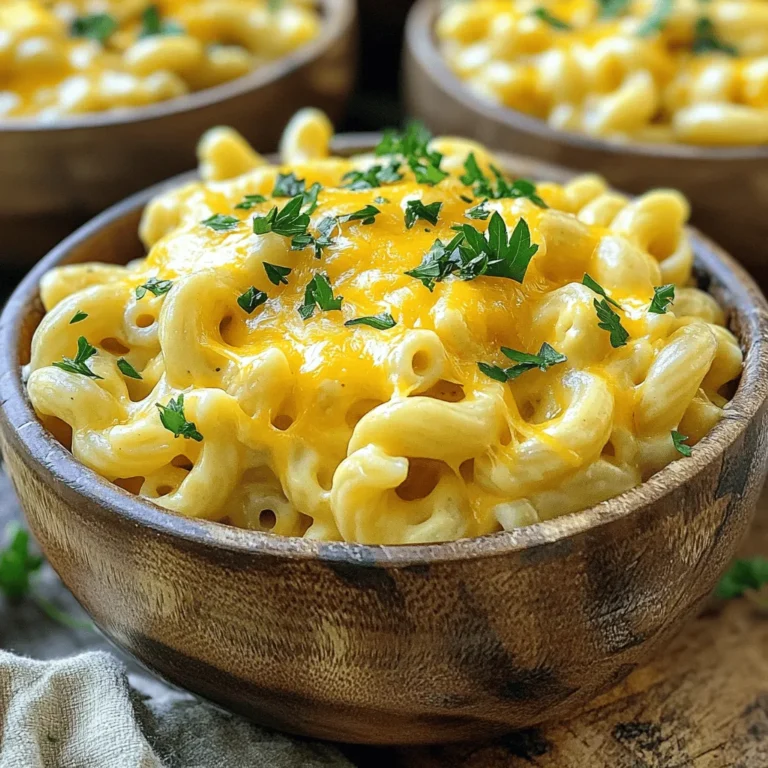
Protein Cottage Cheese Mac & Cheese Delightful Dish

Here’s what you need to make this tasty Pumpkin Chocolate Chip Bread Pudding: - 4 cups of cubed bread - 1 cup of canned pumpkin puree - 2 cups of whole milk - 3 large eggs - 3/4 cup of packed brown sugar - 1 teaspoon of pure vanilla extract - 1 teaspoon of pumpkin pie spice - 1/2 teaspoon of salt - 1 cup of semi-sweet chocolate chips - Optional toppings: whipped cream or vanilla ice cream When picking the bread, I like using day-old brioche or challah. They soak up the custard well. The pumpkin puree should be pure, not a pie filling. Whole milk works great, but you can swap it for almond milk if you want a dairy-free option. Using large eggs at room temperature helps the mix blend nicely. Brown sugar adds a rich sweetness. You can use light or dark, depending on your taste. The vanilla extract gives a warm flavor, while pumpkin pie spice adds that cozy autumn vibe. A little salt balances the sweetness, making every bite perfect. The chocolate chips bring a sweet surprise to each piece. For serving, a dollop of whipped cream or a scoop of vanilla ice cream makes it special. Enjoy this delightful treat! Start by preheating your oven to 350°F (175°C). While it heats, grab a 9x13 inch baking dish. Grease it with butter or non-stick spray. This step helps the pudding come out easily after baking. In a large mixing bowl, whisk together these ingredients: - 1 cup of canned pumpkin puree - 2 cups of whole milk - 3 large eggs - 3/4 cup of packed brown sugar - 1 teaspoon of pure vanilla extract - 1 teaspoon of pumpkin pie spice - 1/2 teaspoon of salt Make sure the mixture is smooth and well combined. This blend will give your bread pudding its rich flavor. Now, take 4 cups of cubed bread. Day-old brioche or challah works best for this dish. Gently fold the bread into the pumpkin mixture. Ensure each piece is coated. Let it sit for about 10-15 minutes. This soaking time makes the bread soft and tasty. Once the bread has soaked, mix in 1 cup of semi-sweet chocolate chips. Stir carefully to keep the bread cubes intact. Transfer the mixture to your greased baking dish. Spread it evenly for uniform cooking. Bake in the oven for 40-50 minutes. The top should be golden brown. A knife inserted into the center should come out clean. Remember, a gooey middle is key, so avoid overbaking! Soaking the bread is key to a great texture. I recommend using day-old brioche or challah. These breads soak up the pumpkin mixture well. Cut the bread into cubes, then mix it with the pumpkin custard. Let it rest for about 10-15 minutes. This gives the bread time to absorb the mixture fully. The result? A moist and creamy pudding that melts in your mouth. Overbaking can ruin your bread pudding. Look for a golden-brown top. Insert a knife into the center. It should come out clean, but with some gooey bits. If it feels too firm or dry, it may be overbaked. Keep a close eye on it during the last few minutes. Every oven is different, so check often near the end of baking. Presentation can make your dessert shine. Cut the pudding into neat squares. Place them on dessert plates for a beautiful look. Consider topping each piece with whipped cream or a scoop of vanilla ice cream. Drizzle extra chocolate chips or sprinkle some pumpkin pie spice on top. This adds flavor and a festive touch. Enjoy your delightful treat! {{image_4}} You can easily swap whole milk for almond milk. Almond milk makes this recipe dairy-free. It still keeps the creamy texture but adds a nutty taste. You can also try oat milk or soy milk for a different flavor. Each option changes the taste a bit, but all work well in this dish. Want to change things up? You can add nuts like pecans or walnuts. They add a nice crunch and flavor. You might also try adding spices like cinnamon or nutmeg for more warmth. A pinch of ginger could bring a lovely zing. These small changes can make your bread pudding unique! When it comes to chocolate, you have options! Semi-sweet chocolate chips are great for a classic taste. If you want a richer flavor, use dark chocolate chips. You could even mix different types of chocolate for a fun twist. Try white chocolate chips for a sweeter touch. Each choice adds its own special flavor to the pudding. To keep your pumpkin chocolate chip bread pudding fresh, store any leftovers in the fridge. Place the pudding in an airtight container. This helps maintain its moisture and flavor. It should last about three to four days in the fridge. If you want to enjoy it longer, consider freezing. To reheat without drying it out, use the oven. Preheat your oven to 350°F (175°C). Place the pudding in an oven-safe dish and cover it with foil. Heat for about 15 to 20 minutes. You can also use the microwave. Heat slices on a microwave-safe plate for about 30 seconds. Check and add more time if needed. To freeze your bread pudding, first let it cool completely. Cut it into portions for easy thawing. Wrap each piece tightly in plastic wrap, then place it in a freezer bag. Make sure to remove as much air as possible. It can stay in the freezer for up to three months. When you’re ready to eat, thaw it in the fridge overnight before reheating. Yes, you can make this dish ahead of time. Prepare it a day before and store it in the fridge. Just cover it with plastic wrap to keep it fresh. When you are ready to bake, let it sit at room temperature for about 30 minutes. Then bake as directed. This makes it perfect for busy days or special occasions. Day-old brioche or challah works best for this recipe. These breads soak up the custard well. Their soft texture creates a creamy pudding. Avoid fresh bread, as it may not absorb the liquid properly. Stale bread gives you the best results, so don’t hesitate to use leftovers! You can use fresh pumpkin if you prefer. Just make sure to cook and puree it first. Choose a sugar pumpkin for the best flavor and texture. Fresh pumpkin adds a lovely taste, but it may need extra care in measuring. Canned pumpkin is more consistent, so keep this in mind. Leftovers will last for about 3 to 4 days in the fridge. Store them in an airtight container to keep them fresh. You can enjoy them cold or reheat them in the microwave. Just warm them up gently to keep the texture nice. This Pumpkin Chocolate Chip Bread Pudding recipe is simple and fun to make. We covered the key ingredients, like cubed bread and pumpkin puree, and detailed steps for prep and baking. I shared tips to help you soak bread well and avoid overbaking. In the end, feel free to explore different flavors or toppings. You can enjoy this dish fresh or stored for later. Whether you serve it warm with ice cream or cool from the fridge, it’s a treat everyone will love. Dive into your pumpkin bread pudding adventure!

Pumpkin Chocolate Chip Bread Pudding Delightful Treat

To make Lemon Poppy Seed Yogurt Pancakes, you will need: - 1 cup all-purpose flour - 2 tablespoons poppy seeds - 2 tablespoons granulated sugar - 2 teaspoons baking powder - 1/4 teaspoon baking soda - 1/4 teaspoon salt - 1 cup plain yogurt (Greek or regular) - 1 large egg - 2 tablespoons melted butter (or coconut oil) - 2 tablespoons fresh lemon juice - Zest from 1 lemon - Optional: Maple syrup and fresh berries These ingredients come together to create fluffy, tangy pancakes. You can easily adapt this recipe to fit your needs. For example: - Use whole wheat flour for a heartier texture. - Swap granulated sugar with coconut sugar for a lower glycemic option. - Choose a dairy-free yogurt if you prefer a vegan version. - Replace butter with coconut oil for a dairy-free choice. - If you lack fresh lemons, use bottled lemon juice, though fresh is best. These swaps can maintain the flavor while catering to dietary needs. Lemon Poppy Seed Yogurt Pancakes are not just tasty; they also offer nutrition: - Protein: The yogurt provides a good protein boost. - Calcium: Yogurt adds essential calcium for strong bones. - Fiber: Poppy seeds add fiber, which helps digestion. - Vitamins: Fresh lemon juice and zest add vitamin C, supporting your immune system. These pancakes are a balanced choice for breakfast, keeping you energized for the day ahead. Start by gathering your dry ingredients. In a large mixing bowl, combine 1 cup of all-purpose flour, 2 tablespoons of poppy seeds, 2 tablespoons of granulated sugar, 2 teaspoons of baking powder, 1/4 teaspoon of baking soda, and 1/4 teaspoon of salt. Whisk these together well. This step ensures that the baking powder and baking soda spread evenly. Mixing the dry ingredients first helps the pancakes rise nicely. Next, it's time for the wet ingredients. In a separate bowl, mix 1 cup of plain yogurt, 1 large egg, 2 tablespoons of melted butter (or coconut oil), 2 tablespoons of fresh lemon juice, and the zest from 1 lemon. Whisk this mixture until it is smooth and creamy. This step adds moisture and tang to the batter. The yogurt will make the pancakes fluffy and rich. Now, let’s cook those pancakes! Preheat a non-stick skillet or griddle over medium heat. If you like, you can lightly grease it with butter or oil. Pour about 1/4 cup of batter onto the skillet for each pancake. Cook until you see bubbles forming on the surface and the edges look set, about 2-3 minutes. Once ready, flip the pancakes gently and cook for another 1-2 minutes until they turn golden brown. Carefully remove the pancakes and keep them warm in a low-temperature oven (around 200°F) while you cook the rest. Serve warm with maple syrup and fresh berries for a delightful breakfast. Enjoy the bright flavors of lemon and the crunch of poppy seeds in every bite! To get fluffy pancakes, mix the wet and dry ingredients gently. Overmixing leads to tough pancakes. Aim for a few lumps in the batter. Letting the batter rest for a few minutes can also help. This allows the flour to absorb moisture better, resulting in a light texture. One common mistake is using cold yogurt. Room temperature yogurt mixes better and helps the pancakes rise. Also, don’t skip the baking powder. It’s key for fluffiness. Another pitfall is cooking at too high heat. Medium heat is best for even cooking and browning. These pancakes shine when served hot. Drizzle with maple syrup for sweetness. Fresh berries add color and flavor. A sprinkle of lemon zest on top enhances the taste. You can also serve them with a dollop of yogurt for creaminess. Enjoy them as a bright breakfast or a fun brunch treat! {{image_4}} You can easily make these pancakes dairy-free. Swap the yogurt with a non-dairy option like almond or coconut yogurt. These choices still give flavor and creaminess. Use coconut oil instead of butter for cooking. This keeps the recipe light and fresh while still being delicious. Want to kick up the taste? Try adding a pinch of vanilla extract to the wet mix. This small addition creates a warm, sweet flavor. You can also add more lemon zest for an extra zing. If you love berries, fold in some blueberries or raspberries into the batter. This adds color and a burst of sweetness in every bite. Think beyond syrup! Serve your pancakes with a dollop of Greek yogurt on top for creaminess. A sprinkle of powdered sugar adds a touch of sweetness and looks great. For a tropical twist, serve with sliced bananas and a drizzle of honey. You can also try a fruit compote for a sweet, tangy contrast. Each option makes for a unique breakfast treat! To keep your lemon poppy seed yogurt pancakes fresh, store them in an airtight container. This prevents them from drying out. Place parchment paper between layers to avoid sticking. You can keep them in the fridge for up to three days. If you want to enjoy them longer, freezing is a great option. Reheating pancakes is easy. You can use a microwave or a skillet. For the microwave, place pancakes on a plate and cover with a damp paper towel. Heat for about 20-30 seconds. For the skillet, warm a little butter or oil over medium heat. Heat pancakes for about 1-2 minutes on each side. This will help them regain their fluffy texture. To freeze pancakes, let them cool completely first. Then, stack them with parchment paper in between. Place the stack in a freezer-safe bag or container. Label the bag with the date. You can freeze them for up to two months. When you're ready, just reheat them directly from the freezer. This way, you can enjoy your delicious pancakes anytime. To make your pancakes fluffier, focus on two key steps. First, avoid overmixing the batter. A few lumps are okay. Second, let the batter rest for about 5 minutes before cooking. This allows the baking powder to activate, creating air bubbles that add lift to your pancakes. Yes, you can use whole wheat flour. It will change the taste and texture a bit. Whole wheat flour makes the pancakes denser but adds more fiber. You might want to add a little extra liquid to keep the batter smooth and moist. Toppings can really enhance your pancakes. Here are some great choices: - Maple syrup for sweetness - Fresh berries like strawberries or blueberries for a fruity touch - A dollop of yogurt for extra creaminess - A sprinkle of lemon zest for added zing Feel free to mix and match these toppings for a delightful breakfast! In this blog post, we explored the key ingredients for making pancakes. You learned about substitutions and nutritional benefits. I shared step-by-step instructions to ensure your pancakes come out perfectly every time. We covered tips to achieve the right texture, common mistakes to avoid, and serving ideas. The variations section introduced dairy-free options and flavor boosts. Finally, we discussed storage and reheating tips. Now, you're ready to create delicious pancakes that suit your taste and dietary needs. Enjoy your cooking and happy pancake making!

Lemon Poppy Seed Yogurt Pancakes Flavorful and Easy

PREV 1 … 9 10 11 … 44 NEXT
yummybiterecipes

explore

DessertsDinnerAppetizersDrinks

Our Policies

  • Cookie Policy
  • Copyright Policy
  • Disclaimer
  • GDPR Policy
  • Terms Of Use
Back to Top
  • About
  • Contact Us
  • Privacy Policy
© 2025 yummybiterecipes