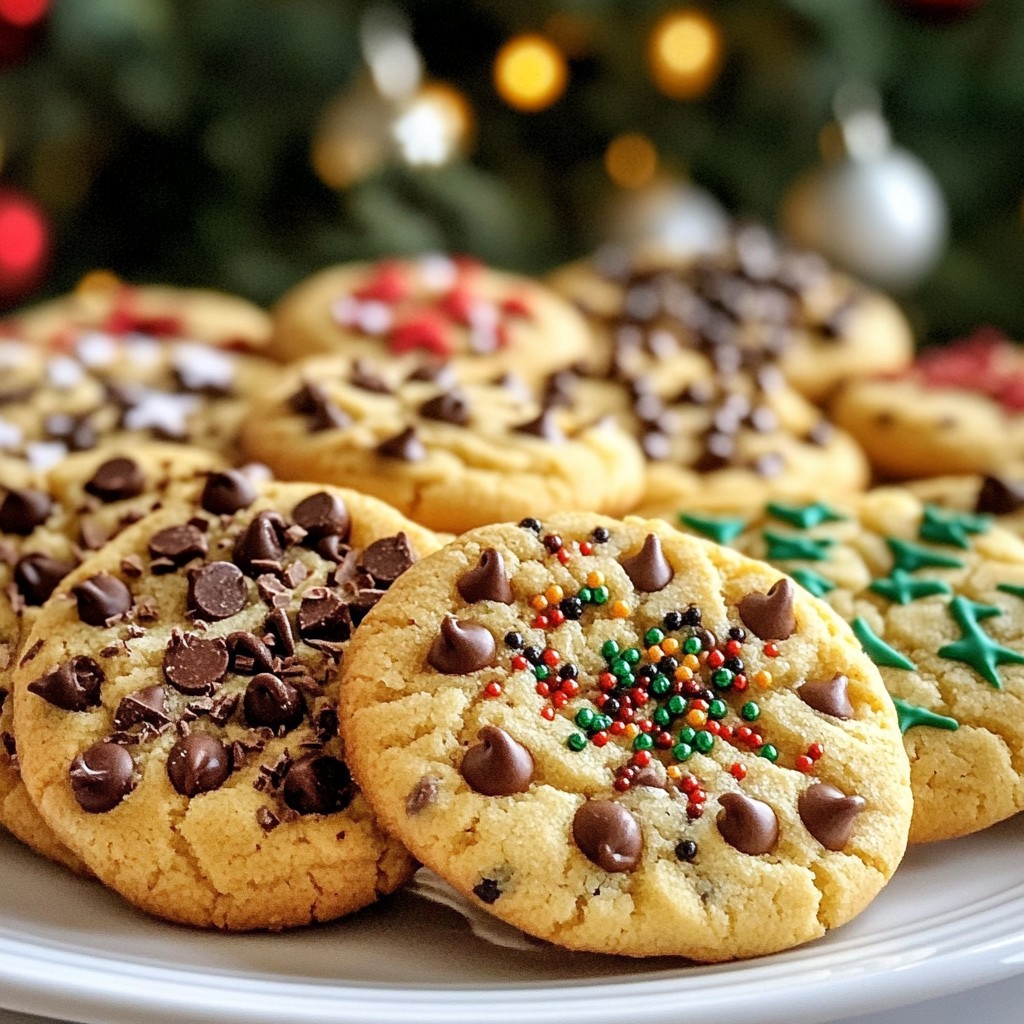
Get ready to bake the most delightful Christmas cookies you’ve ever made! In Absolute Best Christmas Cookies: Simple and Delicious Treats, I’ll share my expert tips and tricks to help you create cookies that are both easy and yummy. Whether you're a baking newbie or a seasoned pro, you'll find all the steps you need. Let's turn your kitchen into a holiday wonderland with these tasty treats!
Why I Love This Recipe
- Delicious Flavor Combination: The mix of semi-sweet and dark chocolate chips, along with warm spices, creates an irresistible flavor profile that is perfect for the holidays.
- Easy to Make: This recipe is straightforward, making it perfect for bakers of all skill levels. You can whip up a batch in no time!
- Customizable Add-ins: Feel free to experiment with your favorite nuts or even swap in different types of chocolate to suit your taste.
- Perfect for Sharing: These cookies are great for holiday gatherings or as thoughtful gifts, spreading joy and sweetness during the festive season.
Ingredients
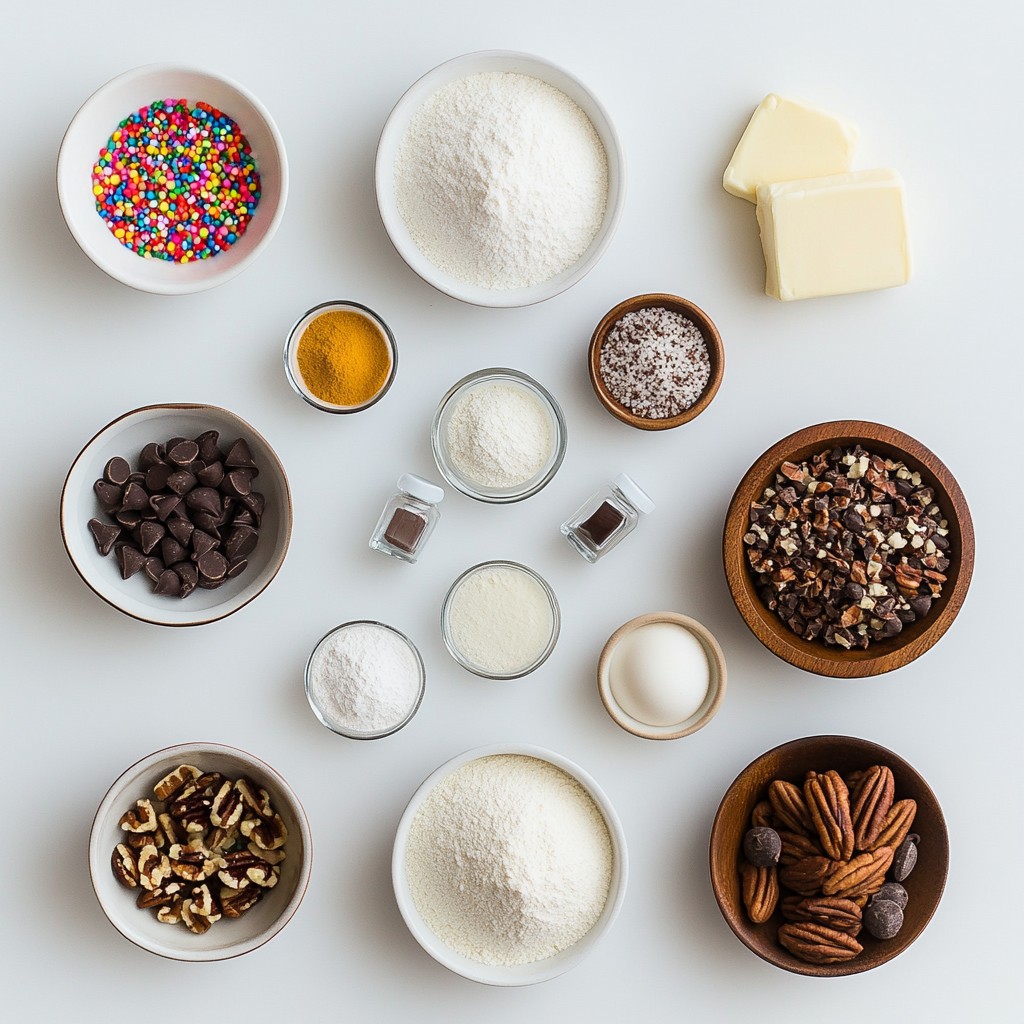
Complete list of ingredients
To make the Absolute Best Christmas Cookies, you will need:
- 2 3/4 cups all-purpose flour
- 1 teaspoon baking soda
- 1 teaspoon baking powder
- 1 cup unsalted butter, softened to room temperature
- 1 1/2 cups granulated white sugar
- 1 cup packed brown sugar (light or dark)
- 1 teaspoon pure vanilla extract
- 2 large eggs, at room temperature
- 2 cups chocolate chips (mix of semi-sweet and dark)
- 1 cup chopped nuts (walnuts or pecans, toasted if desired)
- 1 teaspoon ground cinnamon
- 1/2 teaspoon ground nutmeg
- 1/4 teaspoon fine salt
- Festive sprinkles for decoration
Substitutions for dietary restrictions
You can make a few changes for different needs:
- Use gluten-free flour instead of all-purpose flour for a gluten-free option.
- Swap unsalted butter with coconut oil or vegan butter for a dairy-free version.
- Replace eggs with flaxseed meal (1 tablespoon flaxseed meal + 3 tablespoons water = 1 egg).
- Choose dairy-free chocolate chips if you want to keep it vegan.
- For nut allergies, skip the nuts or use seeds like pumpkin or sunflower.
Tips for sourcing quality ingredients
To get the best flavors, focus on these tips:
- Buy fresh spices. Old spices lose flavor quickly. Check the date on the jar.
- Use high-quality chocolate chips. Look for brands with real cocoa butter for rich taste.
- Choose unsalted butter. This helps you control salt levels in your cookies.
- Get pure vanilla extract instead of imitation for a deeper flavor.
- If possible, buy local eggs. Fresh eggs make a big difference in taste and texture.
Step-by-Step Instructions
Detailed baking process
Baking these cookies is easy and fun. Start by preheating your oven to 375°F (190°C). Line a baking sheet with parchment paper. This step keeps your cookies from sticking.
In a bowl, mix the flour, baking soda, baking powder, cinnamon, nutmeg, and salt. Whisk them together until they are well combined. Set this bowl aside for later.
In a large bowl, cream the softened butter with granulated and brown sugar. Use a mixer for about 2-3 minutes until the mix is smooth. Then, add the vanilla extract. Beat in the eggs one at a time. Make sure each egg is fully mixed before adding the next.
Now, slowly add the dry mix to the wet mix. Stir until you no longer see any flour. Be careful not to mix too much, or your cookies may end up tough.
Next, gently fold in the chocolate chips and chopped nuts. Make sure they are spread evenly in the dough.
Using a cookie scoop or a spoon, drop rounded dough onto your baking sheet. Leave about 2 inches between each cookie. This space helps them spread without sticking together.
Before baking, sprinkle festive colored sprinkles on top of each dough ball. This adds a cheerful touch. Bake them for 10-12 minutes. The edges should be golden brown. The centers may still look soft. They will firm up as they cool.
Let the cookies cool on the sheet for 5 minutes. Then, move them to a wire rack to cool completely.
Step-by-step visual guide
1. Preheat oven and prepare baking sheet.
2. Mix dry ingredients in a bowl.
3. Cream butter and sugars in a large bowl.
4. Add vanilla and eggs, mixing well.
5. Combine wet and dry ingredients carefully.
6. Fold in chocolate chips and nuts.
7. Drop dough onto the baking sheet with space.
8. Add sprinkles before baking.
9. Bake and cool as instructed.
Common mistakes to avoid
Here are some mistakes to watch for:
- Over-mixing the dough: This makes cookies tough.
- Not measuring flour correctly: Use the spoon and level method for accuracy.
- Skipping the cooling time: Letting cookies cool helps them set properly.
- Not leaving enough space: Cookies need room to spread while baking.
- Baking too long: Remove them while slightly underbaked for soft cookies.
By avoiding these mistakes, you ensure a batch of the absolute best Christmas cookies!
Tips & Tricks
How to achieve the perfect cookie texture
To get the best cookie texture, start with room temperature butter. Softened butter blends well with sugar, making your dough creamy. Mix the butter and sugars for about 2-3 minutes. This air makes the cookies light. Don’t over-mix when adding the dry ingredients. Just mix until you see no flour. This step keeps the cookies from being hard.
Decorating ideas for a festive look
Adding sprinkles makes your cookies shine! Before baking, drop colorful sprinkles on top of each dough ball. You can also use icing to create designs. Try using a simple glaze made of powdered sugar and water. For a snowy effect, dust some powdered sugar on the cooled cookies. These details add fun and joy to your holiday treats!
Storing leftover cookies properly
To keep your cookies fresh, store them in an airtight container. This method stops them from getting hard. You can place parchment paper between layers to avoid sticking. If you want to keep them longer, freeze them. Wrap each cookie in plastic wrap and place them in a freezer bag. When you want a treat, just thaw them at room temperature. Enjoy your cookies whenever you like!
Pro Tips
- Chill the Dough: For thicker cookies, chill the dough for at least 30 minutes before baking. This helps prevent spreading and results in a chewier texture.
- Quality Chocolate: Use high-quality chocolate chips for a richer flavor. Consider mixing in some chocolate chunks for added texture and a gourmet touch.
- Don't Overbake: Keep an eye on the cookies as they bake. They should be lightly golden at the edges and soft in the center; they will continue to firm up as they cool.
- Customize Your Nuts: Toast your nuts before adding them to the dough to enhance their flavor. You can also skip the nuts entirely for a nut-free version!
Variations
Flavor variations (e.g., peppermint, orange zest)
You can change the flavor of your cookies in fun ways. Adding peppermint extract gives a fresh, minty taste. Just add 1 teaspoon to your dough. Orange zest can also brighten up your cookies. Use the zest of one orange for a lovely citrus twist. Both flavors work well with chocolate.
Gluten-free or vegan alternatives
If you need gluten-free cookies, swap the all-purpose flour for a gluten-free blend. Make sure the blend is suitable for baking to get the right texture. For a vegan option, replace the butter with coconut oil. Use flax eggs instead of regular eggs. Mix 1 tablespoon of ground flaxseed with 2.5 tablespoons of water for each egg.
Unique mix-ins (e.g., dried fruit, different nuts)
Get creative with mix-ins! Instead of chocolate chips, try dried fruit like cranberries or raisins. They add a nice chewiness and sweetness. If you want a nutty crunch, consider using almonds or pecans. Toasted nuts bring out more flavor. Just make sure to chop them up small so they mix well into the dough.
Storage Info
How to store cookies for freshness
To keep your cookies fresh, start by letting them cool completely. Warm cookies can create steam in containers, which makes them soggy. Once cool, place your cookies in a single layer in an airtight container. You can add a piece of bread to help keep them soft. The bread will absorb extra moisture.
Freezing cookies for later enjoyment
You can freeze your cookies for later. First, let them cool. Then, place cookies in a single layer on a baking sheet. Freeze them for about 1-2 hours until firm. After that, transfer them to a freezer bag or container. Don't forget to label the bag with the date. Frozen cookies can last for up to three months. When you want some, let them thaw at room temperature for a few hours.
Best containers for storing cookies
Use airtight containers for the best storage. Glass jars or plastic containers work well. Make sure they have a tight seal. You can also use metal tins, which can look festive and fun. Just remember to line them with parchment paper to keep cookies from sticking. For cookies with icing or toppings, use a container with enough space to avoid smashing them.
FAQs
How long do these cookies last?
These cookies can last up to one week. Store them in an airtight container. They stay fresh and tasty if you keep them at room temperature. If you want them to last longer, freeze them. They can last for about three months in the freezer.
Can I make the dough ahead of time?
Yes, you can make the dough ahead of time. Chill the dough in the fridge for up to three days. This helps the flavors meld together. Just scoop and bake when you’re ready! If you want to freeze the dough, scoop it into balls and freeze them. Bake them straight from the freezer, adding a minute or two to the bake time.
What can I do if my cookies spread too much?
If your cookies spread too much, it could be due to soft butter or too much liquid. Make sure the butter is softened but not melted. You can also chill the dough before baking to help keep the shape. If your cookies still spread, add a bit more flour to the dough.
In this blog post, we explored how to make delicious cookies. We discussed the best ingredients, including substitutes for different diets. I provided a detailed baking guide and tips on avoiding common mistakes. We also covered ways to perfect cookie texture and fun decoration ideas. Lastly, I shared storage tips to keep your cookies fresh. Enjoy experimenting with flavors and variations. Remember, baking is all about creativity and fun! Don’t hesitate to make these recipes your own. Happy baking!