WANT TO SAVE THIS RECIPE?
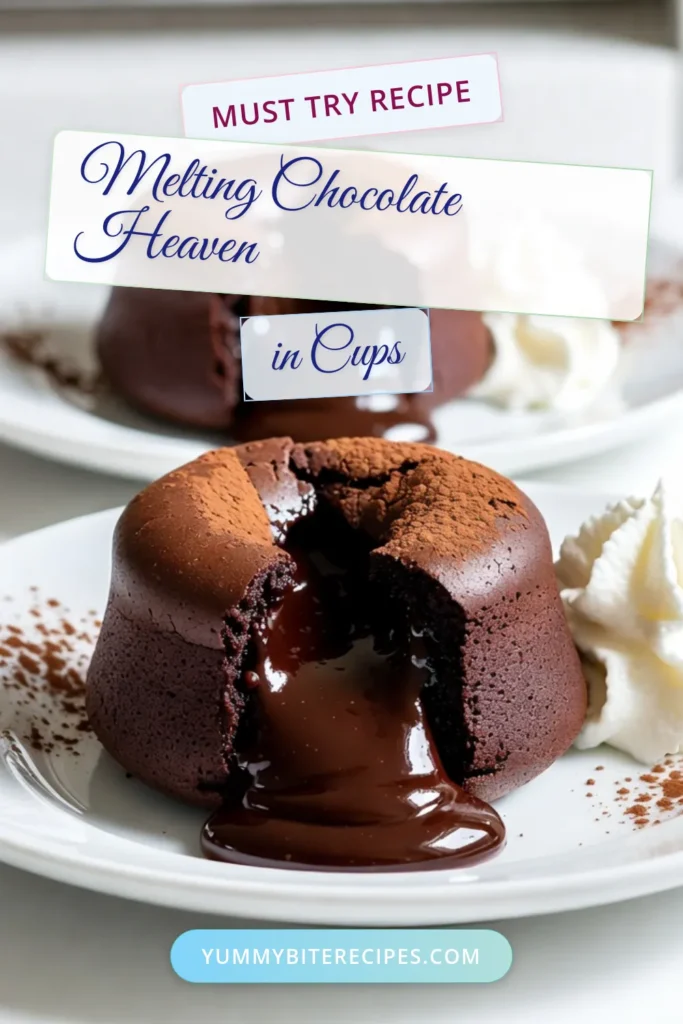
Are you ready to impress your guests with a dessert that’s rich and oh-so-decadent? Flourless chocolate lava cakes are your answer! With a gooey center that flows like molten chocolate, this recipe is simple yet stunning. Whether you’re a baking novice or a seasoned pro, I’ll guide you step-by-step to make perfect lava cakes every time. Let’s dive into this delightful treat that will have everyone begging for seconds!

Why I Love This Recipe
- Decadent Chocolate Flavor: This recipe delivers an intense chocolate experience, perfect for chocolate lovers who crave rich desserts.
- Impressive Presentation: The molten center creates a stunning visual effect when served, making it an ideal dessert for special occasions.
- Quick and Easy: With a prep time of just 10 minutes, these lava cakes are a simple yet luxurious dessert option.
- Customizable Serving Options: They pair beautifully with whipped cream or vanilla ice cream, allowing for personalization to suit your taste.
Ingredients
Main Ingredients Needed
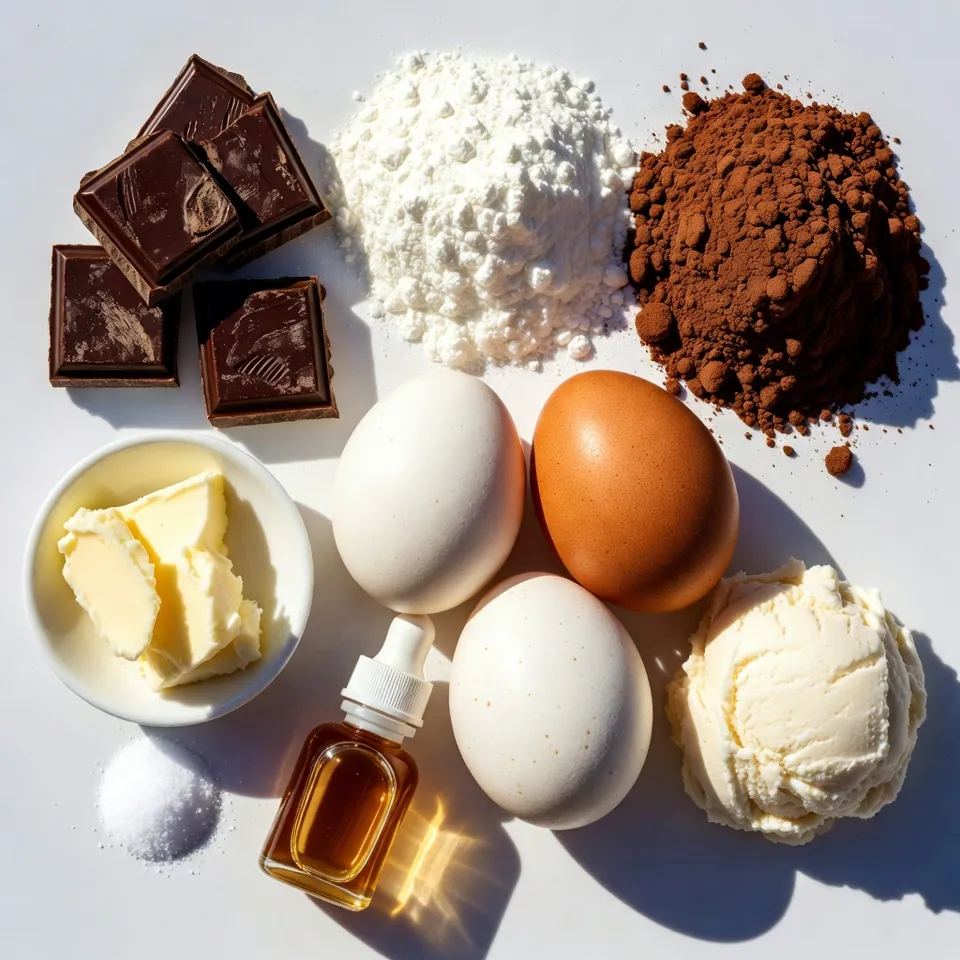
– 1 cup dark chocolate (70% cocoa), finely chopped
– ½ cup unsalted butter, cubed
– ¾ cup powdered sugar, sifted
– ¼ cup cocoa powder, plus extra for dusting
Additional Ingredients
– 3 large eggs, at room temperature
– 1 teaspoon pure vanilla extract
– ¼ teaspoon fine sea salt
Optional Serving Suggestions
– Whipped cream or vanilla ice cream
– Fresh berries or mint leaves for garnish
When making flourless chocolate lava cakes, the right ingredients matter a lot. You want a rich taste and a perfect texture. Start with high-quality dark chocolate. I use chocolate with 70% cocoa for that deep flavor. The unsalted butter adds a creamy touch, while sifted powdered sugar sweetens it just right.
Cocoa powder gives our cakes a strong chocolate taste. It also helps with the texture. The eggs are key for binding everything together. Room temperature eggs mix better with the batter. Pure vanilla extract boosts the flavor, making it more enjoyable. A pinch of fine sea salt balances the sweetness.
For serving, I love to add whipped cream or a scoop of vanilla ice cream. They make a great match with the warm cakes. Fresh berries or mint leaves add a pop of color and freshness. These optional touches make your dessert feel special.
Step-by-Step Instructions
Preparing the Ramekins
Start by preheating your oven to 425°F (220°C). Next, take four 6-ounce ramekins. Grease each ramekin with unsalted butter. Make sure to cover the sides and bottom well. This helps the cakes come out easily. Then, dust the insides of the ramekins with cocoa powder. This step prevents sticking and adds extra chocolate flavor.
Melting the Chocolate and Butter
Grab a microwave-safe bowl. Place the finely chopped dark chocolate and cubed unsalted butter in it. Heat the bowl in the microwave on medium power. Do this in 30-second intervals. Stir the mixture after each interval. You want it melted and smooth, but be careful not to overheat it. A smooth consistency is key for your lava cakes.
Combining Ingredients for Batter
Once your chocolate and butter mix is ready, add the sifted powdered sugar. Stir until it blends in and no lumps remain. Next, sift in the cocoa powder. Mix it well until fully incorporated. Now, it’s time for the eggs. Add them one at a time, stirring well after each. Follow this with the pure vanilla extract and fine sea salt. You want a silky smooth batter, so take your time mixing.
Baking the Lava Cakes
Carefully divide your batter into the prepared ramekins. Fill each one about ¾ full. Place the ramekins on a baking sheet for easy handling. Bake in your preheated oven for 12-14 minutes. The sides should be set, while the center remains soft and slightly jiggly. Avoid overbaking to keep that perfect lava effect.
Inverting and Serving
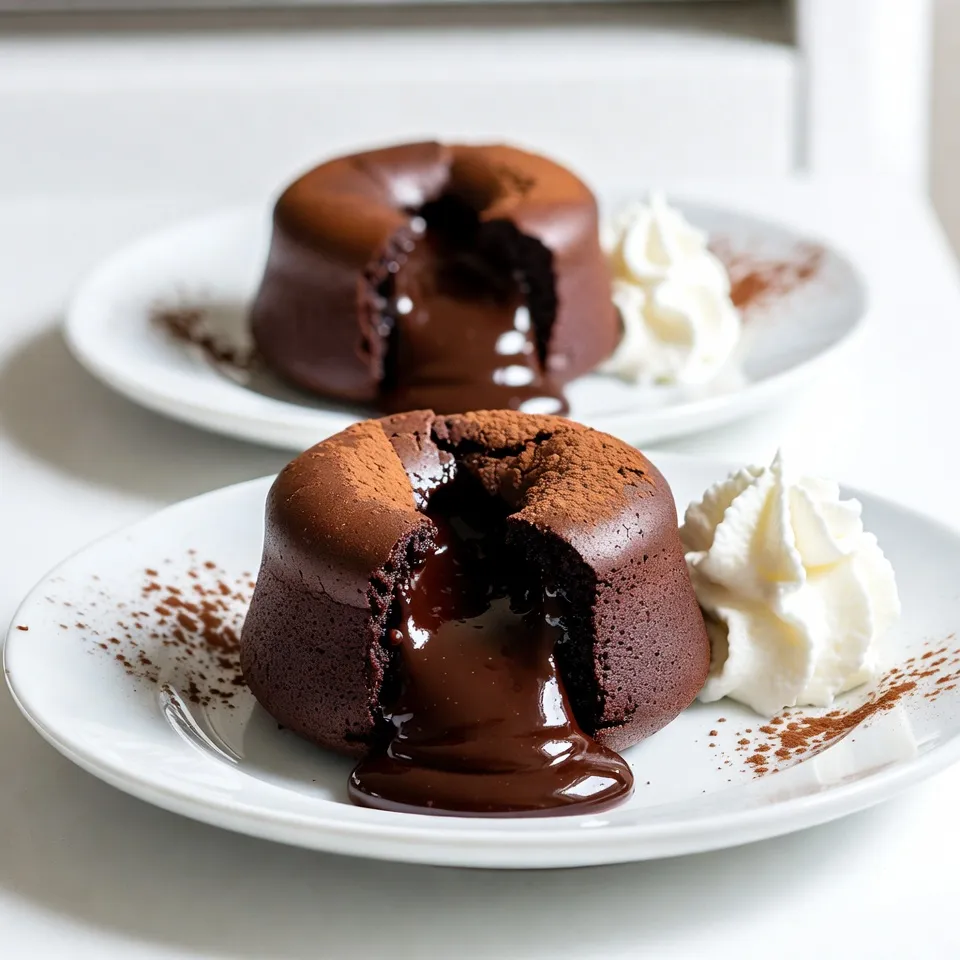
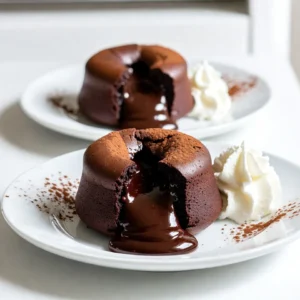
After baking, take the ramekins out and let them cool for 1 minute. Use a small knife to run around the edges of each cake. This helps to loosen them. Now, gently invert each ramekin onto a plate. You may need to tap it lightly to release the cake. Serve the lava cakes right away. Watch the rich, gooey center flow as you cut into them. For an extra treat, add a dollop of whipped cream or a scoop of creamy vanilla ice cream.
Tips & Tricks
Achieving the Perfect Lava Center
To get that warm, gooey center, timing is key. Bake your cakes for 12 to 14 minutes. The edges should be firm, while the middle stays soft. A little jiggle in the center shows it’s still runny. If you bake too long, you lose that lava effect.
Ingredient Substitutions
If you want a dairy-free treat, swap out the butter for coconut oil. It works well and adds a hint of flavor. For gluten-free options, make sure your cocoa powder is certified gluten-free. This keeps your dessert safe for those with gluten sensitivities.
Enhancing Flavor
Want to make your lava cakes even richer? Add a teaspoon of espresso powder to the batter. It deepens the chocolate taste without making it taste like coffee. You can also try vanilla bean paste or a dash of cinnamon for a unique twist. These small changes can elevate your dessert to new heights.
Pro Tips
- Use High-Quality Chocolate: The flavor of your lava cake heavily depends on the chocolate you choose. Opt for a good quality dark chocolate (70% cocoa or higher) for the richest taste.
- Room Temperature Eggs: Ensure your eggs are at room temperature before mixing. This helps them incorporate better into the batter, resulting in a smoother texture.
- Mind the Baking Time: Keep a close eye on your cakes as they bake. For that perfect gooey center, pull them out while the edges are set but the center is still soft and jiggly.
- Rest Before Serving: Allow the cakes to cool for just one minute before inverting. This helps them hold their shape while still being warm enough for the lava effect to flow beautifully.
Variations
Flavor Variations
You can add fun flavors to your lava cakes. Try adding a few drops of orange or mint essence. These flavors make the cake taste fresh and exciting. You can also use different types of chocolate. White or milk chocolate gives a sweeter taste. Mix and match to find your favorite flavor!
Ingredient Swaps
If you want a vegan treat, swap eggs and butter. Use flax eggs or applesauce instead of eggs. For butter, try coconut oil or vegan margarine. You can also choose healthier sweeteners. Instead of powdered sugar, use coconut sugar or maple syrup for a natural touch. These swaps keep the taste rich while making it a bit healthier.
Serving Variations
Transform your lava cake into a sundae! Add a scoop of ice cream on top. You can drizzle chocolate sauce or caramel over the cake. Fresh berries also make a great topping. They add color and a bit of tartness. Experiment with different sauces to find what you love!
Storage Info
Storing Leftover Lava Cakes
To keep leftover lava cakes fresh, follow these easy steps:
– Refrigeration: Place your cooled lava cakes in an airtight container. Store them in the fridge for up to three days. This keeps them moist.
– Freezing: For longer storage, wrap each cake tightly in plastic wrap. Then, place them in a freezer-safe bag. They can last up to three months in the freezer.
Reheating Tips
When you want to enjoy your lava cakes again, reheating is key. Here’s how:
– Optimal Texture: Preheat your oven to 350°F (175°C). Place the ramekins on a baking sheet. Heat for about 10-12 minutes. This helps the center stay gooey.
– Avoiding Overcooking: Keep an eye on them while they heat. You want the edges warm, but the center should still be soft. Check them a few minutes early to ensure perfect results.
Enjoying these cakes again is easy with the right storage and reheating methods!
FAQs
What causes the lava center in flourless chocolate lava cakes?
The lava center forms during baking. You want a soft center and set sides. When you bake the cakes, the heat cooks the edges while the center stays gooey. This happens because of the batter’s moisture and the chocolate’s melting point. If you overbake, the center cooks through, and you lose that lava effect. Timing is key! Bake for 12-14 minutes for the best results. Keep an eye on the cakes as they bake.
Can I make flourless chocolate lava cakes in advance?
Yes, you can prepare the batter ahead of time. Mix the batter and store it in the fridge. Just remember to fill the ramekins only when ready to bake. This keeps the texture perfect. You can prepare the ramekins by greasing and dusting them with cocoa powder. Bake them straight from the fridge, but add a minute or two to the bake time.
What is the best way to serve flourless chocolate lava cakes?
Serve the cakes warm right after baking. The gooey center flows out when you cut into them. I love adding a scoop of creamy vanilla ice cream or a dollop of whipped cream. For a nice touch, sprinkle cocoa powder or powdered sugar on the plate. You can add fresh berries or a mint leaf for extra flair. This makes each plate look fancy and inviting!
We covered the key ingredients, steps, and tips for making flourless chocolate lava cakes. I shared how to melt chocolate, prepare the batter, and bake them to perfection. Remember, timing and ingredient choices matter for the best lava center. You can explore variations and substitutions to fit your taste. Follow these methods to impress your family or guests. Enjoy every gooey bite of your creatio
Decadent Flourless Chocolate Lava Cakes
Rich and gooey chocolate lava cakes that are flourless and perfect for dessert.
Prep Time 10 minutes mins
Cook Time 14 minutes mins
Total Time 24 minutes mins
Course Dessert
Cuisine American
Servings 4
Calories 350 kcal
- 1 cup dark chocolate (70% cocoa), finely chopped
- ½ cup unsalted butter, cubed
- ¾ cup powdered sugar, sifted
- ¼ cup cocoa powder, plus extra for dusting
- 3 large eggs, at room temperature
- 1 teaspoon pure vanilla extract
- ¼ teaspoon fine sea salt
- optional whipped cream or creamy vanilla ice cream for serving
Preheat your oven to 425°F (220°C). Generously grease four 6-ounce ramekins with unsalted butter, then dust the insides with cocoa powder to create a non-stick surface.
In a microwave-safe bowl, combine the finely chopped dark chocolate and cubed unsalted butter. Microwave on medium power in 30-second intervals, stirring between each until the mixture is completely melted and smooth—be careful not to overheat.
Once melted, add the sifted powdered sugar to the chocolate-butter mixture, stirring until fully combined and there are no lumps. Then, sift in the cocoa powder, mixing thoroughly until fully incorporated.
Add the eggs one at a time, stirring well after each addition to ensure they’re fully blended into the batter. Follow with the vanilla extract and fine sea salt, mixing until you have a silky smooth batter.
Carefully divide the batter evenly among the four prepared ramekins, filling each about ¾ full.
Place the ramekins on a baking sheet and bake in the preheated oven for 12-14 minutes. The sides should be set while the center remains soft and slightly jiggly—avoid overbaking for that perfect lava effect!
Once baked, remove from the oven and let the ramekins cool for 1 minute. Use a small knife to gently run around the edges to loosen the cakes, then carefully invert each ramekin onto individual plates, giving them a gentle tap if necessary to release.
Serve the lava cakes immediately, allowing the rich, gooey center to flow out as you cut into them. A dollop of whipped cream or a scoop of creamy vanilla ice cream on the side makes for a delightful finishing touch!
For an elegant touch, dust the plates with a light sprinkle of cocoa powder or powdered sugar, and garnish with fresh berries or a mint leaf.
Keyword chocolate, dessert, flourless, lava cake
WANT TO SAVE THIS RECIPE?