WANT TO SAVE THIS RECIPE?
Do you crave soft, fluffy bread but need to eat gluten-free? I have just the solution for you! My Extra Soft Gluten-Free Dinner Rolls recipe is simple and delicious. In this post, I’ll guide you step-by-step to make rolls that will wow your family and friends. From mixing ingredients to baking the perfect roll, you’ll find everything you need right here. Let’s start baking some warmth and comfort into your meals!

Why I Love This Recipe
- Soft and Fluffy Texture: These dinner rolls are incredibly soft and have a cloud-like texture that melts in your mouth, making them irresistible!
- Easy to Make: This recipe is simple and straightforward, perfect for both novice and experienced bakers looking for a gluten-free option.
- Customizable: You can easily customize these rolls by adding herbs or spices to suit your taste, like garlic powder for an extra flavor boost.
- Perfect for Any Occasion: Whether it’s a family dinner or a festive gathering, these rolls are a delightful addition to any meal.
Ingredients
List of Essential Ingredients
– 2 cups gluten-free all-purpose flour
– 1 teaspoon instant yeast
– 1 tablespoon sugar
– 1 teaspoon salt
– 1 cup warm water (around 110°F or 45°C)
– 2 tablespoons olive oil
– 1 tablespoon apple cider vinegar
– 1 large egg
– 1 teaspoon garlic powder (optional)
– Non-stick cooking spray or parchment paper
To make these extra soft gluten-free dinner rolls, you need a few key ingredients. First, gluten-free all-purpose flour is a must. It gives the rolls their structure. Next, we add instant yeast for the rise. Sugar adds a hint of sweetness, while salt brings balance.
Warm water plays a crucial role. It activates the yeast. Aim for a temperature around 110°F. Olive oil adds moisture and a nice flavor. Apple cider vinegar helps with texture. Don’t forget the egg for binding.
If you want to boost flavor, consider garlic powder. It’s optional but tasty. Finally, you’ll need either non-stick cooking spray or parchment paper to prevent sticking during baking. With these ingredients ready, you can create rolls that are soft, fluffy, and perfect for any meal.
Step-by-Step Instructions
Mixing the Dry Ingredients
Start by taking a large bowl. Add 2 cups of gluten-free all-purpose flour. Then, mix in 1 teaspoon of instant yeast, 1 tablespoon of sugar, and 1 teaspoon of salt. Whisk these dry ingredients well. This step helps to blend everything evenly.
Combining Wet Ingredients
In another bowl, take 1 cup of warm water. Make sure the water is about 110°F (45°C). Add 2 tablespoons of olive oil, 1 tablespoon of apple cider vinegar, and 1 large egg. Whisk until everything is mixed well. This creates a smooth mixture that helps the rolls rise.
Creating the Dough
Now, slowly pour the wet mixture into the dry ingredients. Use a spatula to mix them. Keep mixing until you see a thick and sticky dough. If you like garlic, add 1 teaspoon of garlic powder here. This gives the rolls a tasty twist.
Letting the Dough Rise
Cover the bowl with a clean kitchen towel. Place it in a warm spot. Let the dough rise for about 30-45 minutes. You want it to grow in size. This rising time is key for soft rolls.
Shaping the Rolls
Once the dough has risen, wet your hands. This helps prevent sticking. Scoop out portions of dough, about the size of a golf ball. Place them on a baking sheet, leaving space between each piece.
Baking Instructions
First, preheat your oven to 375°F (190°C). While the oven heats, let the rolls rise again for 15-20 minutes, covered. After that, bake the rolls for 20-25 minutes. They should turn golden brown. Check with a toothpick to see if they are done. Enjoy the smell!
Tips & Tricks
Ensuring Softness and Texture
To make your rolls extra soft, use gluten-free all-purpose flour that has xanthan gum. This helps bind the dough. Mix the dry ingredients well to ensure even flavor. The warm water should be around 110°F. This temperature activates the yeast. Olive oil adds moisture, making the rolls tender. For an extra soft bite, don’t skip the egg, as it enriches the dough.
Correct Rising Techniques
Rising is key to fluffy rolls. After mixing, cover the bowl with a towel and place it in a warm spot. A sunny window or a warm kitchen works well. Let the dough rise for 30-45 minutes until it doubles in size. This step allows the yeast to work and adds air to the dough. For the second rise, cover the shaped rolls for 15-20 minutes. This gives them that light and airy texture.
Serving Suggestions
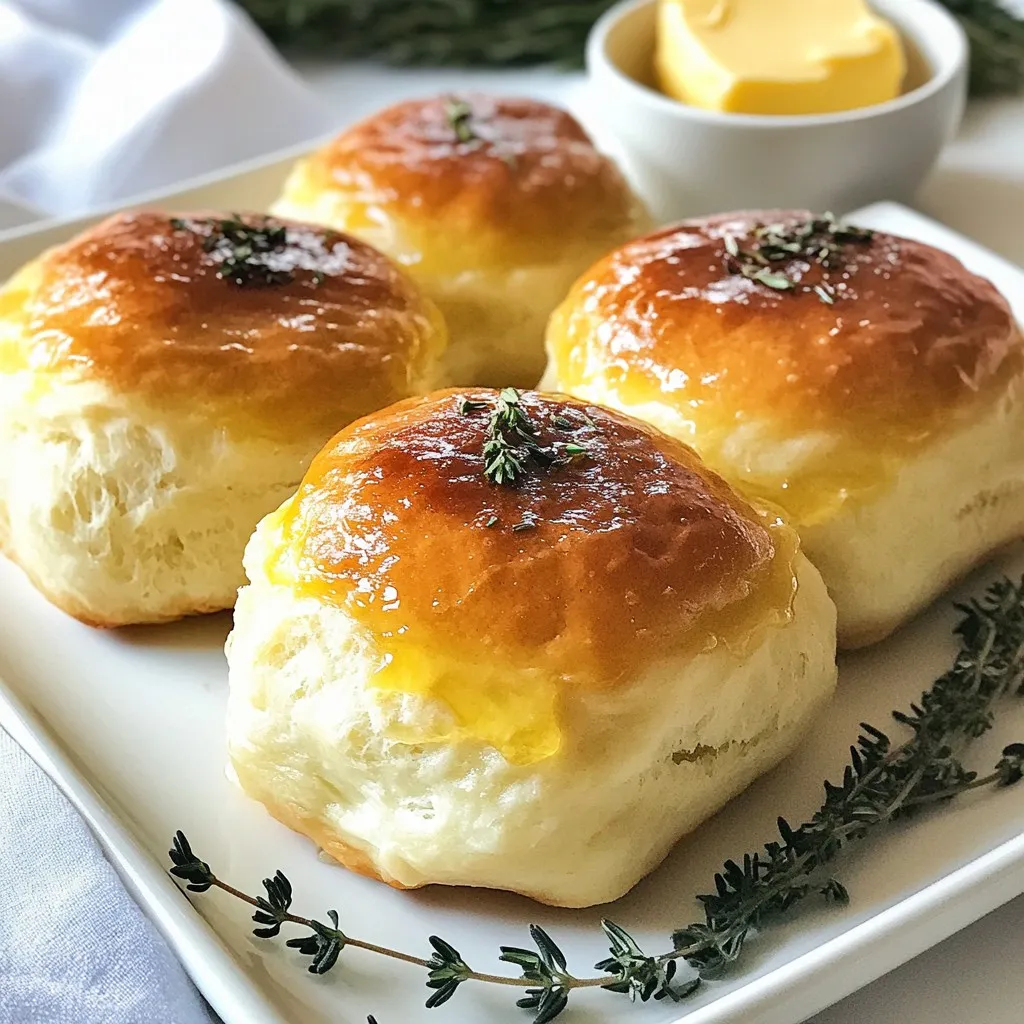
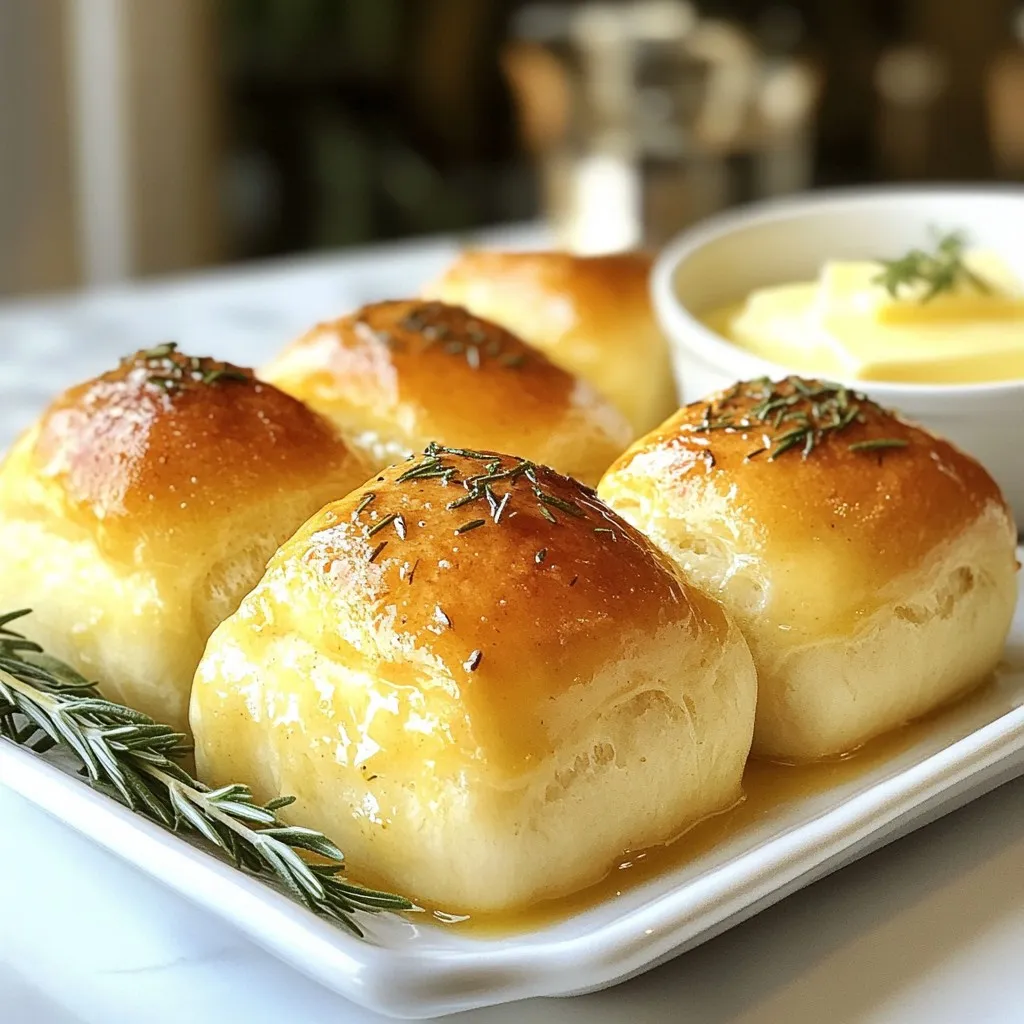
Serve these rolls warm for the best taste. You can spread herb-infused butter on top for added flavor. Drizzling olive oil also works great. For a beautiful touch, garnish with fresh herbs like rosemary or thyme. These add color and aroma to your serving plate. Pair these rolls with soups or salads for a complete meal.
Making Ahead Tips
You can prepare the dough a day in advance. After mixing, place the dough in the fridge instead of letting it rise. When ready to bake, let it come to room temperature and rise. This extra time can enhance the flavor. You can also freeze the baked rolls. Just wrap them well and store them. When ready to enjoy, thaw and warm them in the oven.
Pro Tips
- Use Fresh Ingredients: Ensure your yeast is active by checking the expiration date; fresh yeast leads to better rising and fluffier rolls.
- Water Temperature Matters: Use a thermometer to check your water temperature; too hot can kill the yeast, while too cold may not activate it properly.
- Humidity Consideration: If your kitchen is humid, reduce the amount of water slightly as gluten-free flours absorb moisture differently.
- Experiment with Flavors: Try adding herbs or spices to the dough for unique flavor profiles; rosemary, oregano, or even cheese can elevate your rolls.
Variations
Adding Herbs and Spices
You can easily enhance your gluten-free rolls. Adding herbs and spices gives them a fresh twist. For example, try adding one tablespoon of dried rosemary or thyme. You can also use fresh herbs if you have them. Mix these into the dry ingredients before adding the wet mix. This will give your rolls an amazing aroma and taste. You can even add garlic powder for an extra kick. Just one teaspoon adds great depth. The options are endless, so feel free to get creative!
Cheese-stuffed Rolls
Cheese-stuffed rolls make a tasty treat. You can add cheese to the dough for a cheesy surprise. Try using shredded mozzarella or cheddar. Simply scoop out some dough and place a bit of cheese inside. Then, seal the dough around the cheese and shape it into a ball. This will give you soft rolls with a gooey center. Bake as directed, and enjoy the melted cheese when you bite in!
Sweet Variations: Cinnamon Rolls
Sweet variations can make these rolls perfect for breakfast or dessert. To make cinnamon rolls, mix in sugar and cinnamon. Use two tablespoons of sugar and one tablespoon of cinnamon. After the first rise, roll the dough out on a floured surface. Spread melted butter on the dough, then sprinkle the sugar mixture. Roll it up tightly and cut it into pieces. Place the pieces on a baking sheet and let them rise again. Bake until they are golden brown. Drizzle with icing for a sweet finish!
Storage Info
How to Store Leftover Rolls
To keep your leftover rolls fresh, store them in an airtight container. Place a piece of parchment paper between layers if stacking. This helps prevent them from sticking together. You can keep them at room temperature for 2 to 3 days. If you want to keep them longer, move on to freezing.
Freezing Instructions
To freeze your rolls, first let them cool completely. Then, wrap each roll tightly in plastic wrap. Place the wrapped rolls in a freezer bag or airtight container. You can freeze them for up to 3 months. When you’re ready to eat, just thaw them in the fridge overnight.
Reheating Tips
To reheat frozen rolls, preheat your oven to 350°F (175°C). Unwrap the rolls and place them on a baking sheet. Heat them for about 10 to 15 minutes. This warms them through and restores their soft texture. If you want a crispy outside, you can broil them for 1-2 minutes after baking. Enjoy your warm, soft rolls again!
FAQs
Can I make these rolls dairy-free?
Yes, you can make these rolls dairy-free. Just use a dairy-free milk, like almond or oat milk, instead of regular milk. It will keep the rolls soft and fluffy. Use plant-based butter or olive oil for a great flavor.
What can I substitute for eggs?
You can easily replace eggs in this recipe. Use 1 tablespoon of ground flaxseed mixed with 2.5 tablespoons of water. Let it sit for a few minutes to thicken. You could also use unsweetened applesauce, about 1/4 cup, for each egg.
How do I know when the rolls are done baking?
The rolls are done when they are golden brown on top. You can also insert a toothpick into the center. If it comes out clean, the rolls are ready. Trust your eyes and nose; they should smell amazing!
Can I use a different type of gluten-free flour?
Yes, you can use other gluten-free flours, but results may vary. Mixes with xanthan gum can work well. Always check if the flour blend is suitable for baking. This can change the texture and taste of the rolls.
How long do the rolls stay fresh?
These rolls stay fresh for about 2-3 days at room temperature. Store them in an airtight container to keep them soft. You can also freeze them. They last up to 3 months in the freezer. Just thaw before serving!
You now have a guide to make tasty gluten-free rolls at home. We covered the important ingredients and detailed steps to mix, rise, and bake. I shared tips for texture, serving ideas, and creative variations. You also learned how to store leftovers for later. Remember, great rolls need patience and practice. Enjoy baking and sharing these rolls with friends and family. Trust me, they’ll love the
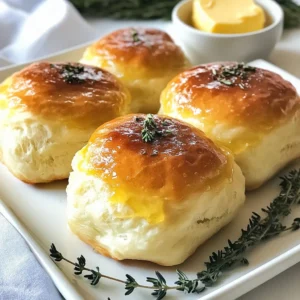
Fluffy Cloud-Like Gluten Free Dinner Rolls
Delicious and airy gluten-free dinner rolls perfect for any meal.
Prep Time 15 minutes mins
Cook Time 25 minutes mins
Total Time 1 hour hr 15 minutes mins
Course Bread
Cuisine Gluten-Free
Servings 12
Calories 150 kcal
- 2 cups gluten-free all-purpose flour
- 1 teaspoon instant yeast
- 1 tablespoon sugar
- 1 teaspoon salt
- 1 cup warm water
- 2 tablespoons olive oil
- 1 tablespoon apple cider vinegar
- 1 large egg
- 1 teaspoon garlic powder
- 1 serving non-stick cooking spray or parchment paper
In a large mixing bowl, whisk together the gluten-free all-purpose flour, instant yeast, sugar, and salt until well blended.
In a separate bowl, whisk together the warm water, olive oil, apple cider vinegar, and the egg until everything is thoroughly combined.
Gradually pour the wet mixture into the bowl containing the dry ingredients and mix until a thick and sticky dough forms. If adding garlic powder, mix it in at this stage.
Cover the bowl with a clean kitchen towel and place it in a warm area. Let the dough rise for approximately 30-45 minutes or until it has visibly increased in size.
While the dough rises, preheat your oven to 375°F (190°C) and prepare a baking sheet by lining it with parchment paper or lightly spraying it with non-stick cooking spray.
Once the dough has risen, moisten your hands with water and scoop out portions of dough approximately the size of a golf ball, placing them evenly spaced on the baking sheet.
Shape each portion into a smooth ball for a polished look.
Allow the rolls to rise again for 15-20 minutes, covered with the towel.
Place the baking sheet in the preheated oven and bake for 20-25 minutes until the tops are golden brown and a toothpick inserted into the center comes out clean.
Remove the rolls from the oven and let them cool slightly on the baking sheet before serving.
Serve warm with herb-infused butter or olive oil for dipping.
Keyword baking, dinner rolls, gluten-free
WANT TO SAVE THIS RECIPE?